Serif Affinity Photo 2026
VERDICT: You can improve your photos in Serif Affinity Photo software, giving them a professional finishing. But mind that this is not a simple program for beginners, but also efficient photo restoration software.
Affinity Photo resembles Adobe Photoshop. Their interfaces and tools layout are similar but at a lower cost, which pleases many beginners. However, when it comes to advanced photo manipulation capabilities, Adobe Photoshop is still a leader.
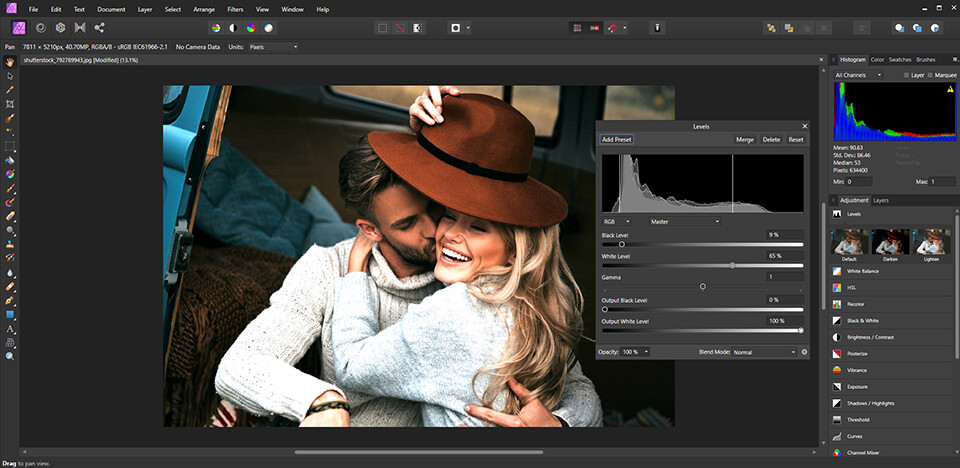
Affinity Photo is a British photo editor that is similar to Photoshop and Corel PaintShop Pro. It is also a good alternaive to basic free photo organizing software, with an extensive toolset for image retouching, photo merging for panoramas, making a HDR effect, and basic digital drawing.
However, all programs have certain drawbacks, and Affinity Photo is no exception. I don’t like that such advanced tools as tone mapping or panorama blending are rather slowly and are inferior to those available in the best photo sharpening software.
In addition, some of the algorithms should be improved, for example, the one that manages the adjustment layers of shadow and highlight. It seems that Photoshop can get more detail from shadows and highlights than Affinity Photo, and this feature is regularly described in Affinity Photo vs Photoshop comparative analyses.

Affinity Photo has all the basic photo editing tools you can expect: red-eye removal, cropping, selecting, drawing tools, as well as instruments for creating vector shapes. It also includes more advanced tools, such as clone stamp, batch edit, font effects, and lens distortion correction and can become a great alternative to Photoshop for iPad.
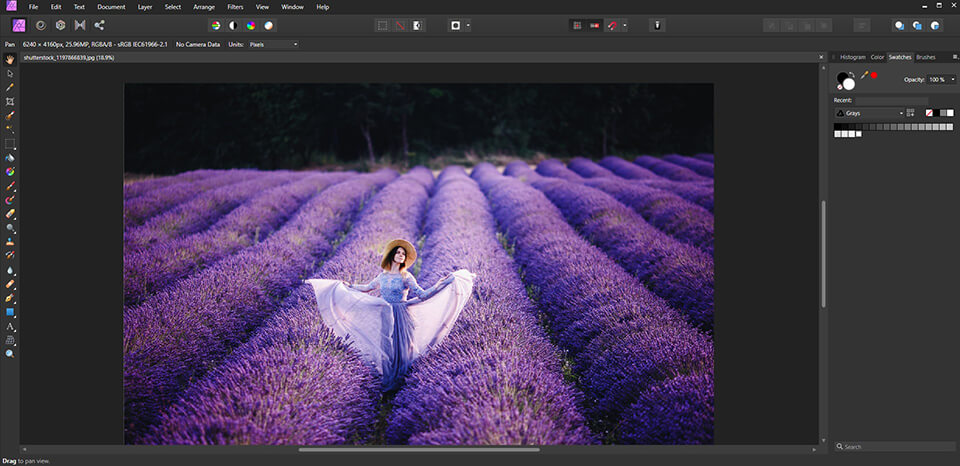
Affinity Photo’s interface is divided into separate task-oriented workspaces, called personas. This means that you will see only icons related to what you are working with. As in Photoshop, the interface has the toolbar on the left, the top panel and context toolbar at the top, and all the corresponding panels at the right. There are 25 panels, which you can add as you wish.
A useful feature that Affinity offers is the Assistant button. It appears at the top of the interface as a tuxedo icon. When you click on it, you can create presets for specific tools. For example, you can set it up so that when you click on the Brush tool, the Assistant automatically optimizes the layer type and applies the specified tool parameters.
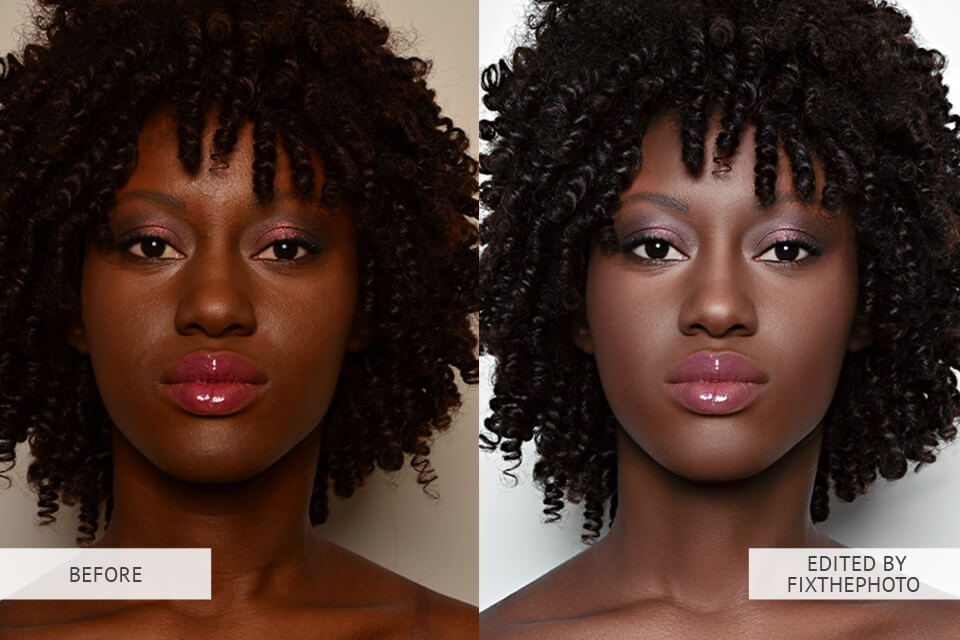
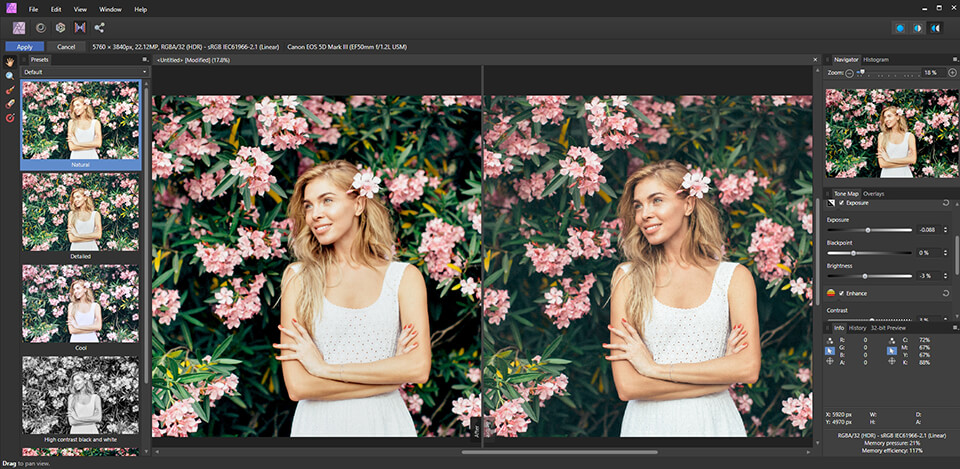
This is the photo I edited in Affinity Photo for about 30 minutes. Affinity Photo editor can’t become a full-fledged alternative, such as Capture One Pro, because it is not intended for integrated system organizations. You can view image files on your computer, but there is no advanced image search function or ranking system. This means you will spend more time searching for a particular image using Affinity Photo.
This software has a separate photo organizing application. The editor is compatible with RAW, JPG, TIFF, PNG, GIF, PSD, PDF files and many others. However, I do not quite like the fact it does not support animation files. It means you can’t create animated GIF files in this image editor. Such an inconvenience of the program gives an additional score to its opponent in the Affinity Photo vs Lightroom stand-off.
Affinity Photo offers non-destructive photo editing, RAW processing, and real-time tools. All this make the image editor very useful for photographers. The most unusual feature frequently discussed on Affinity Photo forum is the division of the image post production into personas. Each one is responsible for its own set of functions and allows not to overload the interface. There are four of them:
Photo Persona - Basic tools for image editing.
Liquify Persona – Allows to modify the image grid using tools specifically designed for liquify changes.
Develop Persona - Opens by default when you process RAW image files and can be switched from raster layers. It includes tools that allow users to customize the tone and overall look of the image.
Export Persona - This area gives users more precise control over the output of the image.
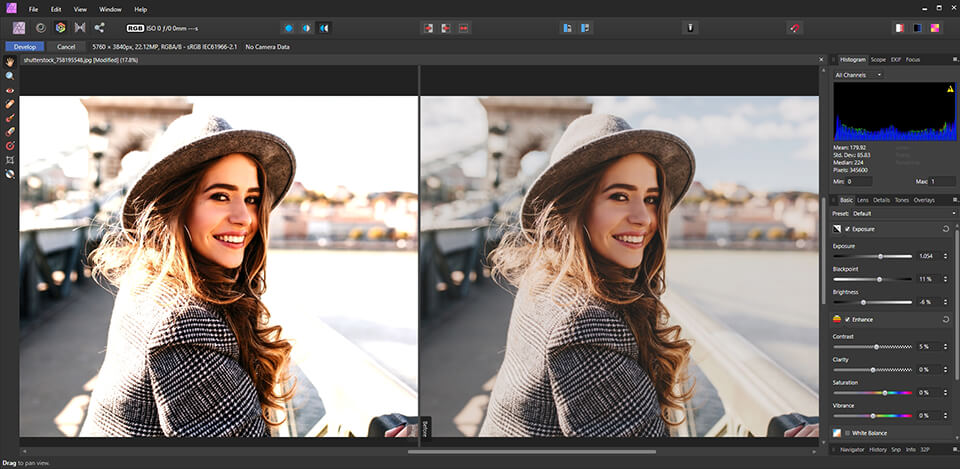
Develop Persona in Affinity Photo editor has all exposure and lens correction settings that we expect on the “Basic”, “Lens”, “Details”, “Tones”, and “Overlays” panels. Exposure, Vibration, Shadow and Glare, Cleaning, Sharpening. All this is present there and even more.
You can save a set of changes to a profile for faster photo editing, and then apply the profile with one click.
To control any exposure settings in Affinity Photo Photoshop free alternative, you can use the function for cropping bright areas/shadows and tones, which adds any tonal spikes to the image. There is also a histogram, along with any EXIF data that includes a location map, if this information is available.
There are instant previews of any changes made. I like the split-screen and mirror screen options which show the before and after image editing effect. These features are highly praised in Luminar vs Affinity reviews.
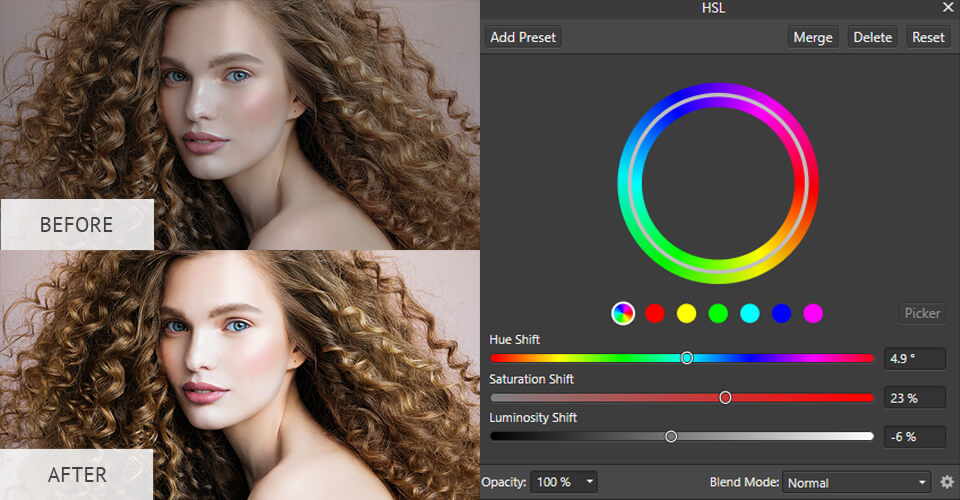
By default, image editing is performed in non-destructively way through adjustment layers. Each layer can be selected, deselected and deleted individually or blocked as a group for further photo editing. I think this is a more intuitive method than making changes with the help of the Story panel.
Speaking about Affinity Photo Persona, you will have access to a combined group of tabbed panels on the right side of the image editor’s window. The top tab will show a histogram, color sets, patterns and brushes, curves, LUTs, and gradients. The bottom panel contains a photo navigator and sections with “Channels” “Transformation” and “History”.
As a rule, in this mode, everything is done automatically, including white balance, contrast, and other settings. However, you can always correct everything manually in the right-side panel of the photo editor. The “Correction” panel includes most of your edits, from levels and curves to vibration and HSL (hue, saturation, brightness). When you click one, it is added as a new adjustment layer with a pop-up window containing controls for setting.
Look at the filters. Affinity Photo includes many filters to create blur effects, distortion, noise, etc. They are applied to the pixel layer and, at the same time, the pixels on this layer are changed (editing it destructively). Many of these filters are available as Live Filter layers, which act as adjustment layers. It means you can make independent changes and reconfigure them later.
All Affinity Photo reviews state that Liquefy is a powerful tool using which you can stretch and deform an image with any deformation style. The grid is overlaid to show the shape of the base that was used. Tone Mapping is like an HDR tool with many presets that can be applied directly to an image.
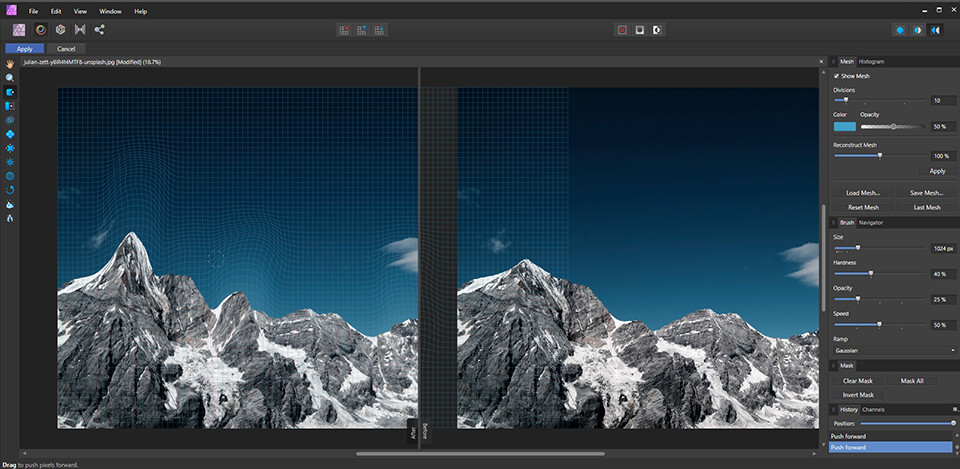
Liquefy and Tone Mapping Personas are very effective. It means you will spend less time using these tools. Not many photographers will apply them every day, however, you must be extremely gentle and neat with these tools to avoid unnatural-looking faces.
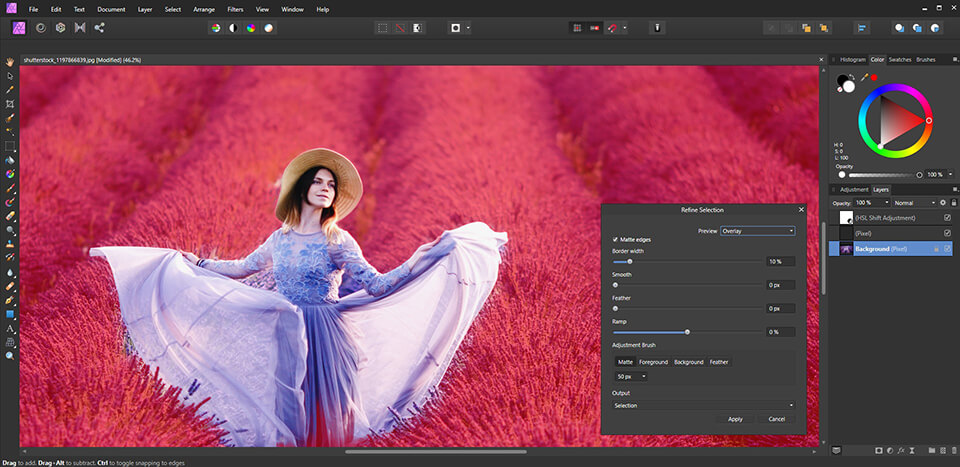
Affinity Photo selection tools are rather predictable — “Rectangular”, “Elliptical”, “Free Hand” (Lasso), “Stream Selection” (Magic Wand) and the Selection Brush tools. I was very impressed with the minimum efforts required to refine the selection. For example, I expected that it would take more effort to clear the selected hair in the portrait, but all I had to do was pressing the “Refine” button and painting the edges.
In addition to the basic options, Affinity Photo Photoshop alternative has several other powerful tools. Tone Mapping copes with merging exposures for HDR photos (with high dynamic range). However, I don’t like that sometimes it works a bit incorrect.
If you are editing portraits in Affinity Photo Windows or Mac, the frequency separation function simplifies the processing of parts of a picture without losing their texture. Command selecting splits the pixel layer into two separate layers – high and low frequency. Coloring the areas that need to be smoothed on each layer softens the skin (low-frequency layer), while preserving texture details (high-frequency layer).
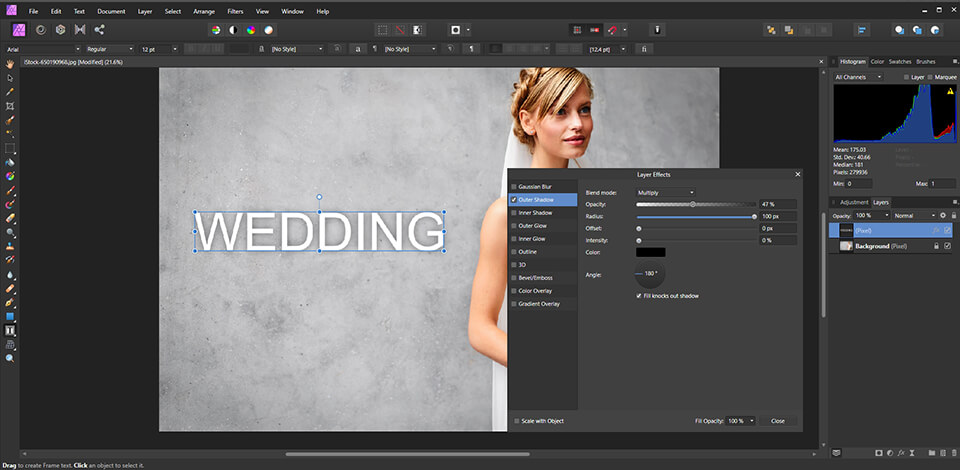
One of the most interesting features that I can’t but mention in my Affinity Photo review is that you can easily open PSD files from Photoshop. However, I came across a problem after testing several options. Working with the text in the program, you can resize, move the text window, but not edit the text itself.
The program has its text tools, Artistic Text, and Frame Text. The first is designed to display the type and the second one is needed for longer inscriptions. Very detailed formatting with thousands of OpenType fonts is at your disposal. You can manage ligatures, but you don't get the same level of editing as Illustrator offers.
In my opinion, Affinity Photo offers more convenient work with masks, acting as independent layers. Adjustment layers are made in the form of presets. The photo processing history is stored in the file itself. It means you will easily transfer the project to another person who will understand it with ease. Actually, I noticed lots of such pleasant nuances when I started to review Affinity Photo.
Not all shooters take 360-degree photos. However, with the increasing popularity of action cameras and the growth of virtual reality, this may be something that you will use in the future. That’s why having a certain space for image editing, you can move/zoom when editing 360-degree photos. A set of powerful will be also of great help.
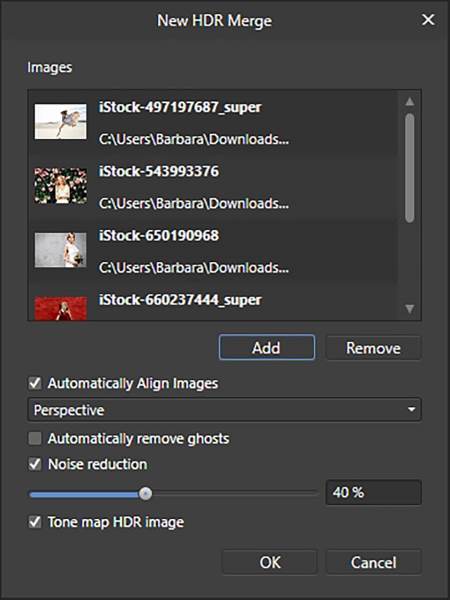
The HDR merging allows you to bring the best details from multiple exposures into one photo. In Affinity Photo HDR merger you can select an unlimited number of source images and automatically align them before merging into one picture. Keep in mind that this is a very resource-intensive task, which will probably take a few minutes if your computer is not very powerful.
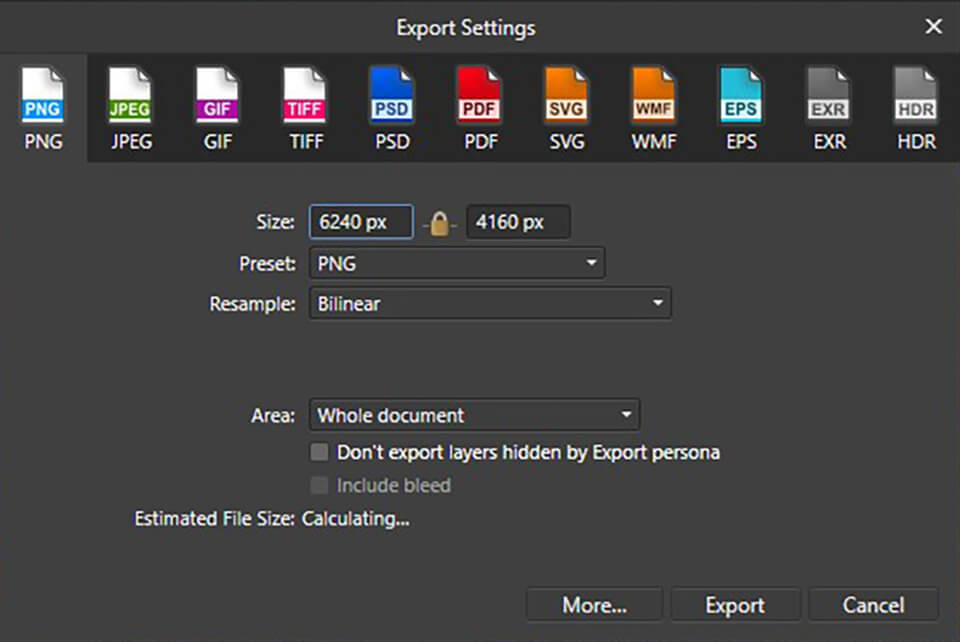
Export Persona in Affinity Photo Windows and Mac allows you to create fragments of images. You can export your works in PNG, JPEG, GIF, TIFF, PSD, PDF, SVG, WMF or EPS formats. Please note, you cannot export in Illustrator format.
While exporting, it is possible to export multiple versions of one file simultaneously with independent control of renaming files and resizing images. There is also a wide selection of file types for export.
I couldn’t find a renaming function while doing batch photo processing. This is a bit disappointing. You can also set the width or length in pixels for a batch. However, there is no option for the longest dimension in pixels that can be used for landscape and portrait orientation.
Affinity Photo Mobile 2026
One of the most interesting Affinity Photo editions is a mobile version created for the iPad. It allows you to use most of the photo editing functions presented in the full version, turning your iPad into a drawing tablet.
Unfortunately, there is no similar version for Android tablets, and Serif does not announce plans to design it. The application requires iPad Air 2, iPad 2017 or any of the iPad Pro options.
Affinity Photo is available in Mac App Store, Microsoft Store as well as on the official Affinity website. One-time Affinity price is $49.99. There is also a simplified version for iPad for $19.99.