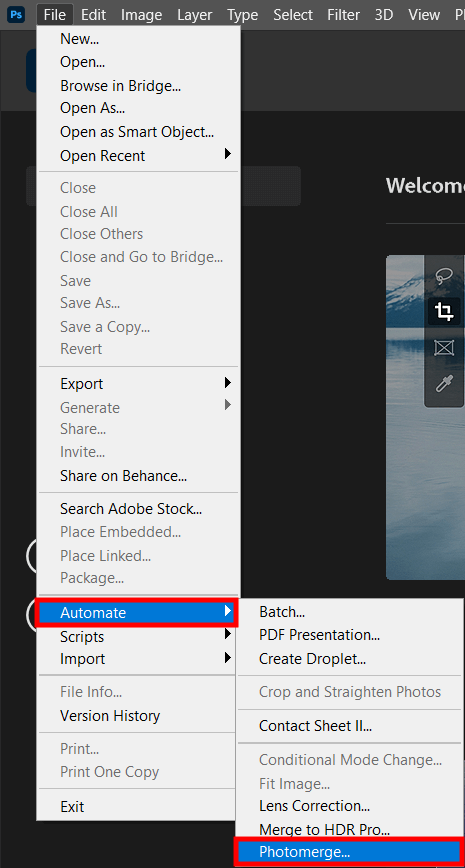
To start the workflow, launch Adobe Photoshop on your computer. In fact, you do not even need to create a new document. Navigate to the top menu, choose File > Automate > Photomerge.
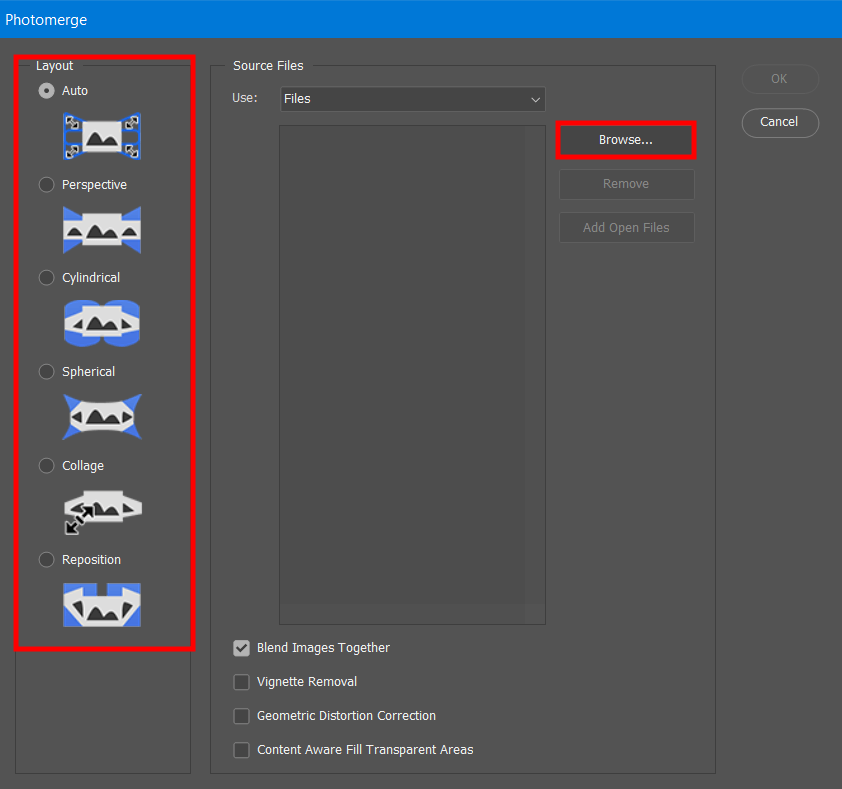
Take a look at the left panel and pick the required layout of the panorama. But if you are uncertain which one you need, it is better to opt for the Auto option.
Click Browse and choose photos, from which you want to create a panoramic composition. Check whether the Blend Images Together option is ticked, if not, do it manually. Once all the pics are imported, confirm it with the OK button.
Now, you should work with masking in Photoshop. In case, your images are similar less than 70%, consider adding a layer mask to fix the stitch lines.
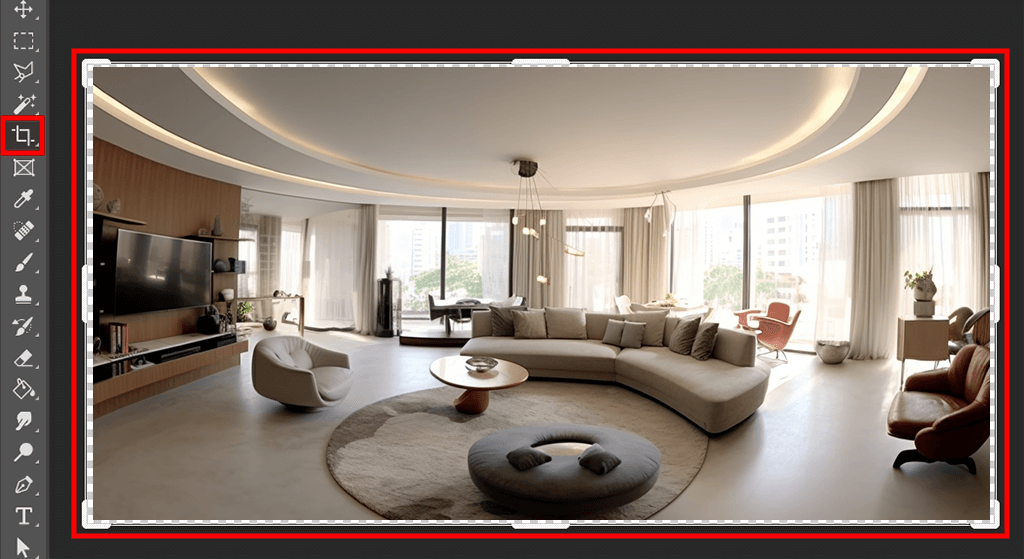
Go to the Layers panel to make the stitching area visible in the layer masks. Now you need to crop the transparent border areas with the Crop Tool. The same operation can be easier fulfilled by using Photoshop keyboard shortcuts and hitting the C button.
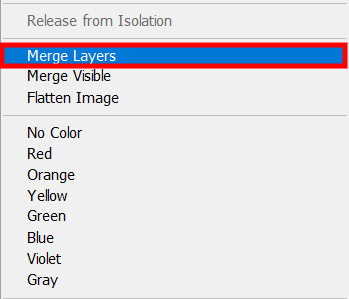
Go to the Layers panel, choose all layers, click with the right mouse button, and find merge layers in Photoshop option. Hit it to launch the merging process, the result of which will be a single composition. This step will simplify your Photoshop stitching photos editing workflow.
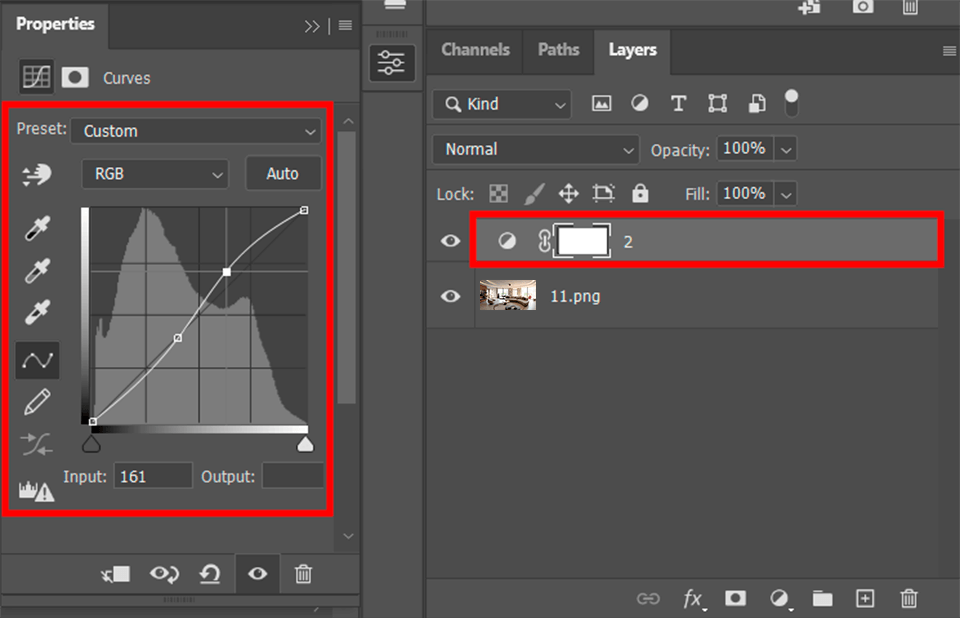
The next step of the image stitching process involves adding to your composition adjustment layers and layers styles for retouching. For instance, you can correct the color scheme or add light in Photoshop. Do not forget to save the corrected variant.
If you are a newcomer and this guide seems complicated, address this task to FixThePhoto professionals. Now you do not need to spend hours figuring out how to stitch photos together in Photoshop, as the specialists of the service will do all the job for you delivering a perfect composition. By the way, they do not only merge pics but also correct colors to achieve a top-level result.

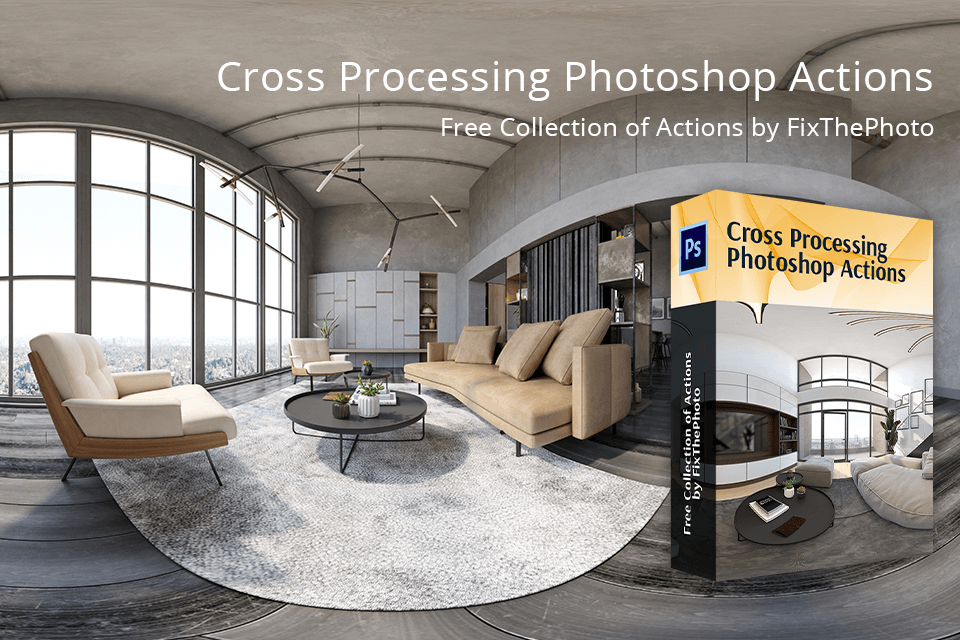
Once you’ve merged images in Photoshop, it is high time to upgrade them. Benefit from these pro-level actions specifically designed to improve such panoramic compositions. Download and install Photoshop actions, choose the desired option, and apply it in just one click to get beautifully edited pics.


