Layers in Illustrator are more confusing than in Photoshop, since the tools are placed in slightly different locations. This simple tutorial will help you understand the process of merging and combining layers in Illustrator with 4 helpful methods.
This technique is a go-to option for famous graphic designers.
It’s essential to make sure that the Layers panel in Illustrator is activated. If you can’t see it, after launching the software, go to Window > Layers menu. Alternatively, press F7 for quicker results. I recommend you to always keep it activated for easy access.
Next, identify which layers you want to unite. Similar to merging layers in Photoshop, all you need to do is hold Ctrl/Cmd and left click on the ones you need. There might be instances while working in your document, when you need to select a long list of objects among the layers. In this case, it's more effective to use the Shift key.
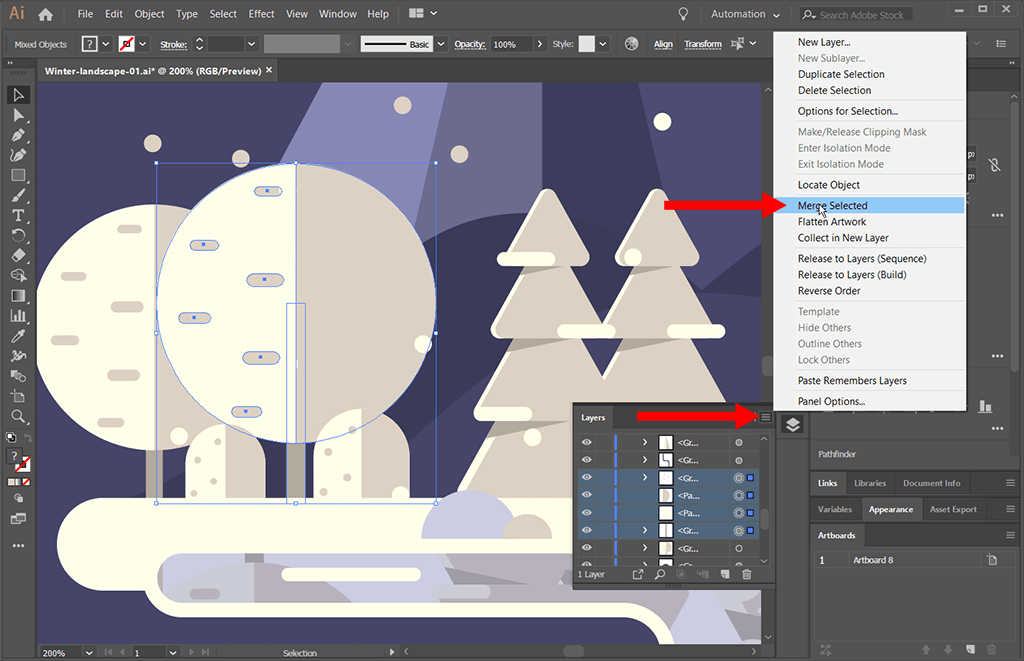
After that, click on the Options button at the top. Go up the fly-out menu that appears and choose Merge Selected.
The next technique of merging layers in Illustrator is by uniting objects into more manageable groups. This will help make your project more organized and structured.
Select them beforehand with a selection tool of your choice.
Go to the Object tab at the top and scroll down to “Group”. If you prefer using hotkeys, use the Ctrl+ G/Cmd + G key combination. This will group all of your objects.
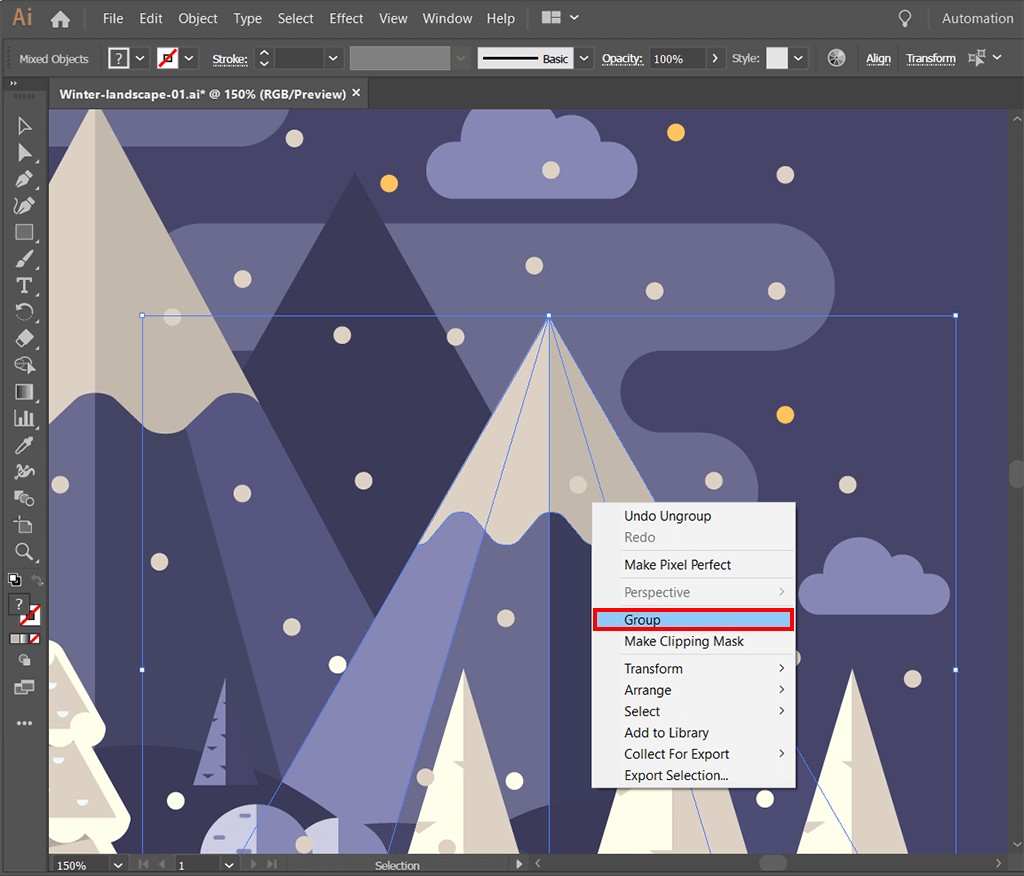
From now on the content of your group will be selected as one, and can share appearance.
Combining objects in Illustrator with the help of the Pathfinder Tool is a great option for when you need to unite several objects together.
To begin with, check if the Pathfinder Palette is activated. If it’s not, go up to the Window tab and find the Pathfinder. Another option is to use the Ctrl+Shift + F9/Cmd+Shift + F9 shortcut to save time. This palette has a number of tools which can be used to combine, divide, trim, or exclude objects.
The next step of this Illustrator merge layers tutorial, is picking any selection tool, and making a selection of the objects you want to fuse into one.
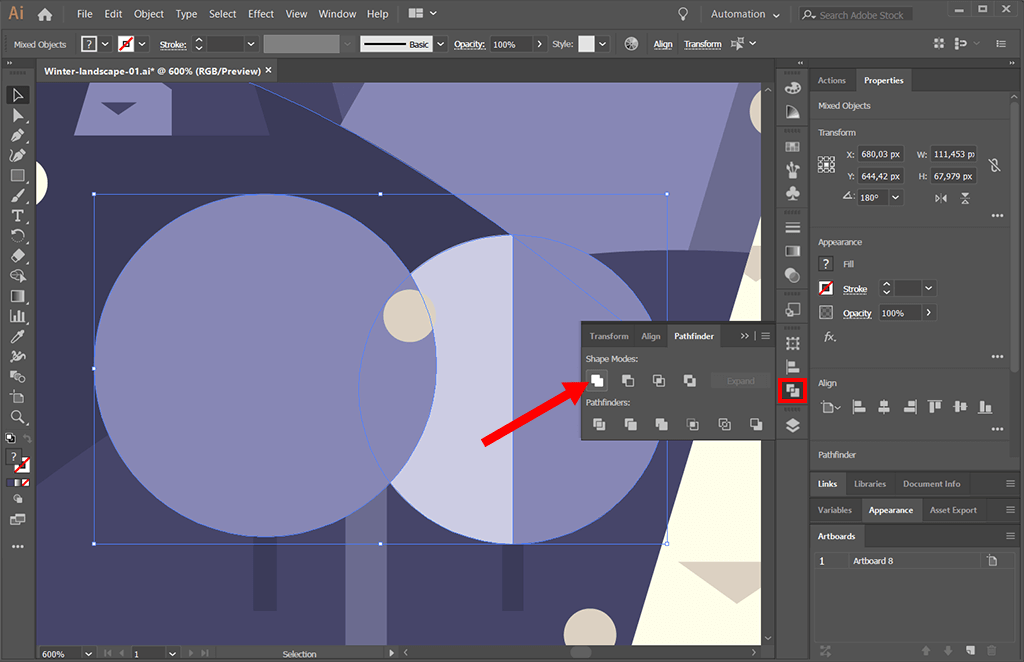
Finally, you’ll see 4 modes on the Pathfinder Palette. Choose the first one to the left, which is the Unite Mode.
Your objects will be instantly combined. You’ve learned how to merge layers in Illustrator with the Pathfinder Tool. If your shapes were of different colors, the final object will assume the appearance of the object that was on the top.
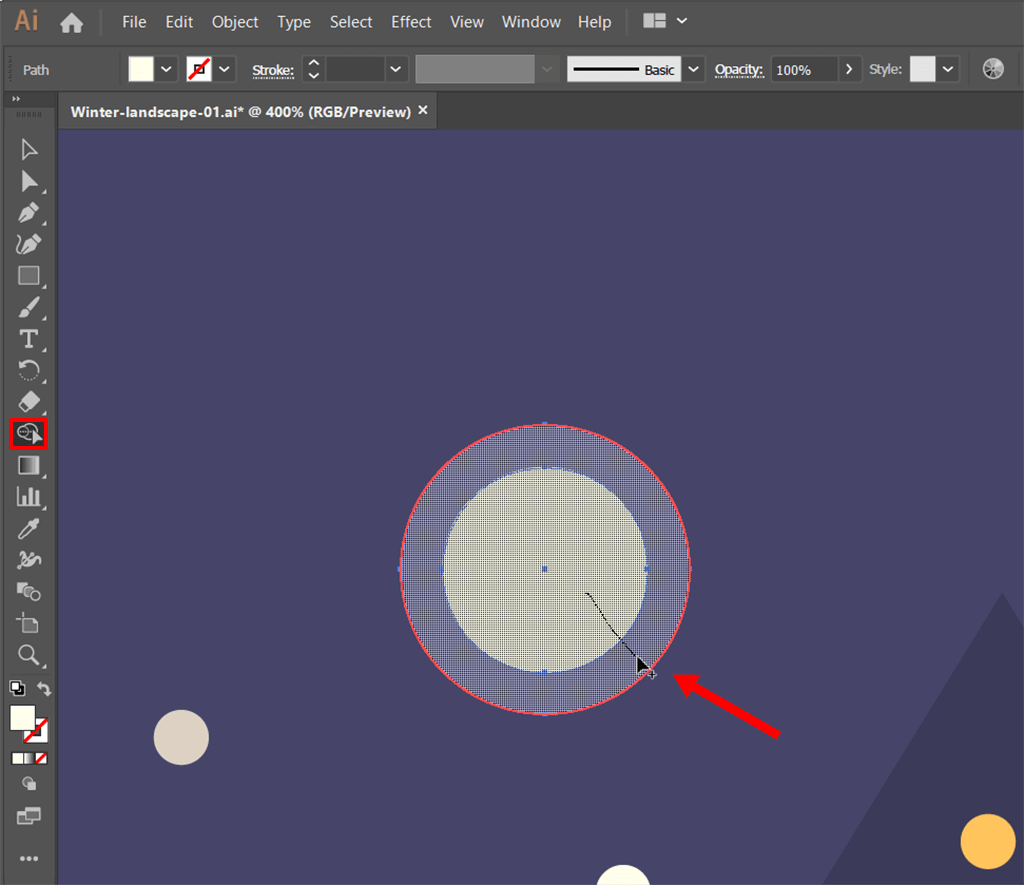
A quicker way to achieve layer combination is using the Shape Builder Tool. It allows you to easily make basic and complex shapes in Illustrator.
Grab it from the Tool’s Panel or activate it by using the Shift + M key combination.
All you have to do now is just select the objects or paths and draw across them. As you drag, a dotted line will form and the shapes will instantly be united. In case, you accidentally selected too much, you can hold Alt/Option key to subtract from that selection.
You’ve successfully completed this tutorial. Now you can move on to other beginner Adobe Illustrator tutorials, like how to change background color in Illustrator.
