I decided to learn how to become a Shutterstock contributor after determining that I wanted to transform my vast collection of photos into a steady revenue stream. But I was stuck between two of the biggest platforms – Shutterstock and Adobe Stock. Since I’m an active Photoshop and Lightroom user who works at FixThePhoto, picking Adobe Stock seemed like the logical step.
However, Shutterstock’s enormous database of contributors and significantly quicker review times were quite tempting. I ended up picking both platforms and uploading my photos to both sites.
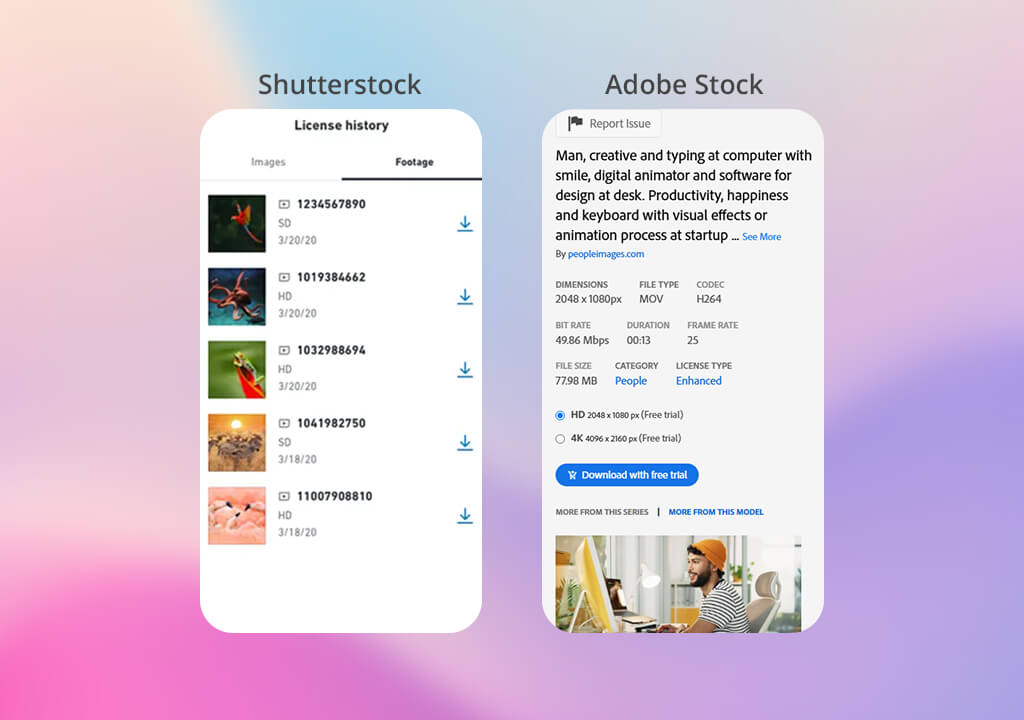
Sales were more common on Shutterstock, but Adobe Stock offers a higher rate per sale and feels more curated.
Spoiler alert: I’ve decided to stay on both sites – Shutterstock because of its wide reach and Adobe Stock due to its superior rates and more professional feel.
Having spent multiple months on both platforms, there are several trends I’ve noticed. Shutterstock provides a significantly larger number of sales, particularly when I contribute hundreds of images that adhere to relevant events or trends.
Adobe Stock, while providing fewer downloads, has a notably better payout per sale. One extended license sale on Adobe can bring in as much money as 20 or more standard Shutterstock downloads.
| Image description | Adobe Stock earnings | Shutterstock earnings | Notes |
|---|---|---|---|
|
Woman working on laptop at café
|
$3.60 (1 download)
|
$0.72 (3 downloads)
|
Adobe buyer added it to a tech brochure; Shutterstock in blog articles
|
|
Overhead shot of healthy lunch
|
$2.20 (1 download)
|
$1.80 (6 downloads)
|
Frequent sales on Shutterstock; single-time commercial sale on Adobe
|
|
Family walking in autumn park
|
$28.00 (1 extended lic)
|
$5.40 (18 downloads)
|
An extended license on Adobe, possibly purchased as a marketing asset
|
|
Home office setup with copy space
|
$1.65 (1 download)
|
$4.50 (15 downloads)
|
Sold more on Shutterstock thanks to keyword targeting
|
|
Flat lay of skincare products
|
$2.85 (1 download)
|
$0.90 (3 downloads)
|
Adobe is popular among users active in the beauty and product design industries
|
These examples prove that Adobe Stock has more people who buy commercial-grade, clean, and versatile photos. Meanwhile, as a Shutterstock contributor, you can secure success by providing volume, good keywording, and following trends.
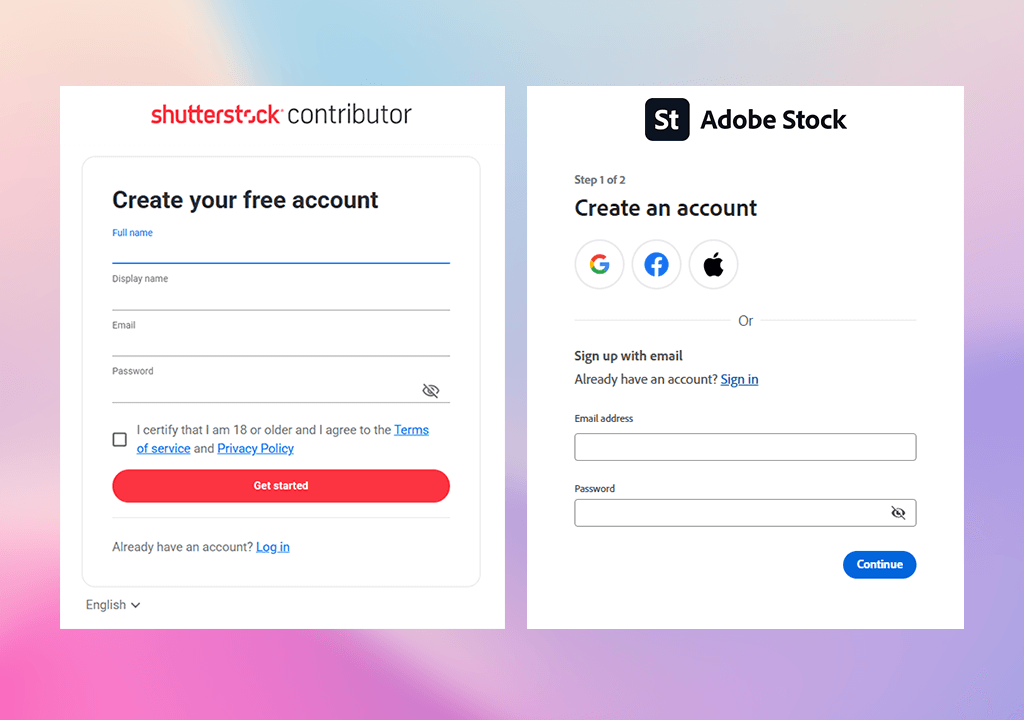
Making an account for both services was pleasantly straightforward. Shutterstock required me to provide my ID and tax information, while Adobe Stock allowed me to log in using my Adobe ID.
If you’re a Creative Cloud user, it won’t take any time at all. I also appreciated the step-by-step guide for uploading images that also provided tips on picking categories and keywords.
In contrast to alternative stock photography sites like iStock or Alamy, I think Shutterstock and Adobe Stock are a lot better suited for beginners. They offer clean dashboards, high upload speeds, and a hassle-free approval algorithm. If you’re still new to stock photography, these are the two best sites to start on.
My most popular images are the ones that convey a clear message. Whether it’s Shutterstock or Adobe Stock, subjects like remote work, healthy eating, a contemporary lifestyle, diversity, and sustainability are always popular.
I’ve seen this proved continuously by uploading batches of photos featuring tidy desks, people working on laptops, and families cooking together. Casual scenes in natural lighting tend to sell better than obviously staged images, and I also recommend that you don’t use intense filters.

Fun fact: Adobe Stock contributors state their highest-selling photos tend to include copy space. Designers require room for text. Meanwhile, Shutterstock buyers prefer action and interaction – typing hands, walking, or people conversing. So I fine-tune my photography projects to accommodate both types of preferences.
Additionally, seasonal content is popular on both platforms. For instance, beach photos and comfy Christmas-themed indoor spaces are always easy to sell if you upload them a couple of months ahead of the season. Adobe Stock and Shutterstock advertise new content more, so getting the timing right is essential for learning how to become a Shutterstock contributor.
From my experience, both Shutterstock and Adobe Stock don’t mind AI-made content as long as you follow their rules. If I add AI-created images without including a “Generative AI” tag, I can have my account blocked.
Even if the photo you generate looks bland and realistic, if it’s AI-made and not properly tagged, it will get flagged quickly.
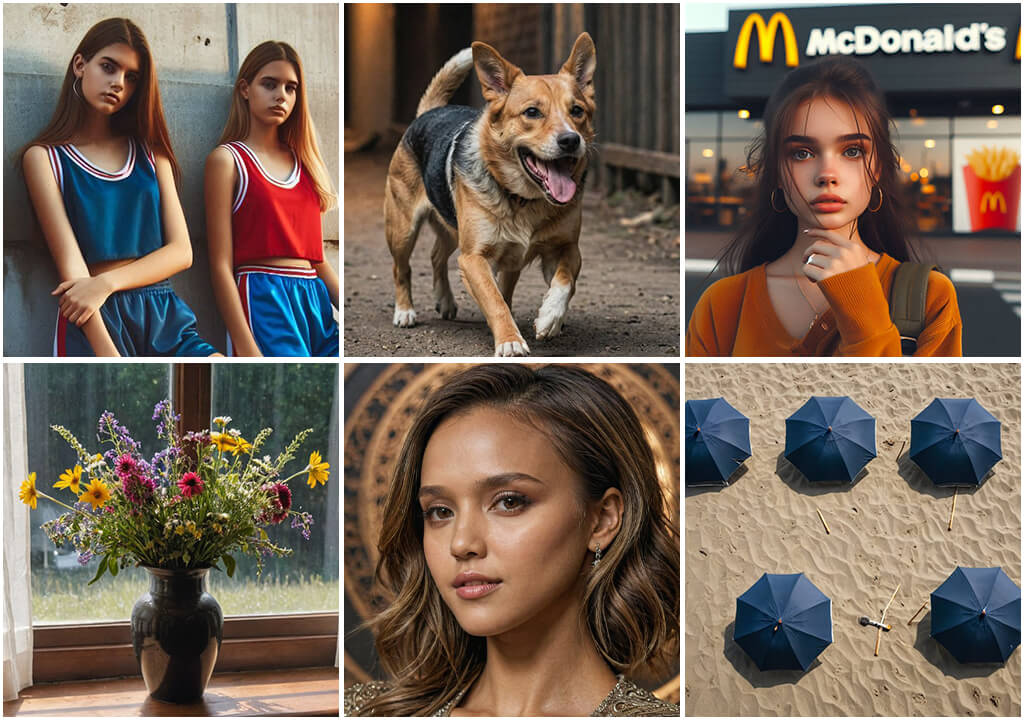
If you want to be a contributor for Shutterstock, avoid uploading any of these things: untagged AI photos, fake model releases, overly realistic faces, content with logos and brand names, and any image that looks like an actual celebrity. Both sites review AI-generated content attentively, and if you get caught, you’ll never get your account back.
Ironically, I’ve found that the most reliable and lucrative content to make is feet. Actual, aesthetically pleasing pictures of feet walking, resting, or during a skincare routine will get you more sales than the average portrait photoshoot. It might sound strange, but the money speaks for itself.
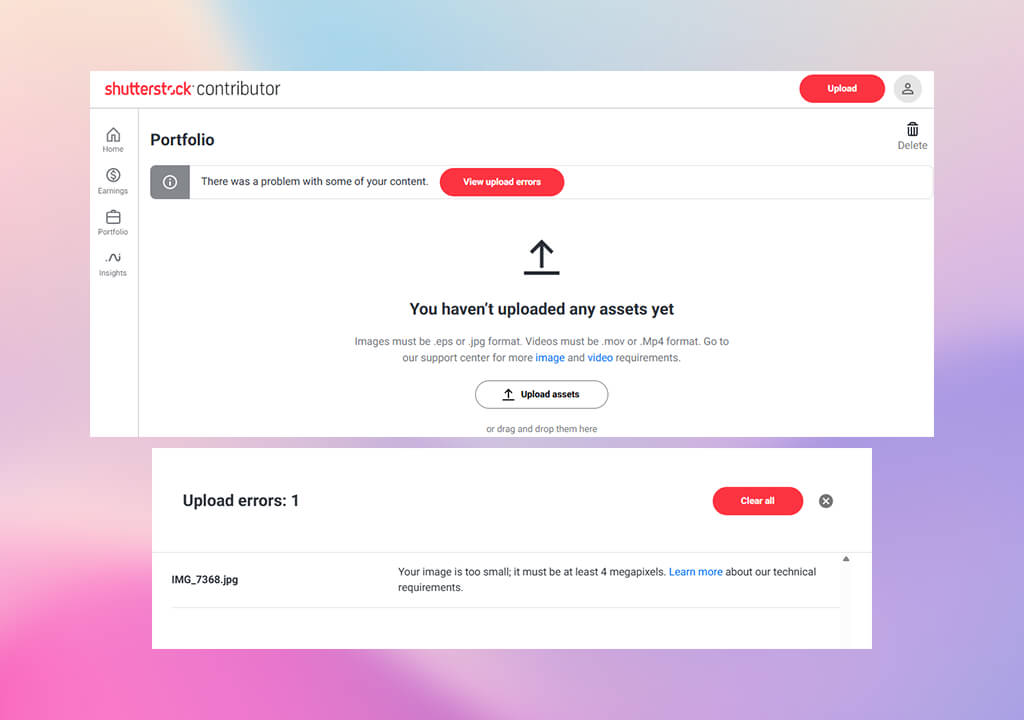
Another aspect you need to get right is to ensure all your images meet the technical requirements of the platform before you upload them.
For photos, Shutterstock accepts high-resolution JPEGs without any layers. If you’re uploading a vector file, save it in EPS format that can be opened in Adobe Illustrator 8 or 10. Check if you can open the image in an older version of Illustrator to make sure you did everything right.
Pick the sRGB color profile when exploring photos. Files in other color profiles will be converted by the platform automatically, but that process can ruin the colors. I’ve seen images that lost their rich reds and blues because they were saved in the wrong profile.
The minimum file size is 4MP, meaning it needs to offer a resolution of at least 2400 x 1600 pixels. I tend to take photos with a 24MP camera, so my pictures meet the requirement easily, even when cropped. Don’t contribute small crops or mobile pictures that don’t meet the required resolution.
The maximum size for JPEGs is 50MP. EPS images have a limit of 25MP unless you’re uploading them via FTP. If you are using an FTP server, then the limit is raised to 4GB for TIFF files and 100 MB for EPS files.
I tested both browser and FTP methods, and while the browser is more convenient for smaller quantities, FTPS is superior when dealing with expansive vector sets and high-resolution TIFF files.
One of the most important Shutterstock contributor tips I can give is to always begin with Lightroom. I adjust the colors, fix the exposure, delete dust specs, and crop the photo to fine-tune the composition.
Adobe Stock puts a premium on sharpness and composition, so I dedicate even more time to enhancing photos for this platform. Additionally, I evaluate the histogram levels and try to find chromatic aberration or soft focus to fix them.
For Shutterstock, I tend to upload sets of images without as much work, particularly if I’m trying to cash in on a trend. If a color scheme or subject becomes especially popular, I create another batch of similar photos. Adobe makes me focus on quality, while Shutterstock demands frequency.
Metadata plays a huge role in determining the popularity of your content. I usually add between 30 to 50 keywords per image, combining literal and conceptual terms. Adobe Stock doesn’t need such a high number of tags, but it’s very important for Shutterstock.
I tend to come up with a clear title and a brief description, and then copy a keyword list from comparable high-selling photos. My colleagues from FixThePhoto tend to share tips on how to improve metadata, particularly when dealing with popular topics like diversity, sustainability, and a work-from-home lifestyle.
Popular keywords that increase visibility:
If you don’t know which keywords to add, leverage Adobe Stock’s automatic suggestions or Shutterstock’s keywording feature.
Important: Don’t use repeating words, as they don’t bring any benefit. Instead, put yourself in the shoes of a designer or vlogger looking for the photo you’re trying to sell.
Both Shutterstock and Adobe Stock will reject some of your images – that is inevitable. The former pays more attention to noise and sharpness, while the latter focuses on overall appeal and market value.
I used to have more rejections until I learned to zoom in at 100 percent before uploading. This approach alone has done wonders for boosting my approval rate.
Interesting insight: Adobe Stock often rejects over-edited or unnatural skin tones, particularly in portraits. Shutterstock can deny your photo even because of a little color fringing or blur. This led me to batch preview my content before submitting it and minimizing the amount of sharpening I applied.
If an image features a recognizable person or private venue, you require a signed release.
I employ a smartphone app to gather signatures on location, which is particularly handy for portrait and lifestyle photoshoots. I also use my phone to snap some pictures on the go or record brief videos.
As a Shutterstock contributor, you can upload such content straight from your smartphone. Meanwhile, Adobe Stock accepts more professional, loopable clips and motion graphics. You can quickly expand your portfolio by recording 10-15 second videos of pouring tea or coffee, someone walking, etc.
If you’d like to expand your reach as quickly as possible, consider sending high-quality clips to free stock video sites through Shutterstock or Adobe. Your content will be added to the free download section, featured in newsletters, and might even get noticed by editors interested in consistent contributors.
Shutterstock. Provides real-time updates on trending topics. The dashboard conveniently displays daily sales, top-performing content, and earnings per photo. Additionally, you can examine downloads by week and determine peak performance periods.
Shutterstock is perfect for quickly recognizing trends and capitalizing on them. I tend to make variations of recently successful content, using different angles, lighting, or props, to try to capture lightning in the bottle. This is particularly effective with lifestyle and seasonal content.
Adobe Stock. Its official contributor portal, provides in-depth analytics and submission recommendations that facilitate long-term growth. Adobe doesn’t update earnings as often, but provides more information about each download.
It lets you learn if the license was standard or extended, which allows you to guess how your image is used. This platform also offers better pay-per-sale, which can make a huge difference in the long run.
Adobe Stock rewards – professional edits and good composition tend to sell well even months and years after being uploaded. I share my best, most appealing photos on Adobe Stock and use it as my premium portfolio despite also being an active contributor on Shutterstock.
Photos that imitate real life, contemporary lifestyles, remote work, entrepreneurship, diversity, healthy food, exercise, and travel all sell well. Images with copy space, a display of emotions, and clear subjects provide the best results.
Combine both literal and conceptual keywords (30–50 per photo). Mention actions, emotions, environments, props, and audience terms. Shutterstock’s keyword recommendation tool can help you get started.
Yes, Shutterstock lets you upload non-exclusive photos. It allows you to add the same pictures to Adobe Stock, iStock, and other platforms as long as you haven’t signed any exclusive agreements elsewhere.
Shutterstock offers monthly payments after your earnings pass the minimum threshold ($35 by default). You can pick PayPal, Skrill, or bank transfer as the payout option.
No, as long as you consistently upload large numbers of photos, you can still become successful. Many photographers earn passive income by gradually putting together a collection of useful, searchable, and trendy content.