Many readers have asked us how to make artboards in Photoshop, so I decided to write this guide. In my daily work at FixThePhoto, I rely on artboards to handle multiple layouts at once. They’re perfect for organizing designs for different devices in a single document. Besides, they give you a clear view of how everything fits together.
Novice users often face the same issue. They mix up artboards with a regular canvas, ending up with overlapping boards. Plus, they have trouble keeping track of layers across different artboards. Exporting and resizing can also cause confusion. Still, once you learn the basics, artboards will make your design process faster and more straightforward.
To help you out, we’ve put together 5 methods to make artboards in Photoshop.
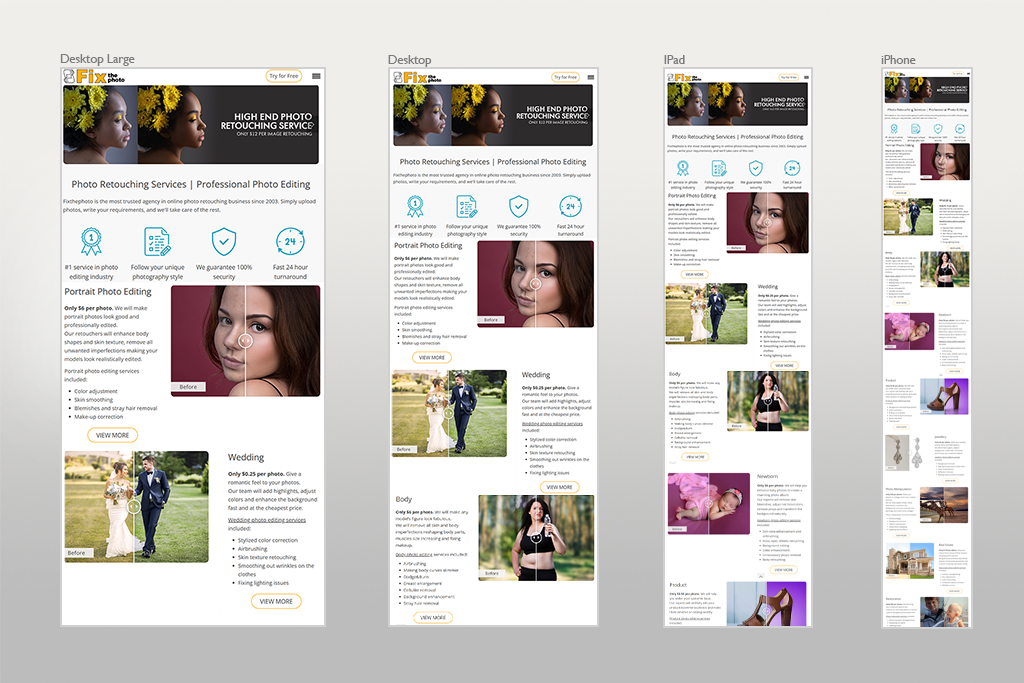
I’ve been using Photoshop artboards for quite a long time. They let you create multiple designs side by side in a single file. This is convenient for projects that need different versions, like website pages, app screens, graphics for social media for photographers like Instagram and TikTok.
Technically, an artboard works like a special type of layer group. It has its own boundaries, and everything inside stays within that space. In the Layers panel, artboards are displayed along with your other layers and groups, but you can’t put one artboard inside another. generally, artboard help you keep your designs structured and easy to manage.
Photoshop artboard is like an individual canvas within a single document. Any layer that isn’t part of an artboard will stay at the top of the Layers panel and won’t be limited to any artboard’s space. I perceive artboards as a kind of “infinite desk” where I can spread out my work. They make it easy to design for multiple platforms at once without switching between files. With everything in one place, it’s much easier to manage and compare different layouts.
“Artboards are very convenient. They can store multi-size or multi-platform designs in one file. It is so easy to manage web banners, Instagram posts, and print layouts in one place.”

When I need to create artboard in Photoshop, I use the Artboard Tool (shortcut V). Thus, I can draw them directly on the canvas quickly. If I want to organize existing work, I just convert layers or groups into artboards. Another useful option is enabling artboards when starting a new file. That way, the document is set up for multiple designs from the start.
Though you can add an artboard in Illustrator, I think Photoshop is more practical for my projects. With it, I can work with detailed images, photo edits, and layered compositions while still keeping layouts flexible. Illustrator is great for vector graphics, but Photoshop combines both layout control and image editing in one place. So, I use this Adobe program most of the time.

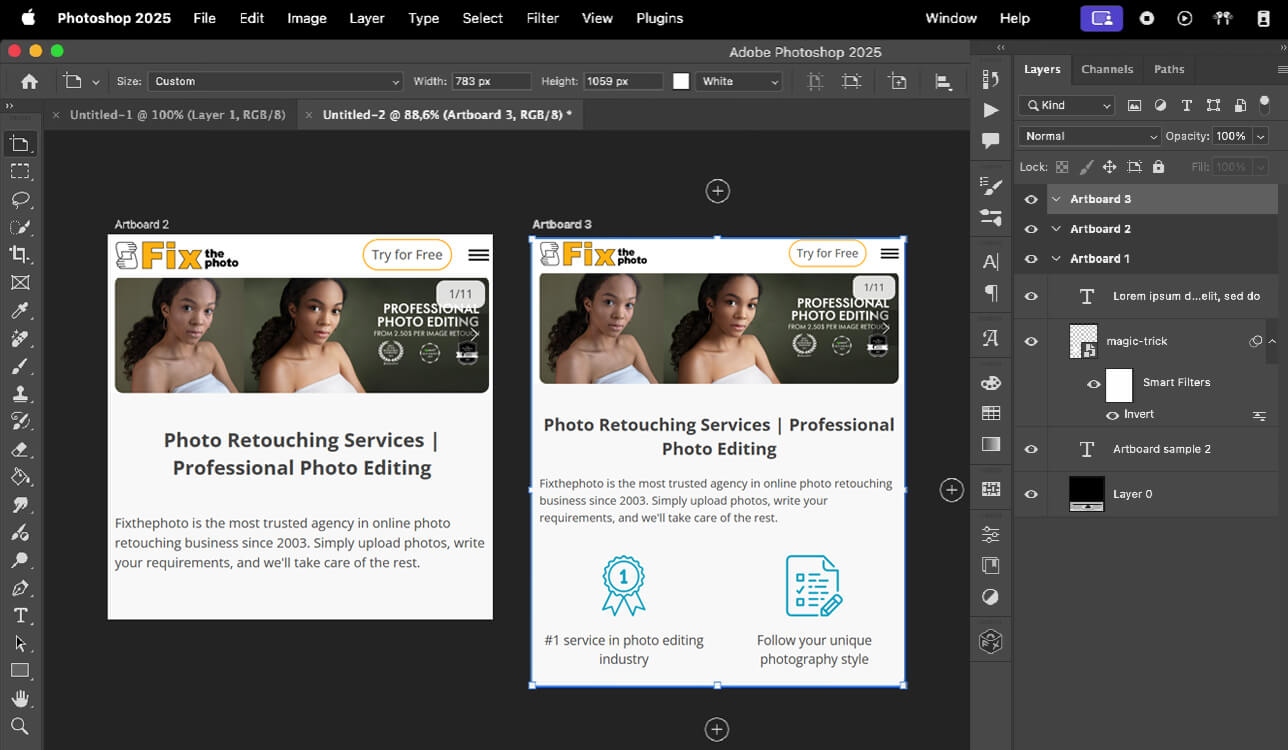
How to create artboard in Photoshop? One of the easiest ways we tested is by using the Artboard tool. With it, you can place them exactly where you need on the canvas and choose the size that works best for your project. This is ideal if you’re creating designs for websites, apps, or multi-page layouts since everything stays tidy and easy to manage in one workspace.
1. Select the Artboard Tool in Photoshop. To do that, click and hold the Move Tool. Next, choose the Artboard Tool from the dropdown list.

2. Make a new artboard. Ensure the Artboard tool is active. Then, click and drag anywhere on the canvas to create a new artboard. You can get any size you want.
3. Use preset sizes (optional). It is possible to choose a preset artboard size. All the options are available in the bar at the top. These presets cover standard device screen sizes, including mobile, tablet, or desktop.
4. Change the name of your artboard. Double-click the artboard name in the Layers panel. Enter a new name according to the device or page it represents. Thus, you can easily find a needed artboard in Photoshop.
5. Add design elements. You can add images, text, and other design elements to your artboard. All layers created while the artboard is active become its part automatically.

6. Move or resize the artboard. Feel free to move or resize the artboard. The content inside will be intact.
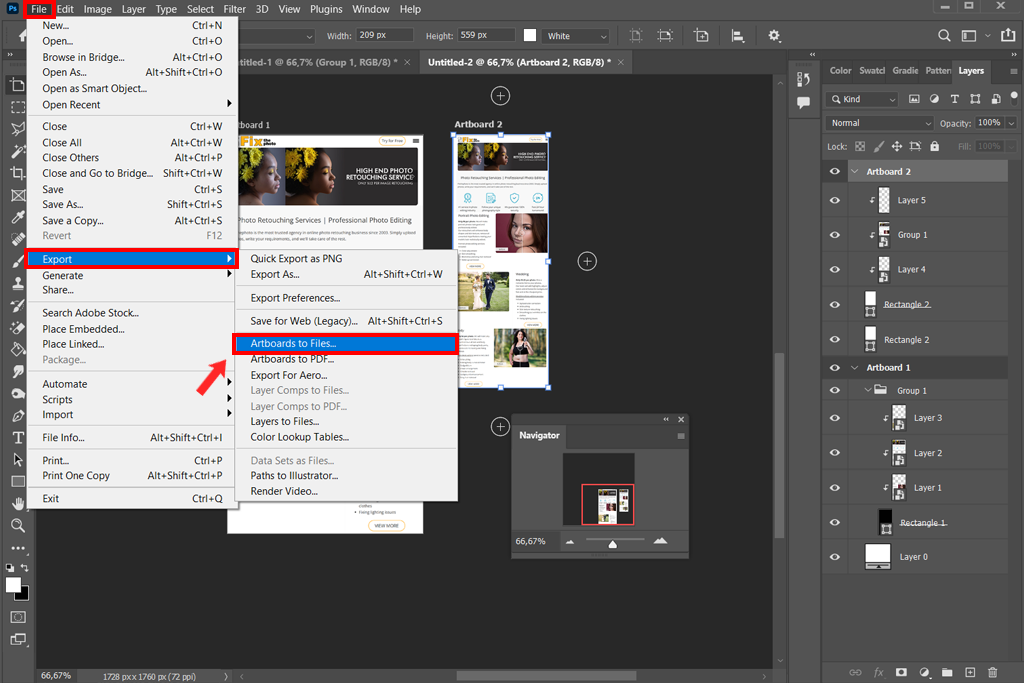
7. Export artboards once you’re done. When the design is ready, export artboards individually or together. Click File > Export > Artboards to Files or Artboards to PDF.
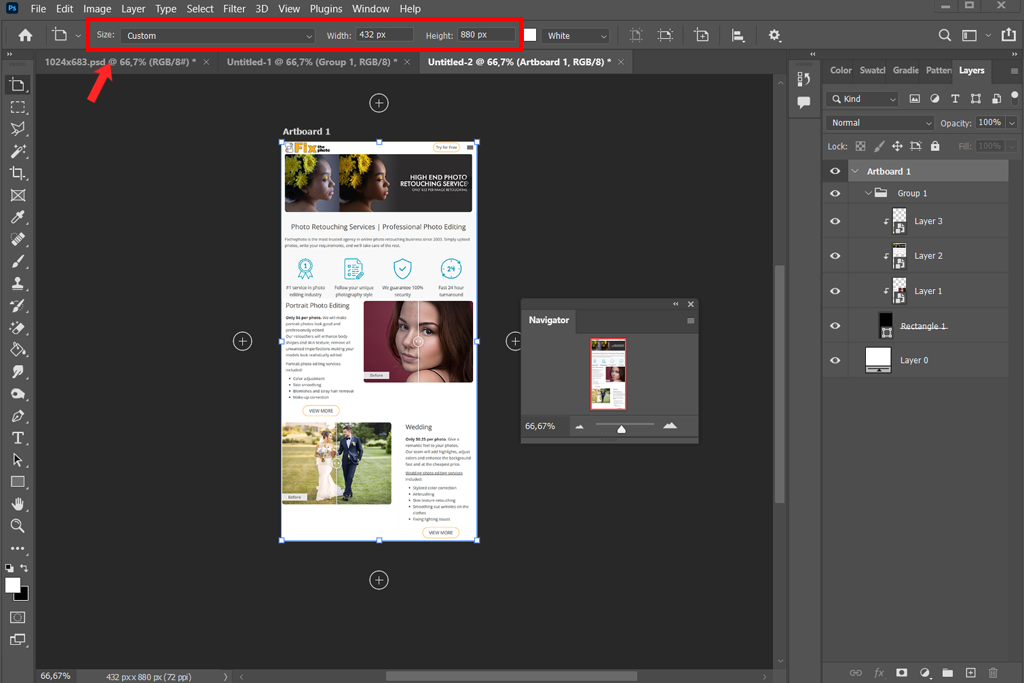
You don’t always need to start fresh with the Artboard tool. Photoshop also lets you convert layers or groups into artboards. This Photoshop manipulation tutorial is great when you already have designs in place and just want to arrange them neatly into new artboards Photoshop for easier management.
1. Select the layers or groups. Primarily, you need to select layers or groups in the Layers panel that will make the basis for an artboard. You can pick both individual layers or groups containing multiple elements.
2. Convert to artboard. After you’ve selected the needed layers or groups, right-click and choose “Artboard from Layers”. Alternatively, you can go to the Layer menu and choose New > Artboard from Layers. Photoshop will make an artboard that has sufficient size to store the selected content.
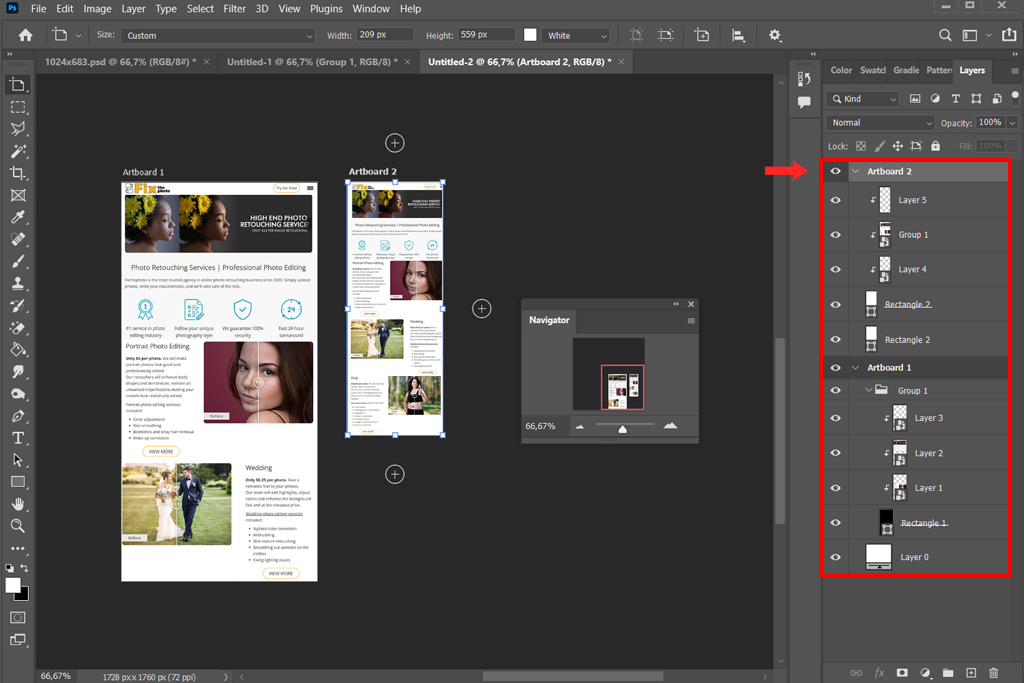
3. Choose a name for a new artboard. I recommend renaming the new artboard so that you can instantly find it among others. Double-click its name in the Layers panel and enter a meaningful title.
4. Adjust artboard size if you want. Use the Artboard tool to alter the artboard size in Photoshop. It is also possible to move the artboard without impacting the layers inside.
5. Add or edit content within your Artboard. Adjust or add artboard Photoshop design elements if needed.
6. Export the result. To output your artboard, click File > Export > Artboards to Files or Artboards to PDF.
“Don’t use generic names like “Artboard 1” and “Artboard 2.” They are truly confusing. Be more precise, e.g., Facebook Cover, Mobile Ad, or Print Flyer.”

When starting a new project in Photoshop, you can add an artboard directly while setting up your document. It is probably the fastest way of how to create a new artboard in Photoshop for various screen sizes or design layouts.
1. Run Photoshop and choose a new document. You need to click File > New. You’ll see the New Document window.
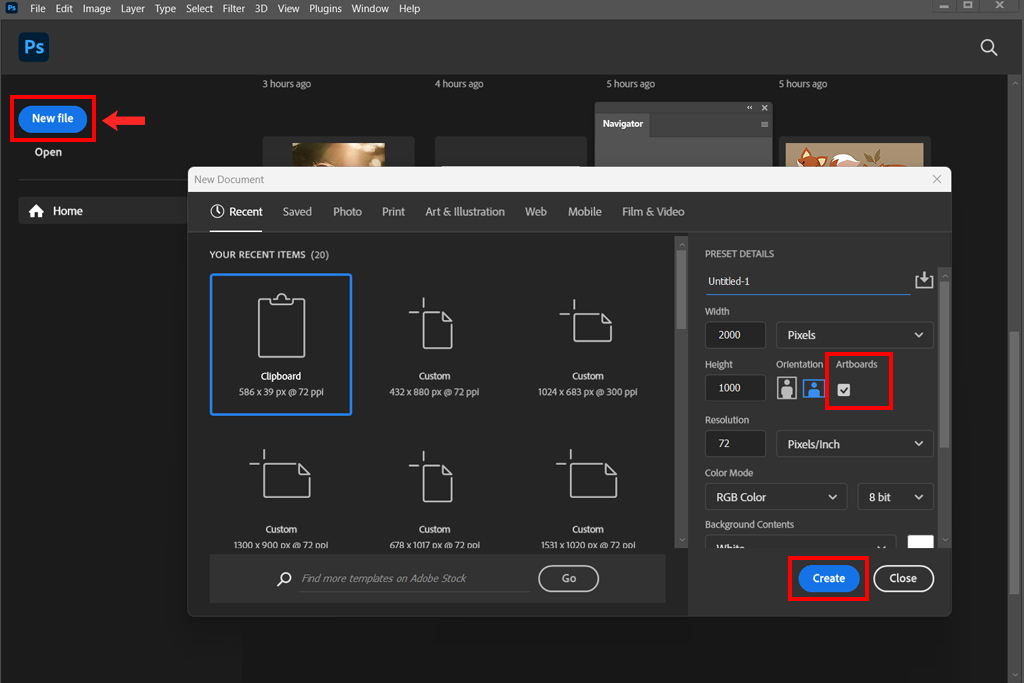
2. Enable artboards. Check the “Artboards” option in the New Document dialog. Thus, Photoshop will “understand” that you want to start with an artboard instead of a single canvas.
3. Choose a preset or custom size. You can select any preset size from the list based on your current project - Web, Mobile, or Print. Alternatively, you may enter custom dimensions.
4. Create the document. Click “Create”. Photoshop opens a new document with one artboard for your project.
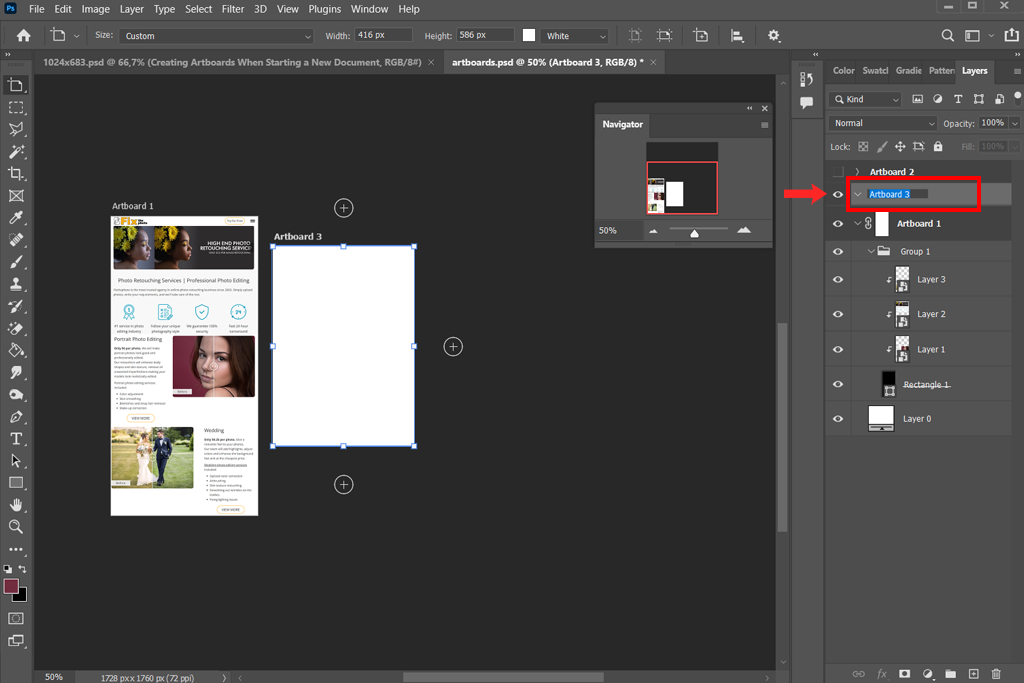
5. Add multiple artboards in Photoshop if needed. If you need several artboards, add them by using the Artboard tool or by clicking the “+” icon. You can find it near the existing artboard in the Layers panel.
6. Rename and organize artboards. Change the name of each artboard. This way, it will be no brainer to locate artboards for specific pages, devices, or layouts.
7. Start designing. Put design elements inside each artboard. You’ll get several versions in one file, which is very convenient.
I often expand my Photoshop workspace using the plus icons. It is available right near the artboards. By clicking the “+” sign, I can add new artboards exactly where I need them.
1. Select your current artboard. Click on any existing artboard in the document to make it active.
2. Find the plus symbols. When the artboard is selected, there will appear small plus (+) symbols along its edges - top, bottom, left, and right.
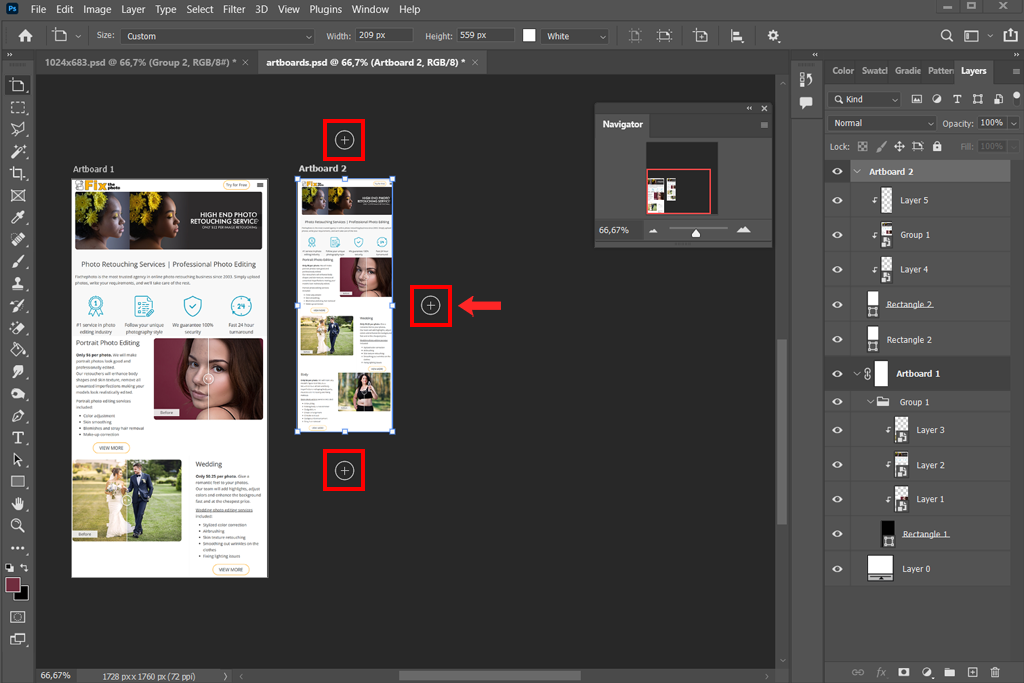
3. Click the plus symbol to add a new artboard. You need to click + on the side where you want a new artboard to appear. Photoshop automatically creates a new artboard near the original one. They will have identical sizes.
4. Give a new artboard a proper name. Tweak the name of the newly created artboard. Double-click its name in the Layers panel and enter a new variant.
5. Adjust or add content. Change the position or size of your design elements. You can also add new items based on your projects.
6. Repeat the process. Take these steps again to add multiple artboards in Photoshop around your existing layouts. The process is fast and intuitive.
“Take advantage of preset sizes. Thus, your designs will be consistent across devices. Moreover, you can speed up your workflow a lot.”

My FixThePhoto colleagues and I often create new artboards by copying existing ones. It’s a fast way to make multiple layouts or versions without rebuilding everything from the ground up.
1. Select the Artboard Tool. Find it in the toolbar under the Move tool.
2. Duplicate artboard in Photoshop. Next, I hold down Alt (Windows) or Option (Mac) and click-drag the artboard I want to duplicate.
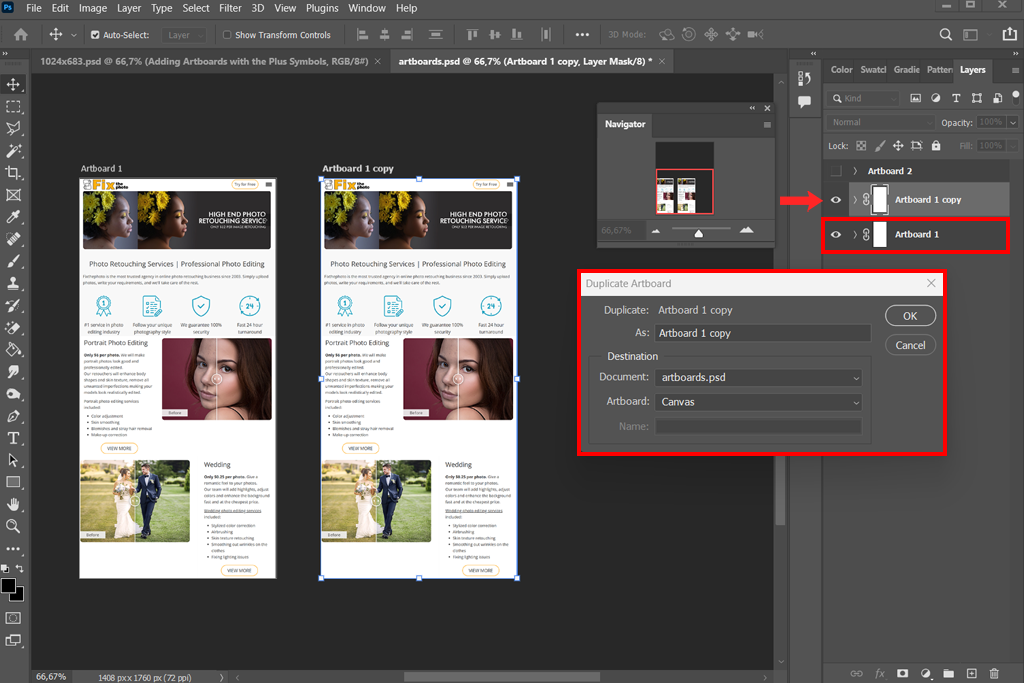
3. Keep the duplicate aligned. Hold down Shift while dragging your artboard to make it aligned on the same axis with your previous canvases.
4. Rename the new artboard. Head to the Layers panel and rename your new artboard. This is useful for quick navigation.
5. Edit or adjust the duplicate. Update the duplicate artboard with new content or adjust it further if you want.

Select your layers or groups, right-click, and choose Convert to Artboard. Your design will automatically fit inside the new artboard.
Using artboards, you have all your designs together in a single file. It’s easier to organize, maintain a consistent look, and export multiple layouts for different projects all at once.
Yes, it is. Each artboard can be its own size. This is great if you need multiple layouts for social media or other platforms in a single project.
Go to File > Export > Artboards to Files or use Quick Export As PNG/JPEG with the artboard box selected. Photoshop will create individual files for every artboard and name them automatically.
They may if your file has lots of big graphics. To improve performance, organize your layers, use Photoshop tool name as Smart Objects for heavy elements, and delete unused assets regularly.
Photographers can layout photo contact sheets, marketers can preview multiple ad options, and designers can display branding concepts using artboards in one file.


![Ripped Paper Effect in Photoshop [+FREE Bonus Tools]](/placeholder-450x300.svg)


