
When working at FixThePhoto, I’ve created editorial fashion layouts, corporate branding designs, and other illustrations. However, when I started designing print-ready t-shirts, I improved my understanding of the main principles of spatial design.
Some people mistakenly believe that it will suffice to paste a logo in the center and click the Print button. Nonetheless, it’s challenging to achieve higher precision while considering anatomy. If you miscalculate, your whole layout design might get ruined. In this t-shirt design placement guide, we will consider why it’s important to choose the right position for logos or prints.
Whether you want to create professional streetwear graphics or minimalist branding T-shirts, you need to master the main principles of placement. It’s necessary to understand what size and proportions to choose to create designs that will sell your products. If you want to sell your designs online, you need to grasp the basics of t-shirt logo placement and choose the best eCommerce platforms. It will allow you to create appealing listings and increase the number of sales.
Belly-level logo. I remember seeing T-shirts where the logo was placed too low, right over a person’s stomach. The designers have achieved an unintentionally humorous effect, as if they were trying to advertise products for digestion. A couple of inches has completely transformed the meaning of the whole design.
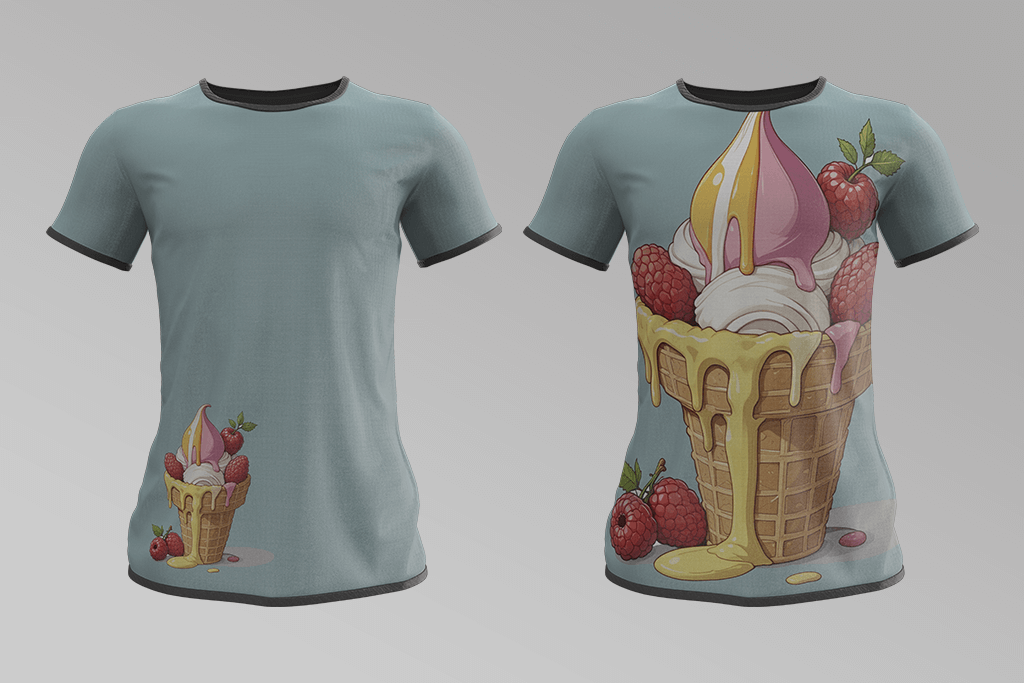
Oversized front. A colleague of mine once discovered a T-shirt with a large print covering the entire front. This design overwhelmed the shirt and made the person wearing this piece of clothing virtually unnoticeable. Oversized designs are never comfortable to wear. They attract too much attention and fail to bring the main message across.
Off-center disasters. Once I saw a design that had been placed at the geometric center of the shirt, but it looked as if it was put on one side. This is why it’s important to consider what is the visual center of a T-shirt if you want to avoid creating a poorly balanced design. Even a barely noticeable misalignment can distract a viewer from your design.
Low contrast misfires. A colleague of mine showed me a pastel yellow design on a light gray tee that was impossible to notice unless you knew what you were looking for. Low contrast colors make designs fade into the background. It’s important to maintain high visibility, especially if you want your design to stand out in varied lighting or busy spaces.
Shirt placement is a serious choice that impacts how your shirt looks, feels, and sells. Every zone on a tee serves a different purpose. Centered chest prints immediately attract attention. Small back logos look refined and elegant. However, if you place a logo too high or too low, it might ruin the overall impression.
Even if you use dedicated tools like Printify’s placement t-shirt design size charts or Adobe Illustrator’s alignment guides available in the best t-shirt design software, you still need to make a choice when deciding on placement. Even if your design looks centered on a screen, it might shift when a person wears the t-shirt.
The visual placement is affected by the fabric, body size, and shirt cut. After testing my designs on hundreds of mockups, I concluded that one should maintain the right visual balance and consider garment structure to achieve perfect placement.
Make sure to learn these terms, as they will help you understand how to place your designs right:
Once you understand these terms, it will be easy for you to create a professional design. This way, you will be able to choose the right layout with little to no effort.

Consider your shirt’s front and back as your prime real estate. Your choice of T shirt design placement impacts how your design will be seen by others. Whether you need to make your T-shirt more attention-grabbing or achieve a more subtle effect, placement has to be intentional. Using the best t-shirt design app, you can preview how your design will look on an actual piece of clothing before printing it.
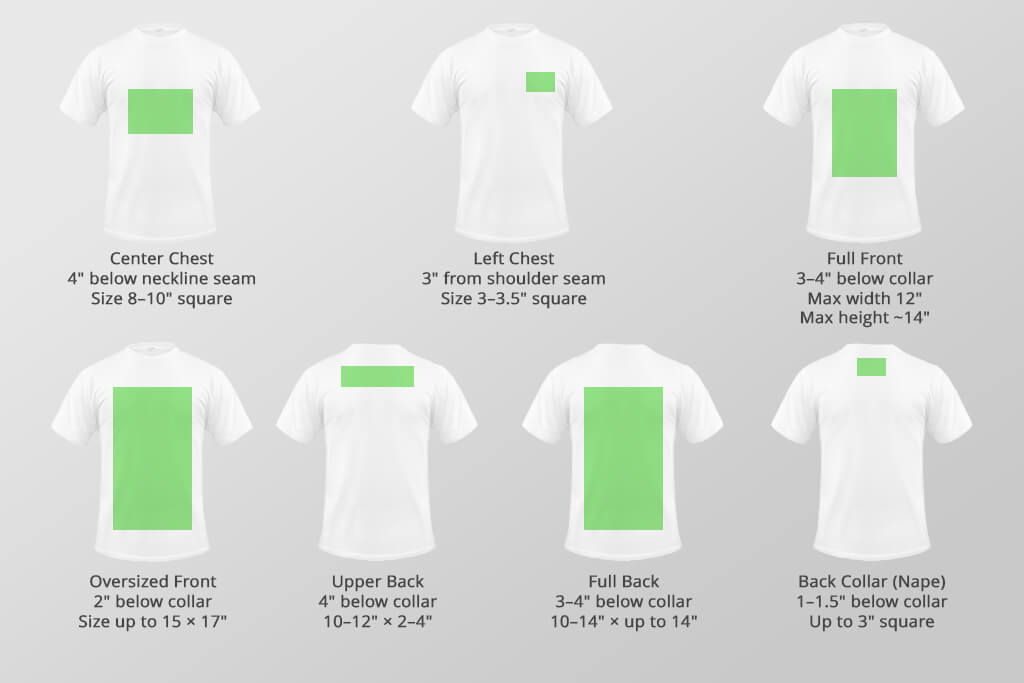
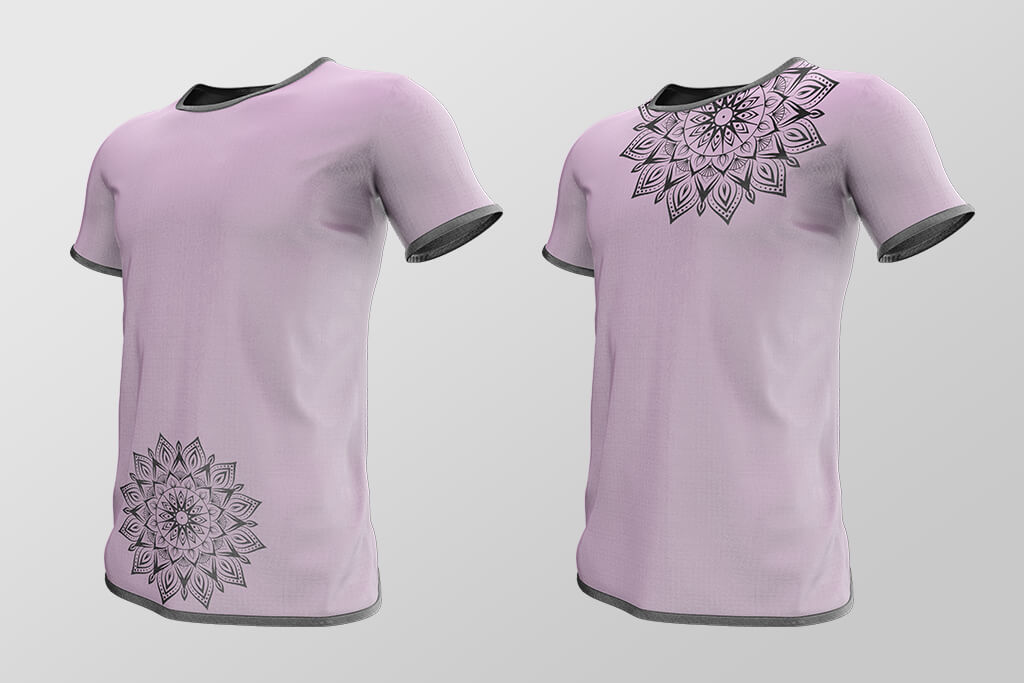
This zone is a popular choice among designers. However, you may still make some basic mistakes even with chest logo placement. To avoid them, place your design 4" below the neckline seam, not the collar’s edge. This tip is perfect for logos, short quotes, or clean graphics. If you place your logo too high, it will look distracting.
Best size: 8"–10" square for adult sizes.
This classic choice allows you to achieve a minimalist effect, which makes it so popular. It’s perfect for branding, uniforms, or embroidered designs. Place your logo about 3" from the shoulder seam. You might ask: “How far down from collar should design be?” It should be centered between the collar and the sleeve.
Best size: 3"–3.5" square.
If you want to attract attention, place your design 3–4" below the collar. This is a great choice for bold graphics, portraits, or storytelling designs. However, your design should not be too wide. Keep it 12" max to ensure that it looks nice across sizes.
Max height: ~14" tall.
«Be sure to test full-front designs on different shirt sizes. Even if your design looks perfectly centered on M shirts, it might be too small on XL shirts.»

Popular brands use this logo placement tip to create fashionable pieces of clothing. Begin 2" below the collar and stretch your design so that it ends just above the hem. It’s best suited for oversized tees and hoodies.
Size range: 15" x 17" — but check your printer’s limits.
This choice is perfect for designers who create team shirts, design clothes for events, or want to add names/slogans. Put it 4" below the collar, otherwise, it will be difficult to notice when one wears the T-shirt.
Ideal size: 10"–12" wide, 2"–4" tall.
The back is a large canvas, so it’s easier to fill it with a huge print. Back of shirt design placement is suitable for poster-style designs, concert merch, or graphic narratives.
Start 3–4" below the collar, and keep it right in the center.
Max range: 10"–14" wide x up to 14" tall.
While it will be barely noticeable, it’s a great place to advertise a brand in a subtle way. The design is visible right under the neck. You can complement it with chest or sleeve logos.
Placement: 1"–1.5" below the collar.
Size: Keep it under 3" square.

Even if you create a professional t-shirt design, it might look wrong unless you take the necessary steps to prepare your file for printing. The edges might look wrong, and the colors might be too bleak when you print the image. Unfortunately, excellent ideas can be executed poorly due to file issues. Whether you use Adobe Illustrator, Photoshop, or a browser-based software like Canva, be sure to edit your files with print in mind.
Many experienced designers use software that supports 3D modeling for eCommerce to preview their designs on real products and choose the right angles. Such tools are perfect for brands that want to achieve consistent, high-quality outputs.
Here are the settings you need to use:
Even if your shirt design does not have a background, it’s better to double-check. Most beginner designers make the mistake of leaving a white box where it should not be. Besides, you need to utilize smart guides to align your design in the printable area. Name your files clearly. It’s better to mention the shirt size, color, and version.
If you want to print a bulk of files, test your export on a single t-shirt first. Even seasoned professionals occasionally forget to fix bleed areas or align the layout elements properly. Adobe Express and Canva Pro allow users to preview placements. Be sure to use them and make measurements in inches or centimeters instead of pixels
At FixThePhoto, our team has fixed many t shirt placement issues. It saved our clients a lot of money and helped them avoid reprints.
Use the right tools to create professional t-shirt designs. I have tested many programs and concluded that Adobe Illustrator and Photoshop are deservedly called the gold standard.
I typically create the base layout in Illustrator. It’s suitable for designing full-front prints, left-chest logos, or oversized illustrations. Using accurate anchor points, smart guides, and vector editing tools, I can achieve higher accuracy when working on my designs.
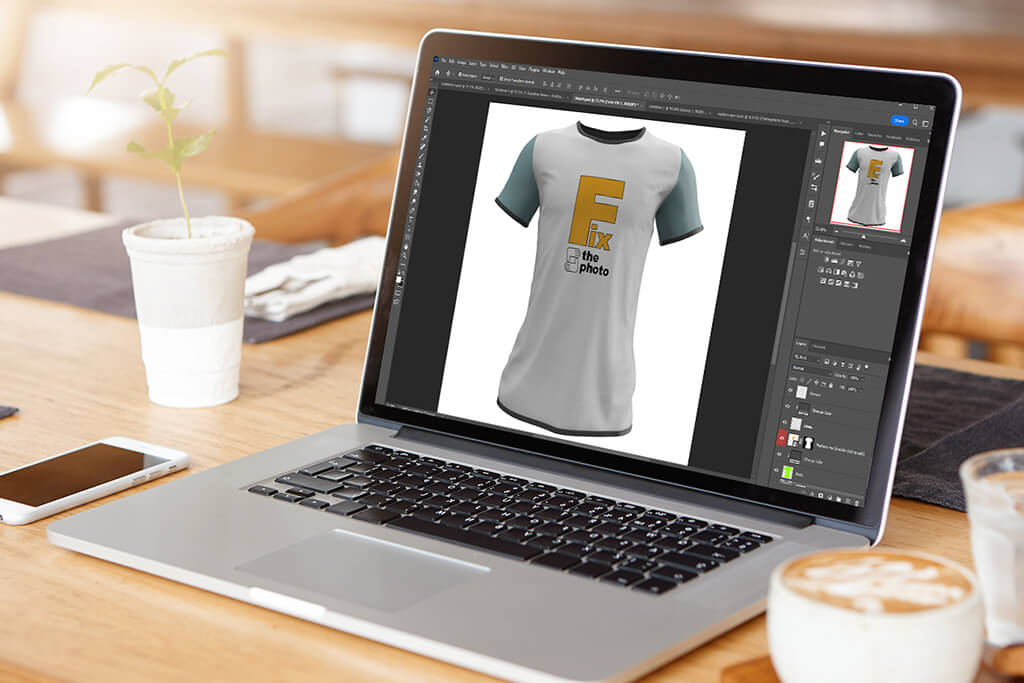
I also use Photoshop for free to create realistic mockups, fabric textures, shadow simulations, and export previews. Whether you want to create a complex design or a simple logo, Photoshop will help you complete every project.
Here’s a brief comparison of these tools based on our experience of using them:
| Tool | Best For | Strengths | Limitations |
|---|---|---|---|
|
Adobe Illustrator
|
Design setup & sizing
|
Vector control, precision placement, templates
|
Hardly suitable for photo-based visuals
|
|
Adobe Photoshop
|
Mockups & presentation
|
Realistic previews, layer control, shadows
|
Slower for layout adjustments
|
|
Procreate (iPad)
|
Sketching design ideas
|
Quick drawing, easy PNG exports
|
No alignment features, not print-optimized
|
|
Printify Creator
|
Live product previews
|
Shows size variation on shirts
|
No design tools, limited file control options
|
|
Canva / GIMP
|
Quick edits or basic designs
|
Easy to access, browser-based, beginner-friendly
|
Problems with alignment, no CMYK, low DPI issues
|
Why Adobe wins. If you want to sell products on Etsy, create your own Shopify store, or prepare your prints for bulk production, use Adobe software to control the output. These programs will help you create professional layouts and mockups. You will create the designs that will look like source pics when you print them.
I have created shirt collections using Illustrator. The program allows me to scale my designs across 5 sizes, 3 colorways, and 2 garment types.
While some programs have drag-and-drop functionality, they are hardly suitable for complex designs. Using them, it might be challenging to create designs of photography shirts and maintain consistent layouts, resolution, and positioning to achieve the intended effect.
I’ve often noticed great designs that looked wrong because of minor mistakes that were easy to avoid. You may wonder: “Which side of a shirt does the logo go?” When choosing placement, you need to understand how a shirt will be worn and how it will look in product photos.
If you make a placement mistake, it might impact customer trust and increase return rates. Besides, it will negatively affect the perception of your brand online. Off-center prints look awkward, so a person won’t feel confident when wearing such pieces. If your product photos look perfect, but the clothing looks wrong, you won’t be able to get any repeat buyers.
Choosing the right placement and using professional clothing photography techniques is necessary to achieve the best results. A high-quality photo without any lighting issues that shows your designs from different angles will help your clients make an informed decision.


If you want to sell your T-shirts on Shopify, Etsy, or Amazon, remember the importance of visual quality and placement, as your sales will depend on it. You may ask: “Where to put logo on shirt?” Many sellers use the FixThePhoto app to enhance their product photos before uploading them to the platform. You can upload them from your phone and order quick edits, ask the team to fix alignment issues, or make the background cleaner. It’s a great choice for those who want to give their photos a professional look and ensure that their listings have higher visibility on online marketplaces.
A poorly aligned design or a product mockup with elements of the wrong sizes will look unappealing even if the artwork was created at a professional level.
«Your design should be perfectly visible in the first product image. This way, people will click on the listing. While angles and styling are important, the design comes first.»

Print-on-demand platforms like Printify or Gelato allow users to upload and preview their designs on T-shirts of various sizes. Remember that a visual that looks nice on a Medium T-shirt will be hardly noticeable on a 2XL T-shirt unless you enlarge it.
When working at FixThePhoto, we cooperate with many small brands and help them increase sales and boost their profits by fixing mockup alignment issues, adjusting colors for DTG printing, and enhancing pics to showcase products better. A professional-looking mockup helps businesses sell more products.os to show the shirt fits better. A good mockup builds trust — and sells more.
While many designers prefer sleeve logo placement on shirt, this choice frequently results in low logo visibility. However, when done professionally, it will have the right impact. This is why I prefer to test my ideas on flat mockups and worn shirts to see whether a logo will still be visible when a person moves their arm. The seam placement can affect the result as well.
At FixThePhoto, we test sleeve designs by putting them 1–3 inches above the hem. They should be centered between the sleeve seams. If you need to place a small, simple logo, one inch is the perfect size. If it’s larger, it will look distorted when a person wearing a T-shirt folds or stretches the sleeve.
When designing branding-focused T-shirts, I typically advise putting a logo on the left sleeve only. It’s especially important for T-shirts with a chest design. However, if you need to design a promotional T-shirt or uniform-style clothing, you can put the logo on each sleeve to achieve the intended effect.
If you work with logo design companies, be sure to discuss placement with them. Not every logo will look nice on a curved, narrow surface. It’s always better to opt for simple solutions.
Most designers put it on the left chest. If you want to achieve a bolder effect, place the logo on the center chest or upper back area.
Logos typically look nice on the left chest. Most people expect to see them there. Name tags are also worn on the left. Besides, this Tshirt logo placement is perfect for achieving a well-balanced effect in product photos.
It should be about 4 inches down from the neckline seam if you want to place a logo in the middle. It will allow you to achieve the right spacing and ensure that the design won’t be too high or too low.
Use programs like Adobe Illustrator to align and resize the design, then export your file in PNG or SVG format at 300 DPI in CMYK color mode.
Place it 1–3 inches above the sleeve hem. It should be centered horizontally. The design should be simple and easy to read when a person wears the T-shirt.
It’s better to put it right above the pocket seam or directly on the pocket if it’s small enough. It’s better to resize your logo to 2.5–3.5 inches.


![Most Wanted Photography Editing Styles [Fixthephoto’s Version]](/placeholder-450x300.svg)


