By using Dodge and Burn in Lightroom, you can emphasize important details and make a viewer focus on specific parts of your photo. It allows you to make some areas brighter while darkening the rest of the image.
Before learning how to apply this effect, download Adobe Lightroom for free. Then, you need to learn how to use the Adjustment Brush to create a custom effect.

To apply the Dodge and Burn effect in Adobe Lightroom, open the image that you want to edit and click on the Develop menu.
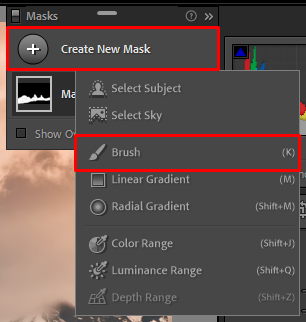
Take a look at the bar between the Histogram and the Basic tabs on the right. After selecting the Masking mode, you can create a new mask. To do it, follow the same steps you take when performing masking in Photoshop.
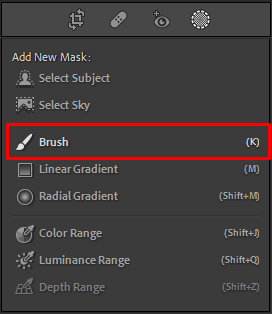
You will see the Masking panel. Click on the Brush option to select a suitable mask. In the Adjustment Brush menu, you can change the settings the way you see fit.
Using the Mask window, you can select from a variety of masks and apply them to your photos.
Before editing photo in Lightroom, you need to change the settings of the brush. It will allow you to select how the brush strokes will look.
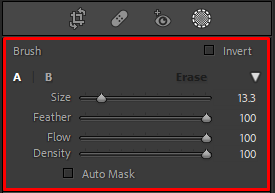
You can adjust the size of the brush depending on the area that you want to edit. The Feather setting allows you to customize the softness of the brush.
Then, bring the Flow and Density values to 50%. Thanks to it, brush strokes will become soft and difficult to notice, which will make the Lightroom Dodge and Burn effect more natural.
However, you can also intensify the effect by applying brush strokes to the same area multiple times. It will enable you to blend the edited area with the rest of your photo.
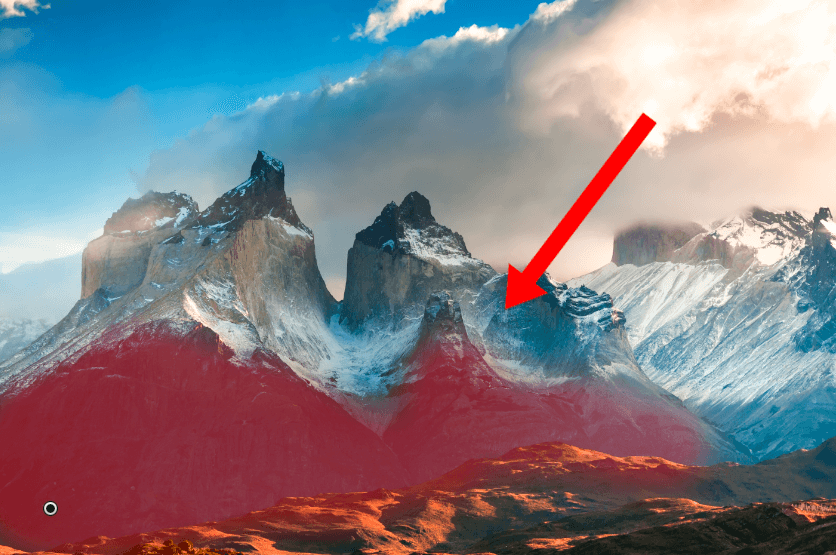
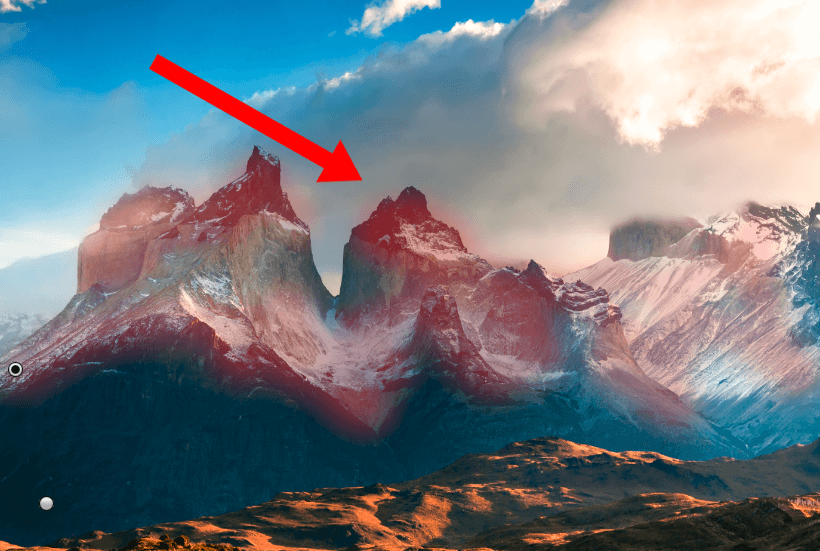
The first thing that you should do is to check Show Overlay in the Mask window. Then, pick any overlay color using the options available on the color palette on the right. By default, the color is set to red. You will see that the selected area will acquire a reddish tint. After taking these steps, select the area to burn.
To perform dodging and burning in Lightroom, use the Exposure slider. After finding it in Lightroom, move it to the left to make the selected area darker. If you want to emphasize the light areas even more, you can also include a part of the foreground in the selection.
At this stage, if you plan to dodge the picture, you need to create a mask. To do it, just click on the New option in the Mask menu.
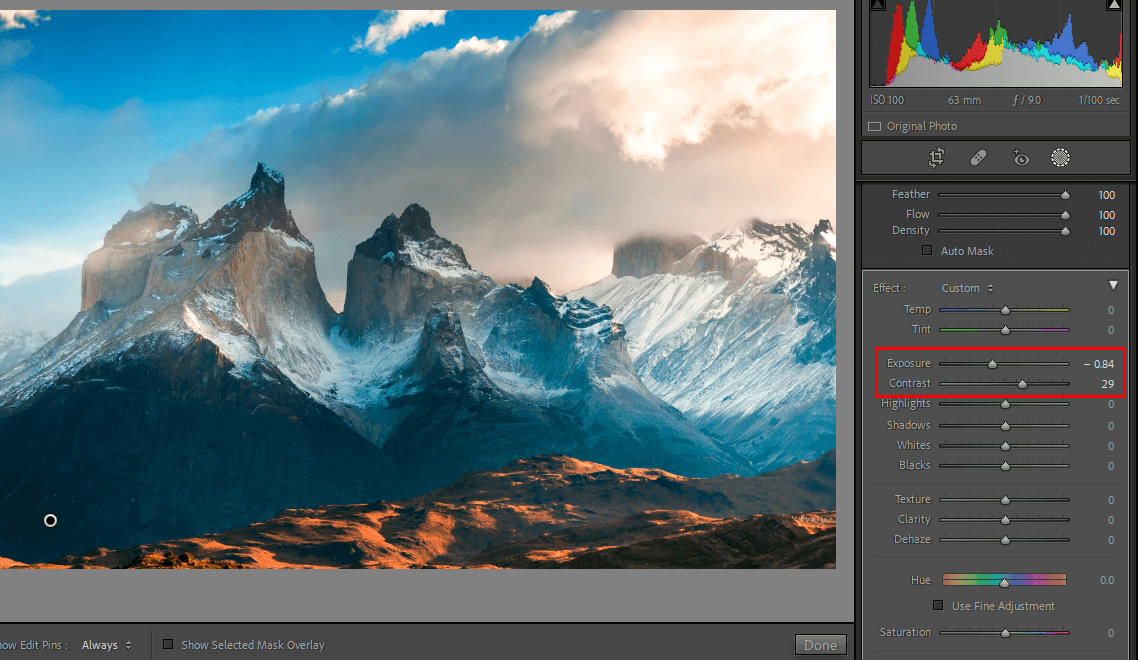
Just like you did in the fifth step, select the area that you are going to dodge. Then, move the Exposure slider to the right to intensify the effect.
You will see that the level of exposure in this area will become higher, and the image will become more highlighted. However, the picture will still look as if it hasn’t been edited as the result will be quite natural.
Using the tools on the right panel, adjust a variety of settings until you are fully satisfied with the result. It allows you to apply effects, increase sharpness, tweak colors, and adjust exposure. If you like your edited image, click the Save button.
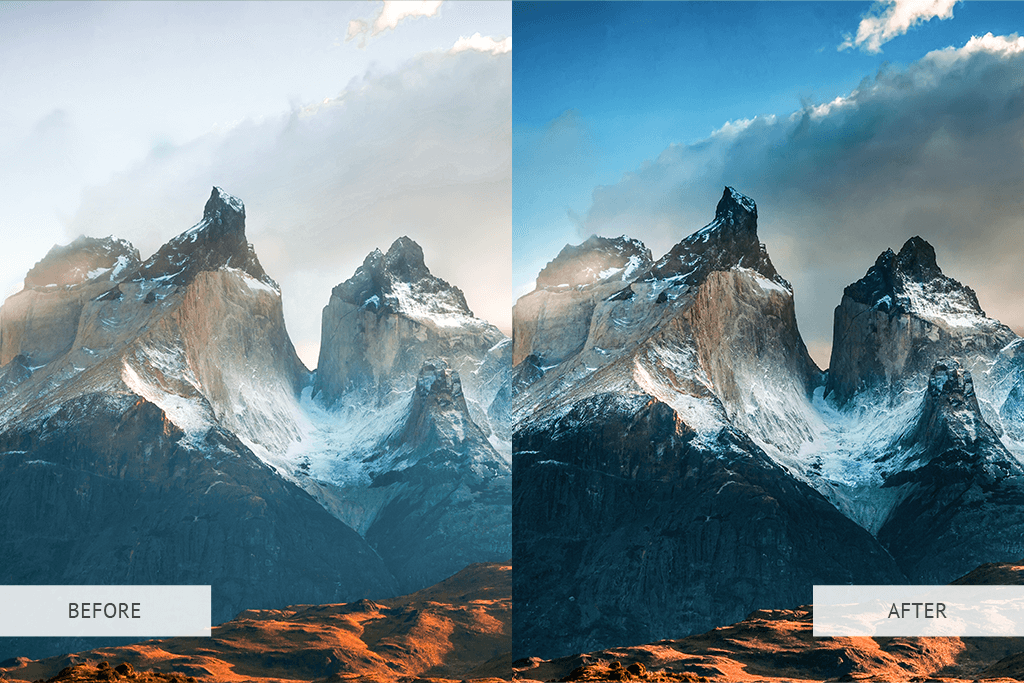
The photo that we used as an example in this Lightroom tutorial looks positively improved. You can see more contrast between different areas, which emphasizes the beauty of the landscape.

This bundle allows you to enhance your pictures in a few clicks. Before trying to use them for the first time, make sure to read how to add presets to Lightroom.
It was called because of technology that makes it possible. To make some parts of an image, a developer should cover them to prevent light from reaching them. To make them darker, the developer should ensure that light won’t reach the rest of the negative while exposing the areas that should be in the shadow.
To adjust the intensity of this effect, press and hold the Option key if you have a Mac device or the Alt key. Then, click on the black button in the center and move your cursor to the right to make the effect more noticeable. If you want to make it less visible, move the cursor to the right.
If you don’t want some areas of your photo to be affected, you can remove the effect using the adjustment brush, radial or graduated filter. Press and hold the Option or Alt key to use the brush as an eraser. Then, move it over the areas that you want to leave unchanged.


