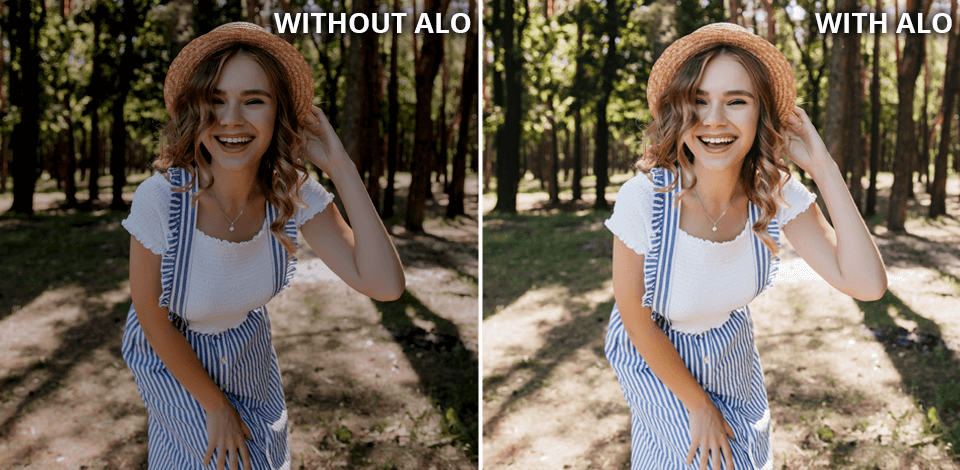
Canon’s Auto Lighting Optimizer is a camera setting. As a photo retoucher at FixThePhoto, I use ALO on my 5D Mark III to improve image quality, making sure the exposure is balanced and details in both bright and dark areas are kept.
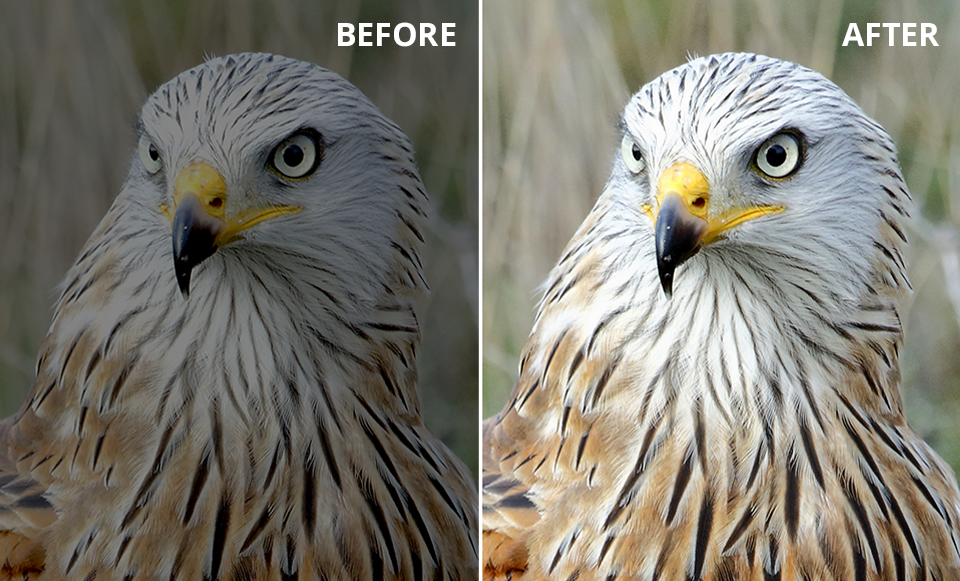
I like how ALO adjusts brightness and contrast while I’m shooting, which saves me time later when editing. As a photographer using JPEGs, it helps show more detail in my photos.
ALO was first added to the EOS 450D in 2008 and is now on all current Canon EOS, DSLR, and mirrorless Canon cameras.
Backlit scenes. If your subject is backlit, they might look too dark against a bright backdrop. ALO helps balance the exposure, making shadowed areas more detailed without making the bright parts too bright.
High-contrast situations. In scenes with strong contrasts, like a sunny day with deep shadows, ALO helps balance the tones so both the bright and dark areas keep their details. Canon camera brand also recommends turning on ALO when using a flash.
Underexposed pictures. If a photo is too dark, Auto Lighting Optimizer can slightly increase the contrast and brighten the dark areas, improving the photo overall. The bright parts of the image change less than the dark areas. On bright days, the effect isn’t as strong, but it still helps prevent shadows from getting too dark.
Portraits in harsh light. When taking portraits in strong light, like at midday, ALO can reduce the contrast and bring out more detail in the face, helping to avoid harsh shadows.
Snapshots and everyday photos. For regular photos, like travel or family events, ALO can make your pictures look better with balanced exposure, so you don’t need to do much editing later.
JPEG shooting. If you’re taking photos in JPEG format, Auto Lighting Optimizer is very useful because it makes adjustments directly in the camera, giving you great results right away.
Better exposure balance. Canon Auto Lighting Optimizer keeps details clear by balancing the dark and light parts of your photo. It also adjusts saturation and contrast to make the photos look more vibrant.
Less digital noise. ALO can brighten your photo without making the highlights too bright. This helps reduce noise while improving the photo’s contrast.
Better skin tones. ALO can gently lighten shadows on faces, which helps create nicer, more natural-looking portraits, especially in tricky lighting.
Highlight protection. ALO helps keep details in bright areas by slightly darkening them. This way, parts of the image that might look too bright and lose detail stay clear and textured.
Real-time processing. ALO adjusts your photos while you’re taking them, saving you time that would otherwise be spent fixing exposure or contrast later. This is especially useful for photographers who need quick results.
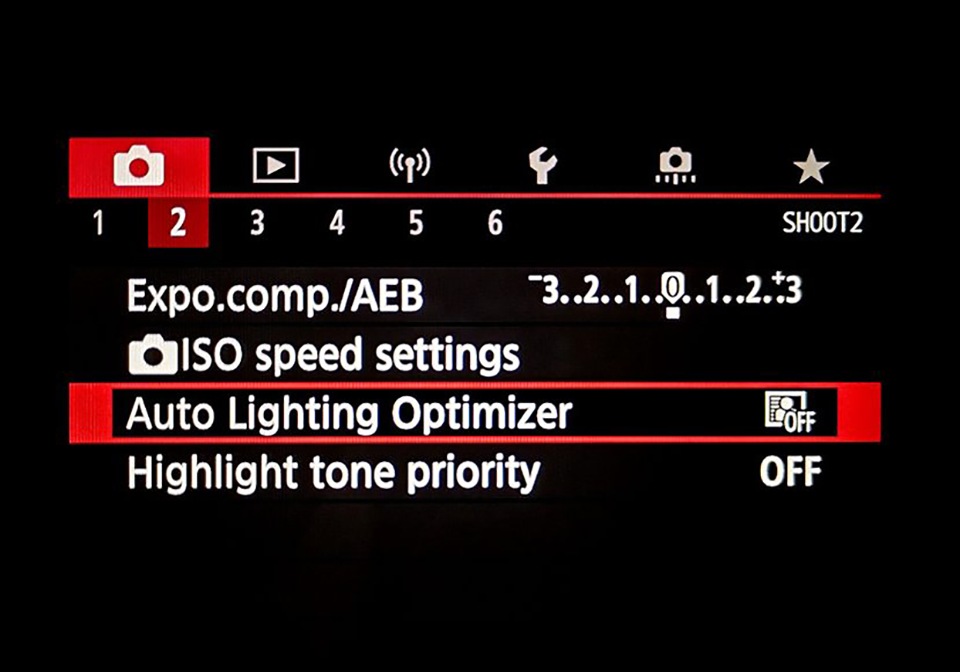
The Auto Lighting Optimizer feature is in my Canon camera for portraits settings menu, so I need to turn on the camera and go to the menu to activate it.
Once I open the menu, I go to the “Shooting” section. Here, I can see many options for controlling exposure, including Auto Lighting Optimizer. On some DSLR cameras, it’s just called “ALO.”
2. Adjusting the Auto Lighting Optimizer intensity
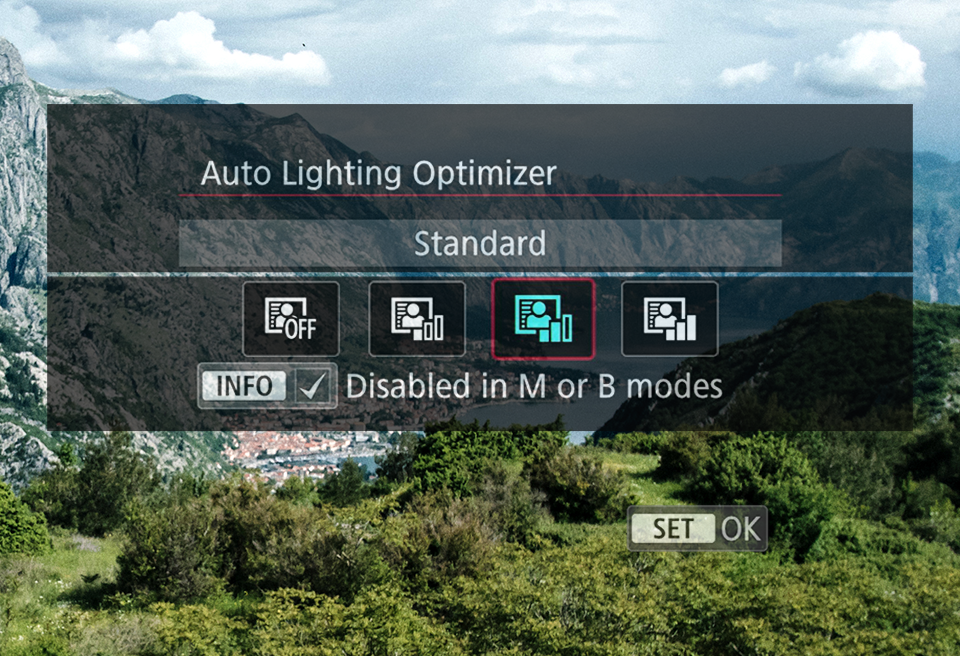
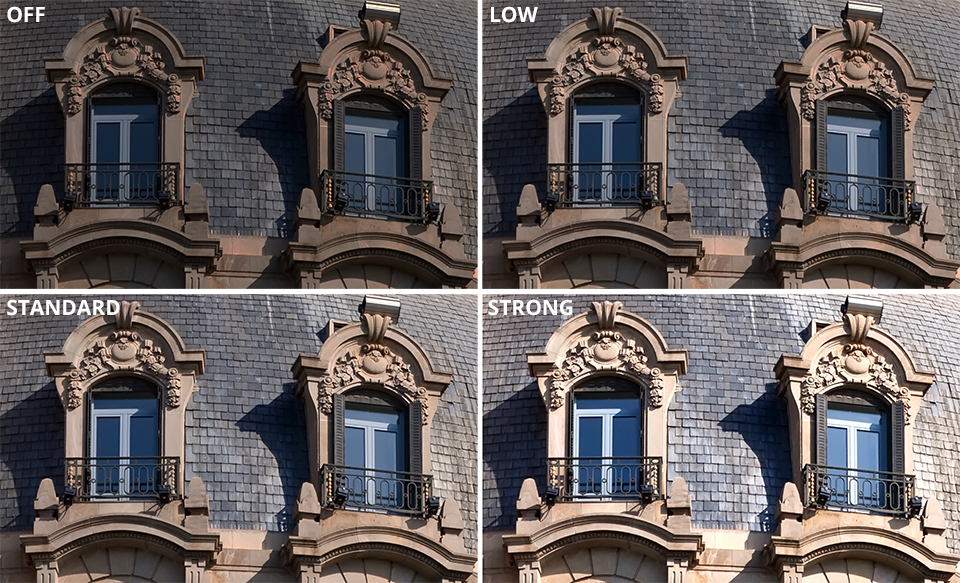
After selecting Auto Lighting Optimizer, a menu appears, letting me choose the intensity:
Standard. This is the default setting and works well for most situations.
Strong. If you're shooting in high-contrast scenes, you can choose "Strong" for a stronger ALO effect.
Off, Low. If you want less ALO effect or none at all (to keep shadows darker), you can choose "Low" or "Off."
Experiment with settings. Take some time to test ALO settings (Off, Low, Standard, Strong) on your camera in different situations so you can see how each one changes your photos. For scenes with high contrast, try using the Standard or Strong setting. In more evenly lit scenes, the Low or Off setting might be enough.
Check the histograms after taking photos. Look at the histogram on camera to see if the highlights and shadows are balanced. This will help you see how ALO is changing your image and if you need to make any adjustments.
Don't rely too much on ALO. It's a helpful tool, but it can't replace good exposure and composition skills. Use ALO as extra help, but don't depend on it completely.
Learn about your camera. Different expensive and cheap Canon cameras might have slight differences in how ALO works. Check your camera's manual to understand the specific ALO features and options your camera offers.
The results will vary depending on what you're photographing. ALO is more noticeable in low-light situations. But in bright natural light, you might not see much difference. So, it's best to use ALO in the right situations, like portraits, close-ups, weddings, landscapes, and wildlife photography.
ALO can slow down your camera's capture rate. Because ALO is an in-build camera mode that uses some of the camera's processing power, you might notice a slight delay or shorter battery life, especially if you use it with other features that need a lot of power, like burst mode.
Yes, you can find the ALO feature on all Canon EOS cameras made after 2008, including models like the Canon 5D Mark III, Canon 7D, Canon 6D, Canon M50, Canon R5, Canon 60D, Canon 80D, and Canon T2i. It’s available on DSLR and mirrorless cameras.
If you have turned on the Highlight Tone Priority (HTP) feature, ALO will automatically turn off. If you see that ALO is greyed out, it might be because HTP is turned on.
You can use ALO with many other features, but not all of them. For example, ALO won’t work with Highlight Tone Priority (HTP) because they conflict. If you turn on one, the camera will automatically turn off the other. ALO can work with features like flash, exposure compensation, and automatic exposure bracketing. However, they might be less effective when used together.
You can turn ALO on or off using the Quick Control Screen (Q) or by going into the menu. Look for it in the Shooting settings of your EOS camera or Canon for video on page two or three. If you can’t find it, check your camera’s manual to see where it is.
By default, ALO is turned off when using Manual exposure mode and set to Standard in other modes. To change this, press the Q button, find the ALO icon in the menu, and use the dials or touch the screen to select the setting you want.
ALO is helpful for many kinds of photography, especially when the lighting is difficult. It’s good for general photography, landscapes, portraits, and scenes with strong contrasts.
ALO works quickly while taking pictures, so it shouldn’t slow down the camera or affect performance.