best webm converter best webm converter

BEST WEBM CONVERTER

I have found Adobe Media Encoder to be the best WebM converter, as it impressed me
with its convenient unlimited customization freedom, and ability to preserve optimal
video quality. I employed it to convert my footage to WebM, ensure it’s optimized for
HTML5, and requires less storage space.

As a web developer and designer, I frequently deal with WebM files when adding videos to web pages because of their superior compression and HTML5 compatibility. I have found this format to provide quicker loading times and better performance across different browsers and devices, improving the end-user experience.

Comparison Chart: Quick Overview

All the WebM converters in this review come with their own sets of benefits that are aimed at different needs, meaning you can choose between pro-level software like Adobe Media Encoder and more straightforward, user-friendly solutions like Zamzar or CloudConvert.

WebM Converter Main Feature Compatibility Free Version/Free Trial

Adobe Media Encoder

Integration with Adobe software

Windows, macOS

✔️

Wondershare UniConverter

Superfast conversion

Windows, macOS

✔️

HandBrake

Free and open-source

Windows, macOS, Linux

✔️

Zamzar

Intuitive interface

Web-based

✔️

CloudConvert

In-depth customization

Web-based

✔️

Online-Convert

Supports batch conversion

Web-based

✔️

1. Adobe Media Encoder – Best Overall

webm converter adobe media encoder
Pros
  • High-quality export results
  • Intuitive UI
  • Batch processing functionality
  • In-depth customization options
Cons
  • Subscription-based pricing model
  • Demands a powerful PC

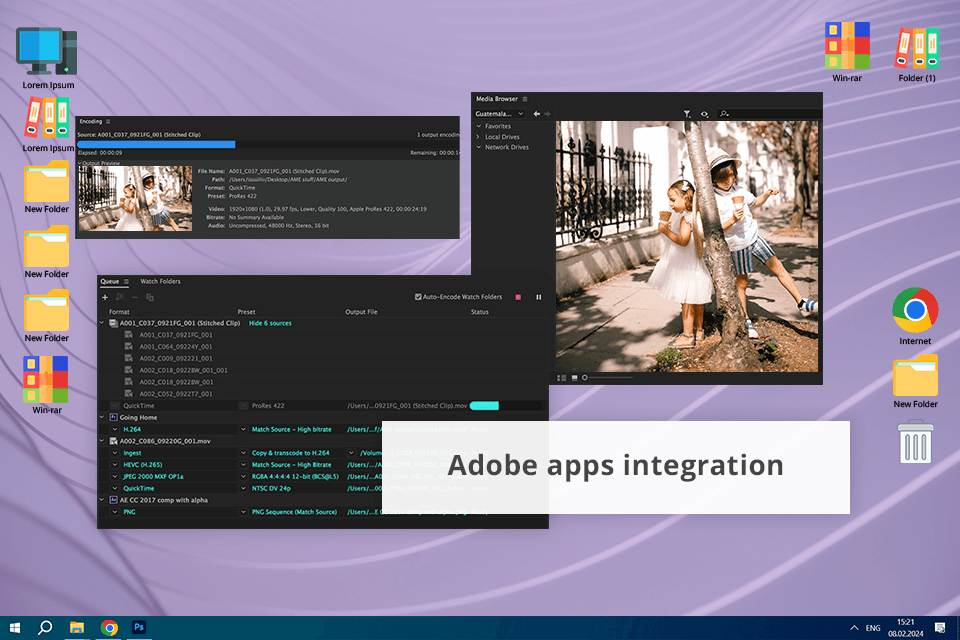
Since my priority as a web developer is the optimization of any content I upload online, I consider Adobe Media Encoder to be the best WebM converter for Mac and Windows available today.

By transforming my files into WebM format with the help of this free video converter, I can guarantee their compatibility with HTML5, which is essential for fluid playback on all modern browsers and operating systems.

Converting the video is very easy, as this software’s intuitive UI lets me adjust and process several files simultaneously, allowing me to establish a more efficient workflow.

Additionally, this tool can be very handy for lowering the amount of storage space taken up by my videos, which allowed me to reduce loading times and provide a more refined user experience for my website visitors. Adobe Media Encoder comes with in-depth customization parameters, making it easy for me to ensure the exported file meets my exact specifications.

How to convert an MP4 to WebM in Media Encoder:

STEP 1. Open Adobe Media Encoder using the Creative Cloud.

STEP 2. Press the Add Source button or drag and drop your video.

STEP 3. When using the Queue panel, select the Format menu next to the video. Choose WebM from the available options.

STEP 4. Click the Preset menu to pick a preset like "WebM 720p. For further customization, press the export file name and tweak the settings in the Export Settings window.

STEP 5. Select the export file path in the Queue section to pick the export destination and rename the video if necessary.

STEP 6. Press the green Start Queue icon to launch the conversion process.

2. Wondershare UniConverter – Intuitive Controls

webm converter wondershare uniconverter
Pros
  • Preserves original video quality
  • High-speed conversion
  • Useful export settings
  • Compatible with a broad list of formats
Cons
  • Free edition has restricted functionality
  • Small number of advanced tools

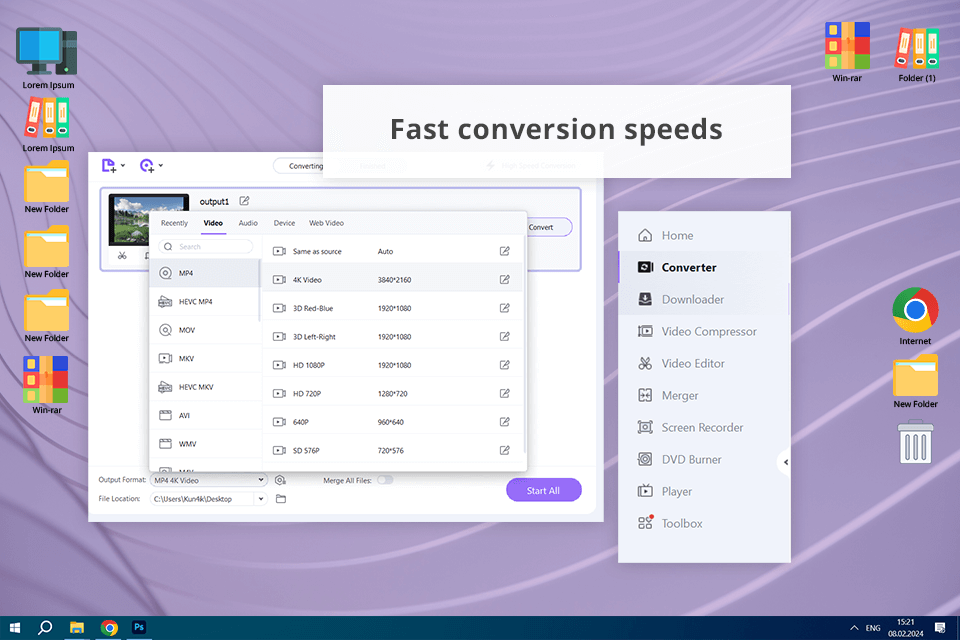
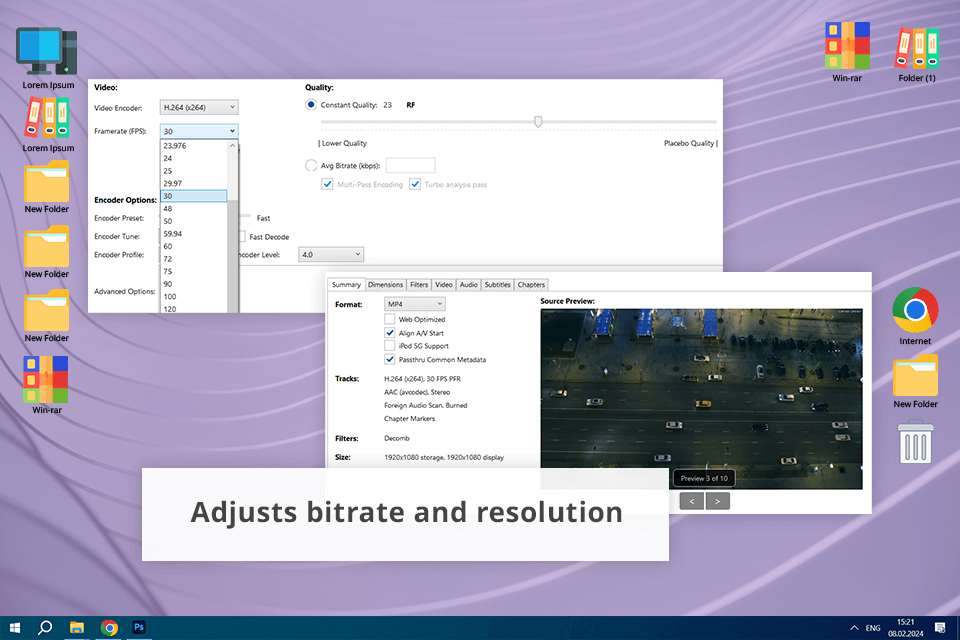
Wondershare UniConverter has greatly simplified the process of converting my MP4 files to WebM. In just a couple of seconds, I can make sure my content is fully HTML5-compliant. The convenient UI offers drag-and-drop controls, so importing and exporting my files was extremely straightforward.

My favorite feature about this tool is its efficiency in minimizing the file size of my videos without lowering their quality. This is very important for securing stable website performance and superfast loading speeds. UniConverter also provides an expansive selection of settings that allow me to tweak parameters like bitrate and resolution as I see fit.

How to convert an MP4 video to WebM in Wondershare UniConverter:

STEP 1. Open the application on your PC.

STEP 2. Press the Add Files button or drag and drop the needed MP4 file into the main workspace.

STEP 3. Press the Output Format menu at the bottom. Pick WebM from the Video section.

STEP 4. Press on Settings next to the export format to tweak the bitrate, resolution, and other parameters.

STEP 5. Press the File Location icon at the bottom to pick the destination for the exported video.

STEP 6. Click on Convert to launch the conversion process and receive your WebM video.

3. HandBrake – Available on Multiple Platforms

webm converter handbrake
Pros
  • Free and open-source
  • Frequent updates and supportive community
  • Extensive customization possibilities
  • Batch conversion feature
Cons
  • Barebones support for non-tech-savvy users
  • Somewhat convoluted UI

Personally, I have found HandBrake to be the best free WebM converter of all the options I’ve tried. Its minimalist UI ensured I had no trouble finding the desired video format and launching the conversion process. I also liked the wide variety of offered settings, which include bitrate and resolution, allowing me to optimize my files before uploading them to my site.

Another much-appreciated feature is the compression technology that is great at minimizing file sizes to provide improved load times without losing any detail in the uploaded videos. Even though this solution is completely free, it comes with several advanced tools that make it suitable for content creation. I also frequently employ HandBrake’s batch conversion feature to avoid wasting time on processing each video individually.

How to convert an MP4 to WebM in HandBrake:

STEP 1. Start the HandBrake app.

STEP 2. Press the Open Source button and pick the required MP4 video.

STEP 3. In the Summary section, choose WebM from the list of available options.

STEP 4. Tweak parameters like bitrate, resolution, and quality in the Video section, according to your needs.

STEP 5. Press the Browse button in the Destination field to pick where the converted video is going to be stored and assign a name to it.

STEP 6. Click on Start Encode to begin the conversion process and receive your WebM file.

4. Zamzar – Online-Based

webm converter zamzar
Pros
  • Doesn’t need to be downloaded
  • Convenient UI
  • High-quality results
  • Great option for fast conversions
Cons
  • Demands a constant internet connection
  • Small range of customization parameters
  • Requires a subscription for bigger files and higher speeds

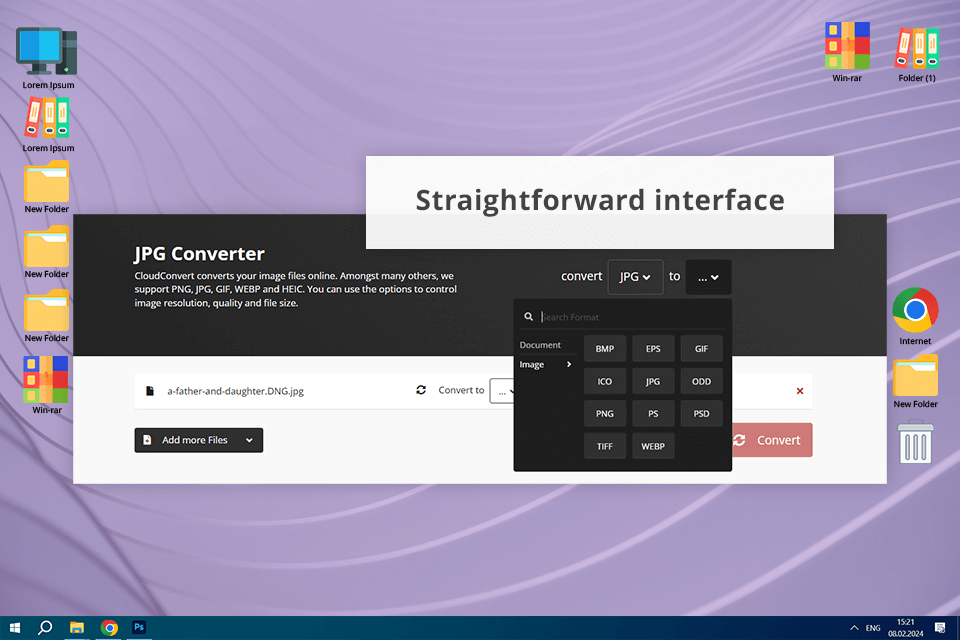
This online video converter with no watermark lets me transform my MP4 files to WebM without having to install any applications on my PC. The fact that this tool offers a very user-friendly interface made using it even easier. If you’re interested in a straightforward tool that will ensure HTML5 compatibility and error-free playback on various browsers and devices, Zamzar is a great option to consider.

My favorite aspect of this tool is its efficiency at compressing videos while preserving their high quality to deliver improved loading times for your website. Despite being an online solution, Zamzar is compatible with all popular video formats and ensures dependable conversion results. Its main drawback is the size and processing speed limits imposed on the free version, but those aren’t an issue if you get a premium plan.

How to convert an MP4 to WebM in Zamzar:

STEP 1. Launch your browser and visit Zamzar’s official site.

STEP 2. Press the Add Files button or drag and drop the needed MP4 video straight onto the website.

STEP 3. Pick WebM as the output format in the Convert To dropdown menu.

STEP 4. Type in your email address to ensure it receives the download link for the converted video.

STEP 5. Click “Convert Now” to launch the conversion process and the platform will take care of the rest.

STEP 6. After the file has been converted, Zamzar will share it with you by sending a download link to your email.

STEP 7. Use the provided download link to save your WebM video. Make sure you can play the video properly before uploading it to your own website.

5. CloudConvert – High-Quality Results

webm converter cloudconvert
Pros
  • Compatible with most popular formats
  • Beginner-friendly UI
  • Straightforward conversion workflow
  • Wide range of settings
Cons
  • Limited free edition
  • Free plan imposes a limit on the number of simultaneous conversions
  • Demands an internet connection

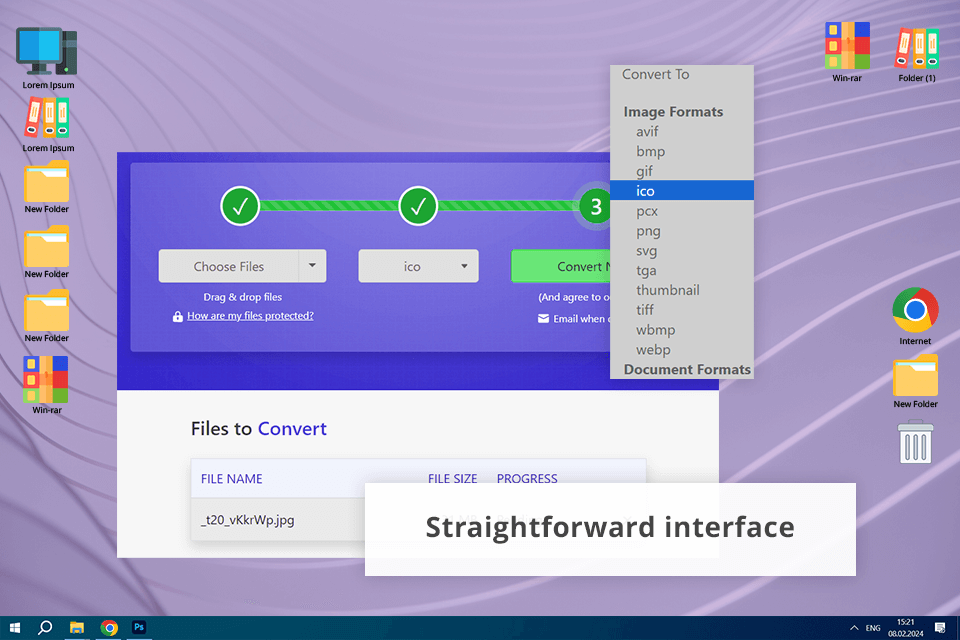
Often mentioned among the best free online video compressors, CloudConvert ensured I enjoyed a seamless experience. I simply imported my MP4 file, chose WebM as the export format, and the platform took care of everything else. The entire process only took a couple of seconds, and the resulting files were all fully compatible with HTML5, allowing my website visitors to enjoy my videos on any browser or device.

This WebM converter is highly effective at preserving the original quality of the video while minimizing its file size to secure superior loading times. Another reason why I can confidently recommend CloudConvert to everyone is its compatibility with a bigger selection of formats that include images and documents.

How to convert an MP4 video to WebM in CloudConvert:

STEP 1. Launch your browser and visit the CloudConvert site.

STEP 2. Press “Select Files” or drag and drop your MP4 video onto CloudConvert’s workspace.

STEP 3. Click on the Convert menu and pick WebM as the output format.

STEP 4. Press the Settings icon next to the export format to tweak settings like bitrate, resolution, and codec.

STEP 5. Press “Start Conversion” to initiate the process and have CloudConvert transform your video into the needed format.

STEP 6. After the file has been converted, the platform will generate a download link. Click on it to save the converted WebM video on your device.

STEP 7. Play the saved WebM video to make sure you’re happy with the results.

6. Online-Convert – In-depth Conversion Parameters

webm converter online convert
Pros
  • Provides in-depth customization options
  • Convenient cloud storage
  • Supports batch conversion
  • Clear UI
Cons
  • Premium tools are locked behind a subscription
  • Free edition has ads
  • Client support isn’t particularly reliable

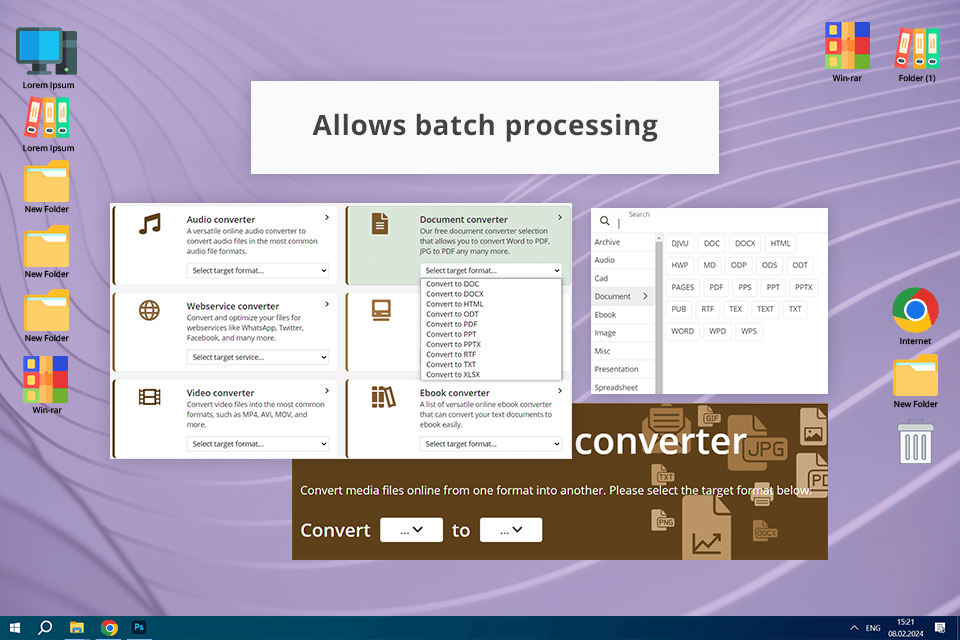
Online-Convert made it extremely simple for me to import my files and convert them to WebM while enjoying fantastic processing speeds. It also offers an intuitive UI that can be easily navigated even by a complete beginner.

I also appreciate the broad range of supported formats, as I can use this platform to convert all kinds of videos, images, and other file types to satisfy my needs. Even though the free plan limits the maximum file size I can import as well as the maximum processing speed, I could easily get one of their paid tiers to lift those restrictions.

How to convert an MP4 to WebM in Online-Convert:

STEP 1. Launch your browser and visit the Online-Convert site.

STEP 2. Press “Choose Files” or drag and drop the needed MP4 video onto the site.

STEP 3. Find the Video converter section. Pick “Convert to WebM” from the list of offered options.

STEP 4. Go to the Optional settings menu to customize parameters like bitrate, framerate, and resolution if necessary.

STEP 5. Press “Start conversion” to receive your WebM file. The platform will convert your video while showing a handy progress bar.

STEP 6. After the file has been converted, you’ll see its download link. Click on it to save your WebM video.

STEP 7. Play the saved WebM video to check if the conversion process was successful and if you’re happy with its quality.

SAVE UP TO 65% OFF SAVE UP TO 65% OFF