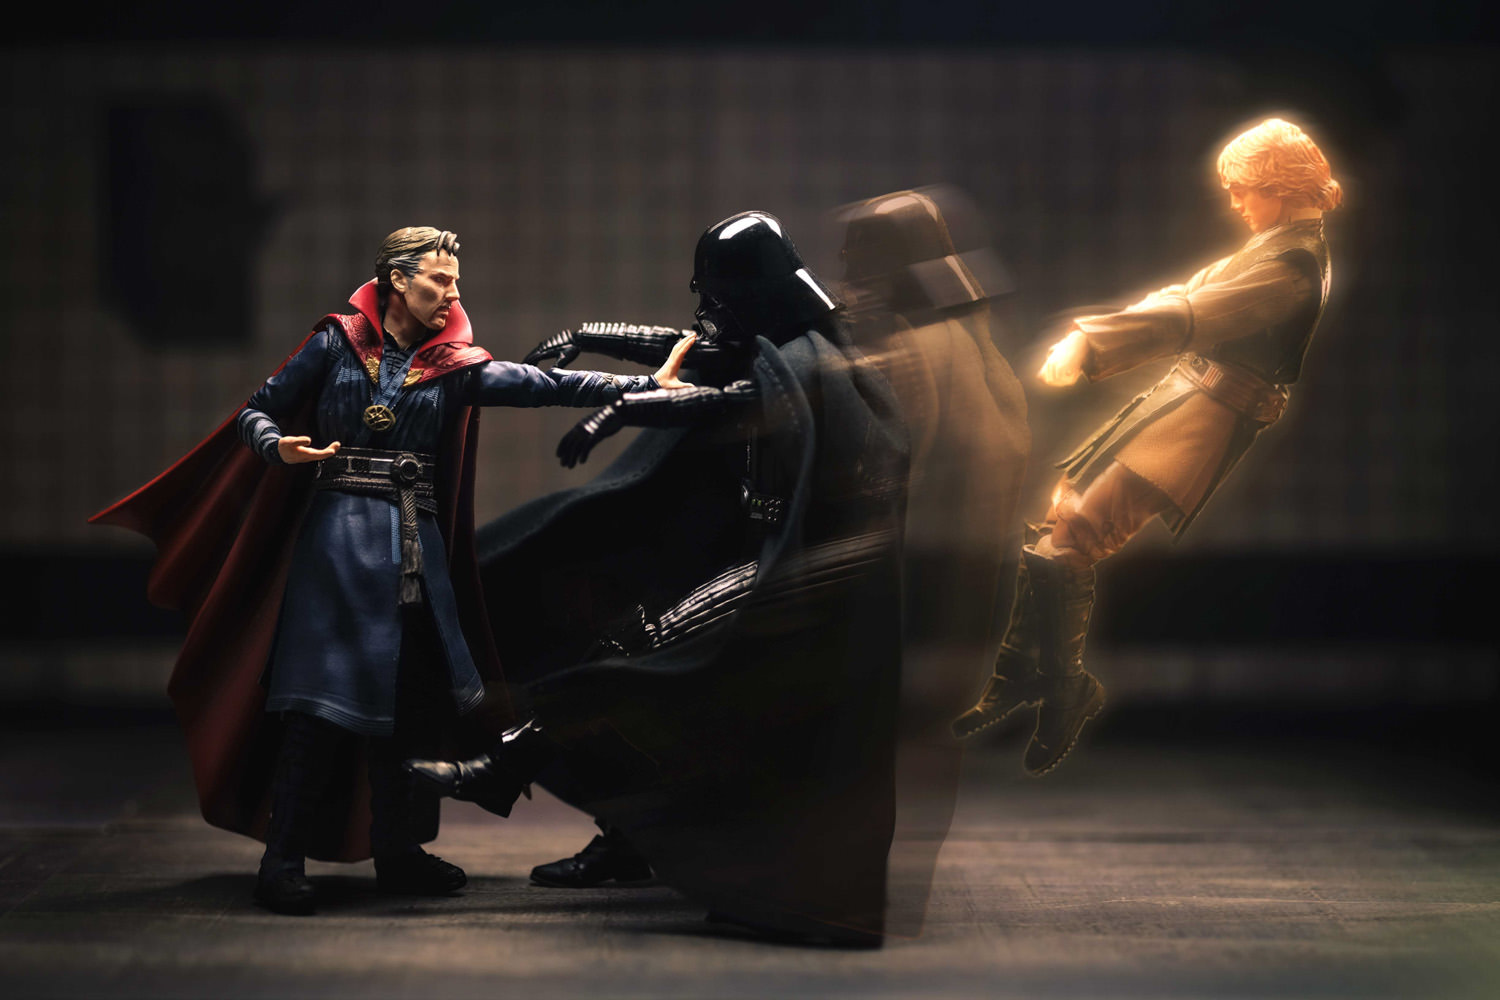
Whether you're dealing with Marvel action figures or photos of toy vehicles – the possibilities offered by the toy photography genre are virtually endless. A toy can convey nearly any emotion, ranging from sorrow to happiness. Even though it’s a still-life object, it can be posed like a person, allowing you to tell a part of the story with each image.
The post below will acquaint you with useful toy photography tips and ideas, helping you better understand how this genre works. It will also teach you how to utilize toys to the fullest for telling stories of your own.

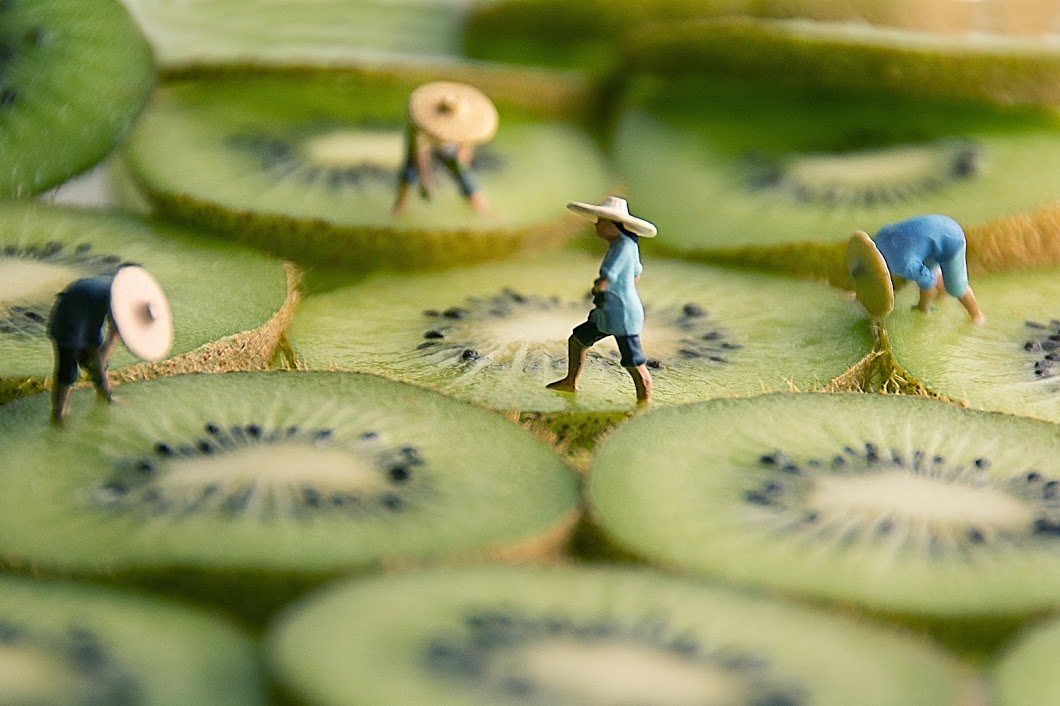
Give the viewer a closer look at the toy by resorting to macro photography. This technique is useful for making the toys look life-size and allows showing them from a new perspective.
There’s no shortage of interesting macro photo ideas for you to try.

You don’t even have to limit yourself to just toys, as you can feature household and nature objects as well to create more complex shots.

“Focus stacking” refers to merging photos that feature the same subject but were taken at different focal points. This can be done either using Photoshop or similar focus stacking software.

Each image should provide a different focal point so that when several photos are merged, a larger part of the shot is in focus. Remember to take each photograph from an identical position and angle.

If you have previous experience in children photography, then you might be no stranger to featuring toys in pictures with kids. However, in this case, you won’t be focusing on the kid but rather on the toy that they’re playing with or holding. The portrait will still look amazing but the shift in focus will allow the viewer to enjoy it from a new perspective.

You can also enhance the photo by including interesting gadgets or an object that the child likes, creating captivating artwork for their room.

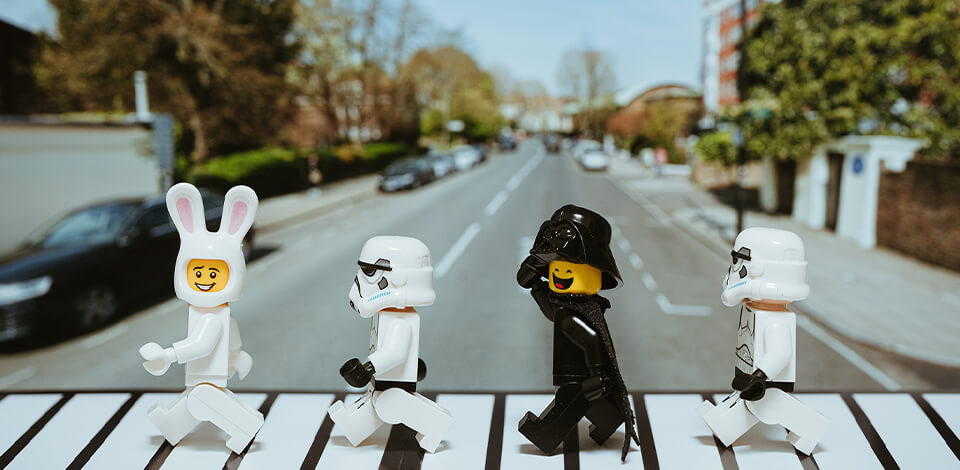
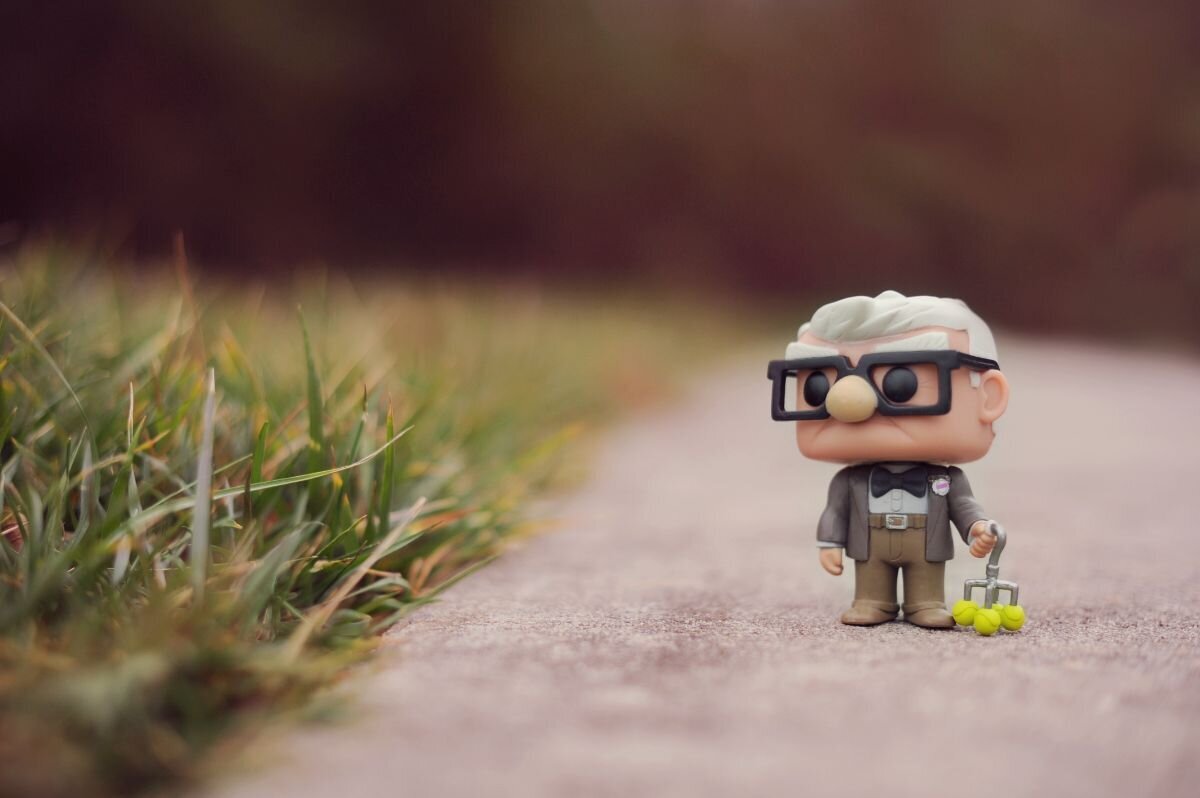
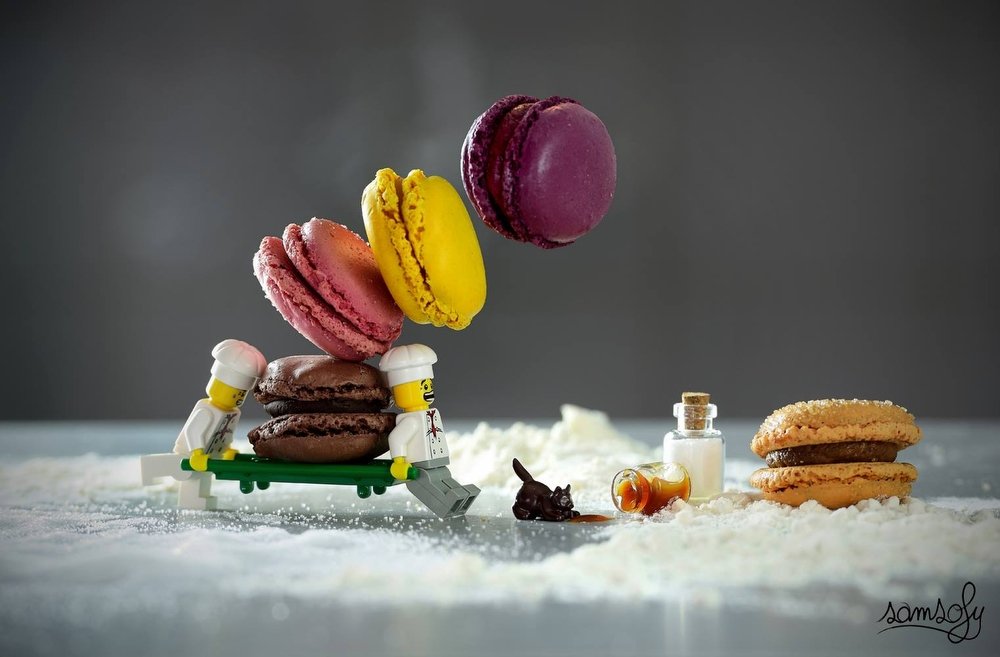
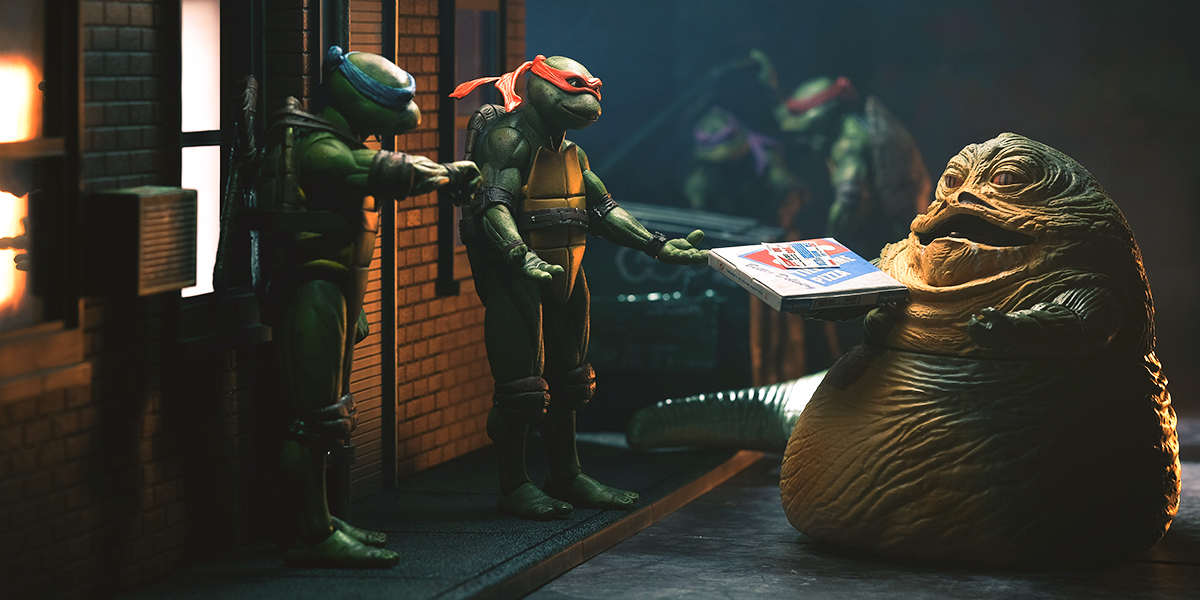
The benefits of implementing storytelling into your toy photos are twofold. Not only will the viewer perceive the story you’re showing, but they can also experience their own emotions born of the nostalgia they feel for the subject. Whether it’s a toy car in the middle of the woods, a doll resting on a windowsill, or a stuffed animal having a tea party – all such toys can resonate with your audience.
You can further strengthen the narrative by incorporating smaller props and an appropriate backdrop. Posing is another important aspect of visual storytelling, so feel free to get inspired by human poses.
Being able to manually adjust the aperture, shutter speed, and ISO will make toy photography a lot simpler while giving you more creative freedom in the process.
The best cameras with manual controls:
When choosing a lens for your toy photography setup, remember to account for its max aperture and f-stop. It’s advised you go with a broad aperture to receive a nice depth of field and optimal subject separation. The recommended maximum value is about f/2, as it allows avoiding the problem of an overly narrow focus zone. If you like to use zoom for your photos, then a 24-70mm lens is also a good choice.
Prime lenses like Fujifilm's XF23mm f/2m XF500 f/2 and XF90mm f/2 are another popular choice for toy photos.
If you want a toy to look more realistic, the photo needs to present its expression and pose in full detail. Employing a camera tripod allows you to snap photos without the risk of shake and blur, ensuring the subject is as clear as possible.
Employing a shutter release cable is another thing you can do to prevent camera shake. Alternatively, you can rely on camera remote controls as long as they are supported by your model. Another benefit of a remote approach is that allows you to view the scene from a distance and better evaluate whether everything looks, as it should.
A hot shoe is useful for either attaching a flash or wireless shutter release. Even though most cameras come with integrated flash, it tends to produce a direct and rough light that isn’t a good fit for toy photos, while also minimizing your influence over the lighting.
If you’re employing a tripod, you can stick to auto-focusing. That said, nothing can match the precision of manual focusing. For instance, if you’re capturing the smaller details of the toy, the camera autofocus might lose track of the focal point, while a manual approach gives you full control of the situation. However, while the increased precision of manual focusing is great, you also have to remember that it can significantly slow down your workflow.
The size of the toys used for action figures photography is often very small, forcing you to employ zoom, a macro lens, or place the subject directly near the camera. All these techniques lead to a shallower depth of field. That’s why you have to maintain the aperture of photography small since a lower value will allow you to get a better result.

For instance, a low f-stop number like f/1.2 will provide a shallow depth of field. Now, if you take the photo at f/1.2-3.5, the toy’s front will be in full focus, while the backdrop will be nicely blurred. Finally, when working at f/8-16 and staying further away from the subject, you’ll be able to have both the foreground and background in focus.
Many photographers set the aperture in the f/5.6-f/8 range, and when they need a close-up shot, they receive a nice bokeh effect.

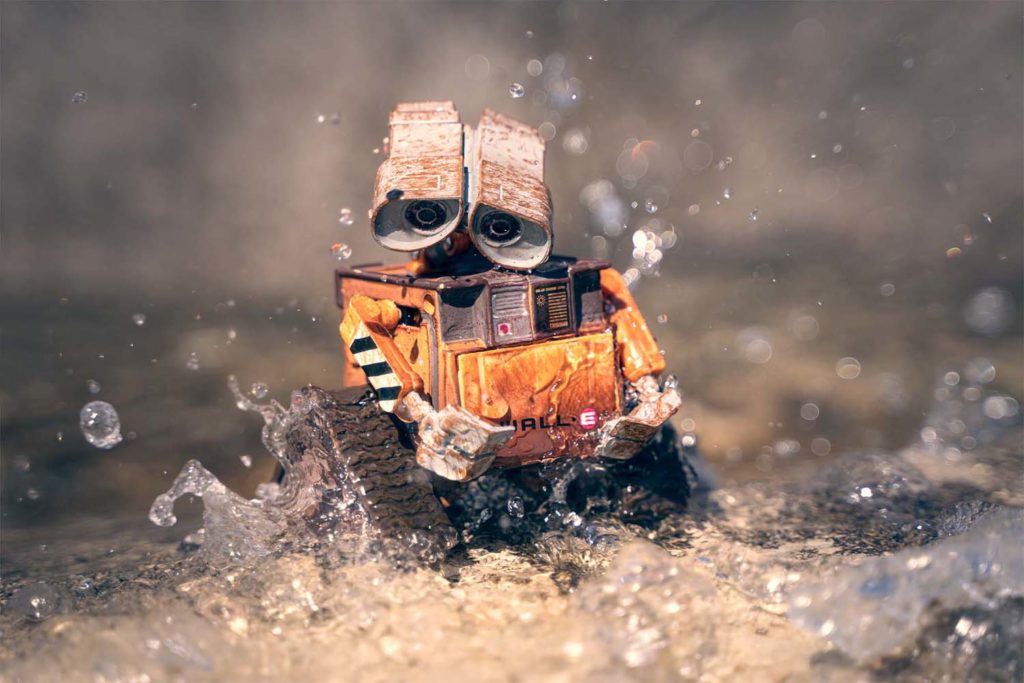
A high shutter speed provides a clear focus, which is particularly important for scenes featuring moving parts. If you’re shooting outside and have to battle wind or other dynamic elements, a fast shutter will help you overcome those obstacles and freeze the action perfectly.
On the other hand, a slower shutter is ideal for taking photos of moving elements. At a lower speed, falling water or dirt will look dynamic and make the photo more eye-catching.
Shutter speed is also relevant when choosing the optimal exposure. For bright shooting conditions, go with a high-speed setting to ensure the sensor doesn’t receive too much light.
If you’re working indoors or don’t want to employ external lighting, then slower shutter speeds are the way to go.
If you’re doing toy photography with a tripod (as you should), then use the ISO 100 setting since it allows you to minimize noise and make the lighting look as good as possible.

Some photographers add color changing lamps to their shots. They glow in red, blue, or neon light and create a superficial look. Just remember to pick an angle for your toy that aligns with the surrounding lighting.

If you’re not willing to invest in such lamps, they can be replaced with plastic transparent bottle caps, clothing, or other surfaces that have light dispersion properties. Simply place the material in front of the lens and you’ll immediately see the result. Pick whichever option suits your budget and toy choice, but never forget to keep the lighting even and soft.
If you’d like to minimize the effort required for taking captivating toy photos, organize the photoshoot outdoors to work in natural lighting. Akin to the majority of other photography genres, it’s advised to stay away from direct sunlight since hard light can show the toy’s build in an unflattering manner.

A moderately cloudy sky with soft evenly spread light is the perfect choice for outdoor photos. It's still a good idea to bring a small reflector or some tinfoil with you, but you definitely won't need to use flash or artificial lights.
If you're working indoors, you'll need a table or elevated platform, as it will allow you to take photos of the toys at "eye-level", as you normally would with human models. Otherwise, you'll have to spend hours on the floor, which is inconvenient and much more tiring.

Be sure to prepare a neutral background, which you can place behind or below the subject. It’s typically advised to get a big white or green background for photography. It’ll come particularly in handy if you want to make a composite image in Photoshop. Working with a neutral background makes it easier to manipulate the backdrop and make it more interesting.
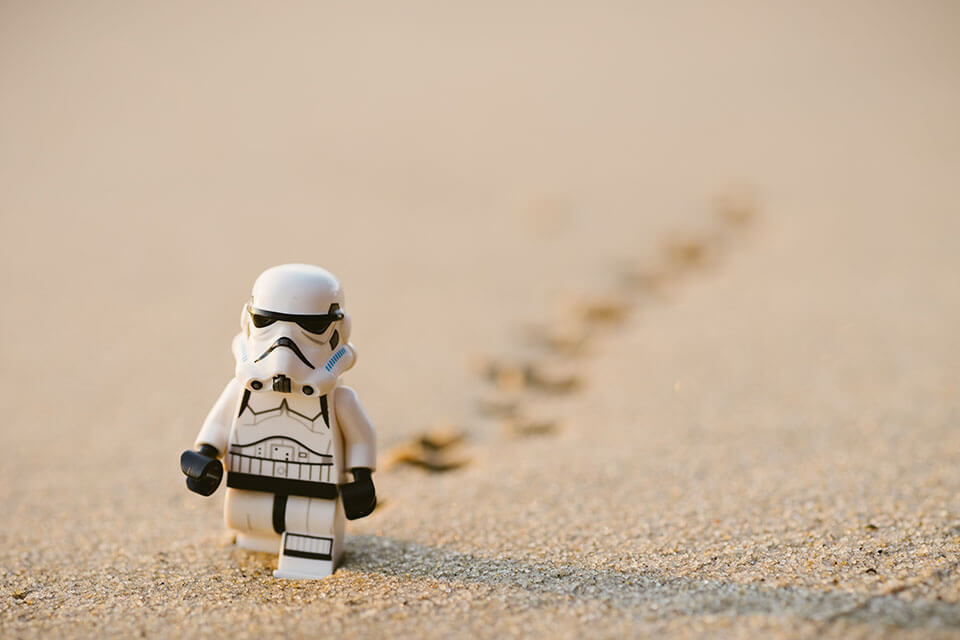
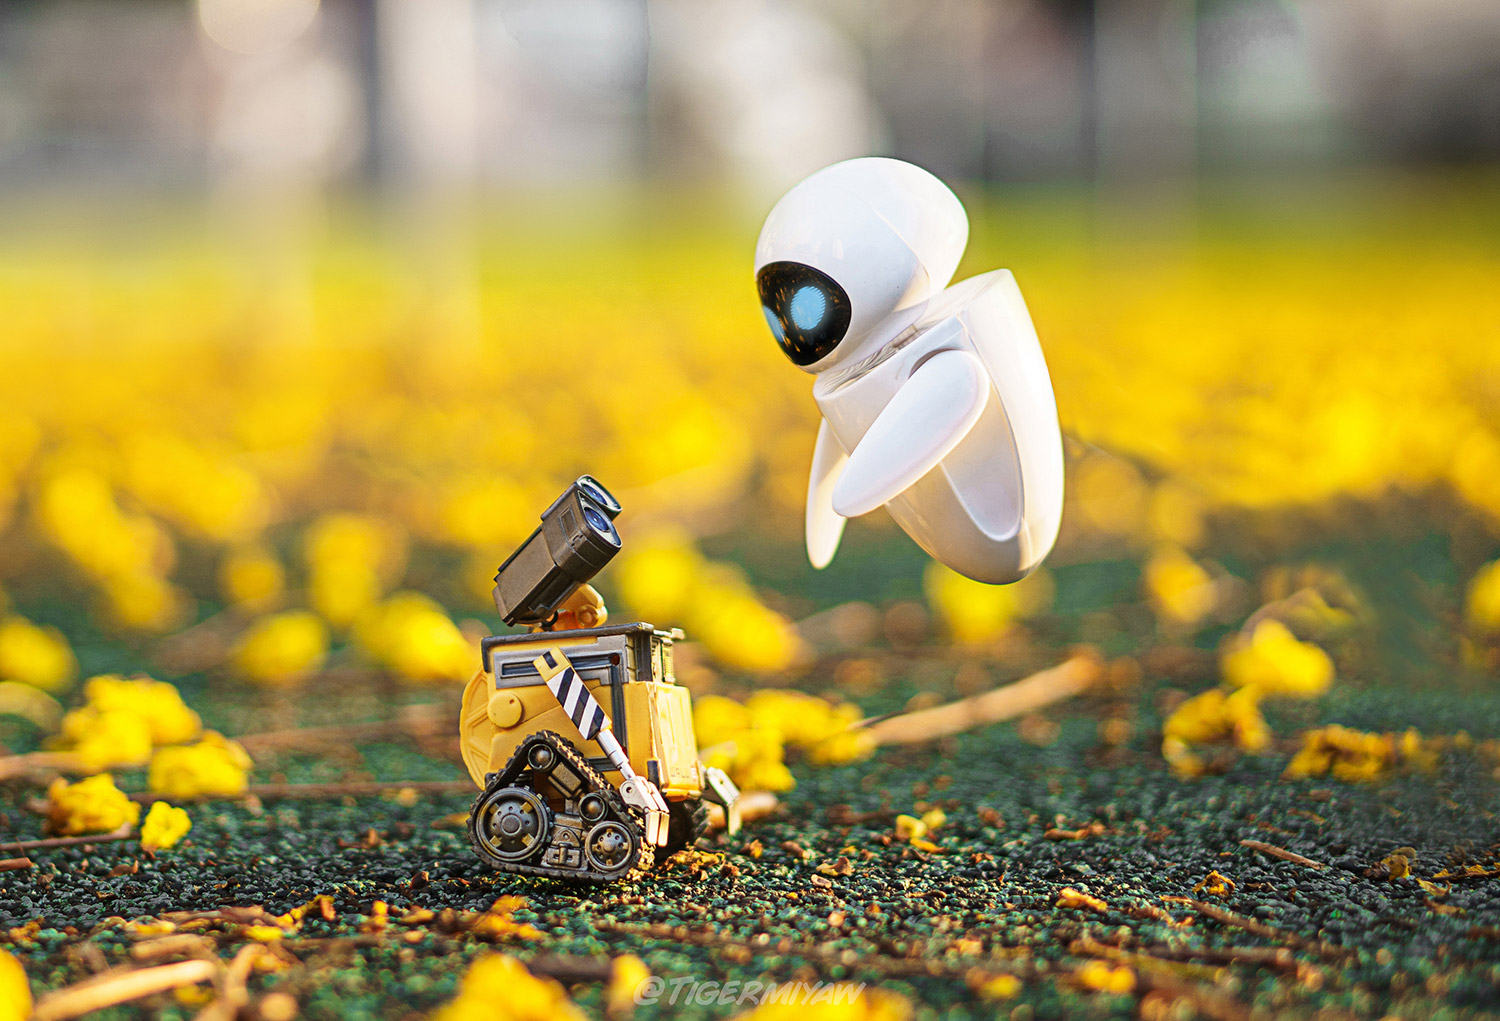
A natural or urban environment is one of the best toy photography backdrops you can ask for if you want to tell a story. Since the subject is small, you can make do with your backyard or a nearby park. Featuring flora or grass in the shot helps improve the scene, but it can also the desired scale of various elements so keep that in mind when having rocks, bushes, or trees in the background.
If you’re taking photos outdoors, potential backgrounds also include puddles, broken branches, leaves, pebbles, flowers, etc.

Photos of a Spiderman action figure will look that much more impressive if the surrounding scenery reminds the viewer of the New York cityscape.

Meanwhile, Marvel characters like the Guardians of the Galaxy ensemble work best on moon-like surfaces serving as the backdrop.
Conceptualizing, constructing, and painting props and decorations for toy photography can quickly become one of your favorite aspects of this genre.
Composition in photography refers to the methods used for arranging objects in the shot to improve the overall look of the photo. If you merely take a couple of toys and props and place them next to each other, the result won’t be particularly awe-inspiring.

However, if you’ll learn and implement some time-tested photography composition techniques, you can achieve the desired harmony between all elements.
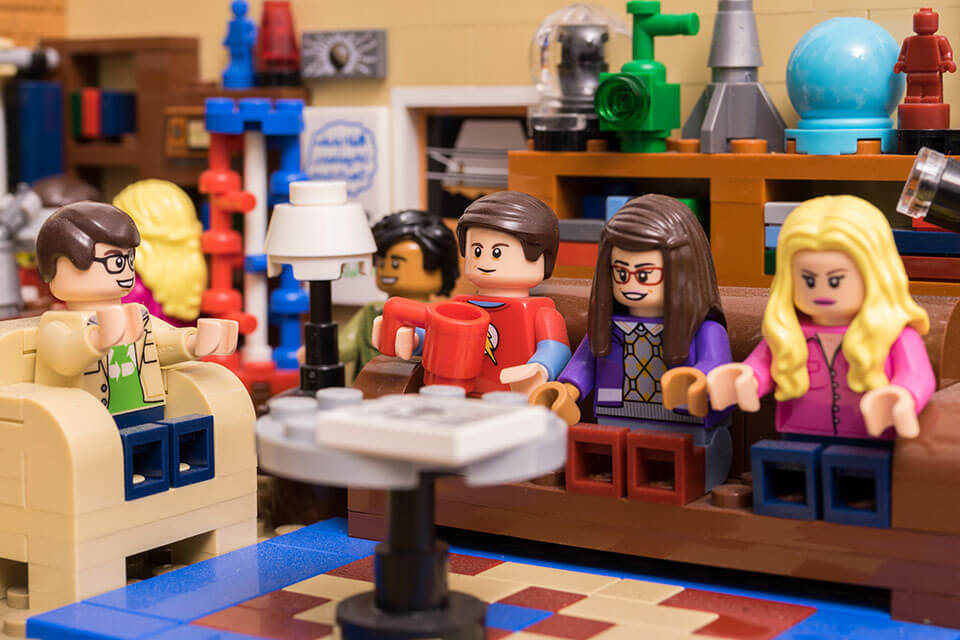
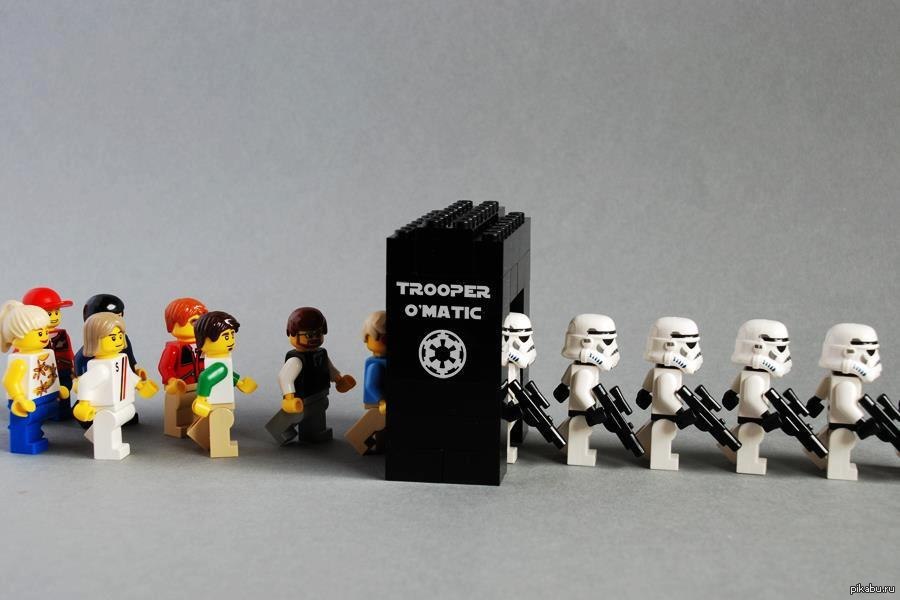
Arrange the scene in a way that all elements complement your chosen depth of field. Adding a bit of blur to the backdrop will help the foreground objects stand out more.

For example, when taking pictures of LEGO toys, you can add parts of other sets to enrich the background with blurred-out LEGO structures. Such attention to detail will make the photo more authentic and coherent, making its impact on the viewer that much stronger.

If you’re looking for interesting still life photography ideas, you might be inclined to try something different than just taking photos at eye level. Looking upward or downward on the subject can help you show the toy from a new angle both from a literal and narrative standpoint.

Place the foreground objects at an unconventional angle rather than side-on. Shooting from below will change the toy’s scale and make it tower over everything else. Such a sight will amuse the viewer and impress them with the fact that such a tiny object can look gigantic.

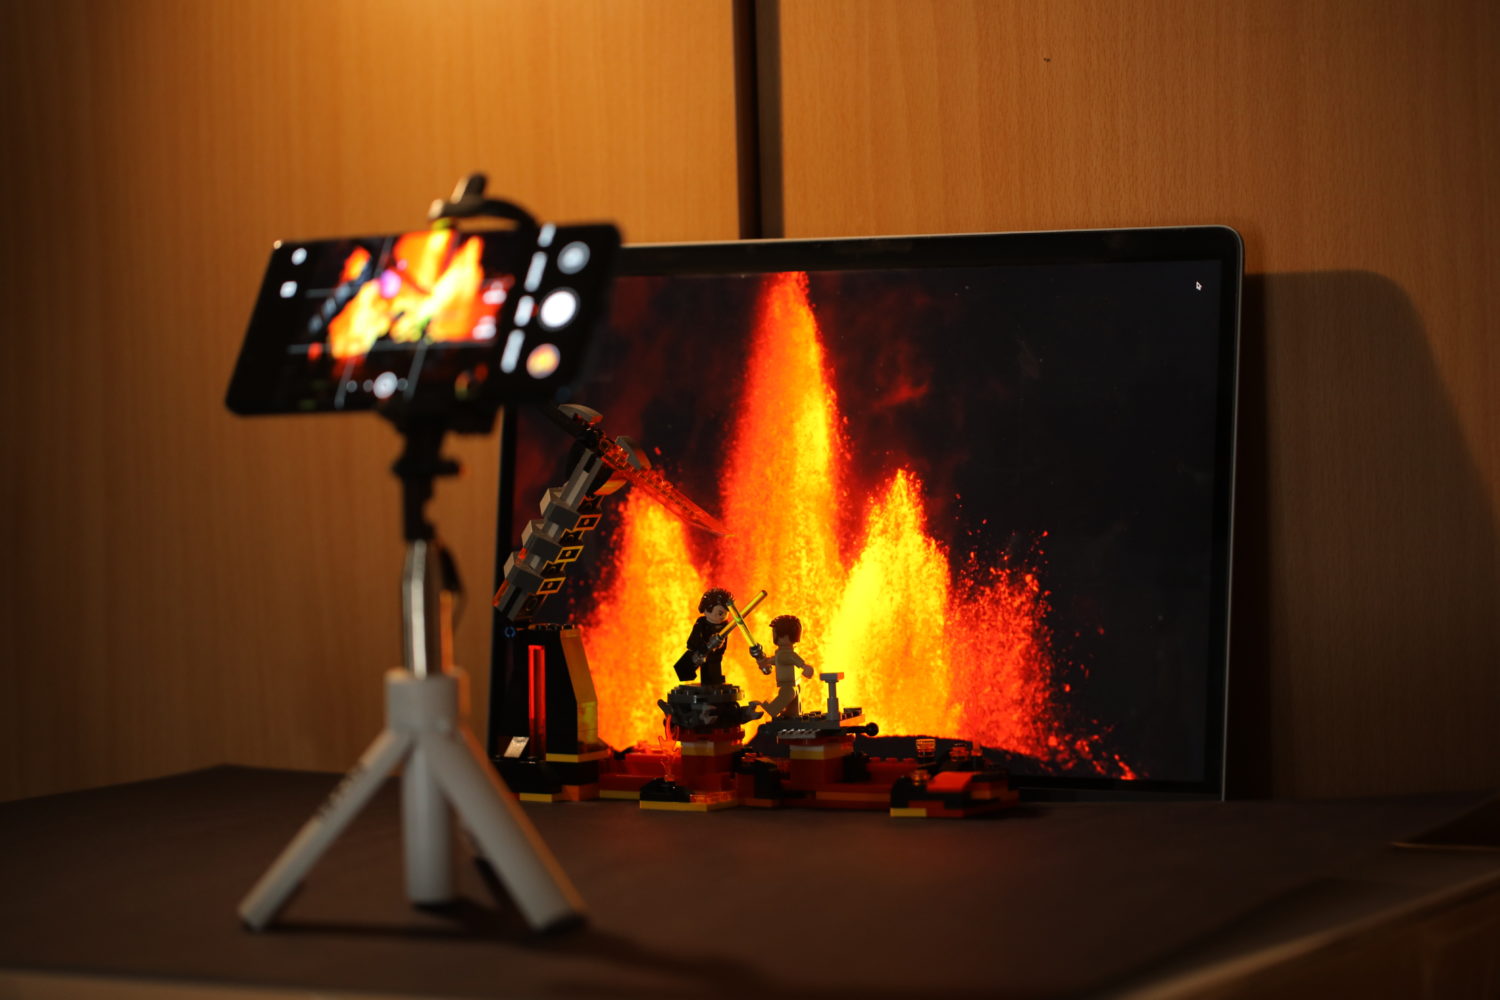
Another layer of photography composition is tied to dynamic effects. For instance, you can blow smoke that spreads across the photo as you release the shutter.

Alternatively, add chaos to the composition by using fire flame effects or dropping pebbles and dirt.
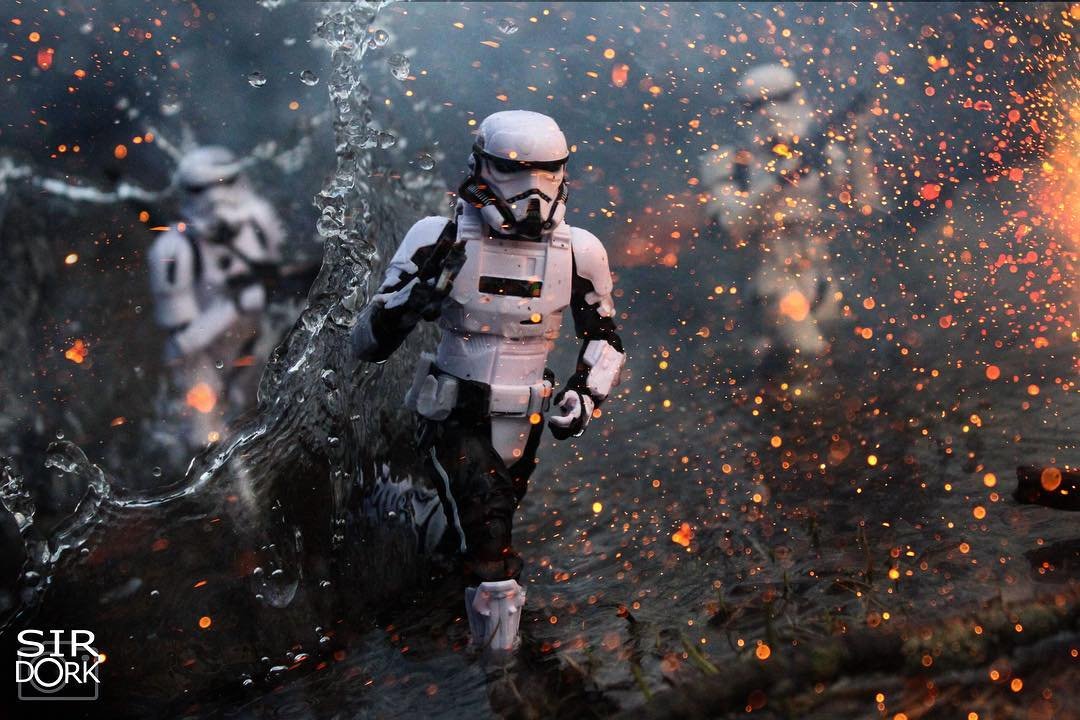
A similar effect can be achieved by spraying water that will look like rainfall from close up. A high shutter speed will capture individual droplets in the air, making them look like actual rain.
Also, you can create a winter location at home and try to make realistic photo with toy cars.

If you’re employing editing software like Adobe Lightroom or Photoshop, you should often rely on the cropping and alignment functions to improve the photo’s composition and angle. Feel free to adjust the horizon line or the focal point.
Vignetting can be useful for toy photography if you want to add a comic or cartoon feel to the image. This effect can make the shot darker, more emotional, and dramatic. Another option is to create vignette in Photoshop to achieve a tunnel look.
However, remember to have the vignette feathered to maintain proper balance.
When working on toy images, Lightroom presets or filters are other useful tools that can enhance the colors of your photos or even completely change their mood and atmosphere. By applying contrast, grain, or B&W presets, you can introduce a new level of professionalism and appeal to your work.
To quickly improve your toy photos after the photoshoot and add a Hollywood-like appeal to them, experiment with these presets. With their help, you’ll be able to achieve a dreamy “haze”, add noise, or introduce a unique color and grain structure that will help you get the most out of your toy photography ideas.


