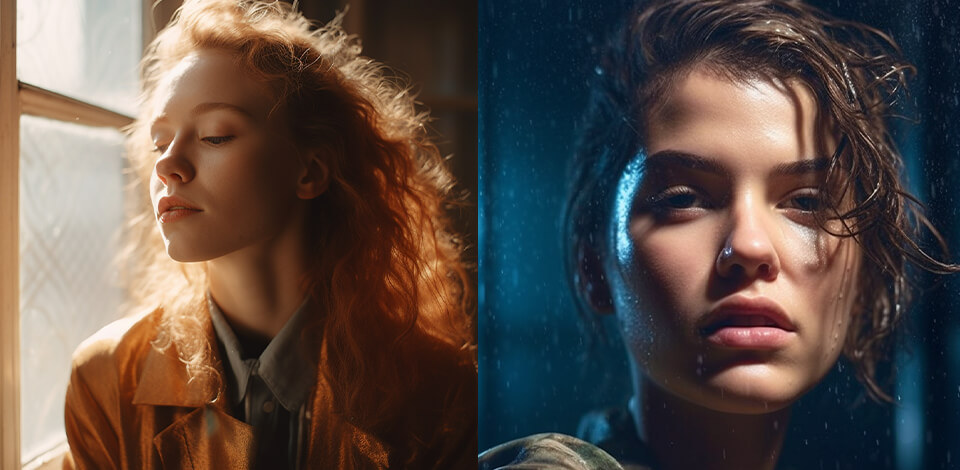
Side lighting in photography resembles rim light and is used to emphasize the subject’s shape. Such lights are particularly efficient at establishing a certain mood and highlighting shadows.
Moreover, side lighting increases contrast and depth, making the photo even more visually impactful.
Side-lit photographs look dramatic and focus the viewer’s attention on the different shapes and dimensions. A side light in photography can be both natural or artificial, as well as ambient or added – the key here is the positioning.

If you’re only learning how to use side lighting in photography, it’s advised to stick with continuous lights at the beginning. This way you’ll be able to constantly see the effect of the lights before taking the photograph, while an off-camera flash will only let you examine the results after releasing the shutter.
With the help of a studio lighting kit, you can try out various looks without wasting time on dozens of test photos. The light can be repositioned in any way you see fit to make the shadows more appealing or deeper, while you quickly learn how side lighting can affect the scene.
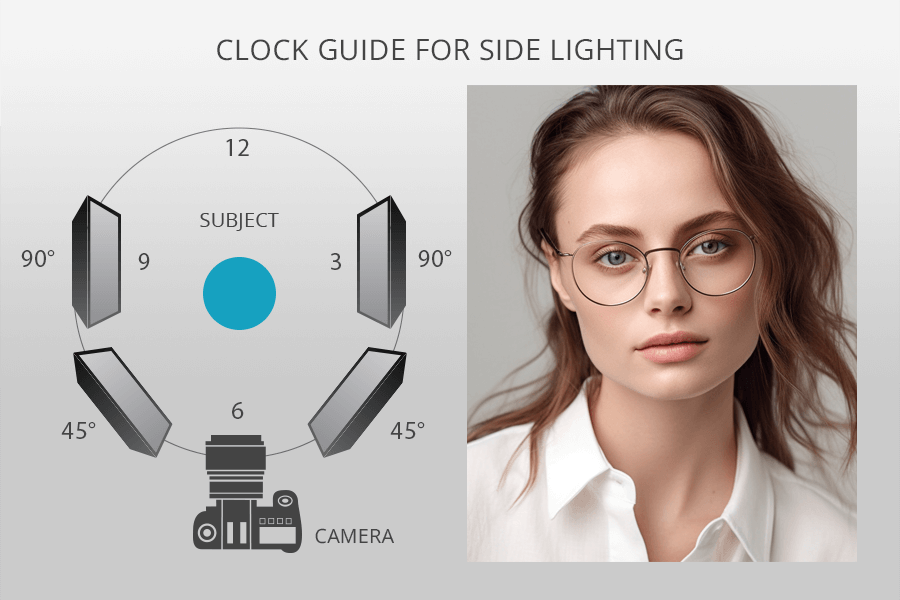
There’s a lot of room for creativity when it comes to learning how to find angles. The light can be placed right next to the subject – at a 90o angle to the camera – or you can place it at a 45o angle slightly in front or behind the subject to make the lighting softer or harsher.

If your goal is to boost contrast to the maximum, it’s advised to avoid using diffusers. Another way to create a rough sidelight is to employ sparse, distant lighting.
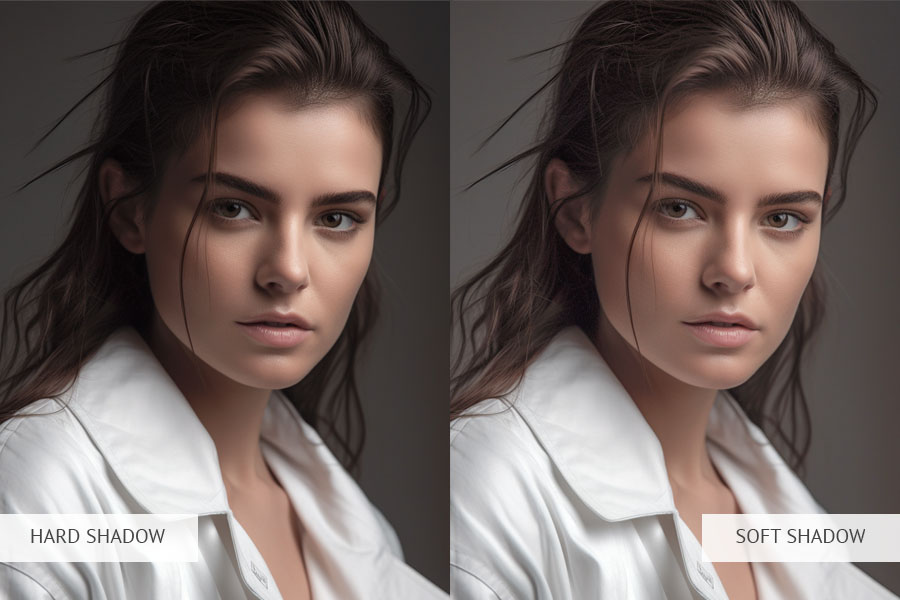
The quality of the lighting is determined by whether it’s direct, hard, diffused, or soft. Your choice between hard light vs soft light has to depend on the type of atmosphere you want to convey. Harsh and direct light is the perfect option for high-contrast photos and dramatic imagery.
That said, if your goal is to make your photos more flattering or vibrant, consider using softer, more diffused side lights. If you go with this approach, you’ll also alter the mood and atmosphere of the scene. To make such photos even more brightly colored, add a fill light.

This side profile lighting technique has you place the light at 90o degrees to the camera. Such an approach only illuminates half of the subject, essentially splitting the scene in half. This technique also highlights the textures when doing landscape photography.

Another popular technique used by famous photographers is called the Rembrandt light. This trick requires you to place the side light at about 45o in relation to the subject.
The key here is to put the light above the model’s head and aim it down. This way, one side will be perfectly lit and you’ll also create a lighting triangle under the eye on the darker side.

As all experienced photographers know, bright parts of a photo have more visual weight than dark ones. This is because the human eye is automatically attracted to a lit subject. You can take advantage of this principle to emphasize the facial features of a model in portrait photography.
By employing a frontal light or an even light setup, the side of the face closer to the camera will look more pronounced and attract more attention.
To implement this technique, you have to put the light to the right. As a result, the side of the face that is better seen in the shot will appear darker than the other side.
If needed, you can add a reflector to the other side to bounce some of the light back and fill the shadows. Alternatively, consider using a secondary light source to light the scene more evenly.
To complement your portrait and achieve the desired emphasis on facial features, consider incorporating the use of the best rechargeable LED light. It can provide consistent and adjustable lighting, allowing you to achieve the perfect frontal or even light setup for your portraits.

One of the most popular uses for side lights involves golden hour photography. The golden hour occurs right after sunrise and before sunset when the sun is near the horizon line and sheds a warm, gold light.
Such shooting conditions are perfect for side lighting photography since the warm light casts aesthetically pleasing shadows and highlights onto the subject.
When setting up side lighting for golden hour photos, you merely have to place the subject in a way that has the sun illuminating it from one side. The different shapes created by the shadows can be used to add more visual interest to the shot and make it more unique.
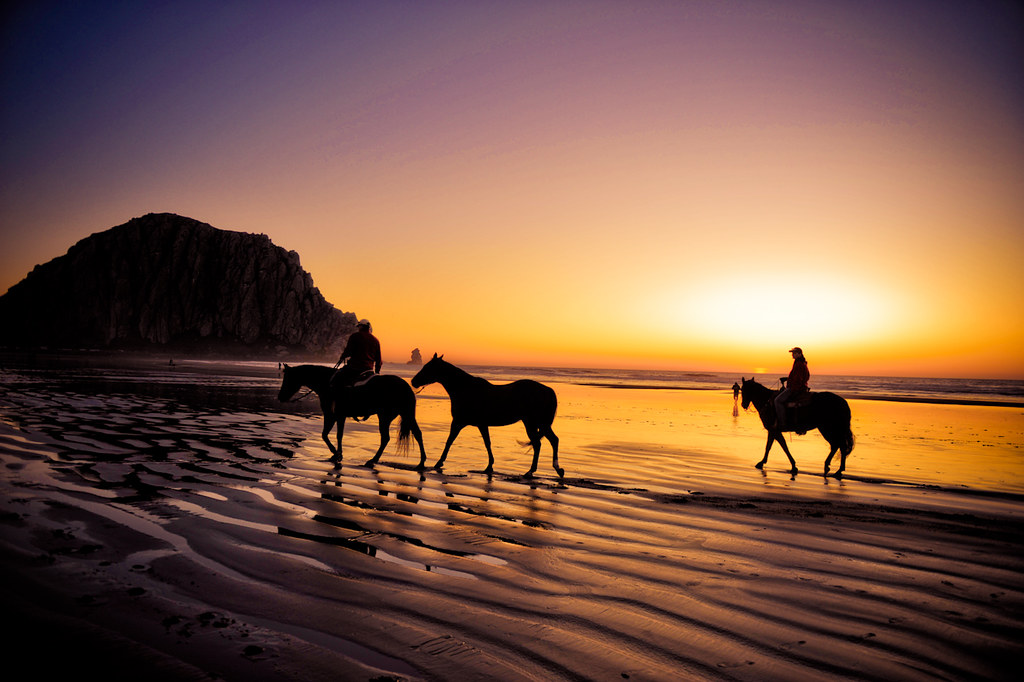
Side lighting can serve as an effective tool for doing silhouettes photography. You can use it to take photos with a small depth of field and only have a small part of the scene in focus while the rest of the composition appears blurry, which is perfect for shots with non-existent foreground interest.

Side lighting in photography can be great for adding depth and separation to a photo. If used correctly, the subject will have a light wrapping around it that will make it stand out from the backdrop. Such photos look more volumetric and visually captivating.
If you add just a small boost from a backlight or rim light, your side lighting setup will allow you to take some truly cinematic photos that look both professional and eye-catching.

Side lighting is great at adding defined shadows and highlights that increase the sense of suspense or drama in a photo. If you’d like to make your pictures more emotion-filled, side lights are the perfect tool for the job.
Such lights can also be employed for taking low-key portraits. This portraiture type is represented by largely dark pictures with only a small number of highlights. Photographers take such portraits to establish an atmosphere of tension or mystique.
Lastly, side lighting can be used to set a romantic atmosphere by softening the shadows and highlights.
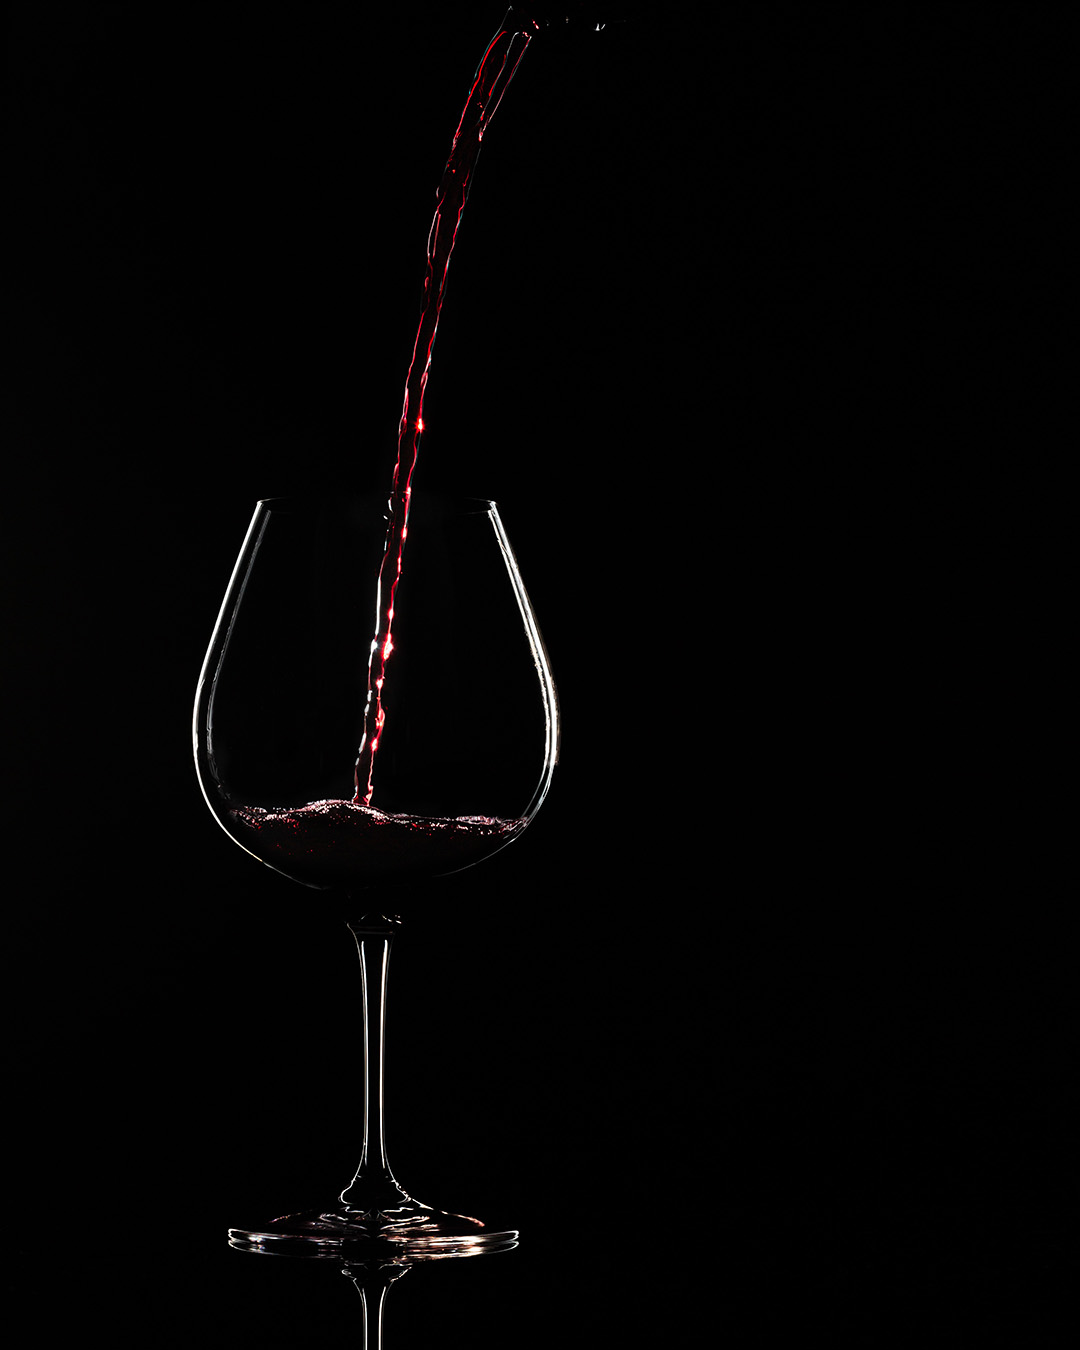
Side lighting that is cast on a product can produce shadows and highlights that serve to emphasize its shape. This technique is tailor-made for product photography, particularly items like jewelry and clothing.

A lot of creative photography ideas require the use of artificial lighting. You merely have to get a flash or a continuous light and place it to the side of the subject. Thanks to the broad range of potential light options, there's no limit to the number of lighting setups you can come up with.

If you’d like to produce a softer side light, shed it onto the subject’s face and use reflector while placing it below the model’s face. As a result, you’ll receive a softer side lighting portrait that is more evenly lit.

A lot of light sources can be employed as side lights in everyday places. For instance, the fridge light in your kitchen, the windows of a shop outside, or a light desk in a library. By recognizing such light sources and learning how to improvise, you can receive terrific side lighting photography results by simply using ambient light.
Yes, side lighting can be highly effective for outdoor photography, especially during golden hour or when the sun is low on the horizon. It creates long shadows and adds warmth to the image, making landscapes and environmental portraits more captivating.
One challenge of side lighting is the potential for harsh shadows. Photographers can use diffusers or reflectors to soften the light and fill in shadows. Additionally, adjusting the light's angle and intensity can help achieve the desired effect.
Side lighting is excellent for still life photography as it highlights textures and adds depth to the subject. Photographers can experiment with the angle of the light to create interesting patterns and shadows, making the still life composition more dynamic.
Side lighting can add drama and energy to action shots or sports photography. It can emphasize movement and create dynamic images, especially when capturing athletes in motion or fast-paced events.


