Hard light vs soft light are the two main types of lighting. Every photographer or videographer, needs to know the difference between these two, and understand in which case it is appropriate to use each of them. After reading our article, you will learn everything about each type of lighting as well as find out what type you need to choose, hard light or soft light.


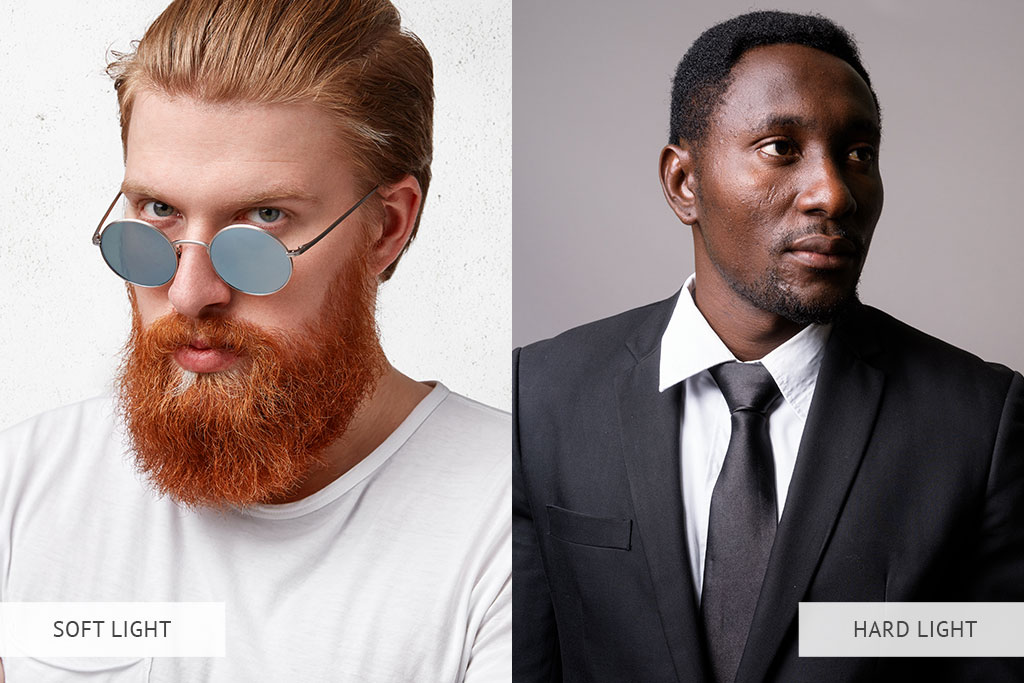
You can see hard light on images with a high level of contrast, which results from a small light source illuminating the subject. When using a pointed light source, you can get hard light. It creates brightly defined shadows and contrast, which do not allow a viewer to see the details. It can also be a very bright light concentrated at one or several points. As a result, all the attention is driven to specific parts of the photo. This type of light works great in black and white photography.
Another distinguishing feature of hard light is that it creates sharp transitions between light and dark areas of the composition. By flooding the object with such bright light, you will get a very distinct and clear shadow. We don’t recommend using this type of lighting for portraits, as you risk getting too dark eye sockets and too long nose shadows.

For an even better understanding of what hard light is, make sure to learn more about Rembrandt lighting in photography. Its distinctive feature is the illuminated triangular part of the face under the eyes and the less illuminated side of the model’s face. It is also known as the Rembrandt patch.
Such a technique is not always suitable for the portrait genre, as it emphasizes skin imperfections. The texture of the skin becomes even clearer, wrinkles appear even deeper, pimples become more noticeable. If you compare hard vs soft lighting, the former has more limited use. With hard light, you risk creating hot spots or overexposed highlights. It might make the skin too white or shiny skin.
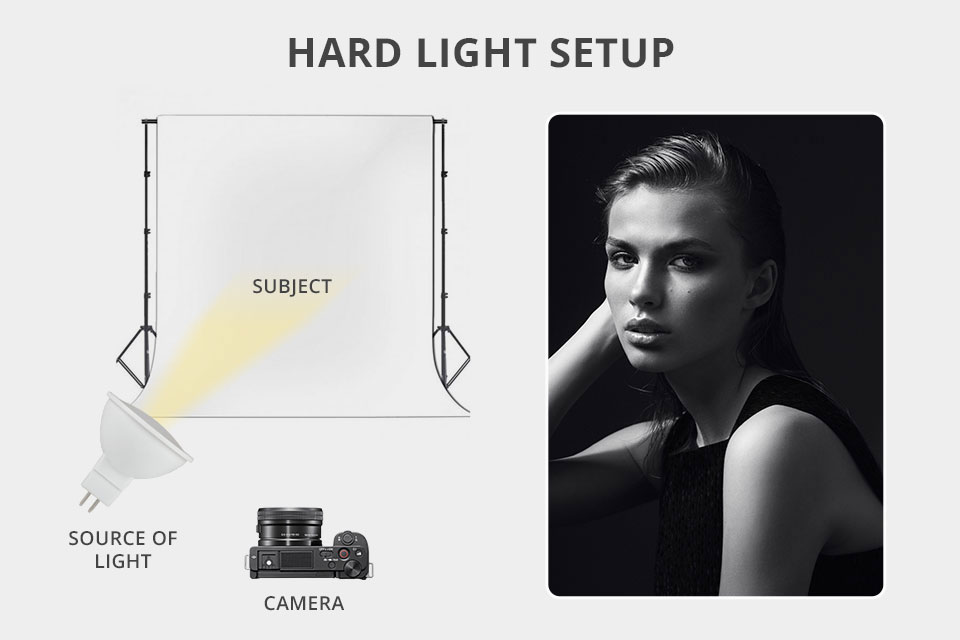
You can create hard light with small pointed lights. There is no need to use a studio lighting kit with many components. You must also consider the distance between the object and the light source. Hard light is created by direct sunlight or an artificial light source. For example, bright camera flashes produce hard light.
Flashes can be used both on-camera and off-camera. In the first case, you will get sharper shadows. For making the light more direct and concentrated, try different light modifiers. These can be barn doors, snoots, or flags. Their purpose is to prevent light from getting where you don’t need it.
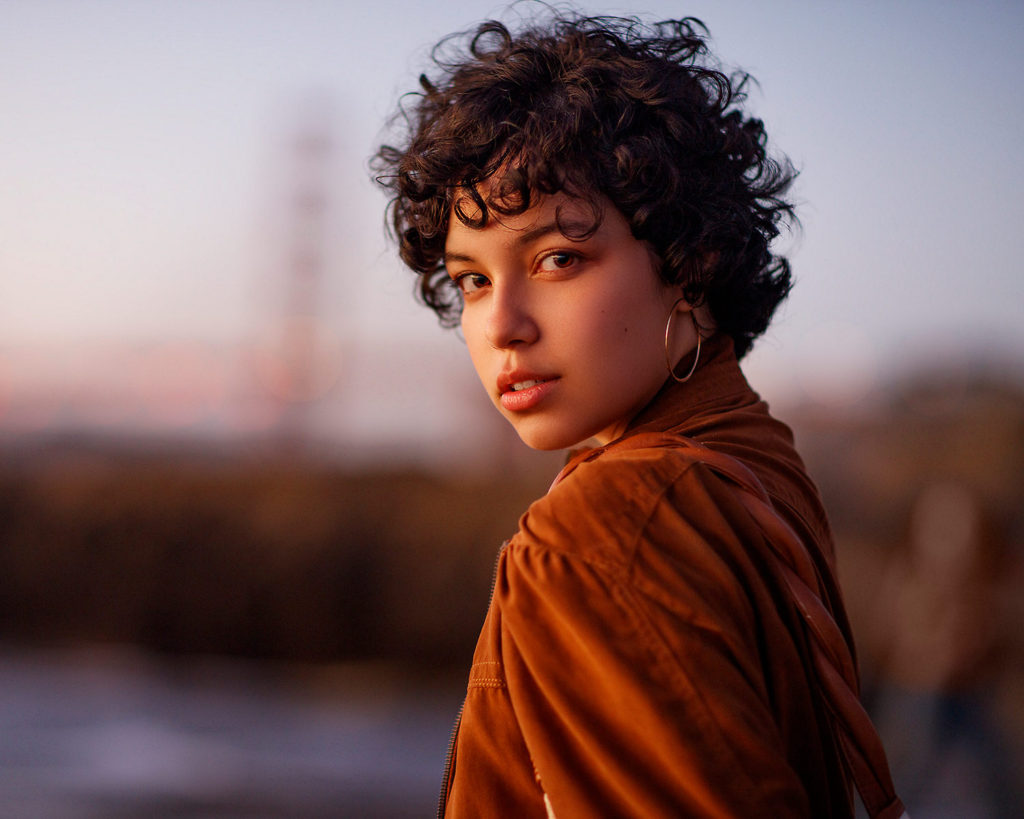
To make the light even harder, try placing it farther away from the subject. For outdoor photoshoots, I recommend staying in direct sunlight. You can get the sharpest light at noon and a couple of hours before and after this time. This will allow you to achieve the most dramatic lighting effect when taking outdoor photos.
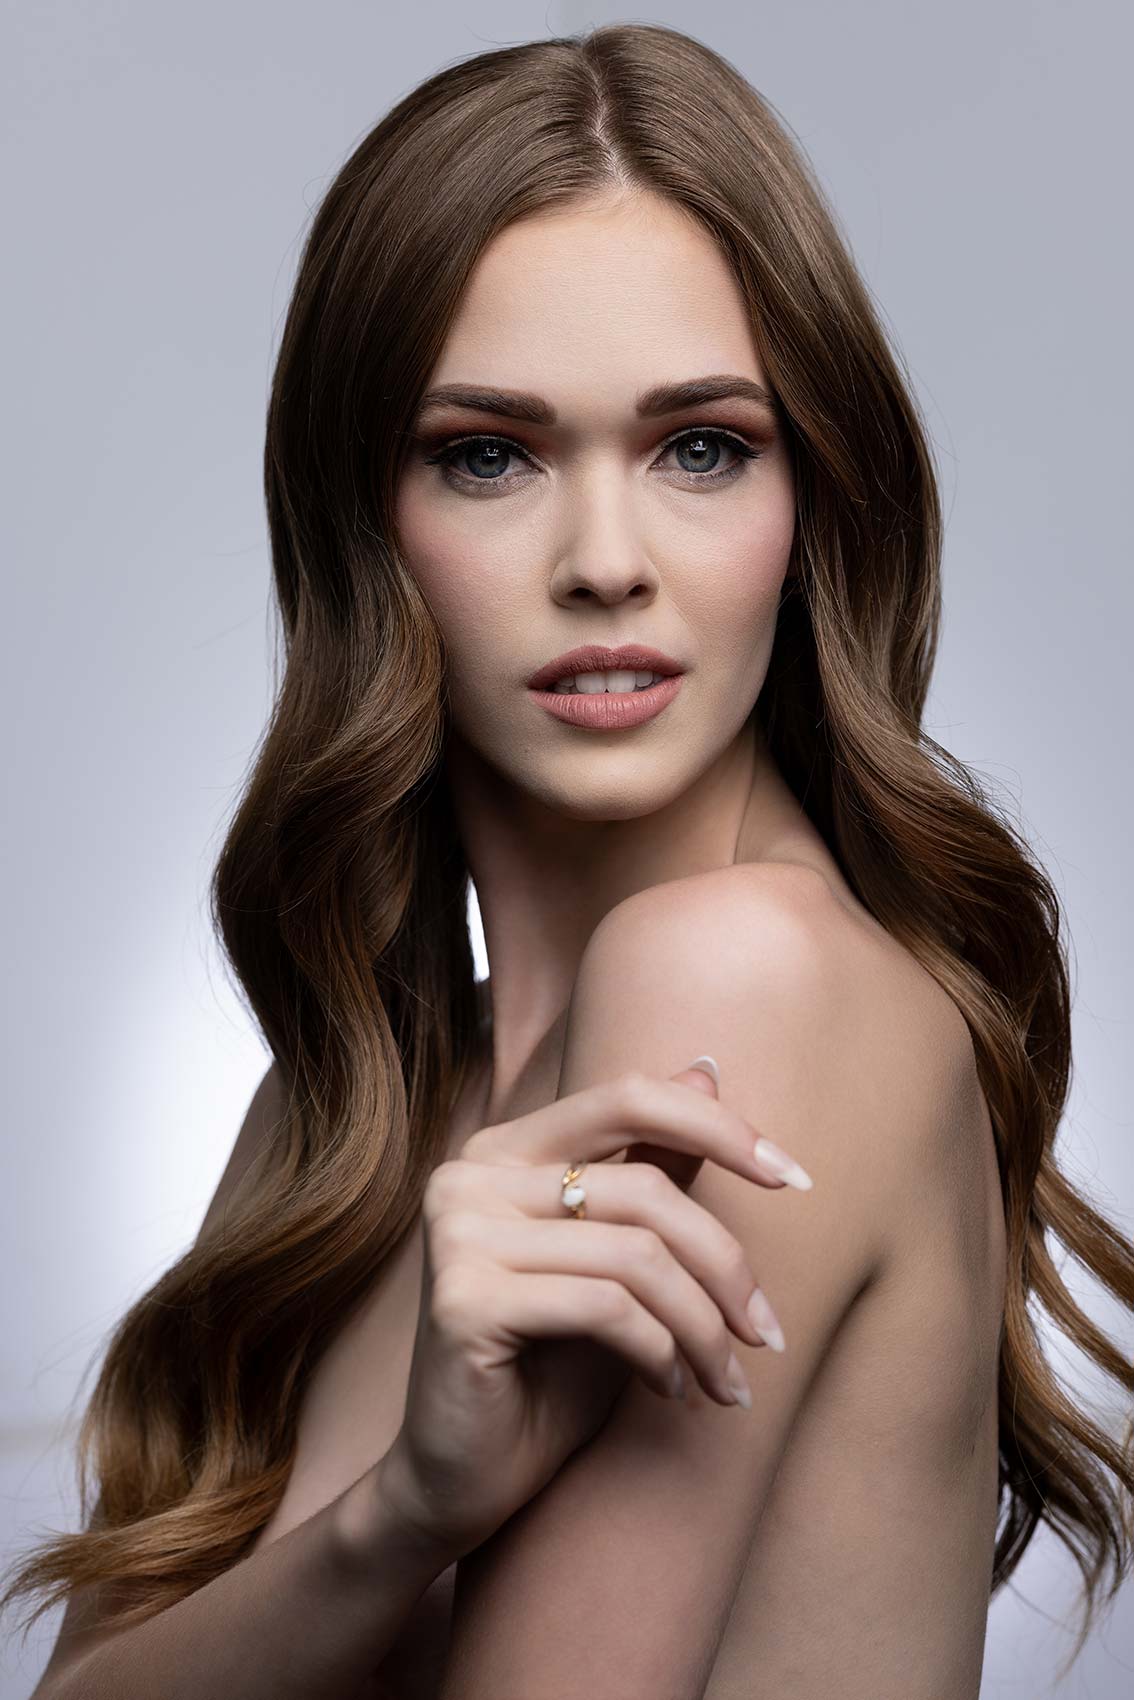
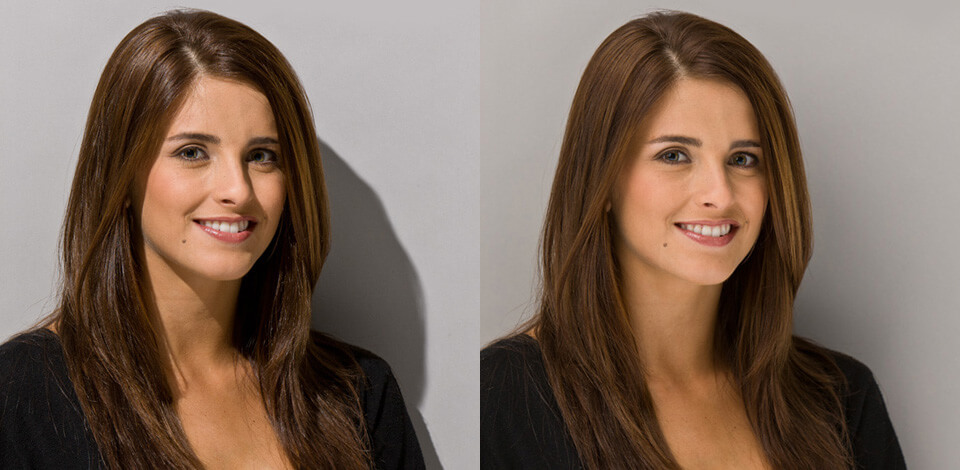
Soft lighting creates some hard shadows, it is bright but at the same time balanced and calm. It is also called ‘broad’ light because it creates soft shadows. The transition between light and dark areas is not clearly defined. A face lit with soft light will appear almost without shadows.
With soft light, images look less dramatic. If you don’t know what option is better for portrait photos, hard light or soft light, keep in mind that the latter does not emphasize skin defects.
When taking street photos, you can achieve soft light on cloudy days. Clouds act as a diffuser, evenly distributing the light. Thanks to it, your photos won’t have high contrast or clear shadows.
Your nature shots may look a bit dull because of soft lighting. However, this type of lighting is perfect for portrait photography. The soft light will make facial features look softer while eliminating skin imperfections. For a deeper understanding of what an outdoor photo with soft light looks like, check out some Golden hour photography examples.
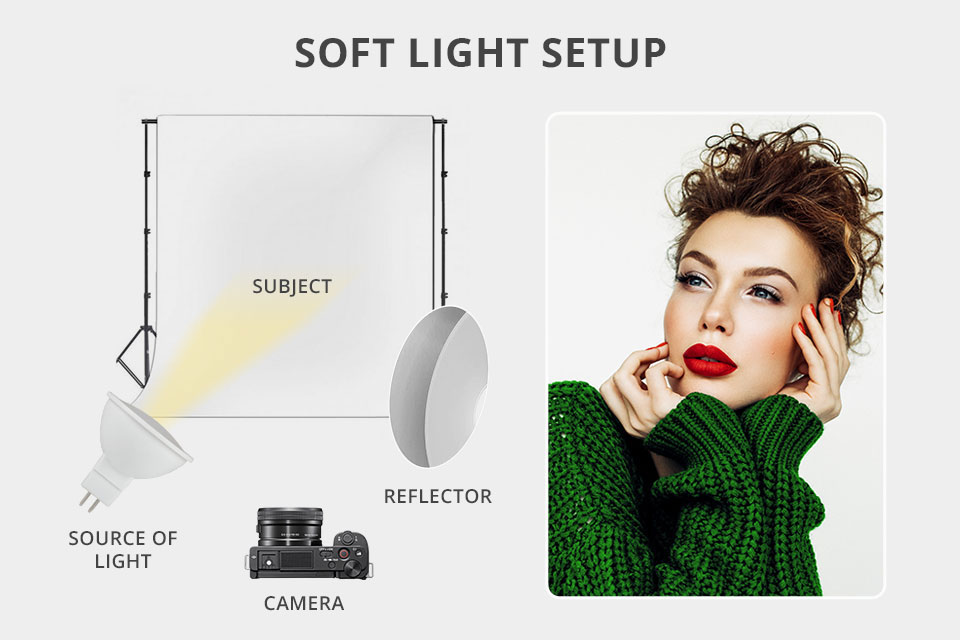
When comparing hard vs soft lighting techniques, you will see that the latter are more difficult to use. You will need to use more light sources of large size and they should be more diffused. Try using a diffuser with a small light source.
Also, pay attention to reflector boards, they will help reflect the light and create a smooth shadow. You can also take a studio strobe or off-camera flash and put softboxes or an umbrella over them, and enjoy the beautiful soft light. To create soft light, set the light power to a low level.
You can get even softer lighting by using multiple sources, such as 3-point lighting. Also, take a closer look at ring lights for photography. It’s currently the easiest way to create soft light.
If you have no special lighting equipment, you can use natural light. However, always make sure that sunlight does not directly fall on the model or object.
There is one very general rule used by photographers. Suppose you are taking a portrait shot with only the shoulders and head visible in the frame. Therefore, you need to capture the 50 x 50 cm area. Your light source should also be 50 x 50 cm, and you should place it at a distance of 50 cm from the object.
To make the light even softer, try using a larger light source. If, for some reason, you can install the light source only at a farther distance, then look for equipment of a size equal to the distance between the source and the object.
If you still can’t decide what option is better, hard light or soft light, your choice should depend on the purpose of your shooting and the mood that you want to convey. In some situations, hard light is perfect, while in others it can only ruin everything, unlike soft light. Let’s summarize all of the above and figure out where and when each of these types will be more appropriate.
Hard light is great in cases when you need to give the object some volume, making it more complex. The strong contrast of such light will create a dramatic mood and harshness. Experts resort to this technique when they need to take a dramatic image. In cinema, hard light is also used to create tension and harshness in film noir, drama, and action films.
Portrait photographers prefer using hard light for men’s photoshoots. It will help you convey the magical atmosphere when shooting love stories. You can also use it when taking photos of women to emphasize their strength and power.
Soft light is calmer and cozier. It makes your subject look attractive and delicate. The big advantage of such light is that you will need to spend less time on photo retouching. Thanks to it, wrinkles and uneven skin will be less visible, and the eyes will look brighter and more vibrant. Soft light is what you need when taking portraits or doing fashion, travel, and food photography.
In the battle of hard lighting vs soft lighting, it’s important to understand what kind of vibe you want to create. For something airy and warm, choose soft light, and if you need to emphasize tension or excitement, then try hard light. By switching between them, you can transform the atmosphere of your video and make it more engaging.
Selecting the type of lighting is the first step in creating the right atmosphere in a photo. The most important step is editing. To speed up this process, our professionals have prepared for you a set of tools to improve your portrait shots! This bundle is suitable for enhancing photos taken in studios and portraits taken outdoors. In seconds, you will get a pro-grade effect!


