Portrait Photography Tips | 21 Tips + Freebies
When you purchase through affiliate links on our site, we may earn a commission. Here’s how it works.
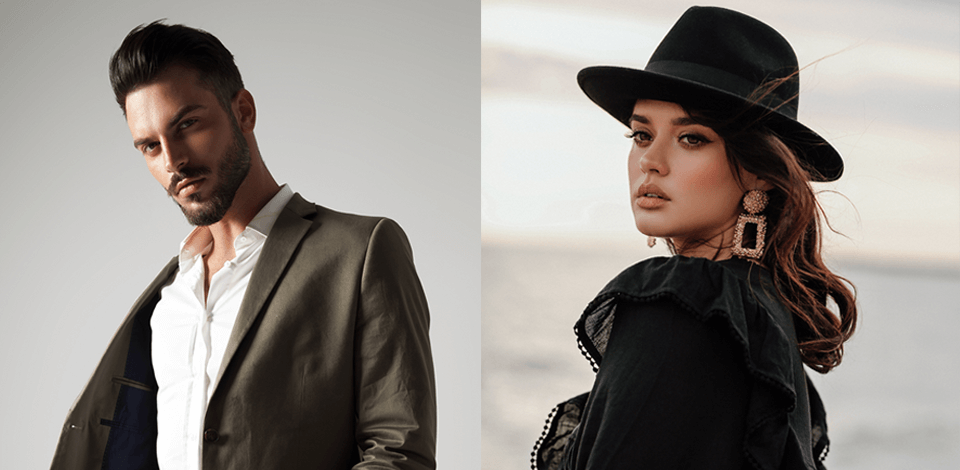
Have difficulties taking portrait photography? Don’t know what techniques to use to show your model in the best light? Follow these effective portrait photography tips that can help any beginner to take top-grade photos.
21 Portrait Photography Tips
Whatever type of portrait photography you want to do: lifestyle, conceptual, traditional or self-portraits, follow these simple tips and secrets to make your images better.
1. Connect with Your Subject
The key to a successful portrait photo is to establish a connection with the model and make him/her feel comfortable. Before the shoot, try to find out some facts about the models, their preferences or hobbies to start a conversation that will be interesting to them. Also, it is a great idea to learn about model’s favorite songs to turn them on during the photo session and create a relaxing atmosphere.
Although it may seem too simple and obvious, I still remind you that interaction with your model is the basis for a successful photo session. Your task as a portrait photographer is to make your subjects relax and let them feel comfortable.

Capture Environmental Portraits. Shooting people in the natural environment or in everyday life is one of the effective tips on how to take portraits. Take a camera in your hands and go out into the street.
Ask ordinary people to become your models for a few minutes. They may be shopkeepers, skateboarders in the park, street artists, etc. Capture them during routine activities. This is a great chance to hone your skills!
2. Shooting on the Street, Think about the Background
The overall look of the shot greatly depends on the chosen location. Taking studio portrait photography, you are most likely to shoot against a solid backdrop to concentrate attention on the model.
Nevertheless, give preference to more interesting backgrounds once in a while, maybe landscapes, streets or cityscapes. A properly selected background will complete the original idea, contribute to a peculiar atmosphere in the picture and won’t distract from the model.
The beauty of the location should not be the main criterion when choosing a background. First of all, it should match your portrait photography ideas themes, as well as clothing and poses.
The background should naturally complement the entire composition you have created.

Use Negative Space. In short, negative space is the area around the main subject in a picture, who is, respectively, the “positive space”. Though it may sound controversial in relation to the previous tip, such a technique also helps focus on the model, surrounding it with a beautiful location, which is a kind of “breathing room” meant to give your eyes some rest. Besides, it is a wonderful way to keep your background uncluttered.
Use Leading Lines. Leading lines are those straight, both vertical and horizontal, lines in the frame that help draw attention to the main object. These can be roads, trees, light poles, etc. Always be on the lookout for lines and use them to your advantage.

Use Frame within a Frame. This is one of the most interesting portrait photography techniques that was initially invented by painters and later adopted by shooters. It means you need to use a frame (an arch, a window, an entranceway, a hole, a tree branch) within the overall frame to bring your model into the center of the composition. Just check whether the frame has sharp lines and shape. The viewers can’t but look at the part of a photo where you have directed them.
3. Capture Sincere Emotions

When people are in front of the camera, they may feel shy or tense. Therefore, I recommend taking a series of shots and not one shot. Thus, you can get one or even a few cool pictures, capture a fleeting emotion or look, and take a picture of an unexpected smile or movement.
If you use burst mode, then you have more chances to embody your studio portrait photography ideas successfully.

Experiment with Subject’s Expressions. Portraits photography included a range of emotions, not only standard happiness or thoughtfulness. Ask the models to improvise and try to express different emotions.

Whenever I see that I have already taken some successful shots, I give my models the full freedom of expressing their feelings for the following 20 pictures. They will demonstrate anger, frustration, enthusiasm and other fascinating emotions that look really captivating in portraits.
4. Choose Interesting Angles
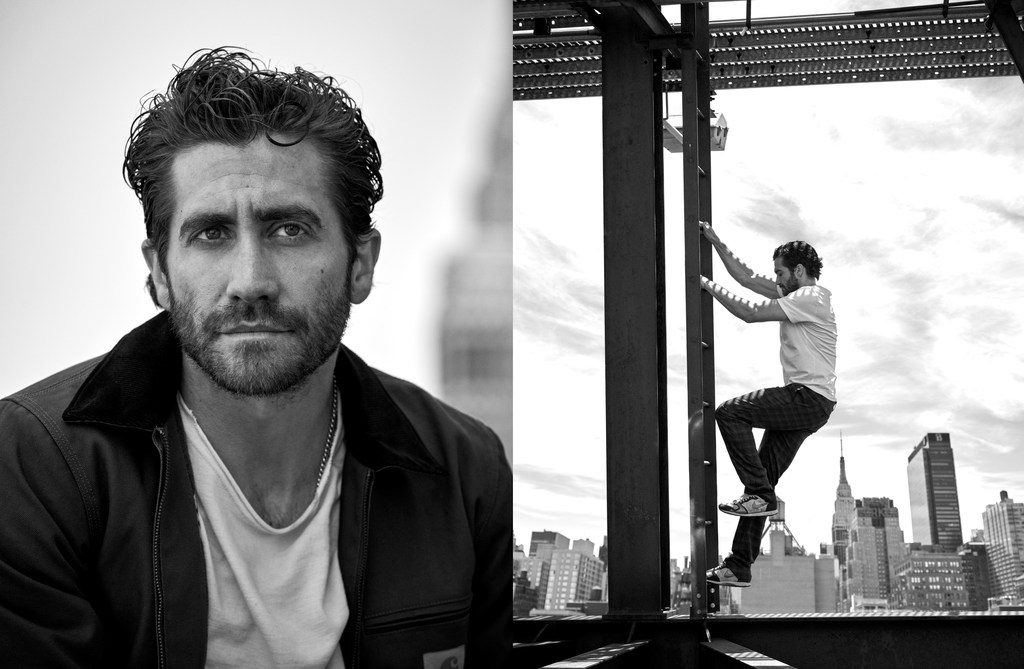
Looking at one and the same thing from different angles can be very helpful. This method is also applicable to portrait photography. What’s the point of taking numerous images of a person facing a camera if you can squat, lay on the floor or ground, climb a ladder to take a photo from another perspective?
I highly recommend moving around a model and photographing from different angles. Don’t be afraid to look strange or silly if you really want to get non-standard shots.

Fill the Frame. Taking close-up portraits means filling almost all the frame with your model’s face. Thus his/her eyes, lips, cheeks, other elements and facial features will be perfectly seen. Such portraits photography samples look more voluminous and detailed.
5. Switch Between Orientations

Look through your portrait gallery. What image do you have more – taken in horizontal (“landscape) or in vertical (“portrait”) orientation? The thing is that many photographers stick to one variant only, so you need to understand whether you are one of them. This may seem insignificant, but you must be good at shooting using both methods.

Beginners think that since vertical framing is referred to as “portrait”, it is a set standard for this genre. It is not the truth, so alternate the orientations.
6. Get Inspired by Other Photographers

When you examine the gallery of your favorite portrait photographers, try to examine their works very carefully. Pay attention to the play of light and shadows, poses, the scene and general vibe. If you look at the incredible portraiture on a daily basis, creative ideas will come to your mind all the time.
Avoid using the same poses and ideas during a photo shoot. Soon this will not be interesting to you and your pictures will not be unique. Try to go beyond the usual photo templates. Look for inspiration in the work of other photographers, in the environment or on the net before you start taking portraits.
7. Prepare a Model Release/Contract

You should also be prepared for the photo session legally by signing a photography contract. Contract terms determine what you can and can’t do with pictures. It protects both a photographer and a model from potential obligations and legal claims, varying from a person’s discretization to interference with private life.
8. Listen to Constructive Criticism
Photographers may become really sensitive when someone starts criticizing their work. Nevertheless, you shouldn’t neglect sound criticism. Sometimes, you may see obvious mistakes only when a professional portrait photographer draws your attention to them. Don’t hesitate to ask for advice from experienced shooters; they may be willing to guide you in the right direction.
9. Choose the Right Lens
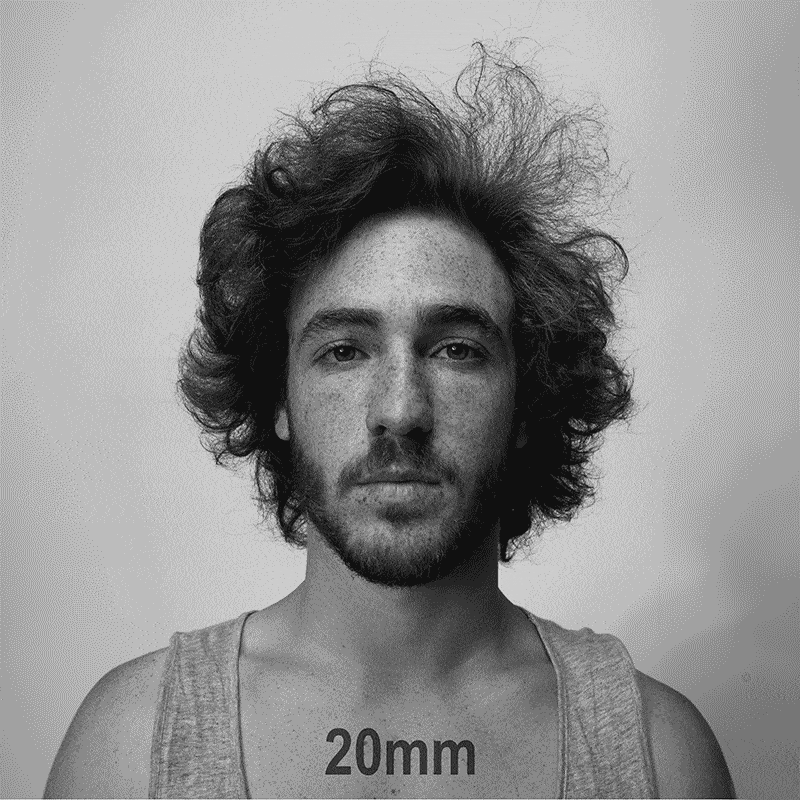
Shooting always starts with choosing a lens for portraits. Don’t use too wide lenses, as they can distort proportions. If you want to show more background, start with 35mm, but 50mm lenses would be the best choice. For waist/chest portraits, 85 to 135mm are ideal options.
Professional photographers believe that telephoto lenses are most suitable for portrait photography, but don’t take too long lenses, as they will distort your model and make he/she look wider than he/she really is. Personally, I recommend using zoom lenses as Canon EF 24-70mm f/2.8L II USM.
10. Invest in a Full-Frame DSLR

Several years ago, portrait photographers claimed that mirrorless devices are the ideal camera for portraits, while, nowadays, DSLRs have occupied the main place in the arsenal of professional portrait shooters. My advice is to purchase a full-frame Canon 1Ds Mark III camera. It will fully satisfy your portrait photography needs, as it has a 10.1-megapixel CMOS sensor, wide ISO range, integrated cleaning system, weather-resistant design, dual memory card slots, etc.
11. Be Prepared for Everything

Get portable camera bag. When you have managed to collect the necessary gear for portrait photography, you will face the problem of its accurate transportation and storing. A properly-designed DSLR backpack with various compartments and the weather-protective covering is what you need.
There are many variants you can try – shoulder and rolling bags, messengers, holsters, sling bags and backpacks.
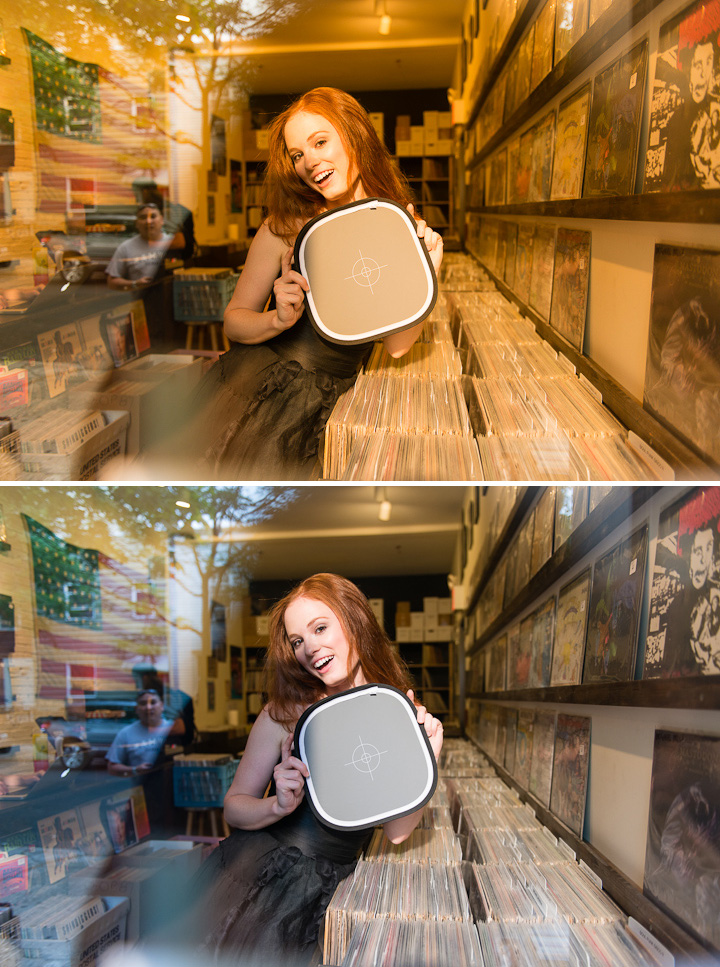
Use tools for correct white balance. Many portrait photographers complain that they have to spend tiresome hours correcting the white balance and giving the skin a natural look. The thing is that the auto WB of a camera may be “confused” by surrounding objects such as clothes, various glares and color casts, so the skin tone will look distorted in a picture. Use the following tools to set correct white balance without further color correction: Gray Cards, White Balance Filters, Color Checkers.
Always have spare batteries & cards. They are quite affordable but can save you from many regrets and problems if your camera or other equipment suddenly stops working because of a dead battery. Same with spare cards. It is such a shame to end the photo session because you have no space for more pictures.
12. Think about the Details

While learning how to take good portraits, remember about the props. Many beginners avoid working with them because they are afraid to spoil the whole photo.
However, properly selected props can emphasize the individuality of your model, attract additional interest, and even relax the atmosphere during the shooting.
Many famous photographers incorporate props into their portraits to contribute to a certain atmosphere in a shot, to add context to the composition, achieve a humorous effect, make a model more comfortable. etc.
Remember that props should be used in moderation in order not to overload the scene.

Work with Clothes, Makeup, Hair Stylists. Very often, shooters, hairstylists and makeup artists collaborate to enjoy creative portrait photography. Having all these people doing their job during the photo shoot increase your chances of getting the pictures you need. It is really important to familiarize yourself with the people from the beauty industry and suggest them to work together.
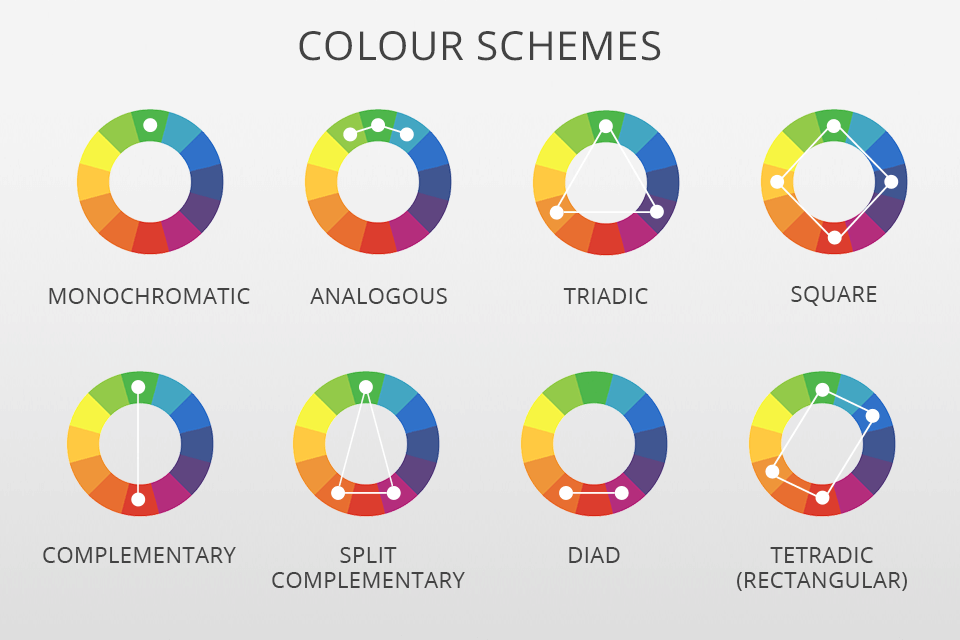
Use the Color Wheel. Once you start picking clothes, backgrounds and tones in image editing software, remember that the colors are supposed to complement each other. For appealing digital portrait photography and well-balanced shades, take advantage of the color wheel. Simply focus on opposing colors. For instance, in case you look for a color that complements blue, examine the color wheel and you’ll see that the opposing color is orange.
13. Use Shallow Depth of Field
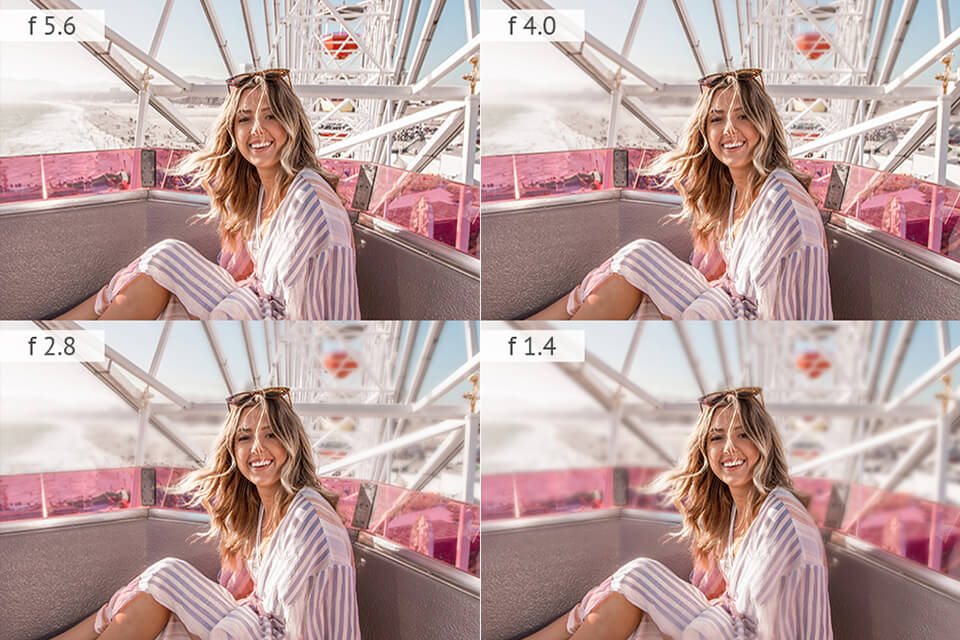
Most often, to get a good portrait, you need to blur the background behind the model. Try different aperture values. A widely-opened aperture (with a smaller number) will blur the background and help highlight the main object. If you want to focus not only on the model, but also on the background, close a diaphragm a bit.
For portrait photography, a wider aperture works best of all. Set it in a range between f/1.2-f/5.6 to capture a shallow depth of field, which means a model will stand out against a blurry background. Mind that the small f-number and the degree of blurriness are interdependent.
14. Make Accents with the Focus and Composition
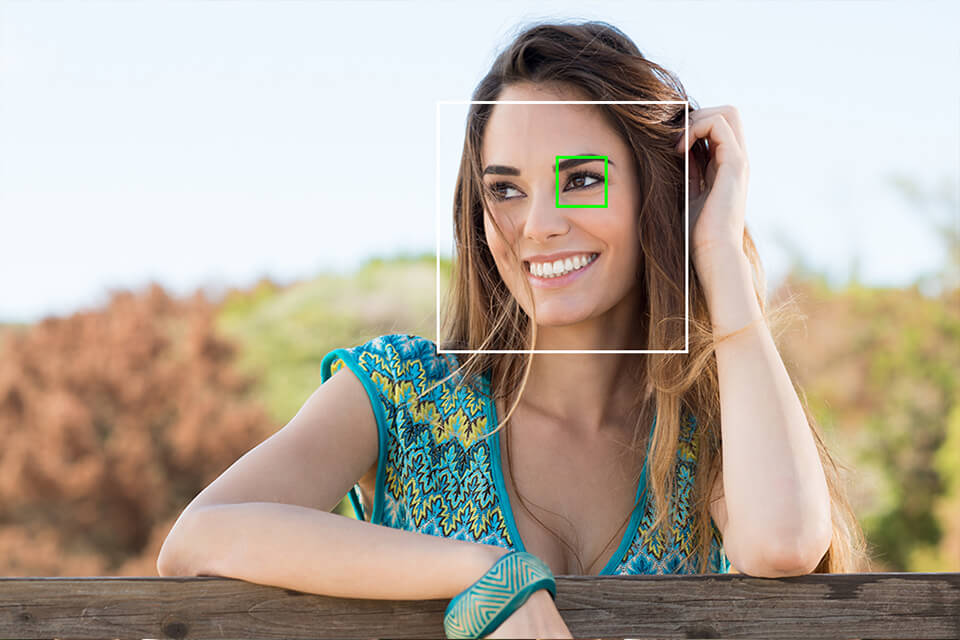
If you aren’t interested in creative portrait photography and need to take classical portraits, like a model facing a camera, you should choose the eyes as the main focal point. This approach ensures a more balanced composition and proper exposure.

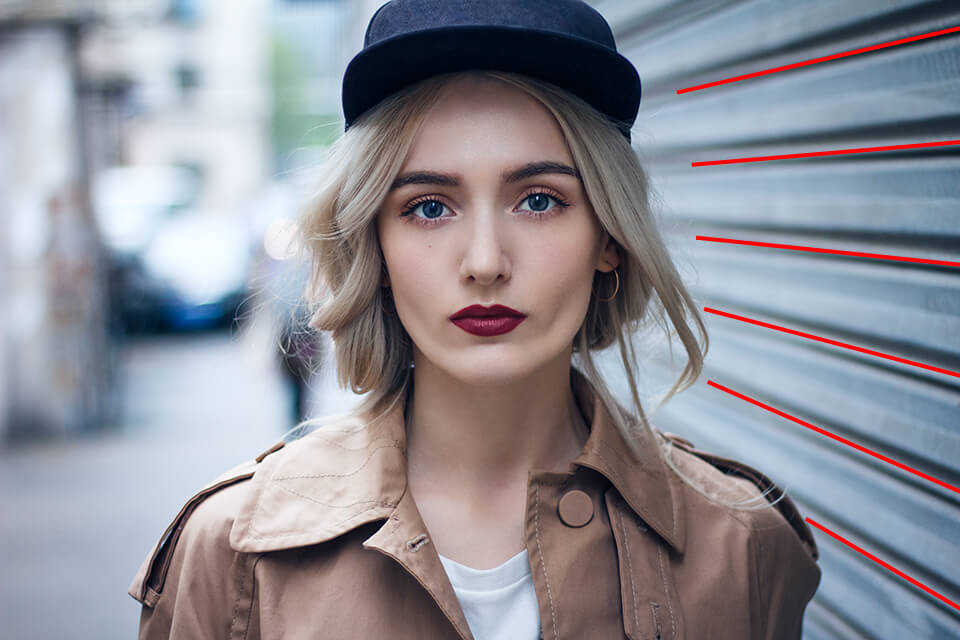
Learn the Composition Techniques. To take better portraits you need to use the composition correctly. It affects the visual perception of the image. The composition should be thought out well and contribute to a more advantageous capturing of the object.
One of the main principles of portraiture is to follow the rule of thirds. Do not forget to pay attention to the leading lines technique.
It presupposes visual dividing of a picture into 9 equal squares, as if there are 2 horizontal and 2 vertical lines intersecting. So, the most important object should be placed either across these lines or on their crossings. Some cameras offer such a feature in the form of a grid on the LCD screen. It really helps to balance a portrait photo.
15. Shoot in Manual Mode

The Auto Mode tempts many photographers, but I strongly recommend choosing manual camera settings. Only this way you can understand how different features influence the final results and how to get the most out of your camera.
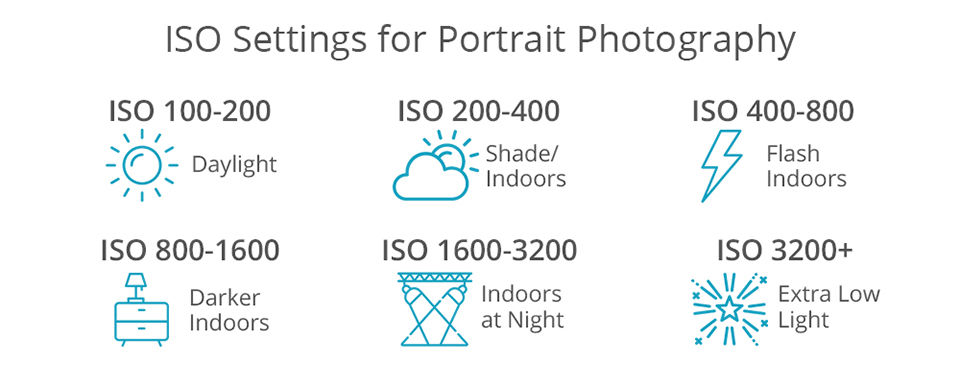
Adjust ISO to weather conditions. Higher ISO means brighter pictures. Personally, I choose the lowest ISO possible for the lighting conditions I work in. When raising the ISO value, you will see grain and noise appearing in portraits.
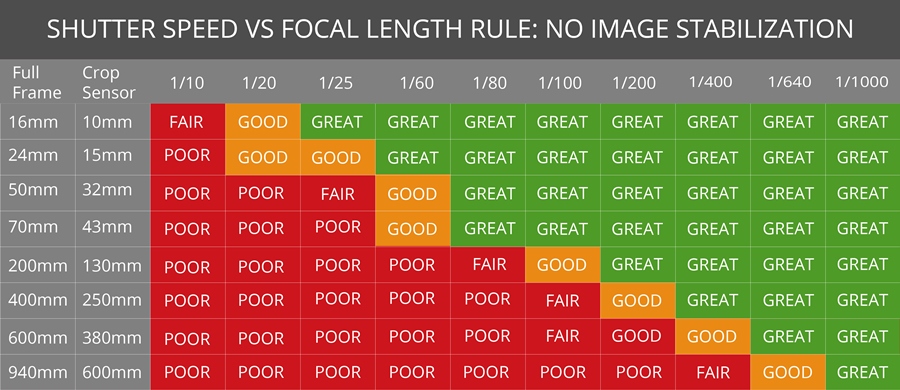
Learn the “Shutter Speed vs. Focal Length” rule. Can’t understand whether you took a blurry portrait photo? The reason is an incorrect shutter speed. You won’t go wrong setting the shutter speed higher than your nominal focal length.
For instance, if the focal length is 100mm, you need the shutter speed of at least 1/100 of a second or faster if you intend to photograph from hands. You can’t expect to get usable pictures if you work without a tripod and had a shutter speed lower than 1/60.
Adjusting the shutter speed, take into account the situation and the subject. For more active movements, use high speed, and vice versa for slower objects. If we are talking about portrait photography settings, then the shutter speed should be no lower than 1/60. Otherwise, the camera may shake.
Shoot RAW. RAW file occupies more space and is rather complex to convert. This format saves more data about a photo and is the best choice for deep portrait photo retouching.
JPEG is recommended if you photograph weddings or events and do basic image editing and color correction. It’s faster to take portraits in this image format.
16. Experiment with Lighting

You have many opportunities for various experiments with portrait photography lighting. It can be both natural and artificial lighting. For example, if you use side-lighting, your portrait will be a bit sterner. Silhouettes and backlit portraits evoke a sense of mystery and secrecy.
Try shadow photography, as a result, you will get excellent, beautiful images. Adjust the lighting correctly in accordance with your ideas, and you will achieve incredible results.

Shoot during golden hour. Never photograph in direct midday natural light. Take care of organizing a photo session one hour before sunset or one hour after sunrise to get pleasant, soft light without long shadows in your images. Download a Golden Hour app (Android or iOS that will become your personal assistant for portrait photography.


Use Color Gels. Color-effect gels are available in different colors, so you can choose something suitable in accordance with the idea you want to reveal in your portraits. You can go further and combine several gels to add a “wow” effect”.

Experiment with Shadows. Many photographers do all possible to eliminate shadows in portraits. However, they can appear helpful if you like experimenting and aren’t afraid of unusual portrait photographs with shadow. Just observe how shadows “behave” and have some practice using them in your work.
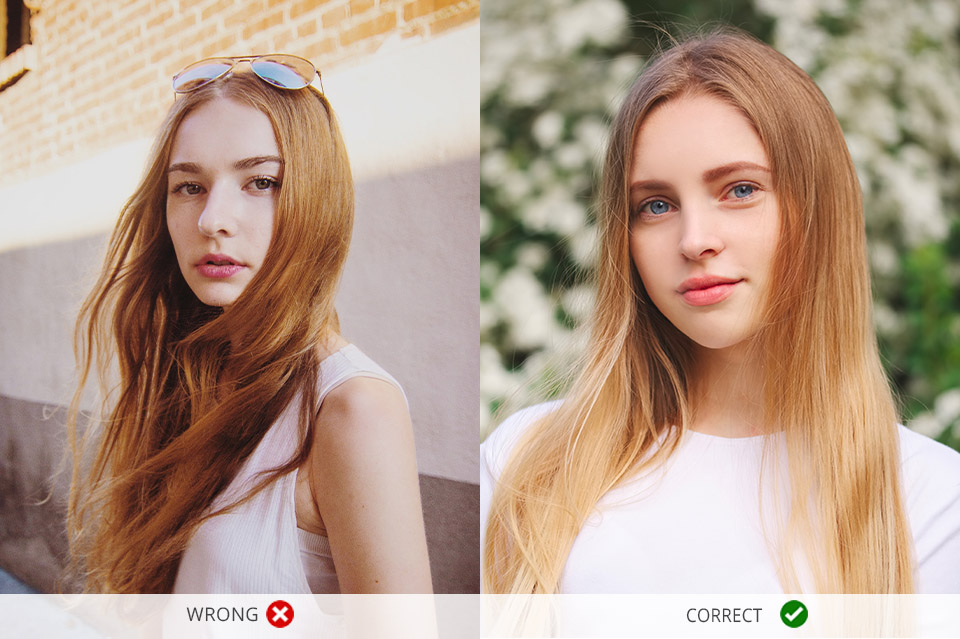
17. Never Shoot in Direct Sunlight
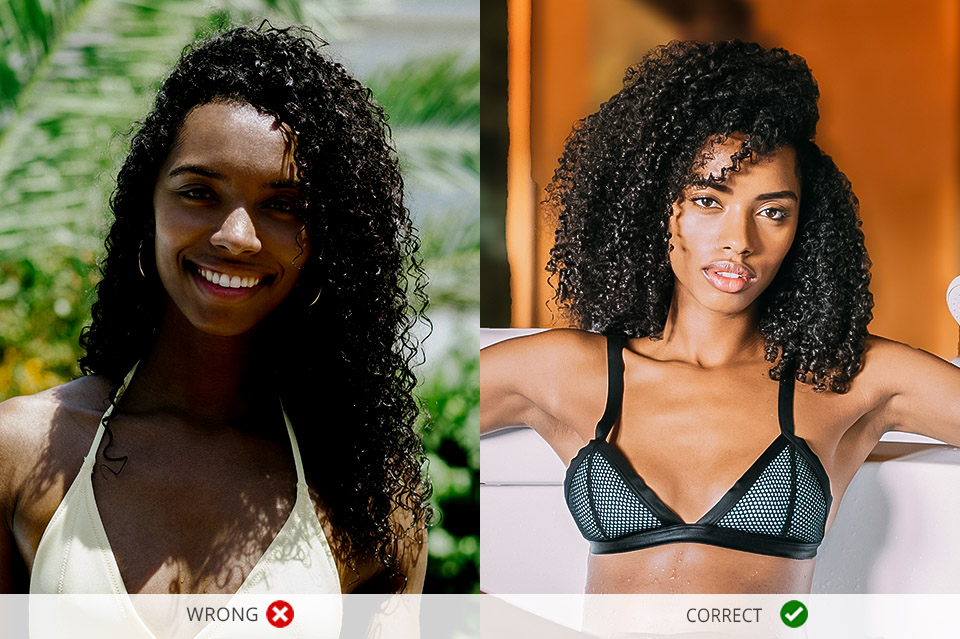
If you are planning to realize your outdoor portrait photography ideas, you should take into account the weather and lighting conditions. Midday shooting on a sunny day can give you a lot of trouble. Avoid direct sunlight.
Otherwise, you will get unflattering deep shadows on the lower part of the face and on the eyes. The most advantageous conditions for shooting are a bit cloudy day.
You can also take pictures when the sun is not high in the sky. On a sunny day, you must take pictures in the shade to get amazing portraits.
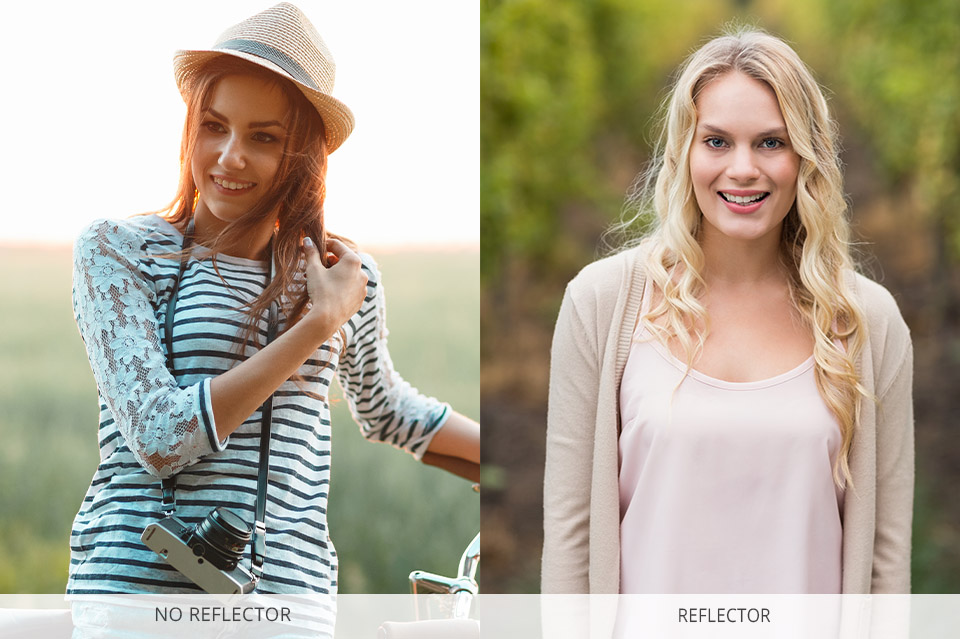
Use a Reflector. To make your portraits more attractive and give them a professional touch, I advise you to use reflectors. For example, one of the available options is Neewer Collapsible Reflector.

Put a reflector near the window if you are taking pictures indoors. You can also use this equipment during an outdoor shoot. Its main task is to fill in unnecessary shadows directing the light on the object.
Are you limited in budget? Do not be discouraged and use a sheet of plain white cardboard! It will cope with the tasks perfectly.
18. Learn Lighting Setups

Lighting is one of the key components that influence the quality of a portrait you get. Shooting in the studio, you should know how to manipulate various lighting set-ups and lightning kits. The main lighting patterns are broad and short, split, butterfly, loop, and Rembrandt.
Soft light is a frequent choice of shooters, who work with women as this type of light makes portraits very appealing, hiding skin defect and wrinkles. It is also known as diffused light, which perfectly characterizes the results you can expect.
Hard light is more dramatic and results in clearer contrast. It can ideally complement men or couple portraits if you want to make them atmospheric.
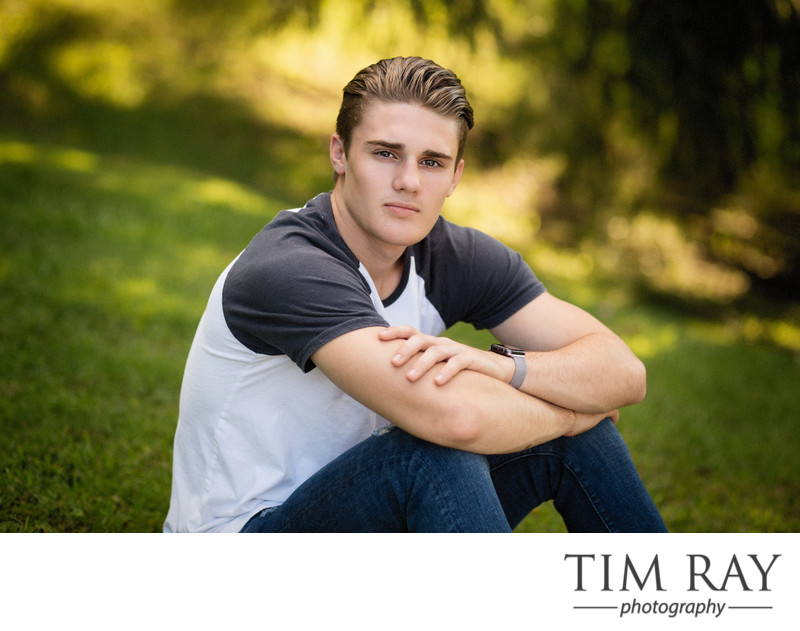
19. Correct Posing – 80% of Success

Typically, models know their beneficial poses for portrait photographs. While posing models, remember that the parts of the body closest to the camera appear bigger than those farther from the lens. Clarify whether there are some body parts a model doesn’t want to be emphasized. For instance, in case the model wants to conceal the width of her hips, suggest pushing her butt back for a slenderer look in the shot.

Collect Posing References. Prior to the photo session, search for interesting portrait photography poses on social media, for instance, on Tumblr, Instagram or Pinterest. Save the ones you like on your smartphone so that they can be at hand in case you run out of creative posing ideas.
Try out various combinations of poses and angles to find the best options for your shoot.
After you have found the right pose for your subject, you can always make subtle changes to make every shot perfect. Showing a visual example to the client would also help communicate better to them.
Avoid Awkward Hands. The shot of a newbie portrait photographer may be distinguished by the position of the model’s hand, which doesn’t correspond to the shown emotion. Whenever you pose models, don’t forget to check at the way their hands look since it may ruin the whole composition.
A very common mistake is hidden in the wrong cropping. It often happens that you can discreetly cut off the elbow or part of the hand. Do not forget to pay attention to it.

Try action poses. In case you feel like adding dynamics to your portraits, ask the models to move around. They may walk, jump, shake their hair or throw clothes everywhere to get more expressive pictures. Dynamic poses are perfect for group or fashion portrait photography, as they make the shots lively and realistic.
20. Don't Forget about Image Post-Processing
Smooth Skin with Frequency Separation. One of the most effective portrait photography techniques for smoothing skin is frequency separation. With its help, you may easily regulate the intricate shades and textures in the shots. Frequency separation is useful for smoothing out colors along with light and dark picture parts, enhancing the skin tone for a healthy and natural look.


Whiten Teeth with Hue/Saturation. A yellow tint on teeth can ruin your gorgeous photography portraits. When the lighting isn’t properly adjusted, the models’ flawless whitest teeth may appear yellow in shots. However, you may correct this defect in Photoshop by tweaking Hue/Saturation adjustment layers for an appealing smile. Be careful not to go overboard, otherwise, you will make the teeth appear unnaturally white.
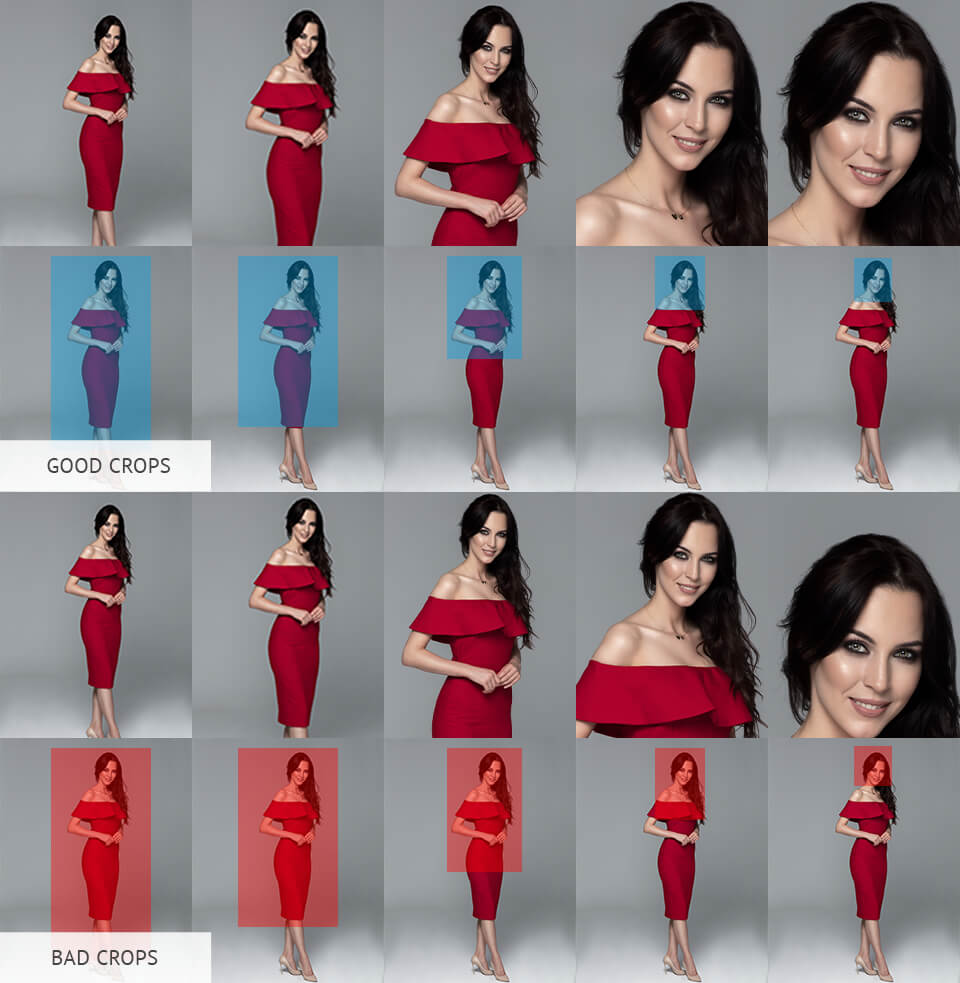
Learn How to Crop. Among the most important portrait photography tips when it comes to picture editing is using cropping. Keep in mind that you shouldn’t crop at the bending areas – elbows, knees, toes, wrists, ankles, fingers and waist, otherwise, the model’s proportions will be distorted in the shot. Your cropping should enhance the model’s body, making it look slimmer.
21. Don't Spend Too Much Time on Image Post-Processing
Use Professional Presets and Actions. Stop performing repetitive steps and start using professional portrait photography presets and actions. They will automatically and quickly adjust all the necessary settings and you will get a consistent look in all shots.

Outsource Your Portrait Editing. If you are only taking the first steps in taking portraits, I recommend entrusting picture editing to outsource services.
It will take less time for professionals to make real masterpieces out of your photos. In addition, you can spend more time photographing and improving your skills.
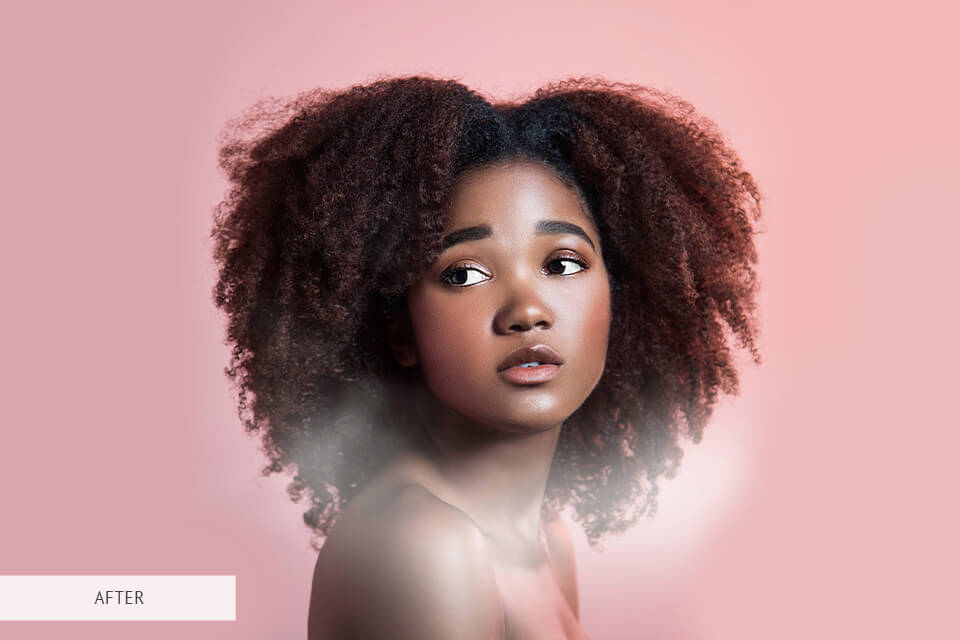
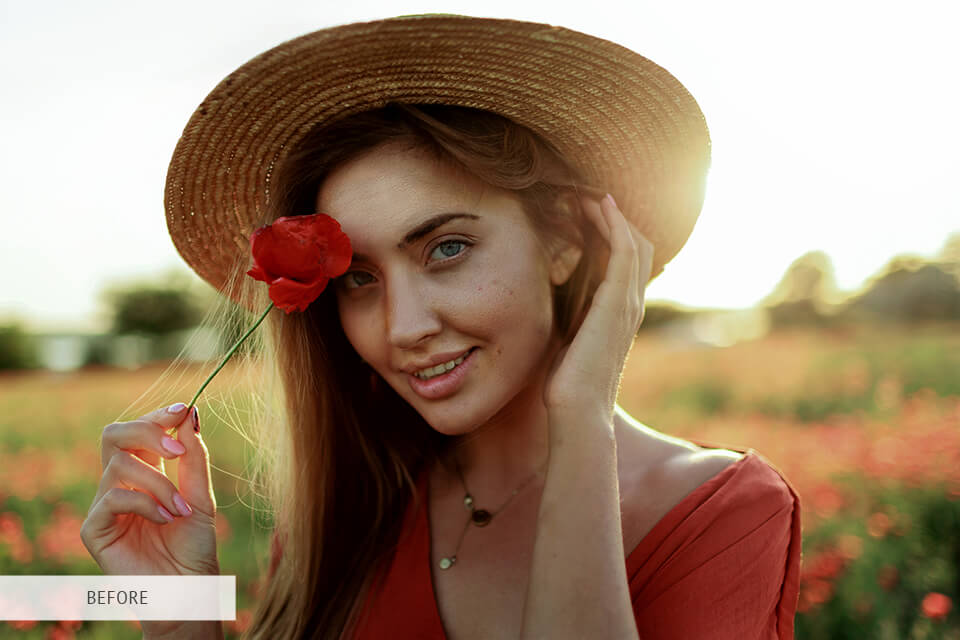
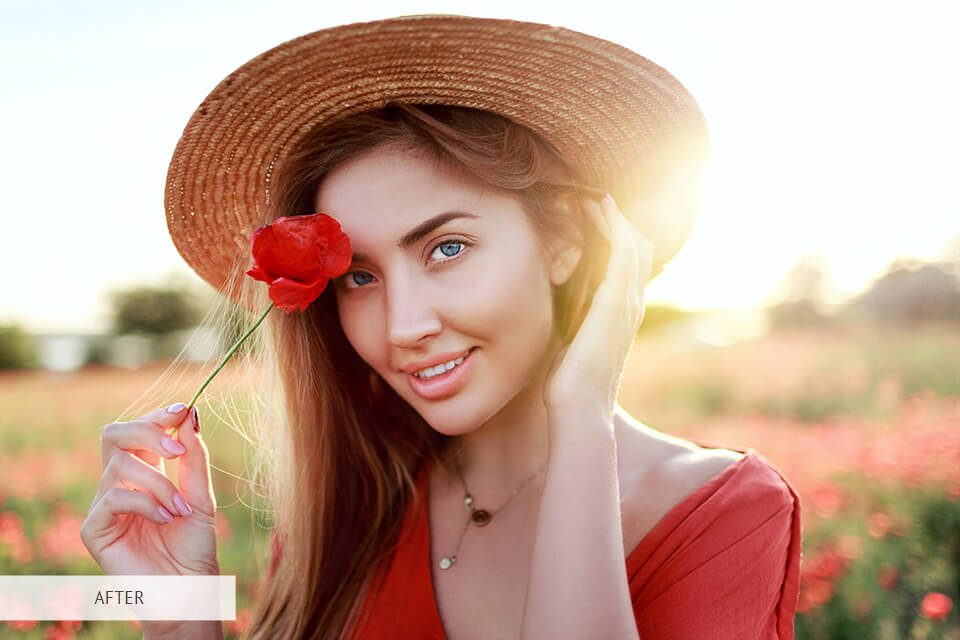
Portrait Photography Editing Freebies
I have selected for you 5 excellent freebies that will help you enhance your portraits fast. Using them you can quickly fill your portrait photography gallery with great pictures without spending much time editing them.
Burn
If you need to add some expressiveness to your portrait, then choose this free PS action. It highlights and emphasizes facial features making the photo slightly darker. This plugin only affects the face of the model and the background remains unchanged. Watch these free Photoshop portrait tutorials.
Bright Eyes
The eyes are the center point of good portraits. Therefore, it is very important that they are expressive and bright. If you can’t achieve this effect, using a camera, try this Photoshop action. View my photoshopping portraits tips for better photos.
Holiday Sparkles
Add some glowing lights all over the portrait. Test possible settings and choose something that makes your image a true masterpiece.
Old Style
When you are taking portraits against a wonderful background, think about slight blurring and giving a matte effect. All this can be done using this filter. Most of all, it is suitable for backlit portraits. View more about how to edit portraits in Lightroom.
Pine
This LR preset will enhance soft skin tones and add pastel shades to your images. Photo retouchers often use it for portrait and boudoir shots.


