If you have taken a photo and then noticed that it looks cluttered because of the position of objects, don’t get upset. Nowadays, you can easily relocate your objects in images while editing them. The most suitable program for the task is Photoshop.

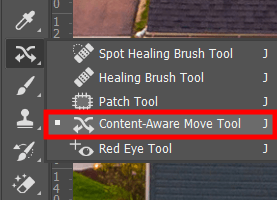
Upload your photo to the program. To make the process faster, use Photoshop keyboard shortcuts. In this case, you should click O. Next, choose the Content-Aware Move Tool. It is hidden under the Spot Healing Brush. This instrument works best for selecting a particular piece of an image and moving it to another place.
When you perform such an action, the program automatically fills the empty space. The result looks absolutely realistic. Thus, you don’t have to make complicated selections but can fully rely on the power of Photoshop.

Moving objects in Photoshop, you can also perform some tweaking along the way. Head to the Options bar and choose the Move mode to place selected items in different places or the Extend mode to expand or contract objects.
If you opt for a higher Structure value, you will preserve more of the copied edge pixels. In case you choose a higher Color value, you will get more color blending. With Transform On Drop option enabled, it is possible to scale the piece of a picture you have just relocated. There are also resizing handles around the moved part, which you can drag to alter its size.

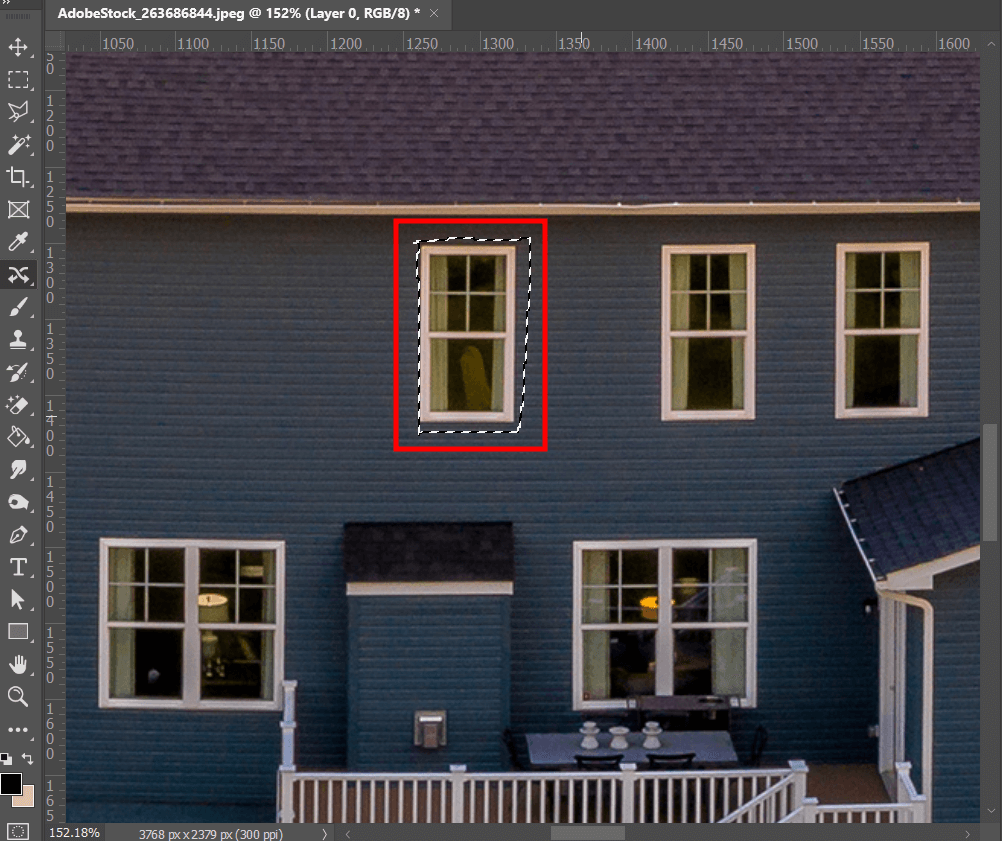
Choose the Content-Aware Move Tool and draw a selection of the object you need to move or extend.

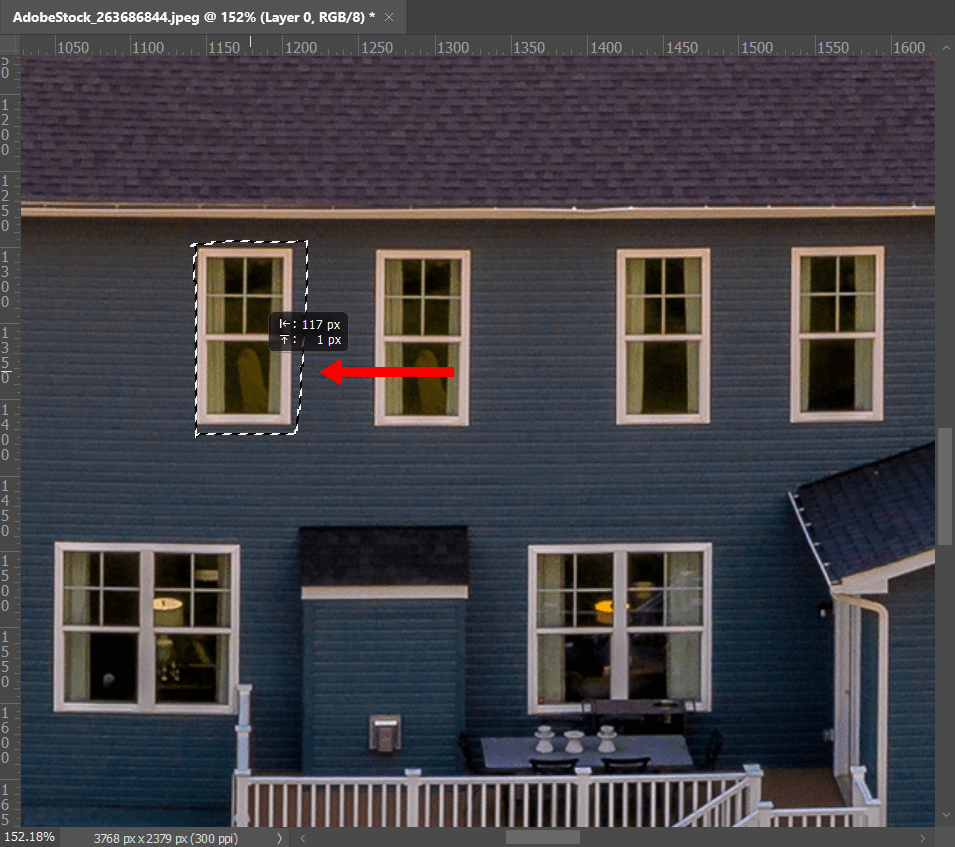
Drag the selection to a new place. Doing so, you will see that the selected object appears in the new position as well as retains its original location.
If you like the result, click Enter. If you need to deselect in Photoshop – hit Return. You can also return to the Options bar in the upper part of the screen and click the Correct icon. Once done, save your photo.
If you are learning how to move things in Photoshop but your results aren’t always perfect, you can get in touch with our team and we will help you out. We can change the position of any object and make other corrections if you want. Our experts fulfill the tasks very quickly and offer rather moderate prices for the services.

I have presented one of the simplest Photoshop tutorials for relocating objects in images. Of course, you can find other guidelines if you are interested in more sophisticated edits.
When you are done changing the position of an object in pictures, you may need to correct some defects and apply creative touches. Doing that is easier with this pack of fantastic effects. Look through available actions and choose the one that best suits your image. There are no strict rules f what effects to apply so let your imagination run wild.
In fact, you can change the position of any object identifiable by the program. To relocate text boxes, selections, pasted objects, layers, etc., you should use the Move tool. Besides, you can drag and drop elements from one photo to another within Photoshop.
Yes. There are the Marquee and Lasso tools for selecting objects in Ps but you can speed up this process with the help of a simple keyboard command. By setting up the Move tool, you can use it to automatically select any item in its path. There will appear a new copy of the selected part of a photo and you can change it the way you want.
We are all used to relocating objects with a mouse or a tablet. However, you can also use the arrow keys on the keyboard to move it to the needed place with the utmost precision. However, you need to select an item first. Using arrow keys, it is possible to move an item by one pixel with each tab, which works especially great if we deal with miniature elements.