People like watching videos with special effects and if you want to create such content, you should learn how to import LUTs into DaVinci Resolve and apply them. The best thing about LUTs is that you can find absolutely different options and apply them to your videos in a quick way. DaVinci Resolve comes with some pre-installed LUTs but you can upload third-party variants if you want.
Make sure you’ve downloaded all the needed LUTs and arranged them in one folder, so that you can easily upload the file to the program.
Launch DaVinci Resolve on your computer. Optionally, you can start a new project. Head to the lower part of the screen and click the setting icon there. There will appear a new window.

In the pop-up list, choose Color Management.
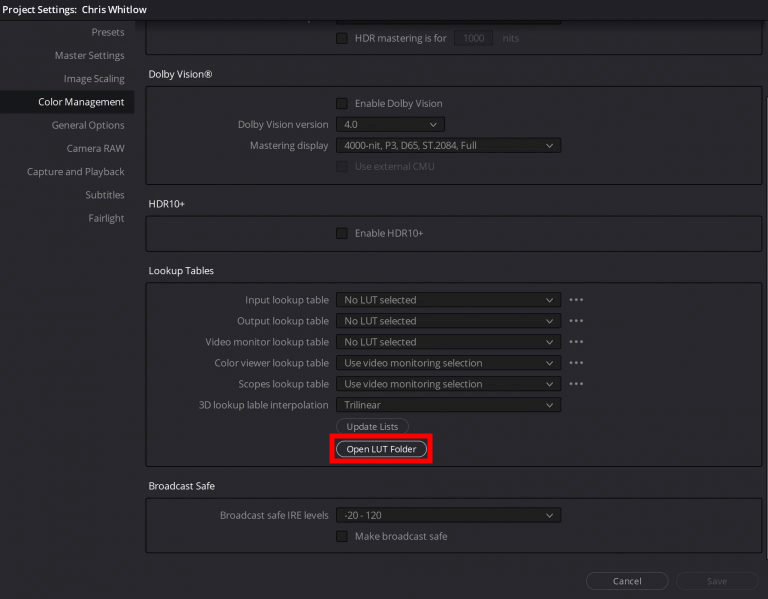
Clicking on this option, you will see a large window with different settings. You need to scroll down and select the Lookup Tables section. Next, click Open LUT Folder.
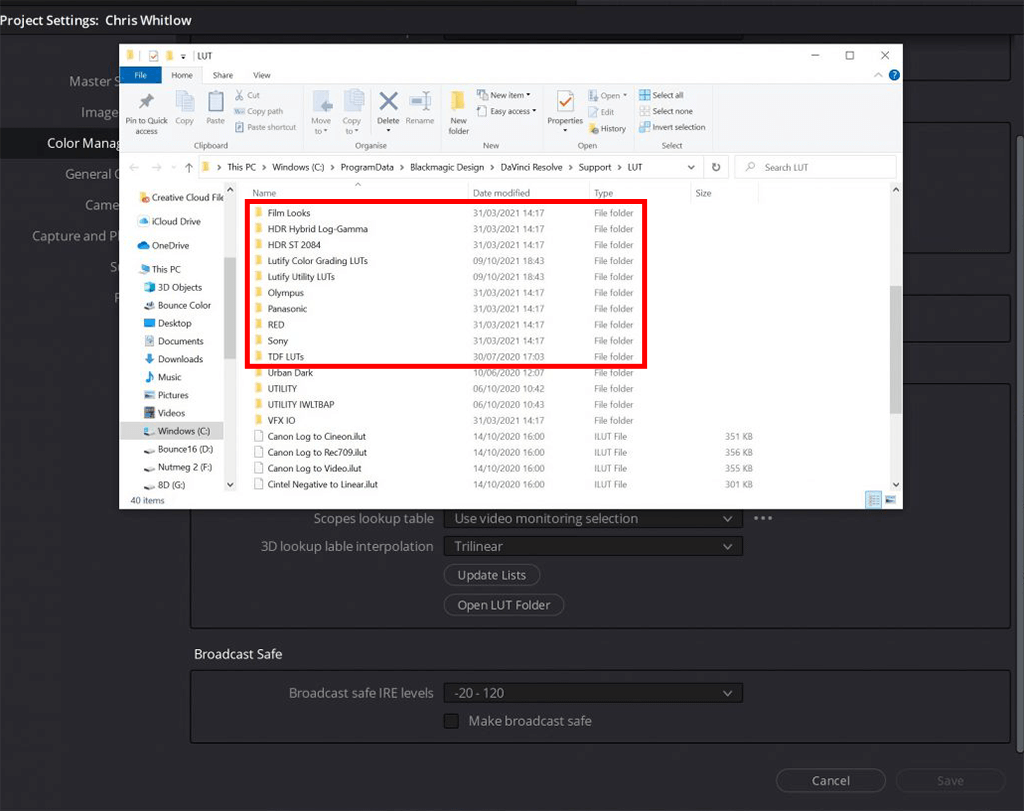
There will appear the LUT Folder window. Unlike many DaVinci Resolve alternatives, this program supports the drag & drop working method. Thus, adding LUTs to DaVinci Resolve will take little time and effort. However, make sure to unzip your files first. Then, you can paste them into the LUT Folder. They will be neatly arranged.
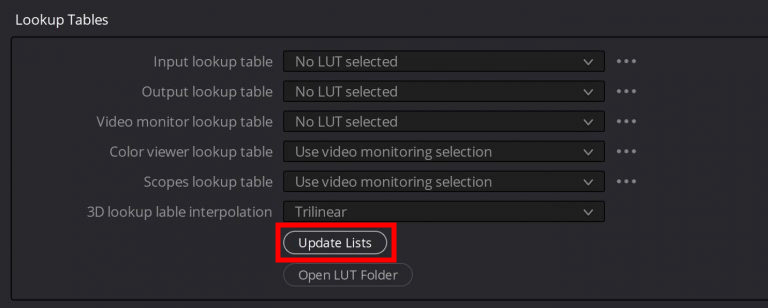
Close this folder. You need to return to the Color Management tab and click Update Lists > Save.

Now you need to open the Color tab at the bottom of the window. Select the video you want to embellish with a LUT. You see, all steps are intuitive and resemble the process of installing LUTs in Premiere Pro.
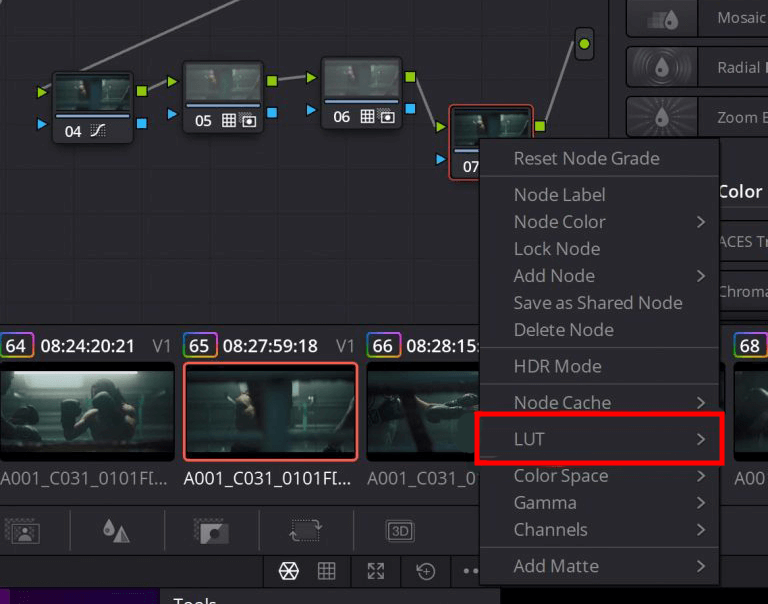
Right-click on a node. Choose 3D LUT > a LUT. Select a suitable option from the list. You’re done. Now you get a fantastic video and know how to import LUTs into DaVinci Resolve.
If your collection of LUTs is rather small, don’t pass up a chance to extend it. The package contains top-notch LUTs that you can apply to your footage to make it darker, accentuate shadows, raise contrast, define details, and more.
All LUTs were created by experts and tackle the most frustrating issues you face while editing videos. They are available in a .cube format. You can apply these LUTs to any video but they yield the best results when used for outdoor videos filmed in rural areas.
Surely. Though such tools aren’t a one-click solution for editing, they still greatly simplify this process. Of course, you need to be very attentive and gradually improve your skills, but using LUTs at the beginning is a great decision. Once you develop your style and understand how to achieve a specific mood, you can fine-tune the colors, exposure, white balance, and other parameters after applying a LUT.
Actually, no. You only need to set the LOG profile in your camera before you start filming.
There is no such requirement. If you want to correct colors before applying LUTs, you may record videos in RAW. Such a format gives more flexibility for advanced manipulations with colors.
If software supports .cube files and has the Lookup Table option, you can work with LUTs in it. The majority of popular video editors such as Premiere Pro and Capture One fall into this group. But you need to double-check whether the program you are going to use supports LUTs.