LUTs offer a fast and simple way of performing color grading while allowing you to achieve fantastic results and implement your artistic vision with minimum effort. LUTs are handy assets that help moviemakers, editors, and colorists save specific color grades as premade templates for future use.
By learning how to apply LUTs in Final Cut Pro, you’ll be able to enhance your clips with rich cinematic tones even if you barely have any clip editing experience. LUTs can be designed to fit a broad range of movies and pictures with the most popular options including wedding, landscape, and portrait.
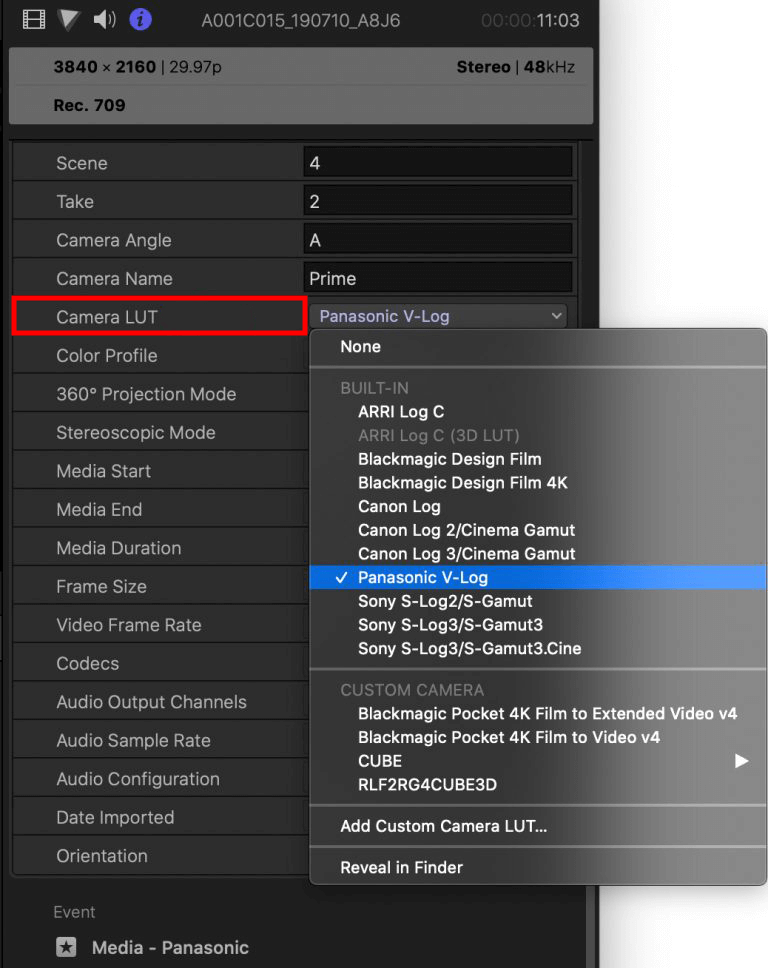
Final Cut Pro allows you to work with 2 LUT categories. Camera LUTs (often referred to as camera log conversion LUTs) offer log processing for videos and images based on modern video cameras that are supplied with a log recording feature. When used for logging a clip from a supported camera, such a LUT will convert the clip to the workspace of the current library.
During the import process, Final Cut Pro reads the file's metadata to determine its log format and automatically converts it using the relevant integrated camera LUT. Such LUTs are employed at the file level (applied to the entire library) and introduce all their changes before you add any other video effects.
Launch Final Cut Pro and Pick the video or adjustment layer from the timeline that you want to enhance with the LUT.
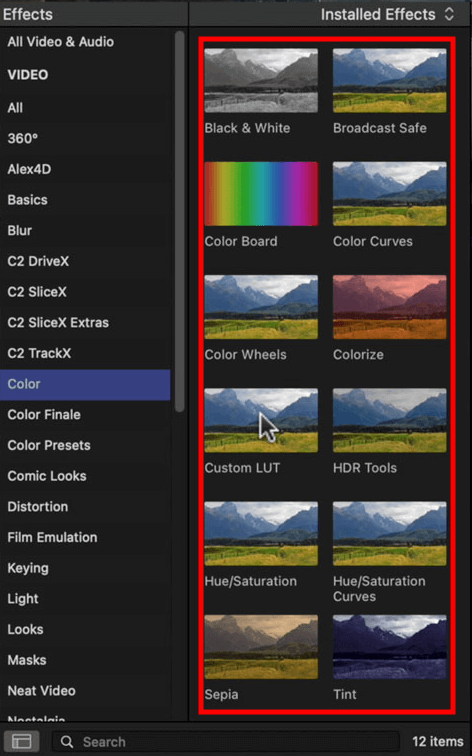
Go to the Effects Browser and pick the Color option, which you can find on the left panel of this video editing software.
Double-click the Custom LUT option or drag it onto the desired video or adjustment layer.
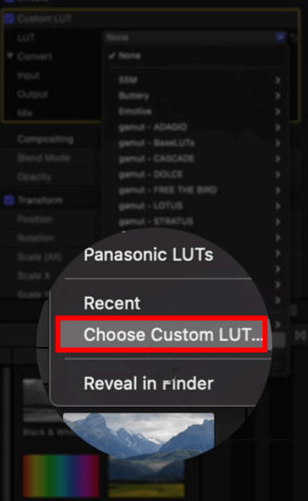
Go to the Video Inspector Window, press the Custom LUT option, and pick “Choose Custom LUT” from the dropdown menu.
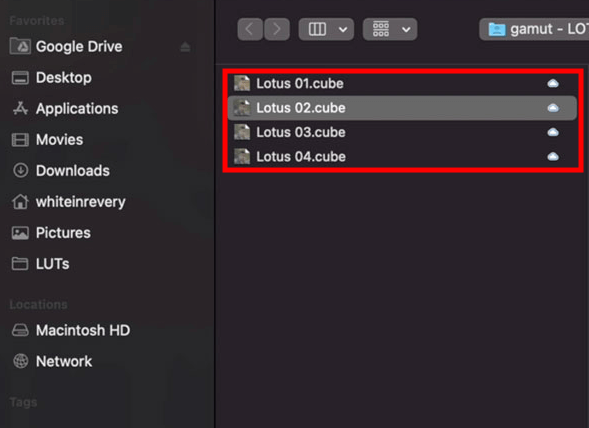
Locate the LUT for Final Cut Pro that you want to add and pick the appropriate .cube file or choose a folder that contains several LUTs and press “Open.”

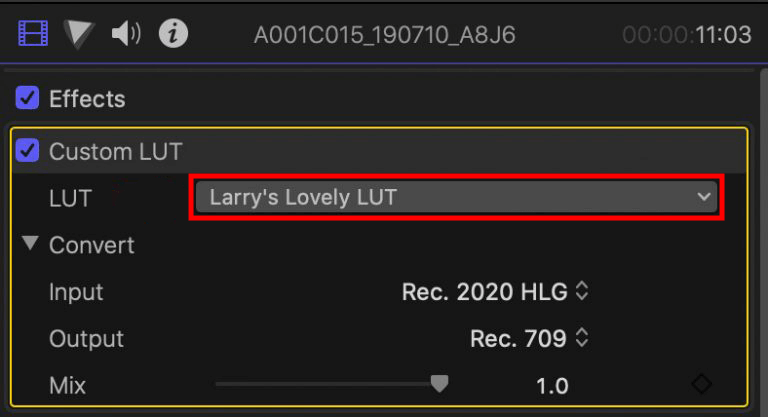
The LUT you added will be immediately loaded and applied to the chosen clip. If you chose to add an entire folder of LUTs, simply select the dropdown menu again and pick a specific LUT from the submenu folder.
Final Cut Pro also lets you conveniently alter the intensity of the applied LUT by tweaking the Mix Slider as you see fit.
Unlike the first type, Custom LUTs represent video effects that can be added to any position in the effect lineup. Such LUTs let you conveniently produce, import, and share customized looks for your videos that serve to achieve your creative goals.
You can apply a custom LUT to the timeline using the Effects browser. Custom LUTs are also extremely handy for performing tone mapping and custom conversions to achieve the desired output color space.
All the changes made by a LUT are non-destructive. The software lets you apply, alter, and remove them anytime you want without affecting the quality of your footage in any negative way.
Typically, camera LUTs are added via the Inspector while custom LUTs are applied via the Custom LUT effect.
Pick one or multiple clips from the Timeline.
Double-click the Custom LUT option to add it to the chosen video fragments.
Pick a Timeline clip (should you choose several clips, the effect will only be added to the fragment with the playhead).
Select Video Inspector > Custom LUT and pick the desired LUT option.
Note: The software lets you import one or several 3D LUTs in .cube and .mga formats. Should you import an entire folder of LUTs, they’ll be added as a separate submenu in the LUT dropdown menu (you should pick the needed LUT from the submenu to ensure it shows as the chosen LUT when viewing the Custom LUT section).
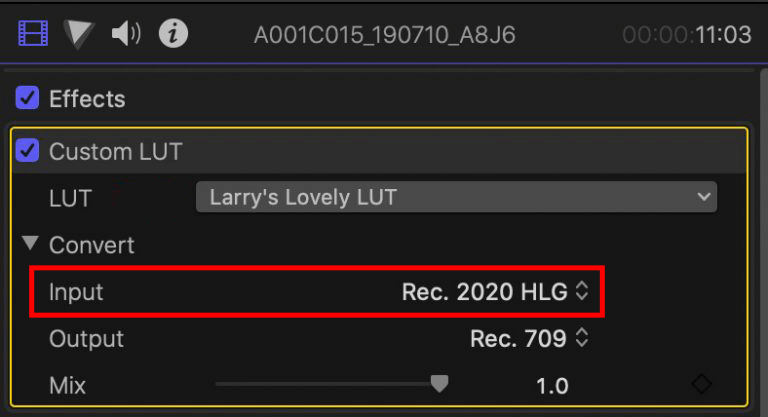
Select the needed Input option so that it matches the color space of the source footage.
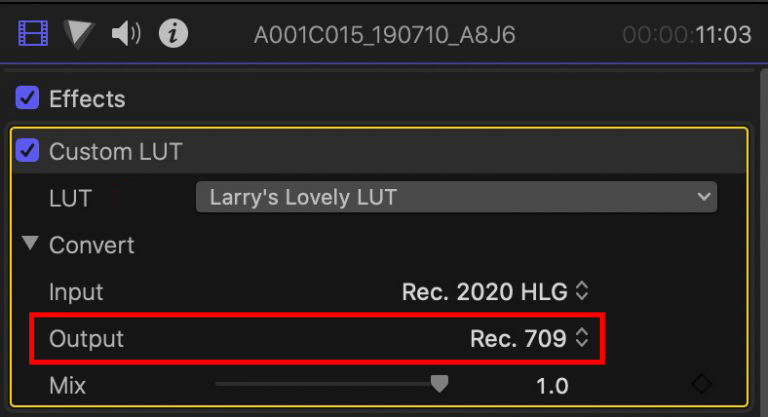
Choose an Output option that matches the color space the LUT was designed for and is in line with the project’s chosen color space.

The offered LUTs will ensure your videos and images catch the viewer’s eye with their vibrant, nicely saturated colors. This collection includes over 250 LUTs that allow you to simplify and speed up the color grading process to the maximum. With the help of specific LUTs offered in these collections, you’ll have no trouble boosting the brightness and liveliness of your clips while achieving cinema-grade quality in just a few clicks.


