Need to quickly flip a layer in Photoshop? Flipping an image is a feature that allows you to turn an image horizontally or vertically. This technique can help you alter the focus in your image, or achieve a more compelling composition. Below, I’ll share the 4 simplest methods of achieving it.
Working with a photo with a single layer is super easy. Find out how to flip an entire photo in under 1 minute.
Launch Photoshop. Go up to the File tab at the top and click on Open. If you prefer using Photoshop keyboard shortcuts, press Ctrl+O/Cmd+O. Find the photo on your computer, that you’ll be working with.
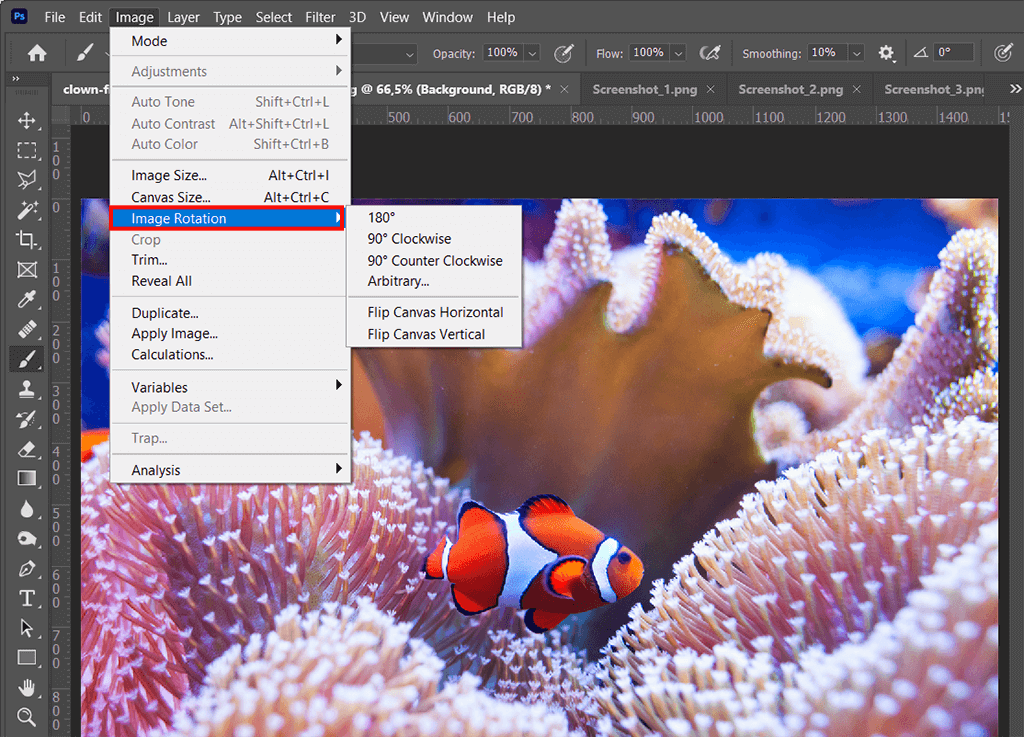
Select the Image tab from the main menu, and navigate to Image Rotation. You’ll find 2 options at the bottom of the fly-out menu that appears. You can either choose horizontal or vertical transformation.

Your image is now transformed. Now, you can move on to following other popular Photoshop tutorials.
Sometimes, you’ll have to modify only a logo, a particular object in a photo, or a watermark. In this case, you don’t need to transform an entire photo, only the layer that includes that element.
The second method is just as easy but you need to learn how to unlock a layer in Photoshop beforehand.
First, you need to make up your mind about what layer you need. Click on it to select it.
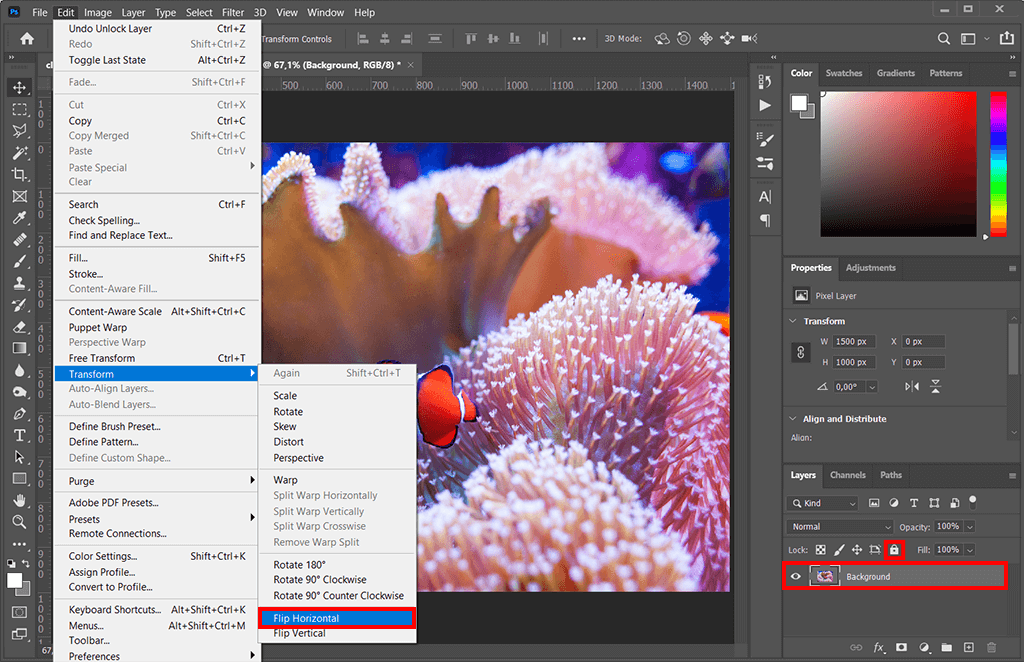
Similar to mirroring an image in PS to enable alterations to this layer, you need to locate the dedicated panel and double-click on the lock icon. This will unlock the layer.

The most straightforward way of flipping the image can be accessed via the Edit tab. Go down the fly-out menu and find the Transform option. In the fly-out menu that appears, you’ll find tons of options for modifying your image, like rotation, skewing, distortion, scaling, perspective change, etc.
In this tutorial, we’ll only be focusing on the bottom 2 options – horizontal and vertical flip.
Choose one of these, depending on the direction you need. It should be pointed out, that this operation will work on all layers, not just raster photos.
Now you know how to flip a layer in Photoshop. You can continue editing your photo and apply more complicated techniques.
Another helpful method is by using the Free Transform Tool. It gives you more control over the whole process.
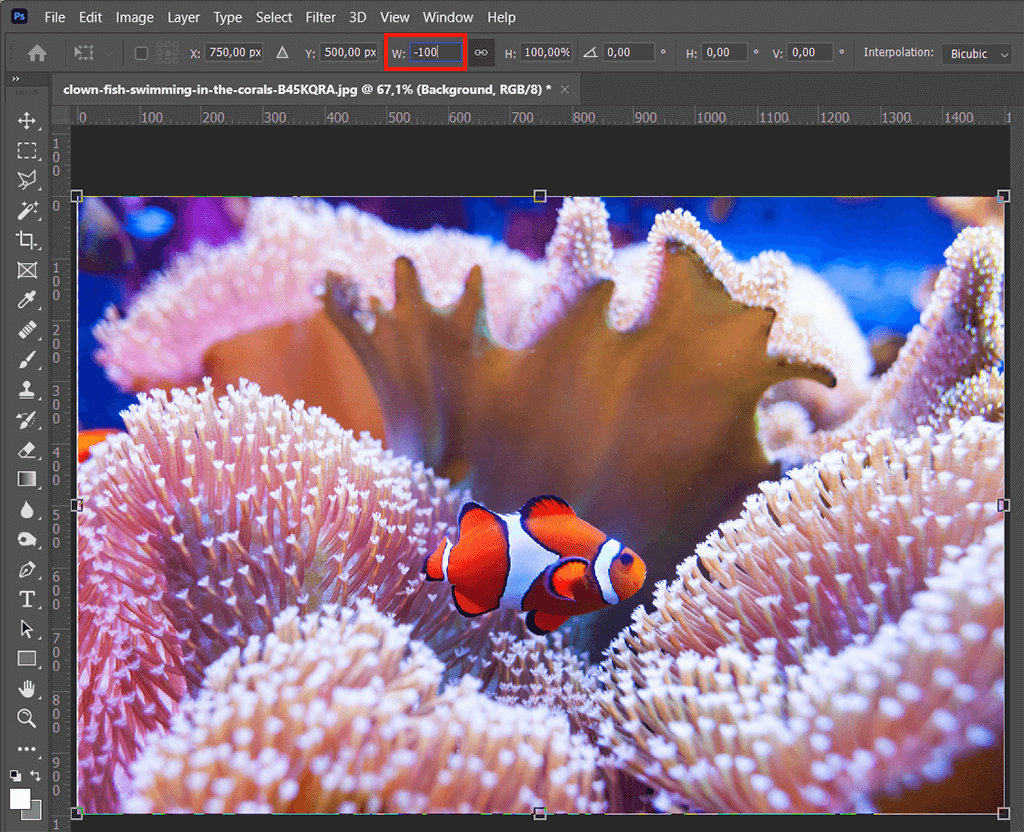
Go up to the Edit tab at the top of the window. Alternatively, use the shortcut by pressing Ctrl+T/Cmd+T. This will instantly activate the tool.
Next, we need to change the width value of this tool. You can either drag the edges across to perform this task manually or type -100 value into the width box at the top.

It’s that easy! You can go on with your editing routine now.
Note that the methods described above are only going to flip the single layer that you selected in the first step. If you would like to flip multiple layers follow the steps below.
Hold down the Ctrl/Cmd key on your keyboard, and select the layers you want to modify.
Access the Flip option through Edit > Transform.

You’ve completed the tutorial. Now, you can either merge layers in Photoshop or proceed to edit your photo.

Want your editing routine to be fast and smooth? Download this bundle of high-quality photo editing tools to help you out. These actions, overlays, and brushes will cut your editing time in half.