If you have tons of pictures and need to make your collection more organized, you should learn how to flag photos in Lightroom. This is a great way to sort and organize your shots while building a clear and well-structured catalog. Experts suggest several methods for adding flags to images.
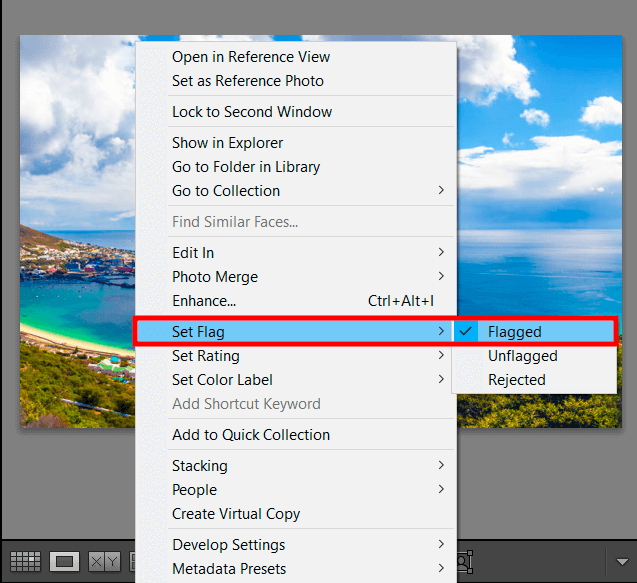
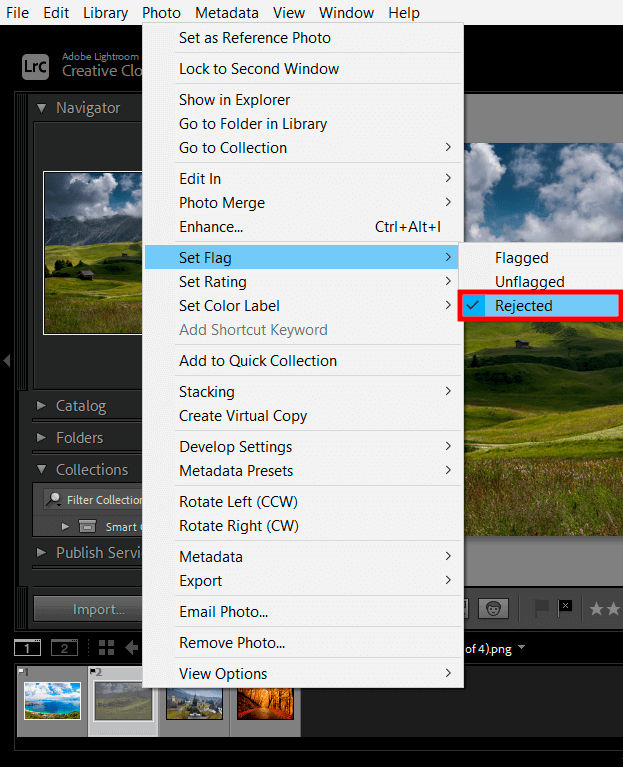
If you want to flag some pictures in Adobe Lightroom, you should choose Set Flag > Flagged in the tab. It appears after you right-click on a photo. If you follow Set Flag > Rejected path after right-clicking, you can indicate a reject picture. Alternatively, you can press X on the keyboard.
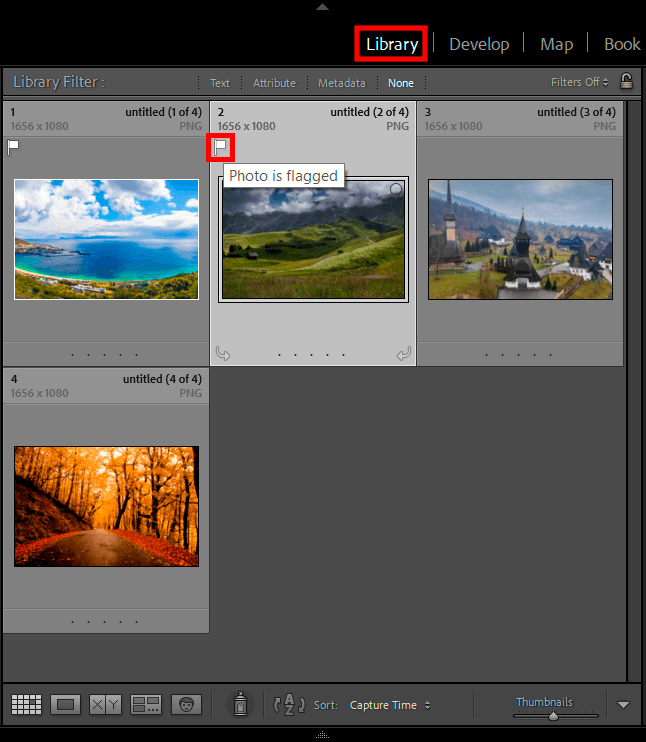
To open the photo editor’s library, you need to click the Library button. It is located in the upper right corner of the panel. You can also flag photos here. This way you can understand which shots you need to select for editing photos in Lightroom. A flag icon above the image will indicate that it is flagged.
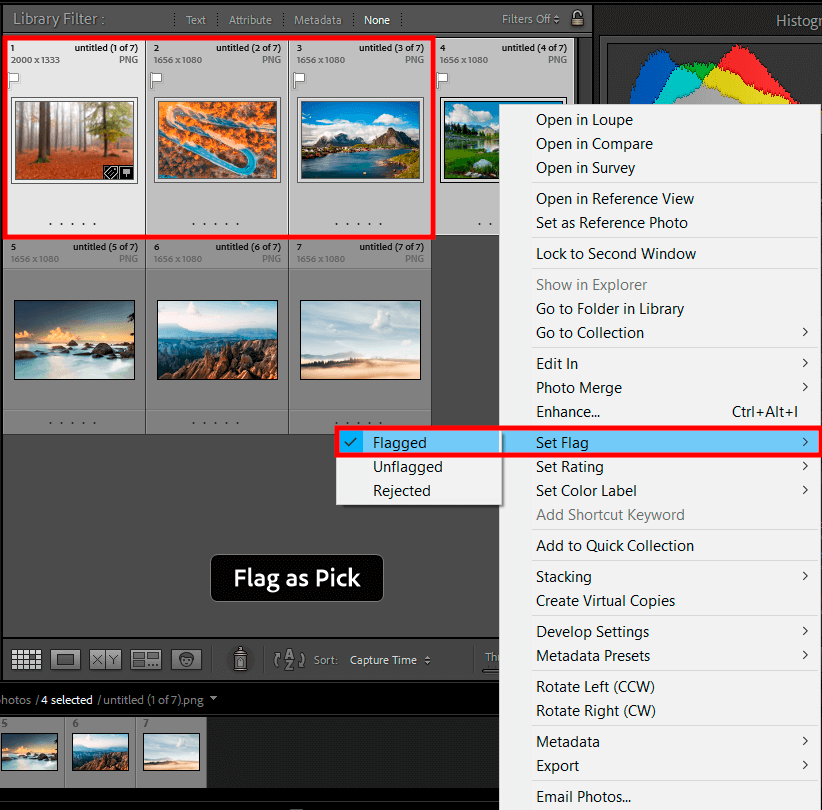
There is an even faster way how to flag photos in Lightroom. It is suitable for those who need to mark several pictures at once. You should click between the pictures by pressing and holding the Command or Control key. Having the desired photos selected, right-click and choose Set Flag > Flagged. This way of adding flags to images is a good variant if you are going to batch edit in Lightroom.
If you think this is too complicated and you can't figure out how it all works, you can check out various Lightroom tutorials. There you will find answers to many questions. For example, you can learn why the program flags only the picture you are viewing instead of all selected ones.
Depending on the flag type you assign, you can filter and organize photos later. Thus, you can set up a workspace to edit, export or delete only a specific group of images.
You can view the selected flags шn the Library Module or filmstrip. They will be indicated by a white flag. As a rule, all favorite images are marked with this type.

To view only flagged photos in Lightroom, you need to apply filters to the library. First, you should open the Attribute setting window. Go to the Flag options and find the white flag. Select it to see marked pictures. Thus, only flagged photos will be displayed in the library. The rest of the pictures will be hidden automatically.
Typically, reject flags are used for less important or completely unnecessary images that you may want to get rid of in the future. These flags are grey. When you tag a picture with them, you will see a black icon in the corner. Thanks to this marking, you will make your work less confusing and remove unnecessary photos.
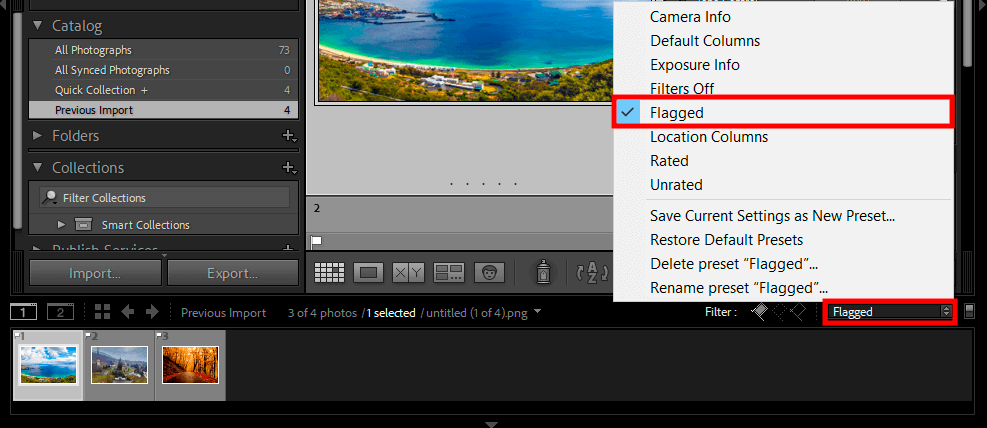
The previous step is only available if you are editing an image outside of the Loupe view of the Library module. Otherwise, you should look for the filter option in the filmstrip and use it. Select the filter options in the upper right corner. As a rule, “No filter” is set by default. Scroll through available options and select Flagged.
After that, your filmstrip will only contain the flagged pictures. This method provides similar results to what you achieved in the previous step. Now you know how to flag a photo in Lightroom if you are working with photos outside of the Library Module.

The flag option allows you to highlight the photos you want to work with. For example, you can select a group of images and apply a certain preset to it. These filters are made by professional photographers so you can enhance your photos in one click. All you need to do is to add presets to Lightroom.
Using flags, you can see if a picture has been unflagged, flagged, or rejected. You can set these indicators in the Library module. When editing images, you can click a flag filter button in the Library or Filmstrip and change only those images that have been flagged with the appropriate icon.
Check the left pane of the Albums area and select Add an Album. Another way is to click the + icon and then select the Create Album option. Name the new album. Next, you need to drag the pictures into the folder after selecting them from the grid. Later, you can add more pics there.
To rate photos in Lightroom, you select the Detail view filmstrip, Photo Grid, or Square Grid view. Then, mark the desired image/images. Using the Set Rating option, you should indicate the rating by right-clicking on the selection.