If you want to make the edges of frames darker, you should learn how to create a vignette in Adobe Premiere Pro. This technique is very popular because it helps direct viewers’ gaze to a specific area in a video, embellish the background, and simply add some original touches to your footage. In this guide, you can learn the process step by step and discover what tools are needed to make such an effect.
The quickest way to create a Premiere Pro vignette effect is to use the corresponding feature in the Lumetri Color panel. However, by going this path, you have to put up with the lack of flexibility. For example, you can’t relocate a vignette if your subject is off-kilter. However, for most shooting scenarios, this method works just fine.
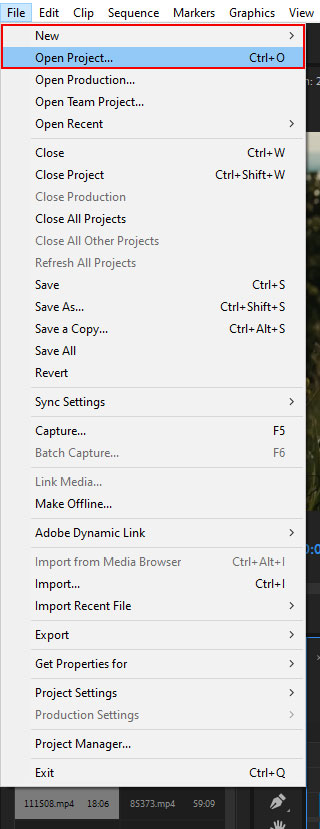
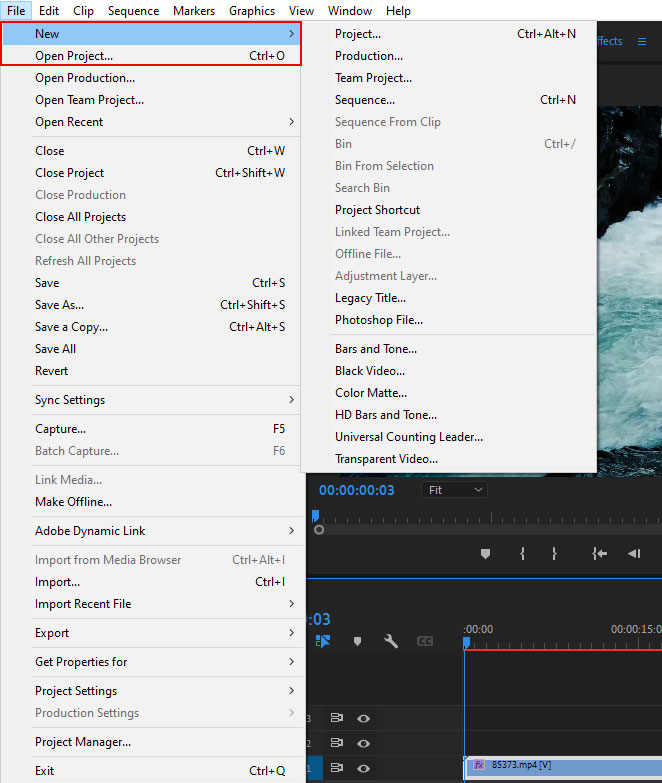
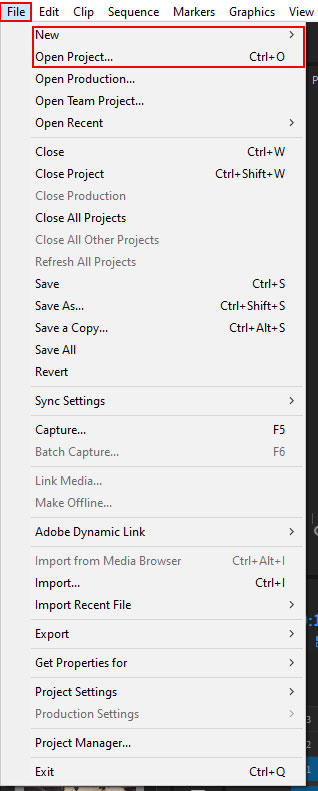
Log into Adobe Premiere Pro. Start a new project or click Projects on the navigation panel to open your previous project.
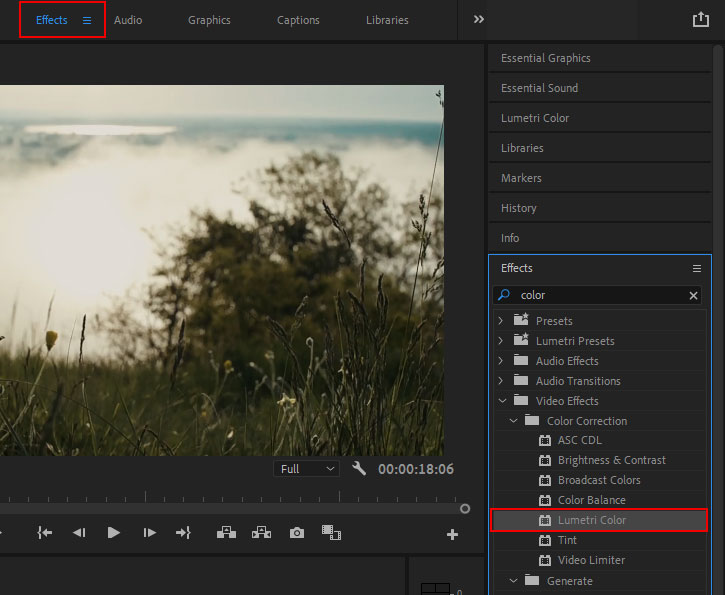
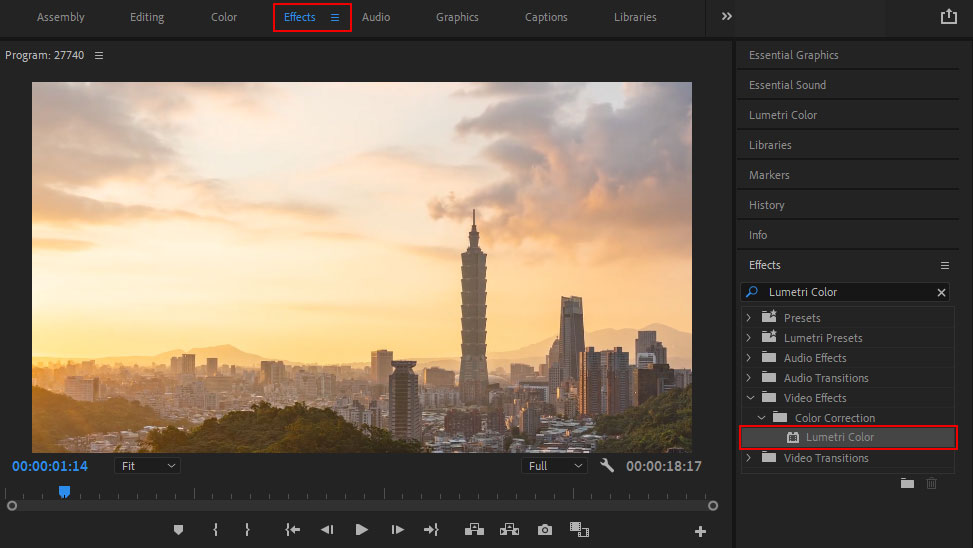
Head to the effects tab and choose Lumetri Color.
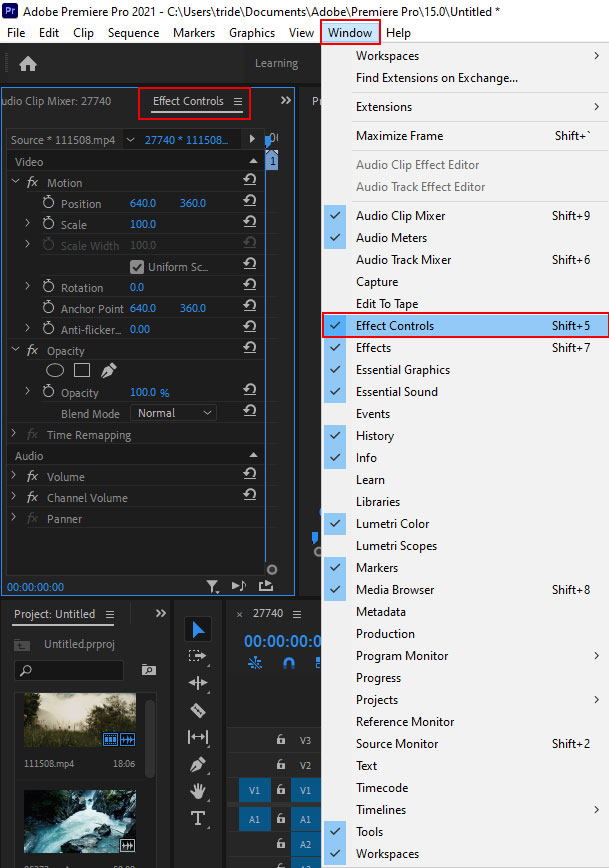
Once the Adobe Premiere vignette effect is applied, open the Effects Controls Panel. There you will see different settings that you can alter.
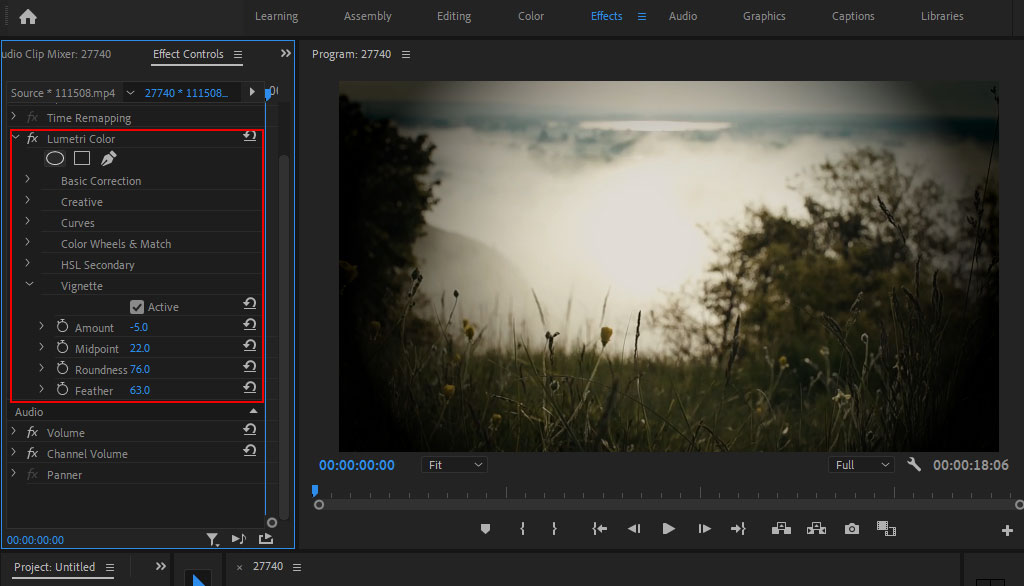
You can customize Amount, Midpoint, Roundness, and Feather. Get creative with these settings to achieve the best result for your video. Since there are no preset values, you can try different values.
Note: It is advisable to start with the Feather slider. Drag it to the zero point. Then, you can proceed with customizing other parameters.
If you are pressed for time but want to get a Premiere Pro vignette effect flat out, you should address clip editing experts.
Another way to darken parts of a photo is to create a mask around a subject. Everything that is located within the selected area will be intact when you apply the Brightness & Contrast effect. This approach is also very straightforward but it will seem limiting to those users, who want to experiment with colors.

Click Effects in the toolbar to access the Effects Workspace. Look for Brightness & Contrast, drag and drop it into your video.

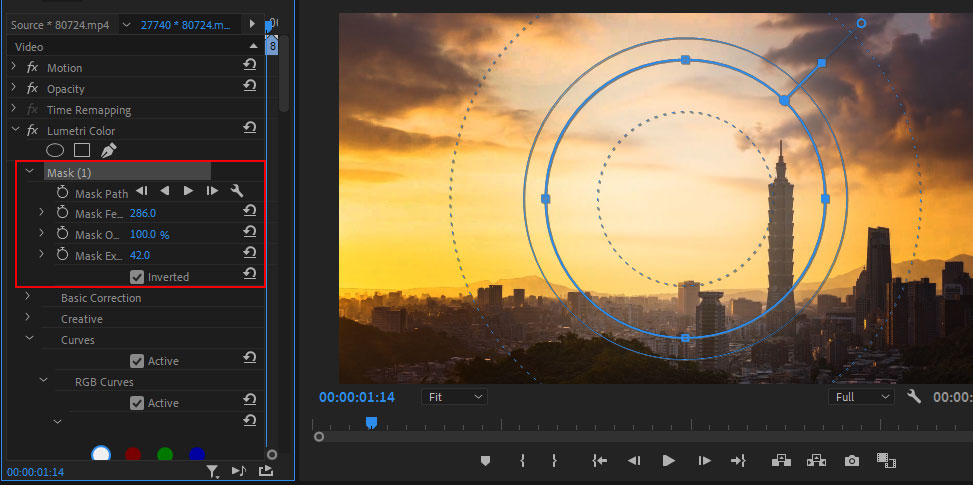
While in the Effects Controls panel, reduce the Brightness value and create an Ellipse Mask. It is located under the Brightness & Contrast parameters.
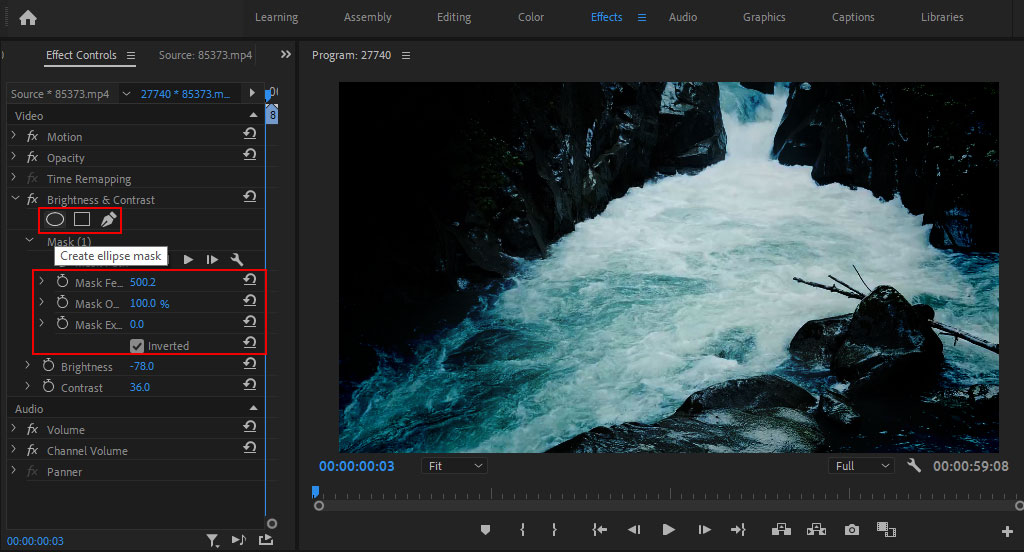
There will appear an elliptical mask in the preview window. To resize it, you simply need to drag one of the handles. Once you are satisfied with the result, click on the Inverted checkbox and the effect will be applied to photo fragments outside the mask. Apply new Brightness and Contrast settings. By using the Mask Extension, you can make smaller or larger the area impacted by the effect. The Mask Feather setting is necessary for smoothing the vignette edges.
Open your previous project or Start a new one.
Choose Effects > Lumetri Color.

Open the window with curves and make your clip darker.
Head to the Effects Controls panel and create an Ellipse Mask.
To relocate your mask or change its shape, drag the handles in the Program Monitor.
Go back to the Lumetri Control Panel to adjust other parameters. You may need to check out some Premiere Pro tips if you want to create other professional effects. For example, you can learn how to use different Curves charts to tweak brightness and hue values.
If you want to simplify the process of adding an Adobe Premiere vignette effect, you can use top-notch templates. They are pre-made files that require minimum customizations for a polished look. Look through the collection and choose a suitable template for your video project.
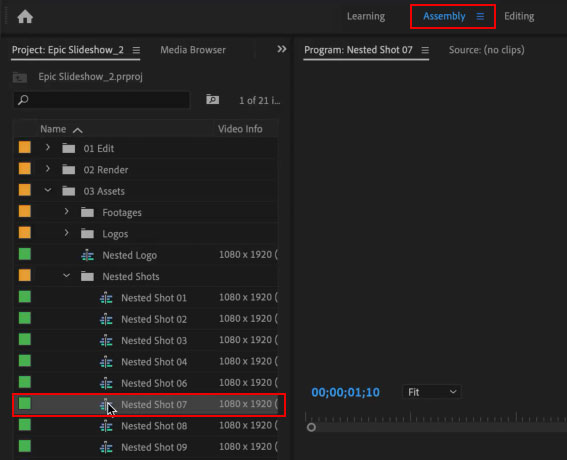
Head to the Assembly tab, open and select templates.
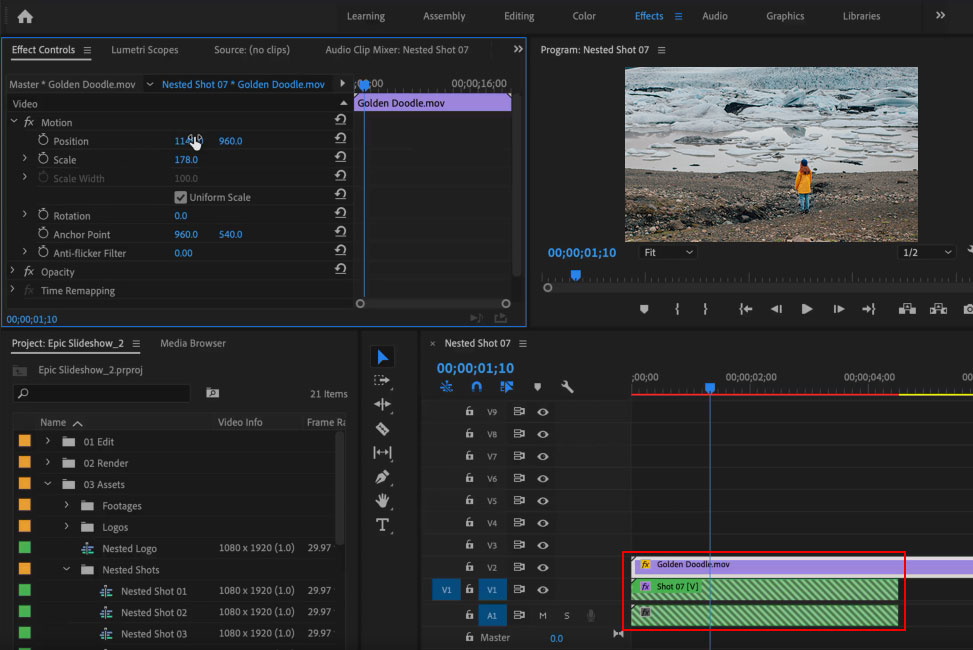
Upload a template and add your footage. Edit the position of a clip.
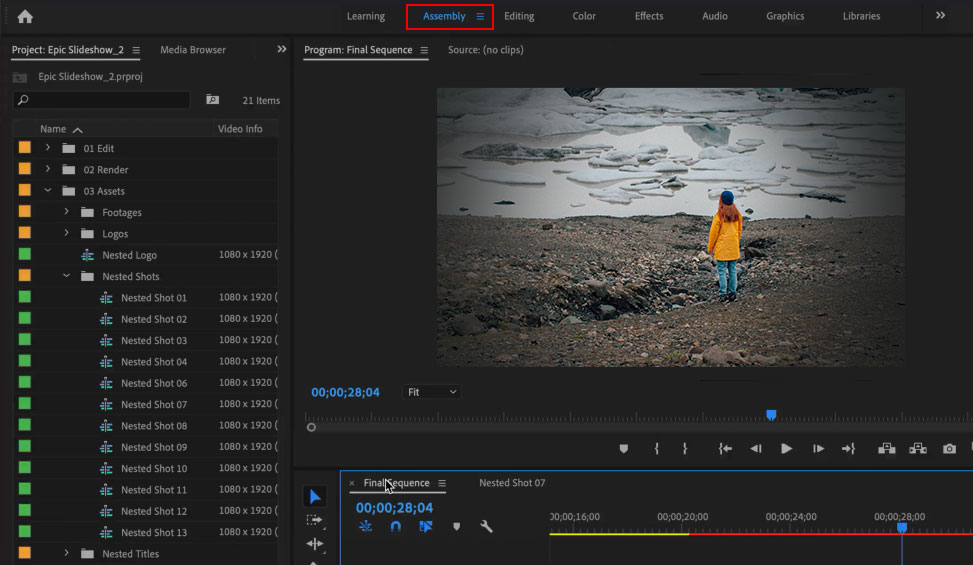
Return to the Assembly Tab and evaluate the effect.

Open a project you want to continue working on or create a new one.
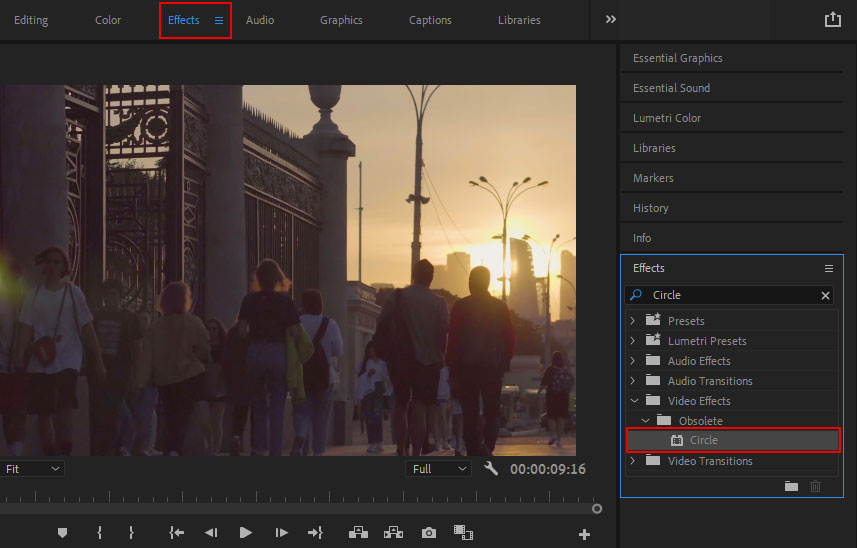
Click Effects in the toolbar to open the Effects Workspace. Open the Effects panel, choose Circle, and drop it into your clip. Select the Circle parameters.
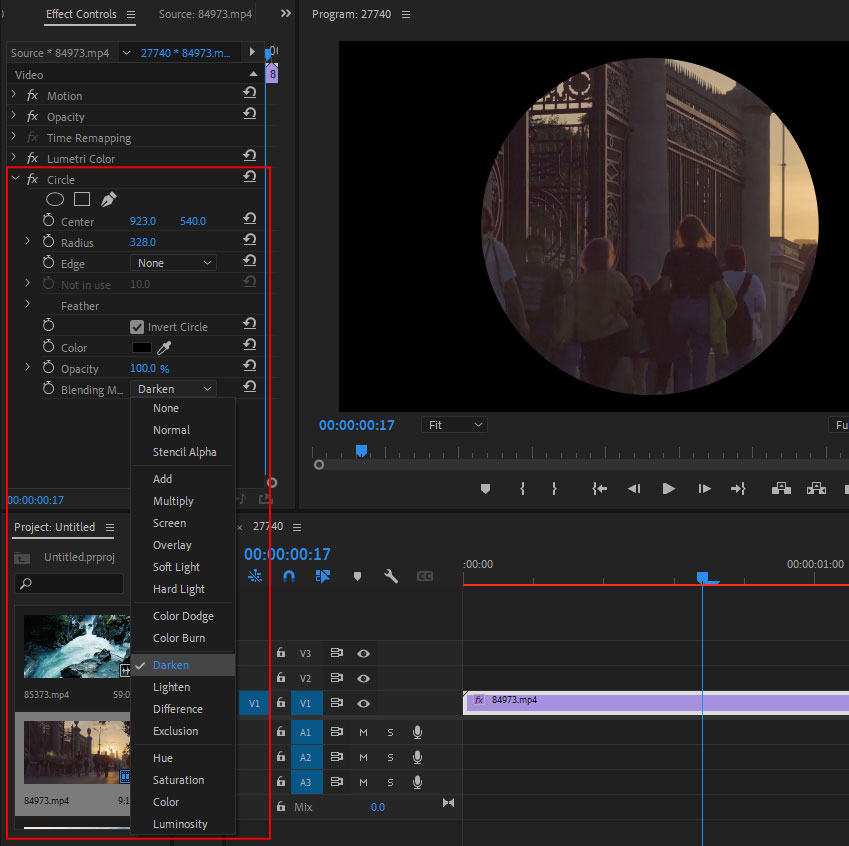
Enable the Darken blending mode and choose black in the Color field. Check Invert Circle.
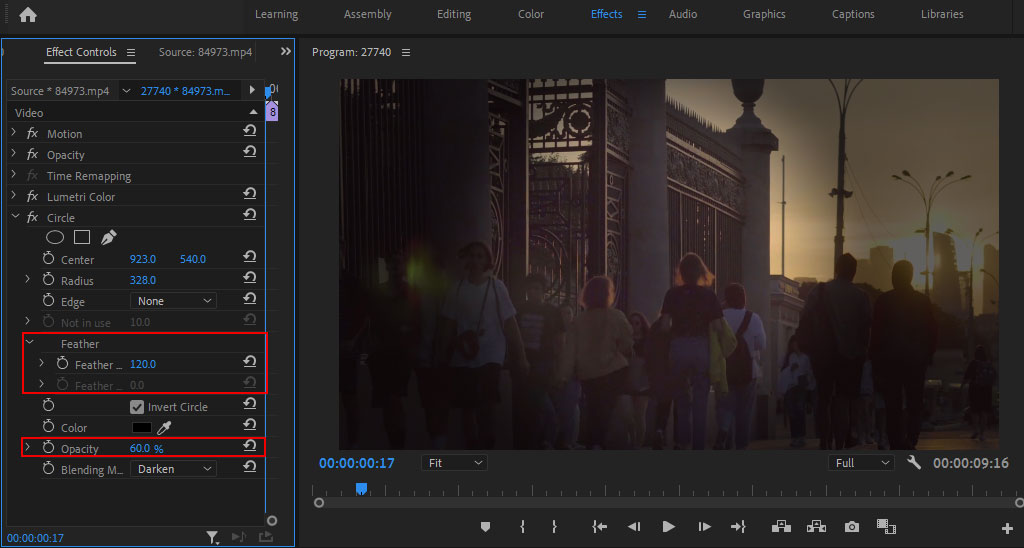
Go to the Feather menu and choose the Feather Outer Edge option. It is aimed at changing the edges of a vignette. You can make them as soft as you want. Using the Radius setting, you can define the size of your vignette. The Center option is indispensable for selecting the on-screen location of the effect, especially if you use the Circle tool.
You can experiment with different color and blend modes till you achieve the desired outcome.

Hope you’ve found the needed information in this detailed Adobe Premiere Pro tutorial. Now you know how to create a vignette in Adobe Premiere Pro, following several different methods. However, you can cope with the task even quicker, using these stylish LUTs. They are suitable for different types of videos and can be applied even for total novices. The collection of LUT is extensive – there are filters to changing contrast and saturation, making shadows deeper, highlighting subjects, and more.
You should check out whether it complies with declared tech specs. The minimum OS requirements are:
You can learn more details on the developer’s official website.
Yes, it does. You can use the program and enjoy clear visuals both on Mac and Windows computers with a Retina display.
Surely. It works flawlessly with a huge variety of workstations and capture cards, as well as third-party hardware, so you can create an editing system in accordance with your needs. Besides, you can choose constituents based on your financial capabilities.
If you have a free CC membership, you can download a trial version of Premiere Pro and other apps in Creative Cloud. By upgrading to the All Apps plan, you will be able to take advantage of all premium features. The Premiere Pro plan costs $20.99/mo. Creative Cloud All Apps 100GB is priced at $54.99/mo.