Timecodes are an important part of any video since they significantly simplify the process of working in video editors, which is why it’s vital to know how to add timecode in Premiere Pro if you’re relying on this tool for handling your post-processing needs. Premiere Pro provides several methods for dealing with timecodes. Follow this simple tutorial to learn how you can quickly add timecodes to your video clip.
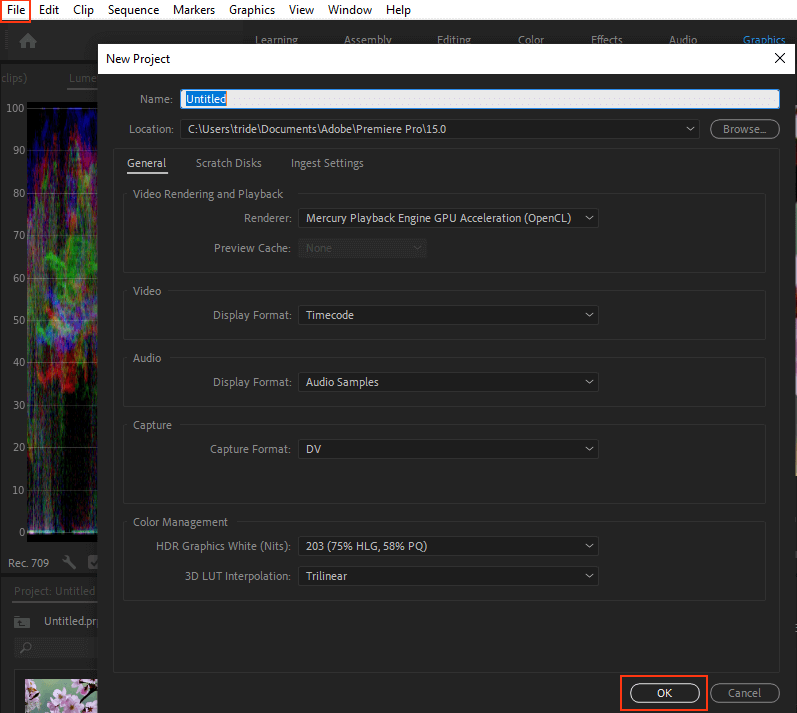
Launch Adobe Premiere Pro and open the video that you want to edit. The required parameters can be found in the Export Settings dialog box.
To complete this step, you merely have to click on File > Export > Media, and then click on New Project. Type in its title to ensure the file won’t get misplaced and can be easily accessed in the future. Additionally, you can employ Premiere Pro keyboard shortcuts like Ctrl + M (or Cmd + M for Mac) to perform the same tasks.
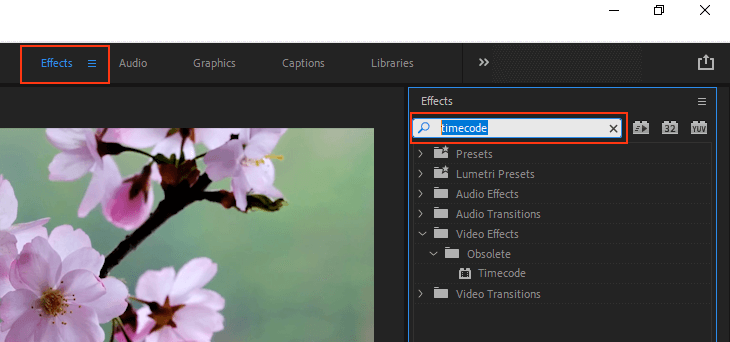
Go to the Effects menu, which is located on the far left. This section offers an array of cool options that you can use to enhance your video. The included effects range from pro-grade LUTs to different overlays, custom images, and timecodes.
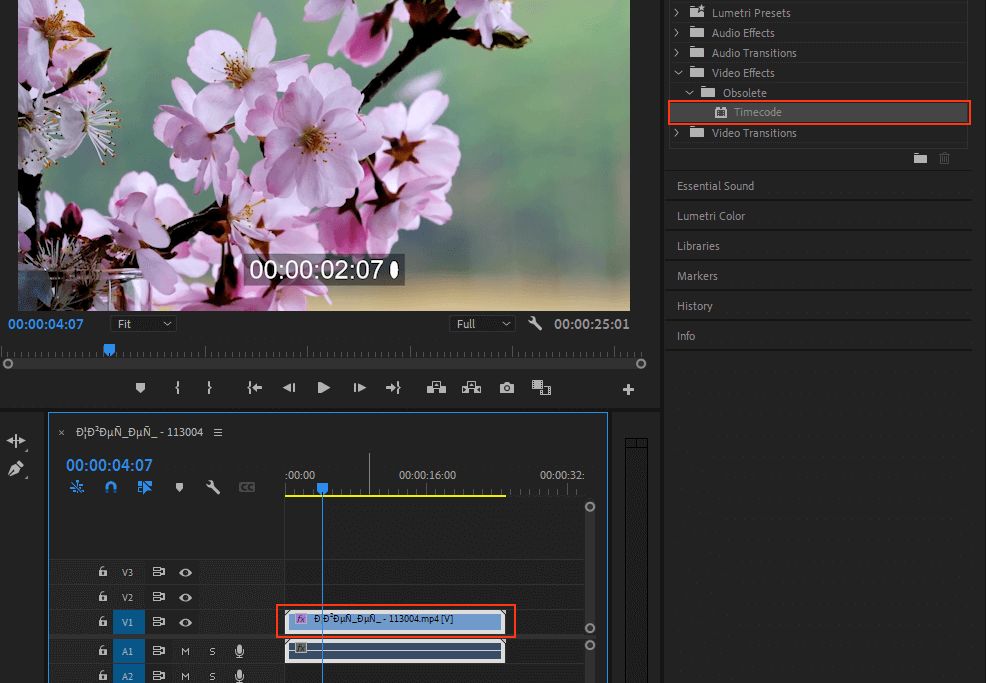
Drag the desired effect onto the video. Even though Premiere Pro is marketed as software that is designed for professional use, its drag-and-drop controls make it extremely easy to pick up and master, even if you’re a complete beginner when it comes to video post-production.
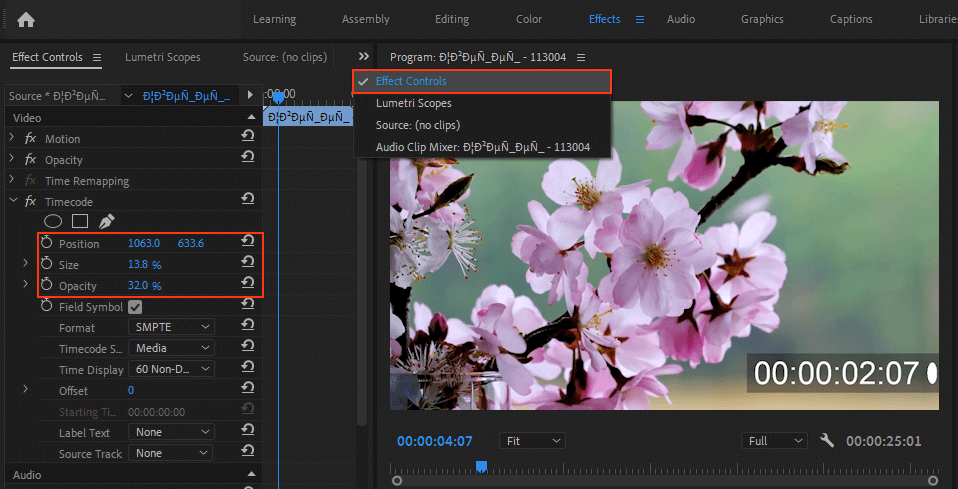
At this stage of this Adobe Premiere Pro tutorial, you have to tweak the parameters of the video. Customize the Position, Scale, and Opacity of the background element. Getting these settings right is particularly relevant if the added overlay will serve as a watermark. Additionally, this menu lets you generate a personalized Premiere Pro timecode that shows frames instead of time.
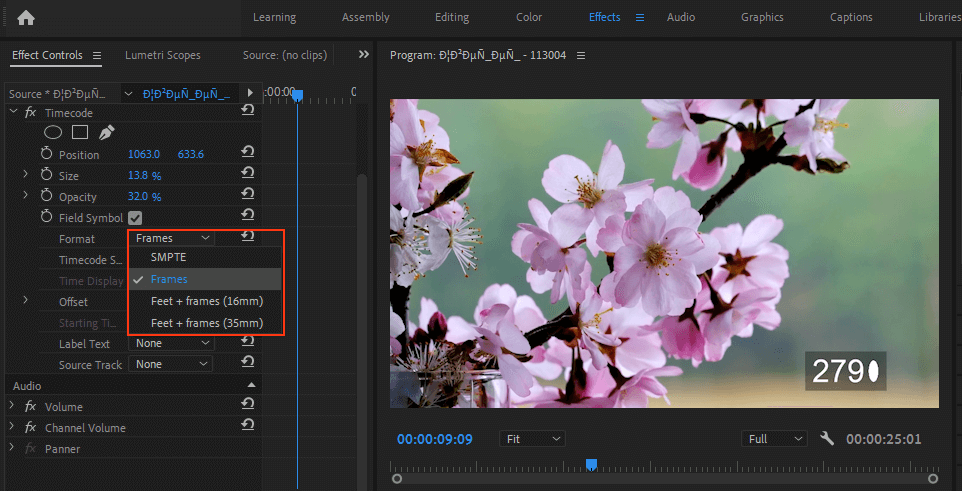
When working with timecode, you’ll also be able to alter the look of the timecode itself by using the Frames drop-down menu.
The software lets you choose how the frame count will be displayed by picking either the Frames or Feet + Frames option. It allows you to decide whether the count should begin at 0 or 1. Alternatively, you can convert it from the source timecode. Should a frame of a 30fps clip have a source timecode of 00:00:20:00, the Timecode Conversion feature will set the frame number to 600 since Premiere Pro will convert a 20-second 30fps video to 600 frames.

If you’re a beginner editor and you have to not only learn how to put timecode in Premiere but also want to enhance the look of your clip, then you can easily accomplish that goal by applying these premade LUTs. You can use this bundle to adjust basic parameters like colors, lighting, textures, and contrast as well as add creative effects that will make your video look more eye-catching.
Timecodes serve multiple important purposes. You can use them to quickly move to the desired frame without taking any additional actions. They are also helpful for producers who constantly have to take relevant notes. Timecodes can also be used for syncing all cameras and sound recorders on set since they allow you to complete the entire process in just a few clicks. Timecodes represent a metadata-grade type of synchronization since it doesn’t impact the actual recording process of the filming gear.
Yes, you can download the free trial edition that is available on Adobe’s official website. You’ll have 7 days to test the software’s full functionality but once the one-week period ends, you’ll need to purchase a subscription to continue using Premiere Pro.
Adobe Premiere Pro is a professional solution for non-linear clips post-processing that allows editing video files in any format. With its help, you can import videos, crop and change the sequence of different frames, add animations and video effects as well as adjust the audio.
Why is Premiere Pro so popular among professional editors?
Most people are displeased with the software’s subscription plan model. Additionally, Premiere Pro can be a bit intimidating to beginner users and requires a powerful PC to run smoothly. If you don’t plan to do video editing on a professional level, consider using one of the Adobe Premiere Pro alternatives instead.