If you’re wondering how to make a photo glamorous and you are new to editing, you can either address professionals or master simple retouching techniques to streamline your workflow. In this article, I have briefly outlined the most helpful methods that will help you facilitate this task.
You will learn how to retouch your photos like a pro and find out how to make the models in your pics look like Kendall Jenner’s lookalikes. Using these methods, you can make your photos worthy of Vogue and Harper’s Bazaar covers. To edit your images, it’s better to use such software as Photoshop and Lightroom. All the ways described below were tested in these programs.

When editing your photos, you need to ensure that the colors in the frame are perfectly balanced. You can tweak colors and make them more saturated as well as add highlights to the specific areas of your photos. Colors should look rich and lively on any screen.
I prefer using the HSL tool in Photoshop and Lightroom to change hues, saturation, and luminance and make the colors pop. It allows me to select any of the 8 colors and adjust their parameters.
To select any color that you want to edit, you can use a color picker. When using HSL tools, you can select the shades that suit your needs best. Some photographers use color grading in Lightroom to make some colors lighter and darken others.
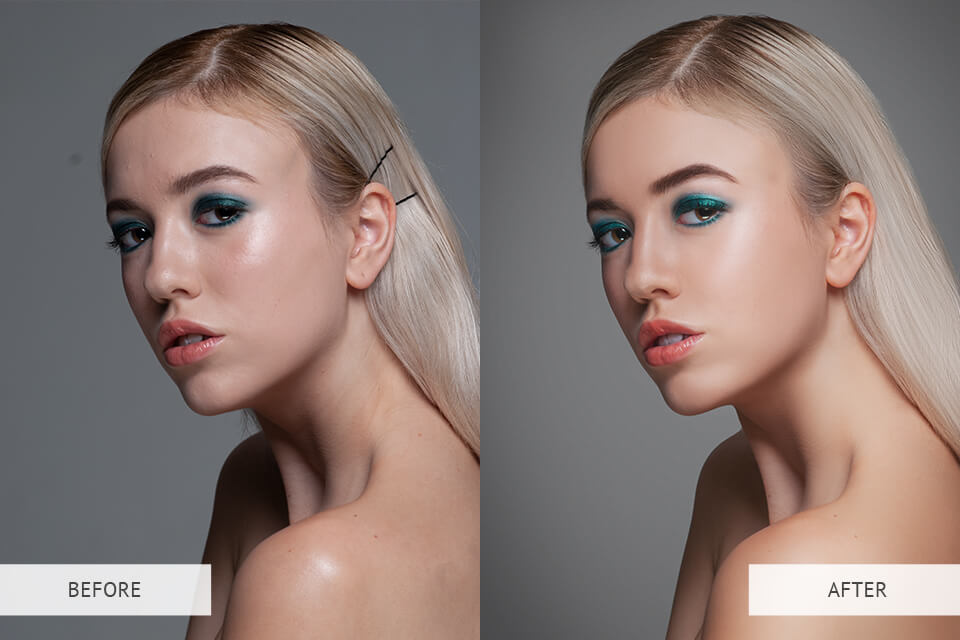
Professional photographers know everything about the importance of removing distracting details before applying glamour photo effects. Take a look at your portrait and pay attention to the details that instantly grab your attention. If there are any wires, streetlights, or unwanted people in the background, make sure to learn how to remove objects in Photoshop.
The easiest way to make the background less cluttered is to use the clone stamp and healing brush available in Photoshop. The latter is suitable for deleting small details and basic retouching while the former is used for more advanced tasks.
Some photographers prefer to remove objects in Lightroom. While this software doesn’t have many advanced tools, it’s perfectly suitable for basic editing.
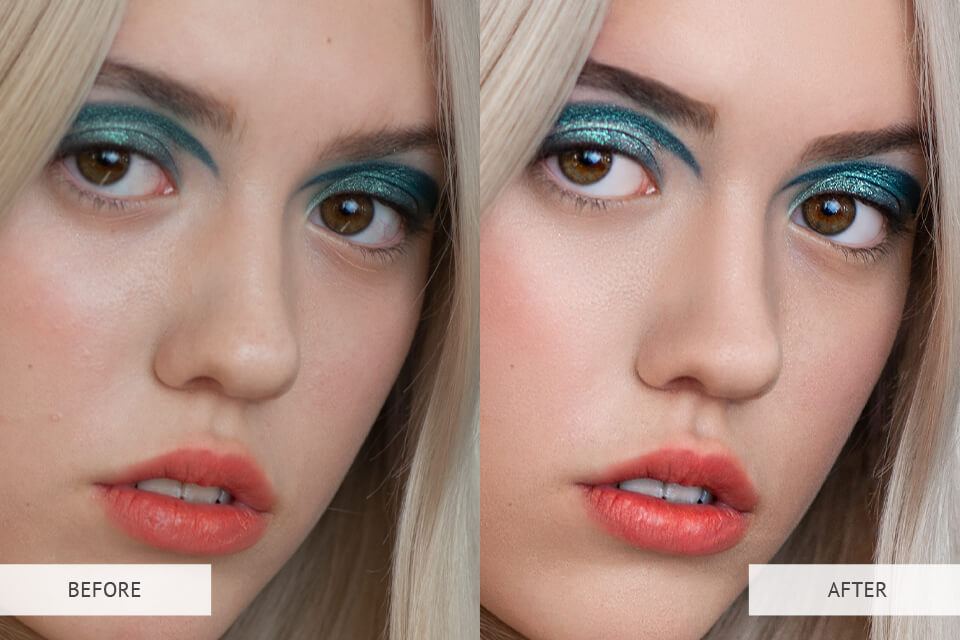
When a viewer takes a look at a portrait photo, their attention instantly gets driven to the eyes of the model. If you want to ensure that they are in focus, adjust sharpness using dedicated tools available in Photoshop and Lightroom. You can use the Sharpen tool with little to no experience.
While removing any sign of blur around the eyes will help you quickly enhance your image, you can perform other adjustments as well. For instance, you can whiten the eyes and adjust contrast using a set of special Brushes and Adjustment Layers.
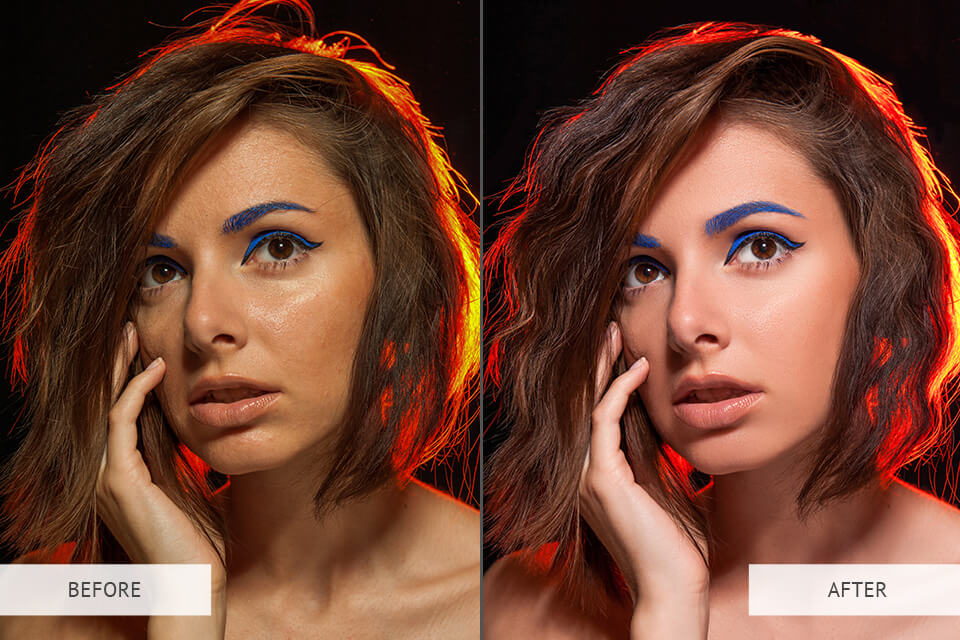
Flyaway hair might make your model look less perfect, which is why it’s highly advisable to remove stray hairs in Photoshop using the Spot Healing Brush and Healing Brush.
You can drag any of these brushes over flyaway hair to remove unwanted details without affecting the texture. Set hardness to 100% and roundness to 20-30%. Besides, you can experiment with different angles and change the tilt of the brush. To speed up your workflow, make the print size a bit larger than the part of your image that requires enhancement. Make sure not to use these brushes too much, otherwise, your model will look unnatural.
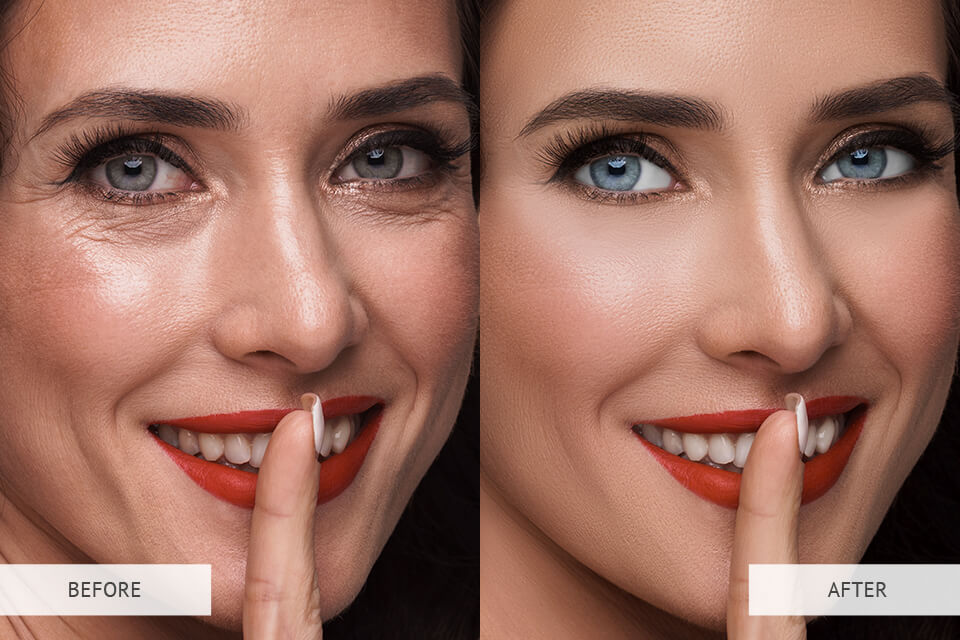
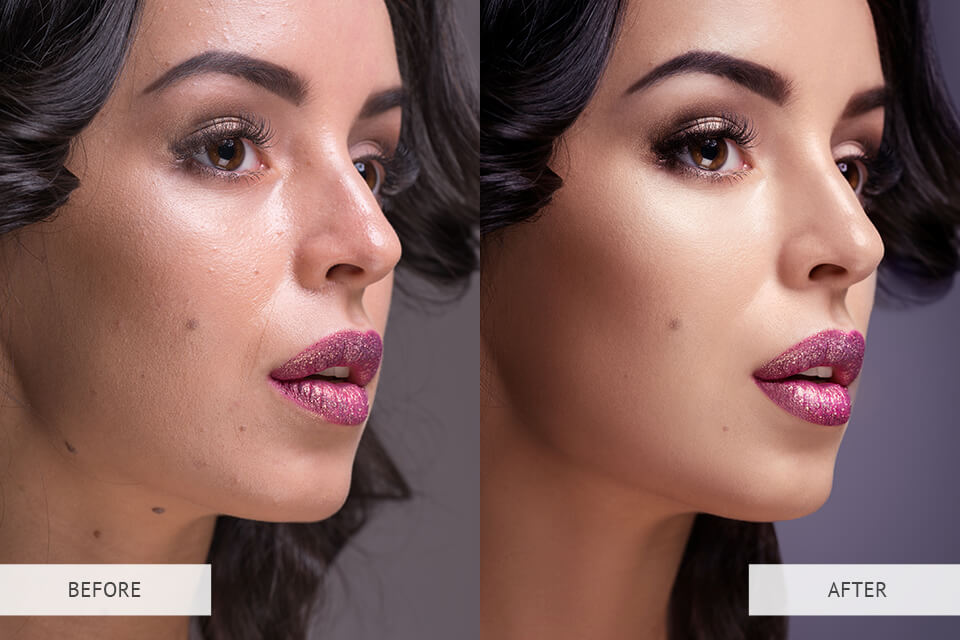
Whether you prefer using artificial light sources or working outdoors where there is plenty of sunlight, you might notice some skin defects in your photos. If you are wondering how to make photo glamorous, you need to find out how to smooth skin in Photoshop. It will help you remove distracting wrinkles from various areas of the face to give your model a fresh and young look.
To do it, you can employ the Patch Tool to seamlessly remove imperfections without making the skin texture look overly edited. For instance, to remove wrinkles from any area of the body, drag the brush over the wrinkle to select it. Then, fill out this part of your image with pixels from the adjacent area for a more natural result. Compare your photos to professional retouching examples to instantly recognize your mistakes.

Frequency separation is often used by professionals who have years of experience behind their backs. It enables them to separate the colors and textures for making more precise and accurate adjustments. High frequencies store the info about hair, skin texture, wrinkles, and various skin defects.
Low frequencies save the info about the dark areas, hues, and colors. When you separate these frequencies, you can edit them without affecting the rest of the elements. For instance, you can remove skin imperfections without making colors look bleaker or add highlights without giving the skin an artificial look, which is one of the most frequent retouching mistakes.
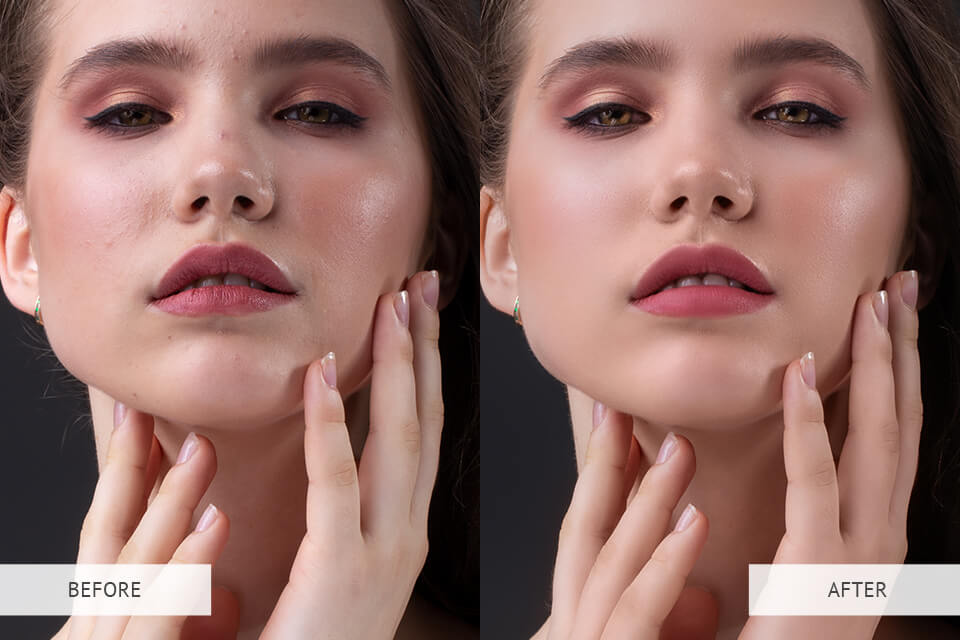
If you take a closer look at skin retouching tips compiled by professionals, you will see that most of them include the recommendation to use the dodge and burn method. It’s frequently used by post production services. With its help, you can make some areas of your photo overexposed or underexposed. You can find these tools in Photoshop. One of them allows you to make some parts of your photo lighter, while the other darkens them.
These tools are also suitable for adjusting the values of highlights, shadows, and mid-tones. They are perfect for making selective adjustments that don’t affect the whole image. Using these brushes, you can indicate the parts of your photo that you want to enhance.
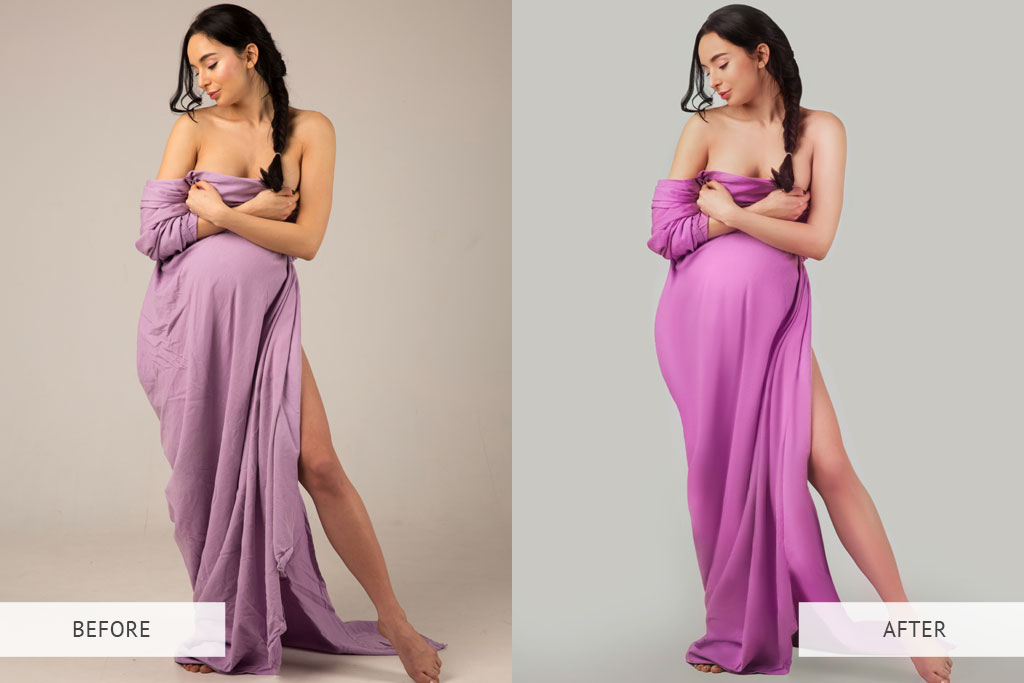
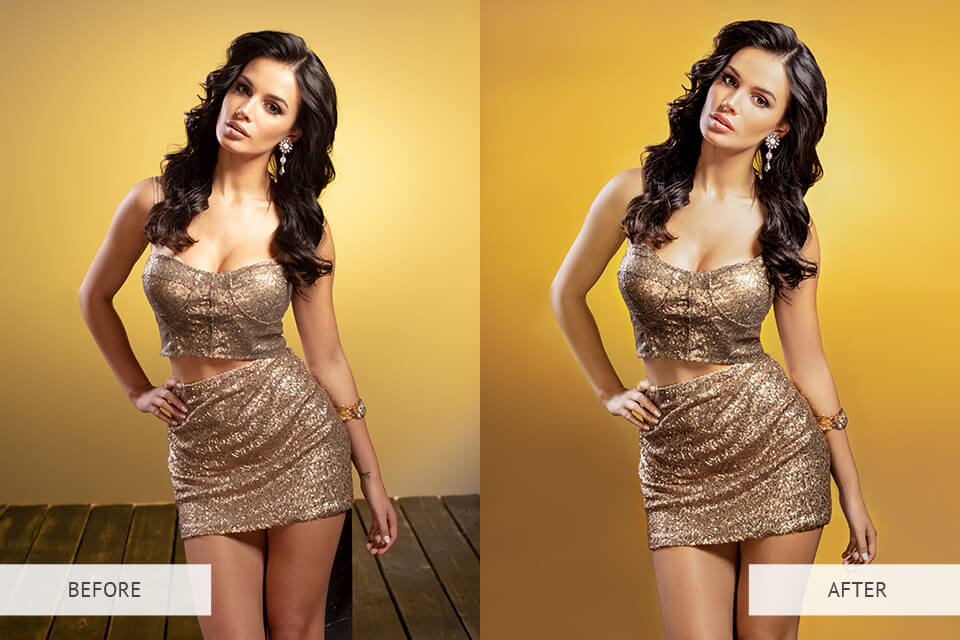
When taking photos of fashionable clothes, it might be impossible to achieve an immaculate look since wrinkles are likely to spoil the overall impression. Even if your model wears professional makeup, her clothes might look wrinkled in photos. It will make your advertising photos less visually appealing. For those who are interested in taking fashion photos, removing clothing wrinkles in Photoshop might become a life-saver. It will allow you to get a professionally edited image that can be used in marketing campaigns.
By editing clothing in your photos, you can emphasize the main subject and give your photos a more polished feel. Start by finding the areas that require enhancement and carefully edit them to give them a smooth and clean look.
When enhancing your photos, pay attention to the texture. You might make it look unnatural by editing it too much. Make accurate adjustments to preserve all the important details. To make clothes look well-ironed in Photoshop, use the Spot Healing Brush Tool, select the Content-Aware option, and set the editing mode to Replace. Use a brush with soft edges to smoothen out wrinkles and make clothes look perfect and stylish.
While it’s important to give the skin a healthy look, remove stray hair, and make the eyes brighter, dry and wet lips might spoil the overall look of your portrait. To make your photos more immaculate, you can use the Clone Stamp Tool to enhance the lips.
When editing my photos and adding glamour photo effects, I usually make the lips redder to emphasize them. I create a new layer for adjusting the saturation and increase the red value, but you can experiment with making the red color richer or bleaker, depending on your needs. For better accuracy, I create a layer mask and put it over the lips.
When you look at photoshopped celebrities before and after photos you’ll see that retouchers also use special filters that allow them to make the lips fuller in a few clicks. You can also use a dedicated lip filler app or the Liquify Tool. The latter option will also come in handy for those who need to make the shape of the lips more symmetric.
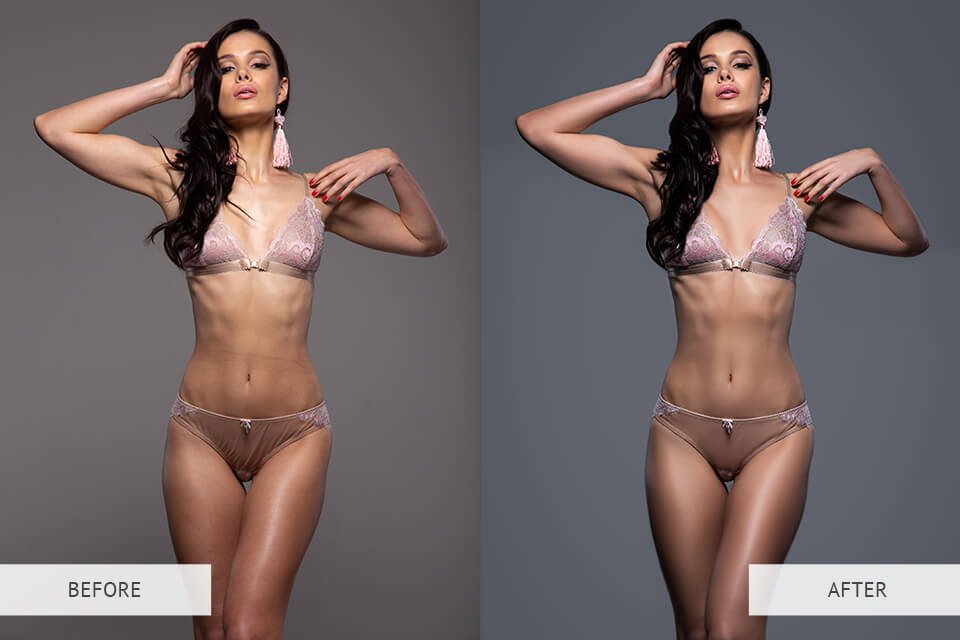
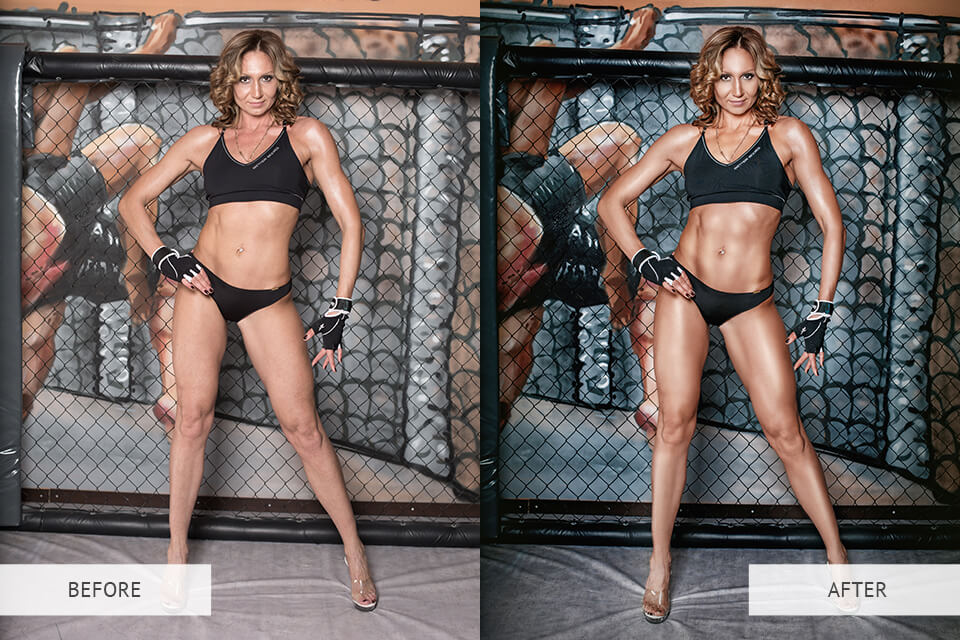
While you can find many poorly edited photos with wrong body proportions and lighting, you can avoid common mistakes and use dedicated tools and apps to modify the proportions of your model without making your images look unnatural. First, retouch the body using the Dodge and Burn, as well as Frequency Separation techniques. Then, use body slimming apps, to apply a variety of effects to your pics to make your models look fit. In some cases, you might also need to edit the curves of the body or remove double chin in Photoshop using the Liquify Tool.
To do it, you may need to employ the Forward Warp Tool in the top left part of the window. With it, you can carefully edit specific areas of your photo without distorting the rest of the image. The Puppet Warp Tool will help you select the areas that you want to leave unchanged. It’s also important to contour the body, and make the skin smooth and shiny.
Since photo shooting may last several hours, the makeup of your model might get distorted. When editing your photos, you can fix any issues with the makeup. Even if the makeup was done by a professional, colors might become bleak and washed up because of the sun or hot weather. Makeup retouch is important for those who need to advertise cosmetics and beauty products. Take a look at your photo and think about which areas require improvement. For instance, you may need to emphasize cheekbones or make the eyeshadow more noticeable. If you want to turn your photo into a glamour shot, you can perform dodging and burning as well as use the clone stamp. To apply digital makeup, you can use the tools available in Photoshop and Lightroom.
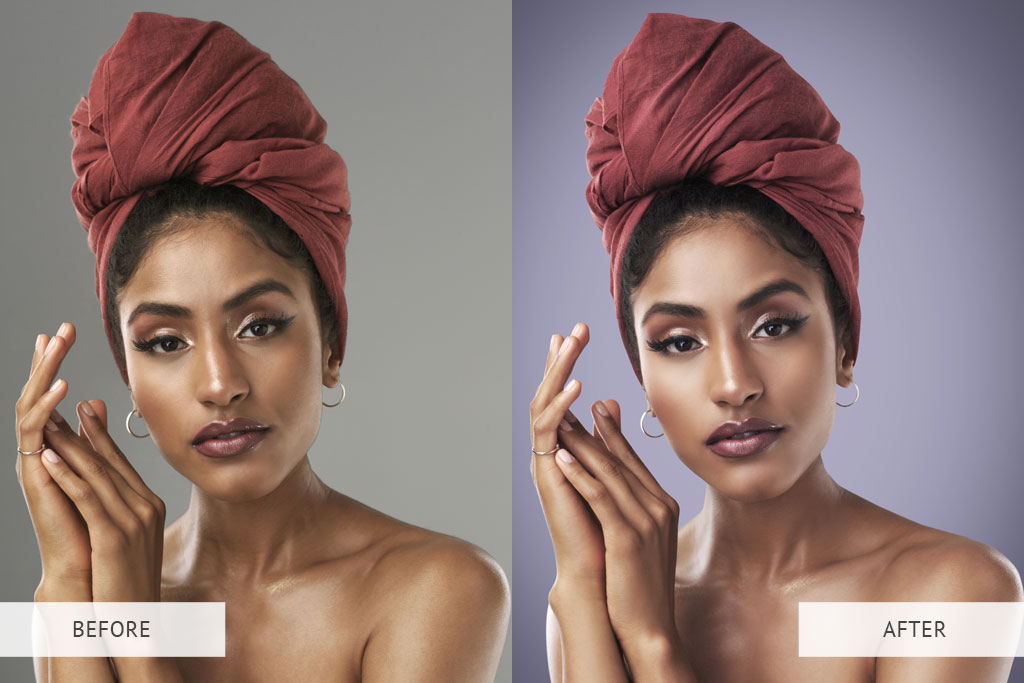
In some cases, you might notice that the overall atmosphere in your photo could benefit from the background replacement. To ensure that all the elements of your composition look well-balanced, you may need to change background color in Photoshop or replace the background with a new one. If you are interested in travel photography, you can experiment with adding different backgrounds to your photos to make it look as if you visited various locations across the globe.
To replace the background, find a suitable image and select the subject in the photo using the Quick Selection tool. Use the Select Subject option and then click on Select And Mask to get access to all the tools that you might need to use to perform this task.
If you don’t have advanced editing experience but want to give a unique feel to your portraits without mastering complex retouching techniques, use a variety of Photoshop portrait tools from this bundle. This collection includes a wide choice of effects that will help you speed up your editing workflow and get professional results more quickly.
Here, you will find over 200 actions that will come in handy when you need to add a twinkle to the eyes, make lips look fuller, transform the atmosphere in your photos, and emphasize specific areas. To customize these actions, you can adjust brightness and other settings.