
Aquarium photography can be very diverse and unique. You can take beautiful close-ups of exotic fish or pictures of performing dolphins or sea lions. However, if you try to do it, you will see that it might be quite difficult.
It’s not easy to take perfect aquarium photographs as it they can turn out too dark or blurred. This is why you need to use the right equipment and how to work with reflections, light, and other important nuances.
Before starting your photoshoot, make sure to clean the glass of the aquarium because it might be quite dirty. Use a piece of fabric and a cleaner for this. This way, you can remove fingerprints and dust from the glass.
If the glass is damaged, it can ruin your image when you take close-up photos. If an animal is farther from you, scratches and cracks won’t be visible in a picture.
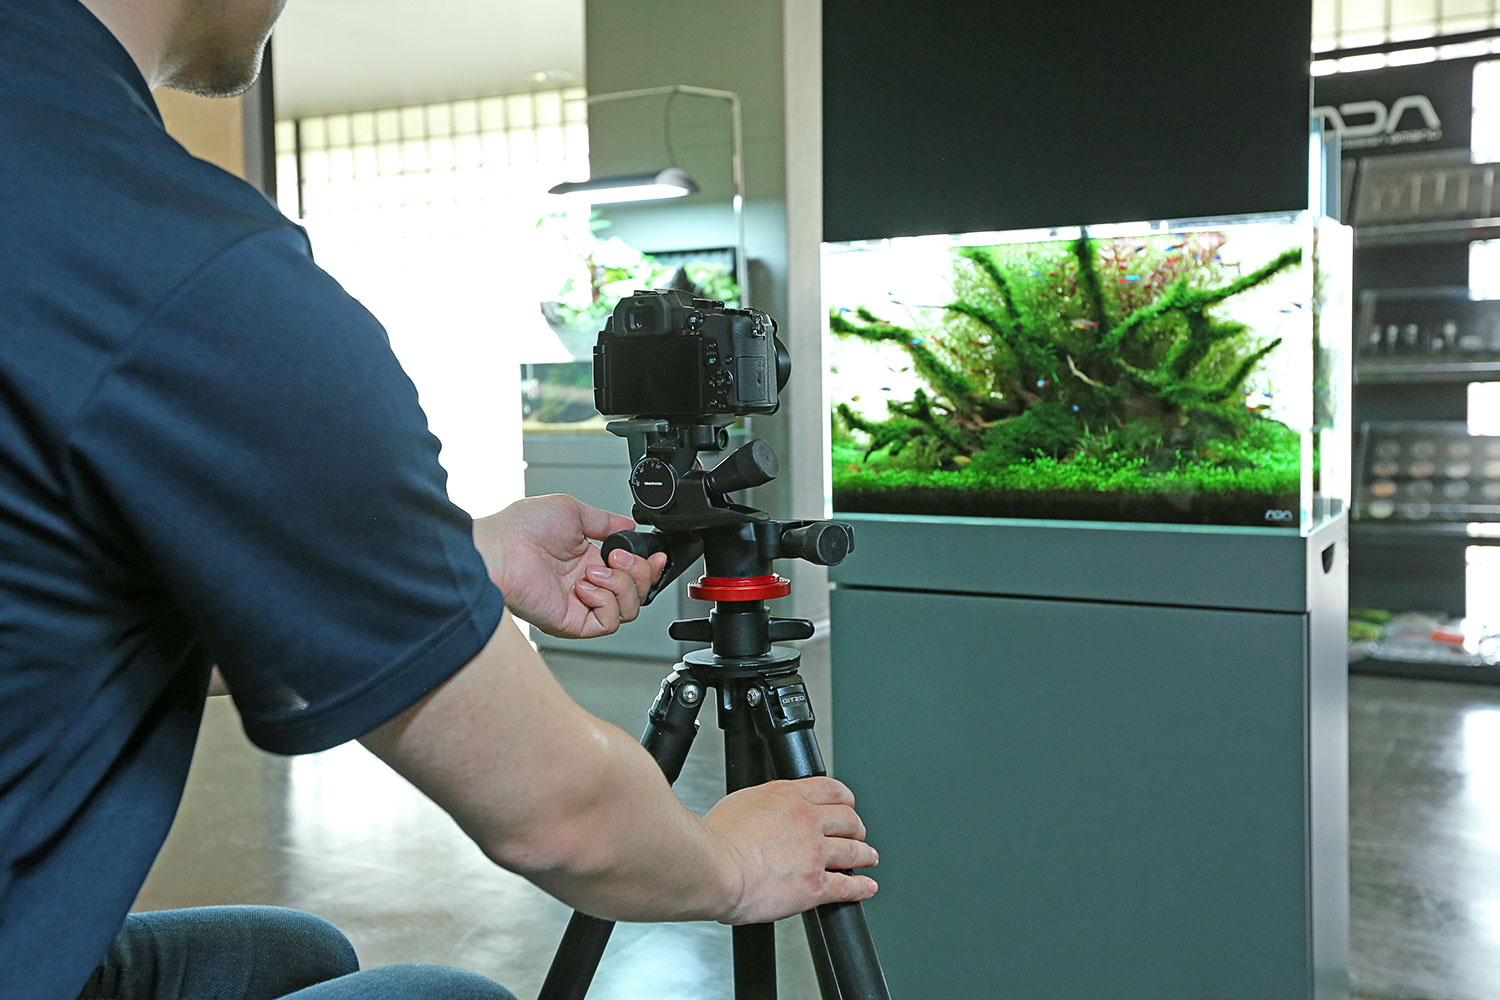
Even if you’re standing still, small vibrations from your hands might cause a camera blur. To prevent it, use a lightweight tripod. Setting up a tripod takes some extra time but you won’t regret it. It’s better to use an adjustable tripod with a ball head, however, such models are more expensive.
Also, consider purchasing a DSLR gimbal as not every aquarium allows bringing a tripod in.
When working on aquarium photography, it’s difficult to deal with reflections on the glass. If it’s possible, turn off the light and other sources of light. Also, don’t wear bright, reflective clothing. Try to choose such an angle and position for the camera so that excess light doesn’t hit the lens.
If you want to get your aquarium images edited quickly and at an affordable price, address a photo retouching service that will fix all the issues.
If you work with several optical environments, such as air, glass, and water, the light rays will be refracted at different angles at the edges between these environments. This can lead to distortion and optical defects.
To avoid it, make sure you keep the lens perpendicular to the glass and an animal in the aquarium. If you don’t do it, you won’t be able to get a sharp image because it will have light refraction and chromatic aberration (a blue-violet aura) issues.

Make sure to select the right camera mode to take great aquarium photographs. With Shutter Priority mode, you can get clear pictures of fast-moving fish. However, you will need to adjust shutter speed and ISO manually. The camera will adjust the aperture automatically.
By setting the shutter speed manually, you can get clear pictures without any sign of blur caused by movement. Also, don’t set it faster than you need. If it’s too fast, your photos will be dark or underexposed.
If you are confident in your abilities, you can select the Manual Mode but you might have some exposure problems that can be fixed during the image post production stage.
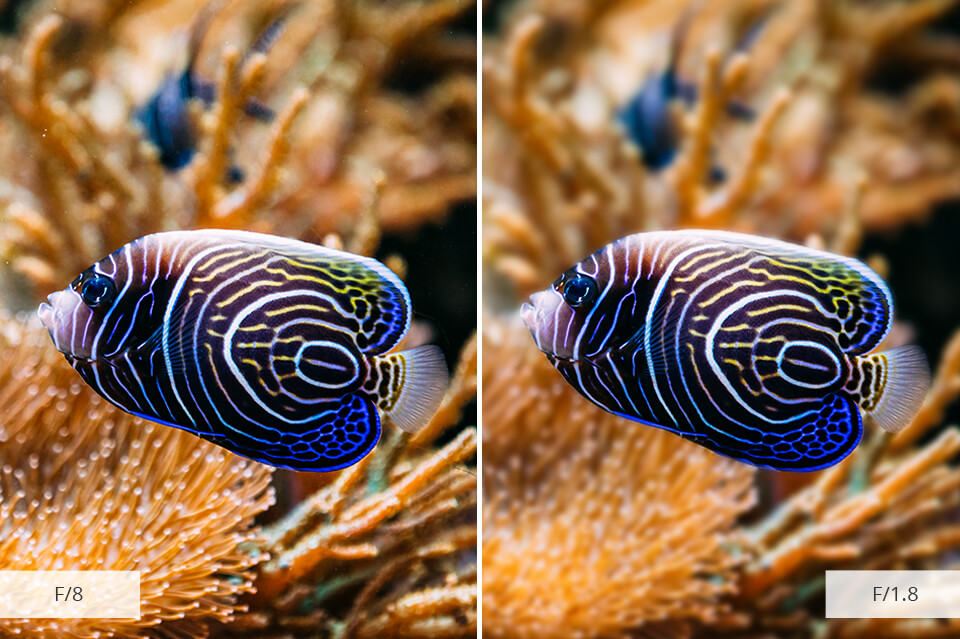
Aperture and depth of field determine the amount of light. Even if you have a high ISO and long exposure, your aperture should be f/2.8 - f/5.6, which means a low depth of field. This compensates for the lack of light and solves exposure problems.
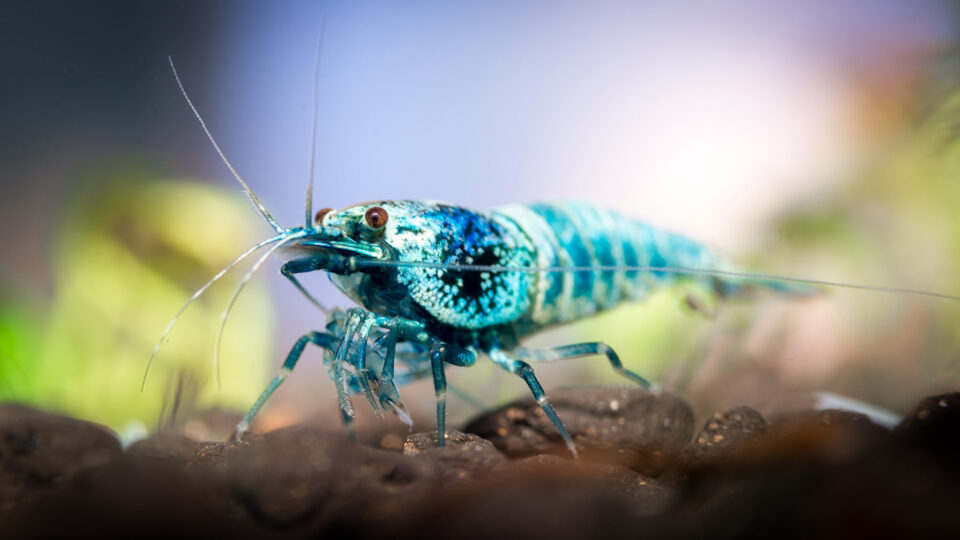
If you’re taking photos of slow animals, like snails, you need a longer exposure. This allows setting the aperture to f/8 and getting more depth of field. It’s essential for macro photography.
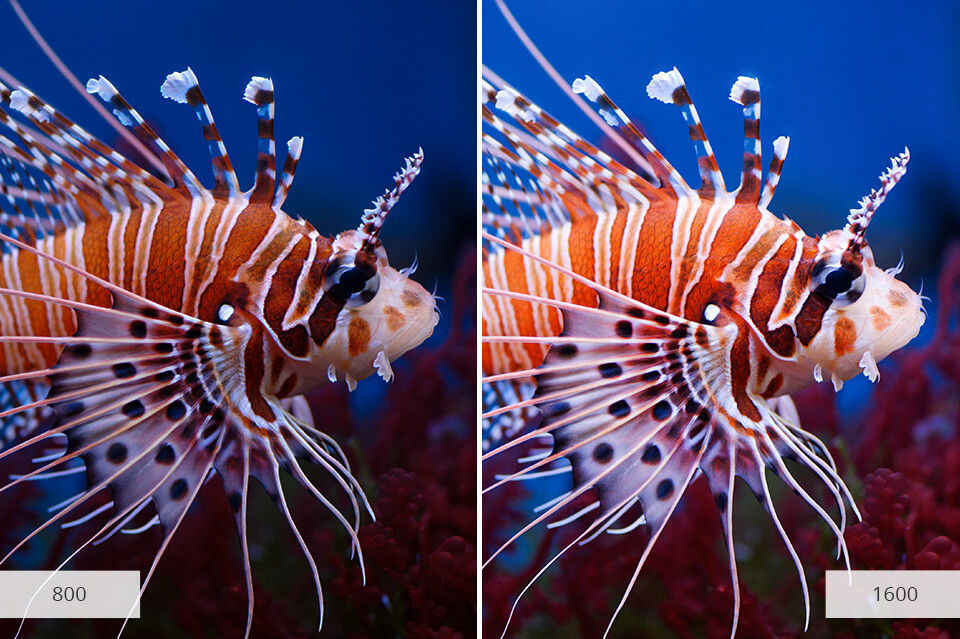
In rooms with poor lighting, your ISO has to be a minimum of 800 or even 1600 if it’s possible for your camera. You can use noise reduction software if you need to remove the noise caused by high ISO.
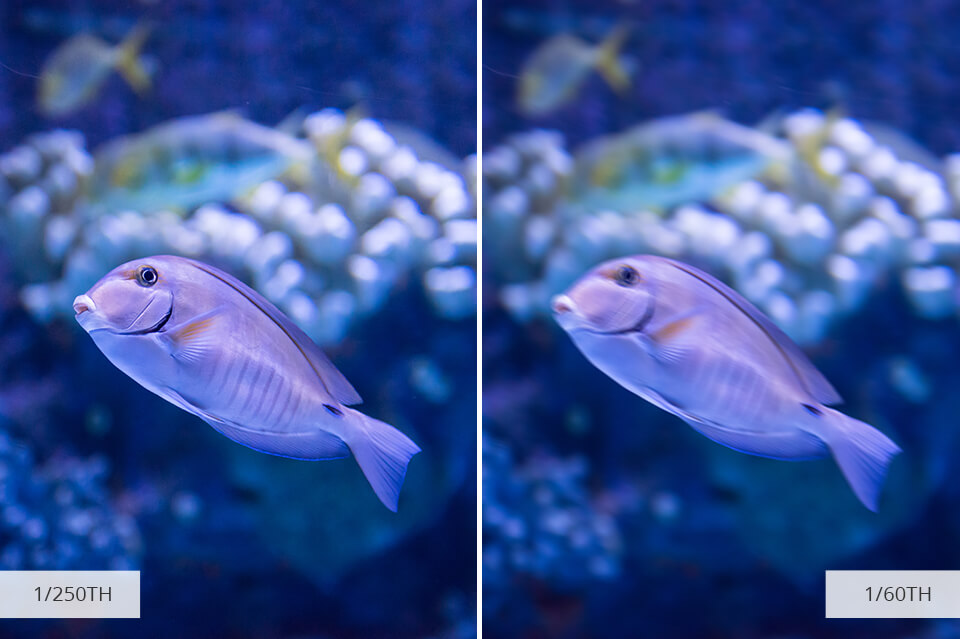
When working with aquarium photography, it’s crucial to set a high shutter speed to prevent blur caused by moving objects. However, there should be enough time for the light to get to the camera. In this way, your photos won’t be too dark.
Set the ISO high, the aperture wide, and the shutter speed to 1/125th or faster (1/60th -1/250th) to achieve a perfect exposure. You can also try other shutter speeds to see which option is the best for your needs.

If you shoot reefs and work in saltwater aquariums, white balance is going to be an issue. You can use the auto white balance feature or adjust WB later.
If you don’t want to use auto white balance, you can use your camera’s white balance settings. You can adjust the white balance manually if you have a good reference point or object.
Since aquariums have poor light conditions, you will need to adjust shadows and increase exposure. If you take photos in JPG format, it might be impossible to save your photo, but the RAW format allows you to do a lot of manipulations with light.
The best thing about RAW format is that it keeps all the image data unchanged and uncompressed so it’s easier to work with such files.
Fish are scared of flash. Also, if you use it, the natural light of the aquarium will be distorted. It creates a large reflection on the glass, which can damage your aquarium pic.
Remember to switch your flash off before entering the aquarium so that you won’t have to deal with glare.
If you have a good camera, it doesn’t mean you will get nice results, however, it’s difficult to take high-quality photos with a basic camera. The Nikon 1 line is perfect for aquarium photography because it has amazing autofocus and the best continuous shooting settings if you compare it to other mirror-less cameras. Also, it’s much better than the entry level DSLR.
The newer models of Nikon cameras have great focus and exposure balance, which makes them perfect for photographing fish and other inhabitants of the aquarium.
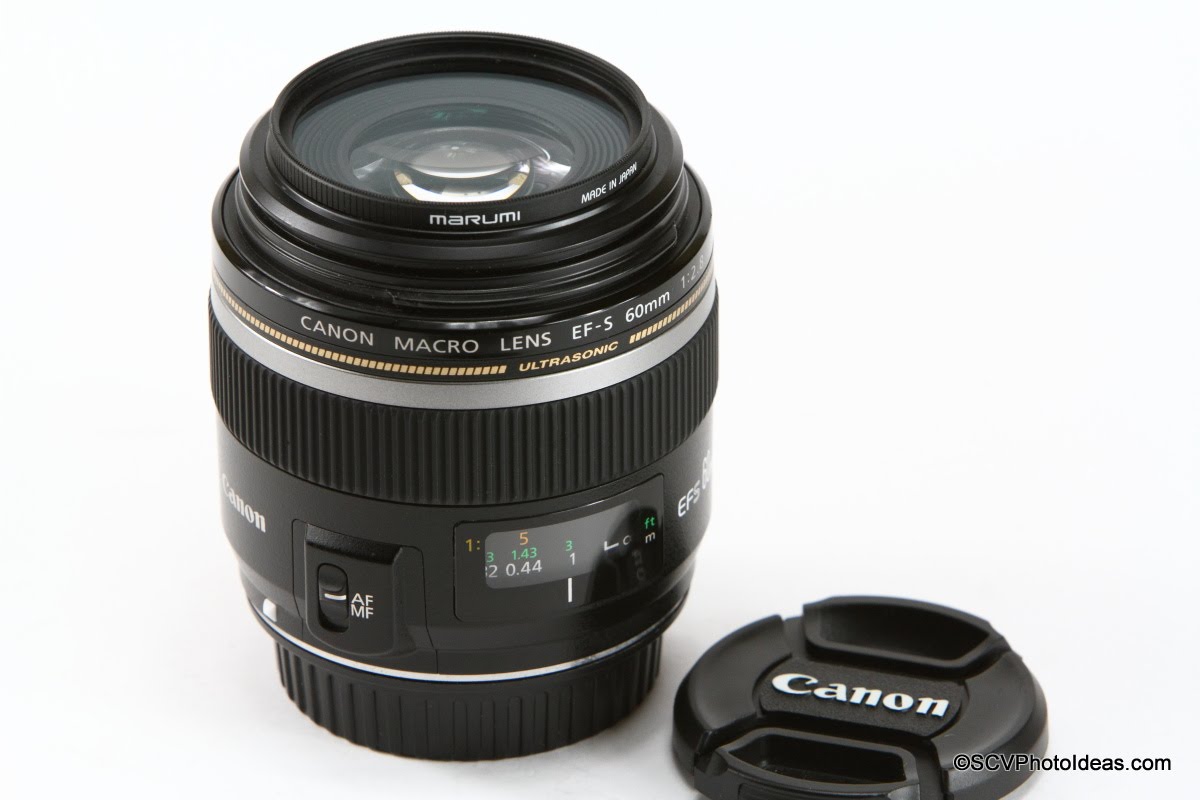
It is quite difficult to take pictures of the deeper areas of the aquarium tank. If the focusing distance is small, you need have to use macro lenses. This way, you can focus a lens when an animal swims close by. However, such lenses are rather expensive for beginning photographers. Get the fastest lens you can afford (minimum f/2.8).
Also, a lens must allow you to see fish clearly. The Canon EF-S 35mm f/2.8 macro lens has an almost ideal field of view for an FX body as has a 24x36mm image sensor. You can also use the Tokina 35mm f/2.8 AT-X PRO DX Macro Lens, which is perfect for a DX body as it has a smaller 16x24mm image sensor. With a 35mm lens, you can focus approximately 2 inches from the front of the lens. Thus, it doesn’t matter how close the fish is to the other side of the aquarium, as you will be able to take clear aquarium photographs and implement the best macro photography ideas.
If you don’t want to purchase a macro lens, consider using the Macro Extension Tube. By using it with the rubber hood, you can focus on the subject that is close to your lens and avoid reflections from the glass.

A rubber lens hood is affordable camera gear that allows you to take better aquarium photographs. It’s better to use a flexible rubber hood rather than a hard-plastic tulip flower one. It will allow you to reduce glare and avoid scratching the glass.
Such devices have different sizes for various lenses. For instance, for the Nikon D3500 with a 52mm lens, you should get a 52mm lens hood. If you use a Canon camera, get a 58mm rubber lens hood. It will help you take pictures of an object that is too far from the glass for the lens to focus.
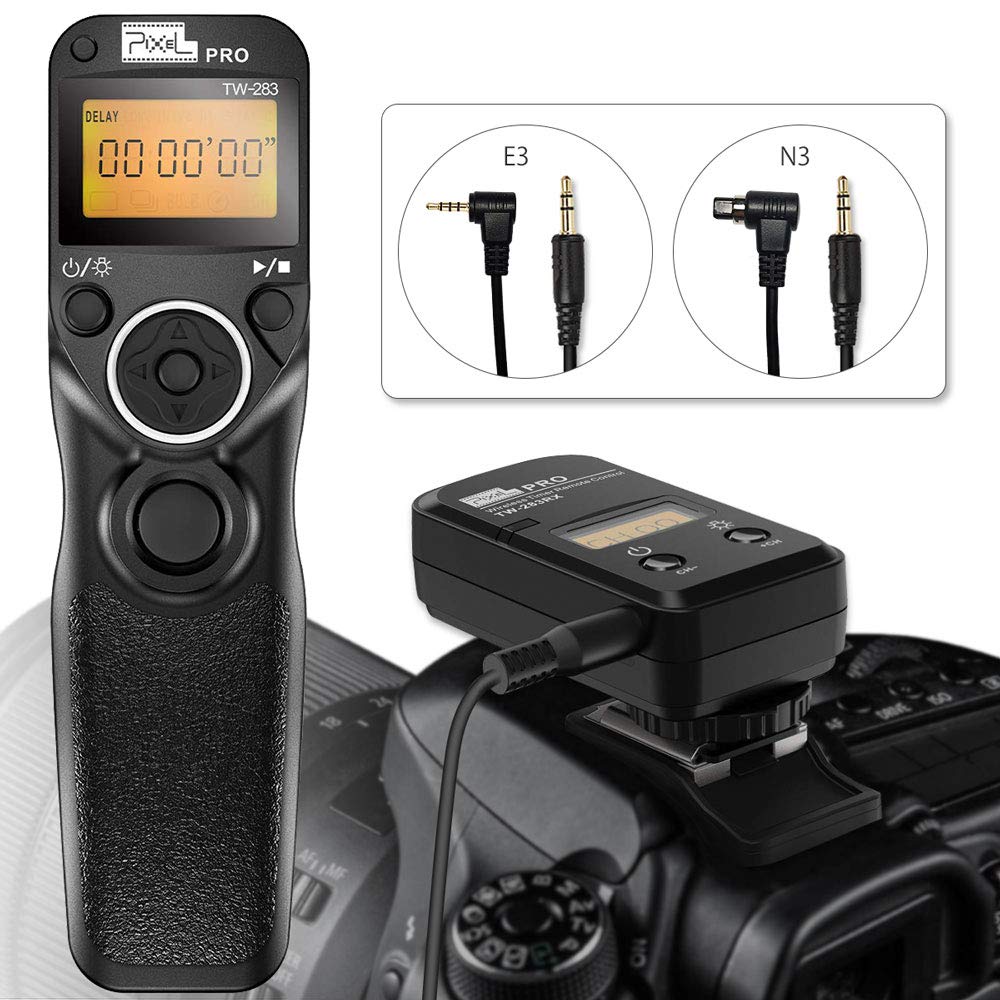
A tripod won’t be as helpful if you don’t use it with a camera remote control because your camera will shake when you press the shutter button. With the remote shutter release, you can take shots without touching your camera.

Capturing silhouettes in aquariums is quite easy. To take a perfect aquarium pic, you need to use a bright background and a dark foreground. In the Manual Mode, you can adjust the exposure as needed.
In the Auto Mode or Shutter Priority, your camera can automatically create a silhouette. You can also use exposure compensation to achieve ideal exposure.

Try taking photos from different angles for more interesting results.
If you shoot at wide angles, you will get distortions, so it’s better to take front-facing photos in aquariums. By using an eye-to-eye camera angle, you can capture the smallest details. In a large aquarium, you can also try using the low-angle position to take photos of large fish and capture their teeth and fins.
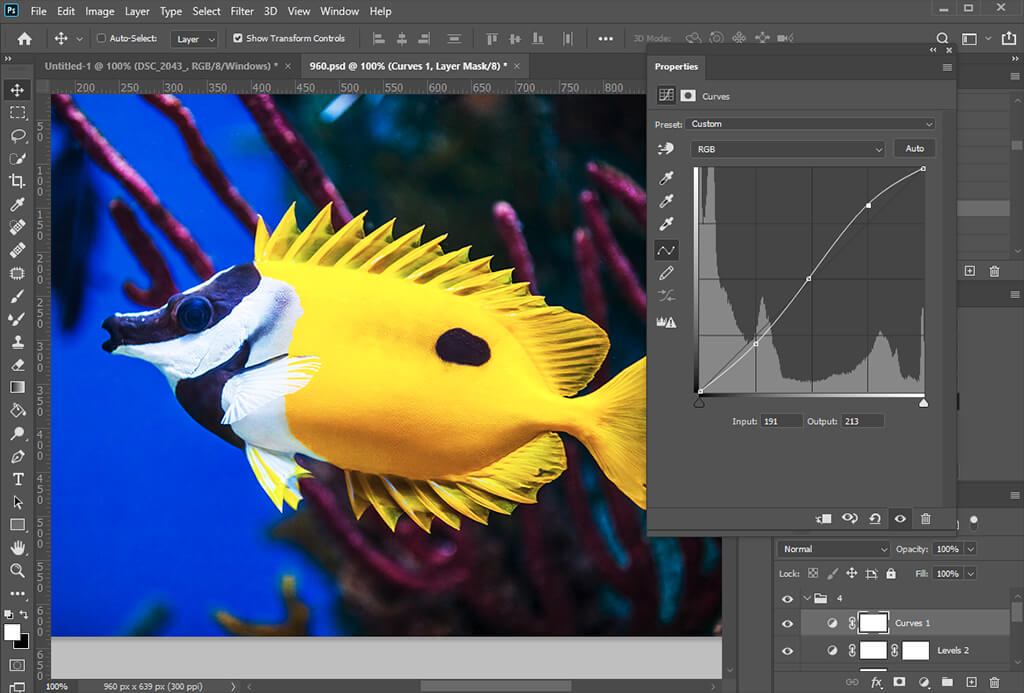
If you didn’t manage to avoid distortion caused by the lens, you need to edit your photos to make the sides of the aquarium tank parallel. Many aquarium RAW photo editors, such as Photoshop, allow you to correct distortion.
Make sure not to crop and sharpen your image too much, especially if you use high ISO settings.
To make your picture look attractive, you can enhance it with Lightroom filters. When editing your aquarium photographs, try keeping natural colors. Use the brightness/contrast slider and adjust the exposure as needed. If your image looks too blue, you can also try adjusting colors.
If you have difficulties, you can use free Lightroom tutorials or choose presets for batch processing.
If you want to save time when editing the color tones in your photos, use these Lr presets with the most universal settings to get perfect pictures.


