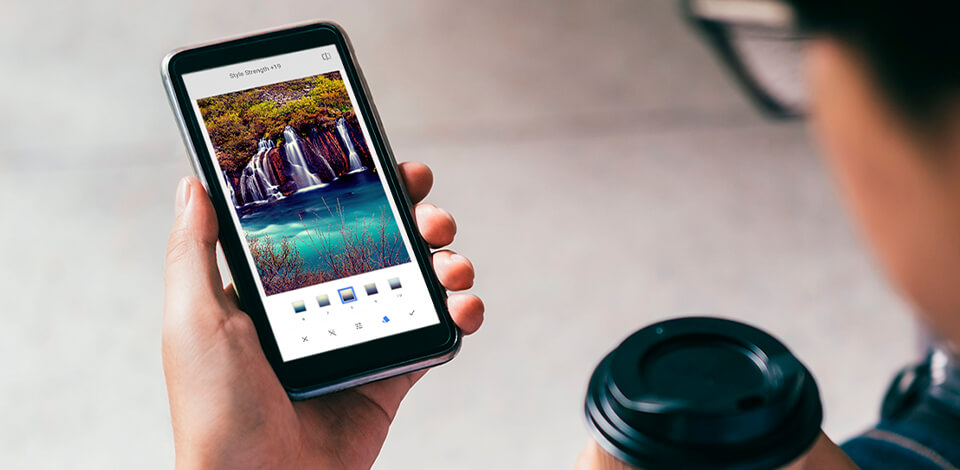
Snapseed is a convenient, free raster graphic editing app for enhancing photos on mobile devices in a few steps. If you are a complete beginner, follow these Snapseed editing tips to master this app more quickly.
To make a raw photo more aesthetically pleasing, you might need to practice a lot and use some hidden tools and features I will tell you about below.
Before learning how to use advanced techniques, you need to master the basic features of this free photo editing app. The key advantage of Snapseed is that it supports manual editing. To embellish most images, you just need to improve them a bit by adjusting their brightness, contrast, saturation, shadows and highlights.
You can redact various settings by using sliders. Make sure to learn how to perform basic manipulation tasks before applying more complex techniques.
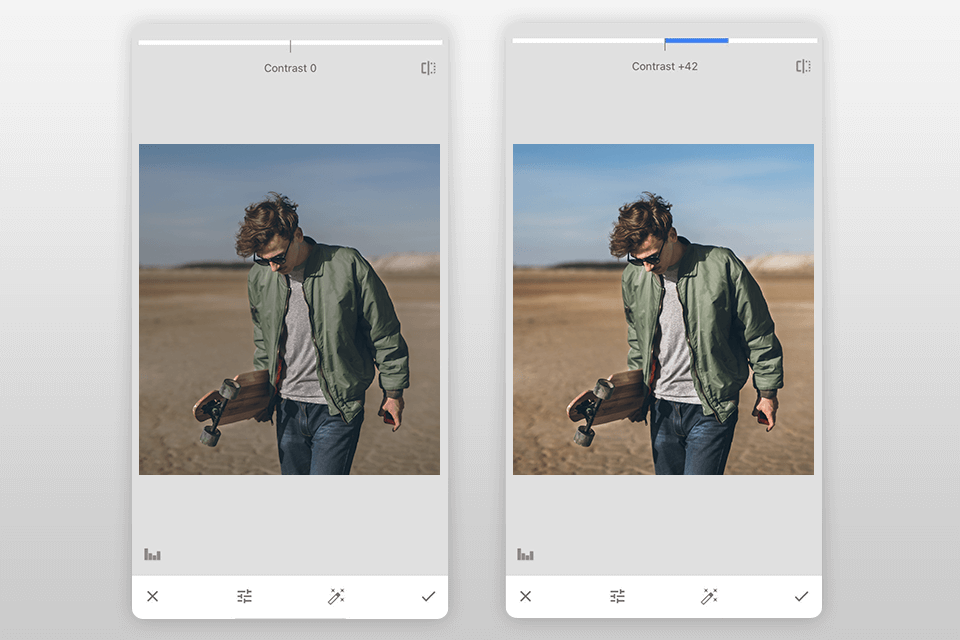
If your image is overexposed, it’s crucial to adjust its brightness. By lowering it, you can make the overexposed areas more detailed.
You can also adjust settings to make a dark image brighter. However, make sure not to overdo to avoid noise.
Contrast is the difference between the brightest and darkest parts of an image. By raising it, you can emphasize the details.

With the White Balance tool, you can embellish your photo by adding various color tints. Use them to make colors richer, get rid of unwanted tints and change the overall mood of a photo.
You can use two tools for adjusting the white balance. With the Temperature tool, you can make colors in a photo colder by adding a blue tint or make it warmer by adding an orange tint. By using the Tint tool, you can add a green or pink tint to a photo.
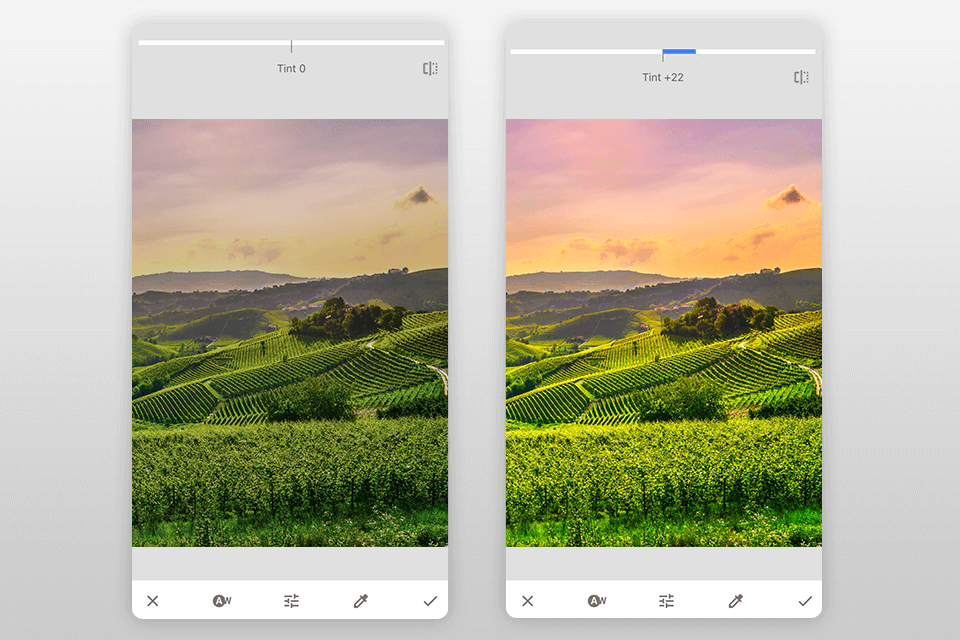
The former option is useful for adjusting warm and cold tints. The latter allows you to emphasize the green color in your photo.
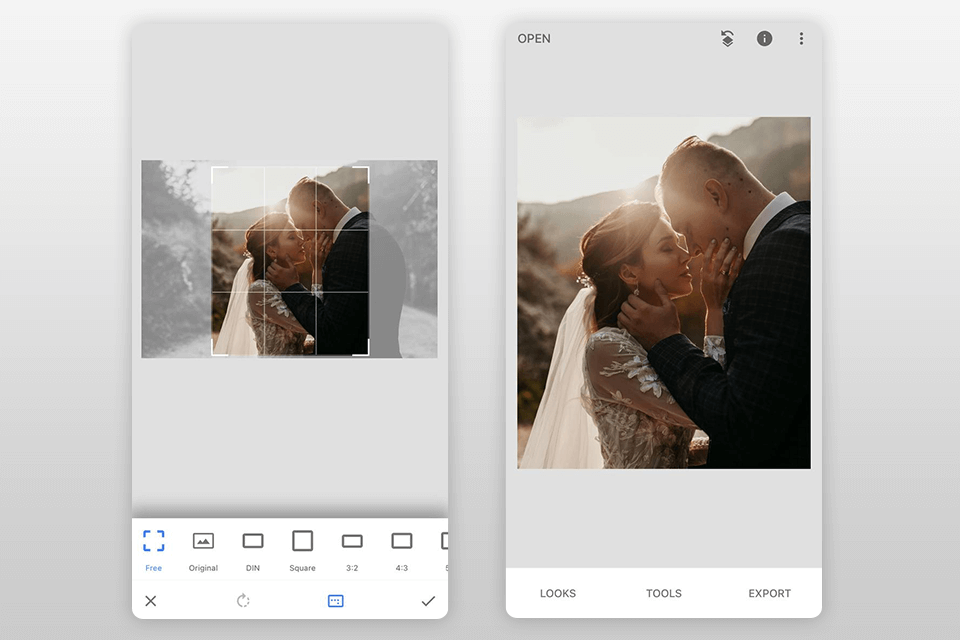
To crop the edges of a photo, use the Crop tool. This way, you can delete distracting elements or empty space in your frame. By cropping an image, you can also improve its composition and emphasize the details.
Go to the Tools menu and select Crop. Then, select an aspect ratio, for instance, the original one, the square one, 4:3, etc.
You can also set a custom aspect ratio. In this case, you will be able to select any size of your image you need.
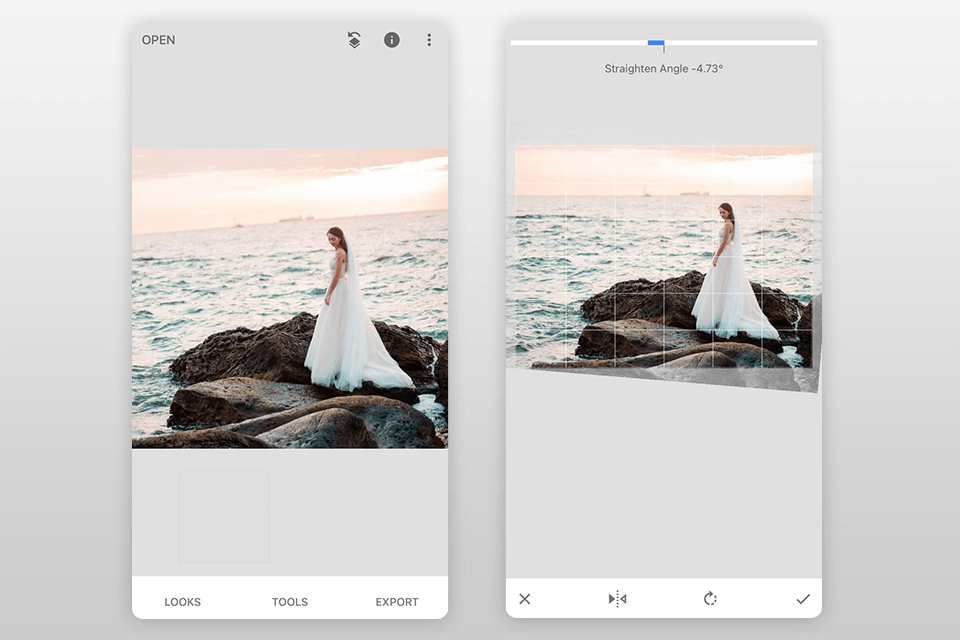
The Rotate tool in Snapseed allows you to quickly straighten your image. Find the Rotate option in the menu and tap on it. This professional Photoshop app for your smartphone will analyze your image and straighten it automatically to fix any issues with the horizon.
In some cases, Snapseed might fail to rotate a photo automatically. To do it manually, tap on the image and use the grid to straighten it.
When rotating a photo, the app will crop its edges. Make sure to avoid cropping the important details along the edges of the frame.
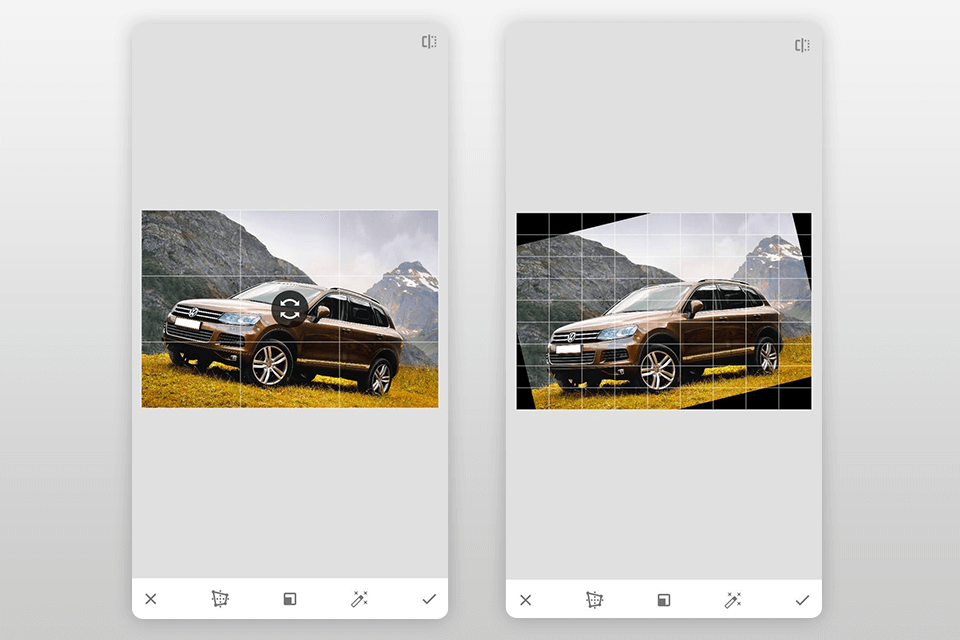
If you take a photo of an object from up close, you won’t have a lot of background to work with. In some cases, when you take a picture of the facade of a beautiful building, you might notice that it doesn’t look straight. In this case, you can use the Perspective tool to expand your background or change the perspective of an image.
You can also use this option to tilt or rotate your image. Make sure to be careful when using it, since your image might get distorted if you overdo it with editing.
Snapseed comes with a powerful Healing Tool that allows users to get rid of unnecessary objects in the frame. If there are several distracting elements in your photo, such as stones or pieces of wrapping paper lying all around, you can easily delete them. Besides, to enhance a photo of a picturesque landscape, you can even remove the figures of people in the background.
Go to the Tools menu and select the Healing brush. Enlarge the part of an image that you want to amend and tap on it.
The selected area will become red. As soon as you take your finger off the screen, the area will be filled with the adjacent pixels.
You must be extremely careful and patient when deleting unwanted objects. These Snapseed tips will come in handy when you have a simple background, such as the sky or a wall.
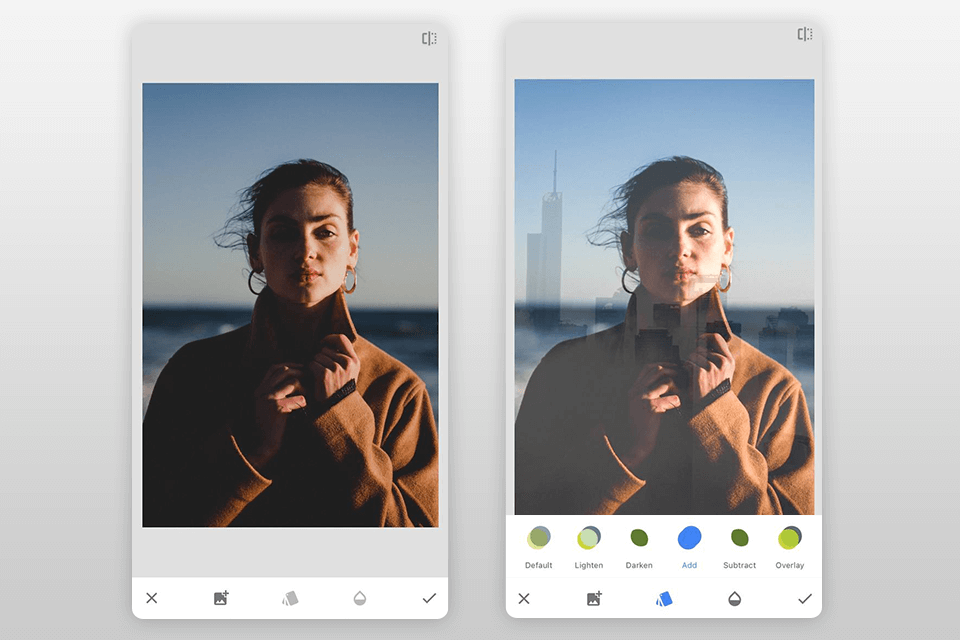
To make your image more unique, try overlaying one image on another. After importing the main image, you need to go to the Tools menu and select the Double Exposure option from the list. Then, press on the small “+” icon below and export the second image.
Now, you can move the second photo, resize it, adjust its opacity and change other settings until it meets your requirements. Snapseed also allows you to use several templates for making your image brighter, darker, or simply overlaying two images.
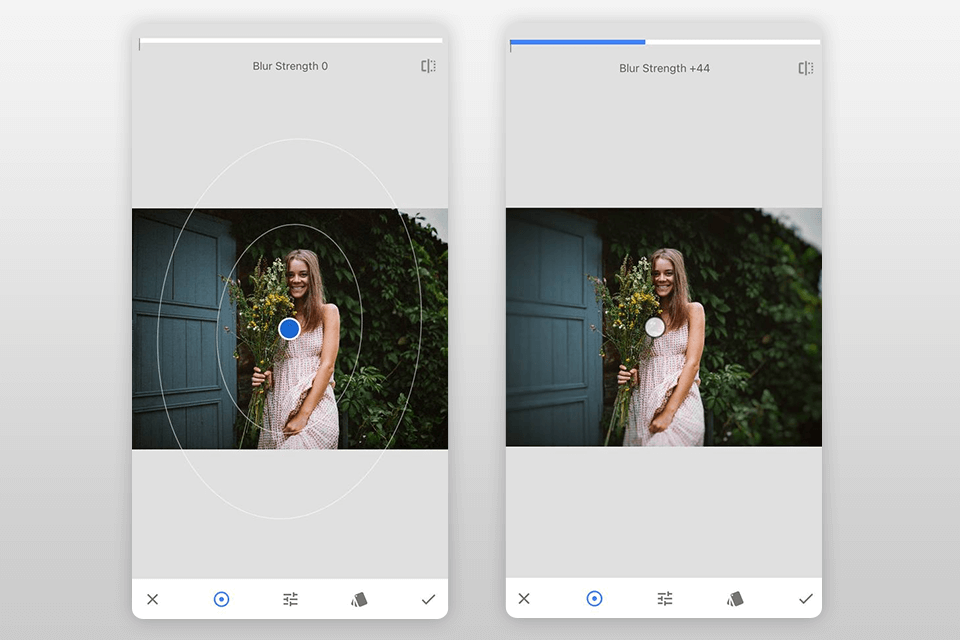
You can make the background more blurry or turn your portrait photo into a bokeh photography by using these Snapseed editing tips. With the Lens Blur option, you can shift the focus and blur the surrounding area.
You can also select the intensity of the effect. If you want to become a true professional, you need to learn how to make the background of a picture blurry.
Unfortunately, the app doesn’t allow you to make an already edited image less blurry. However, this option is perfect when you need to focus a viewer’s attention on a specific part of an image.
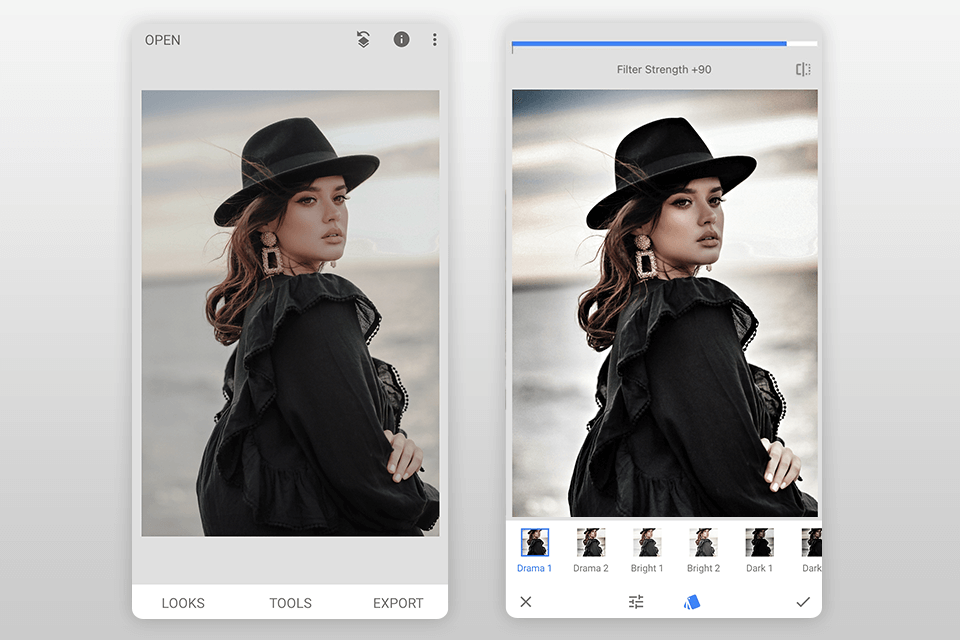
If you have a flat image with bleak colors, try using the Drama tool to make it more attention-grabbing. It allows you to enhance the whole image by raising contrast and making colors more saturated.
With it, you can focus a viewer’s attention on various elements of the background, such as clouds or trees. You can also use various presets to quickly enhance your image.
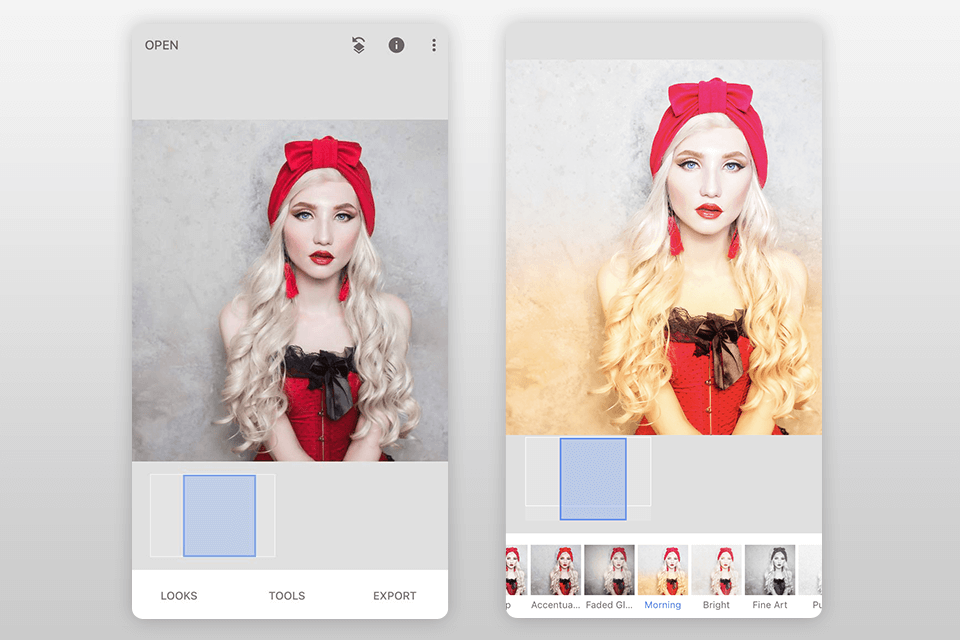
If you don’t want to waste your time on advanced photo manipulation, you can quickly enhance your image by using these Snapseed editing tricks. Being one of the best filter apps, Snapseed allows you to embellish your photos and make them more unique by applying in-built filters.
Here, you will find basic filters in the Looks tab, such as Pop, Faded Glow, Morning, Smooth, etc. Besides, you can find more advanced options in the Tools menu, such as Noir, Vintage, Grunge, etc. There are dozens of useful filters that will help you enhance your images in a few clicks.
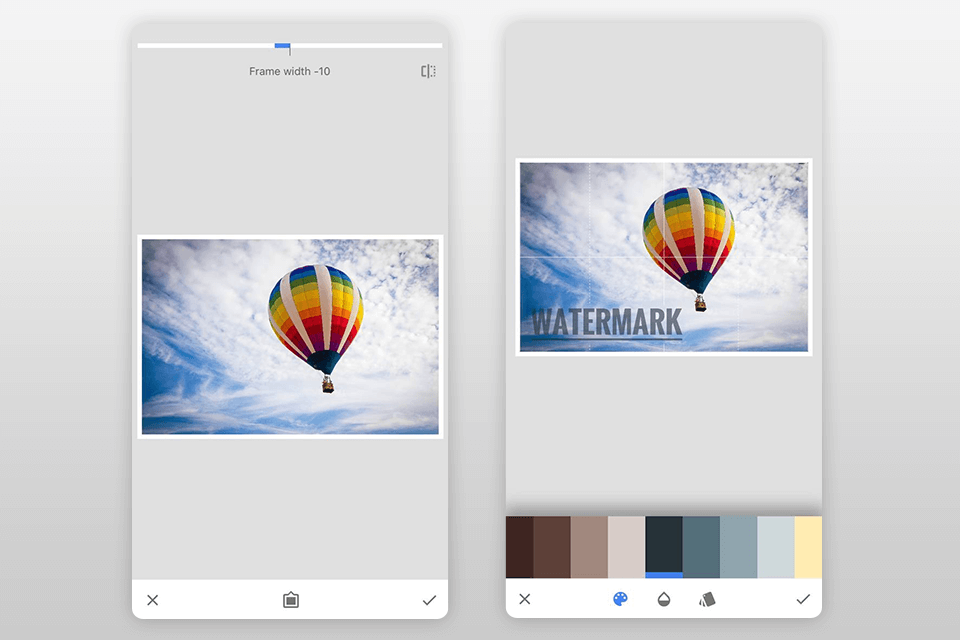
Snapseed has in-built text fields and frames that you can use for adding text to your images. This option comes in handy when you need to create a watermark to protect your images from being copied or if you want to add a frame to your photo.
You can customize text blocks and frames by selecting various designs and changing the text color.
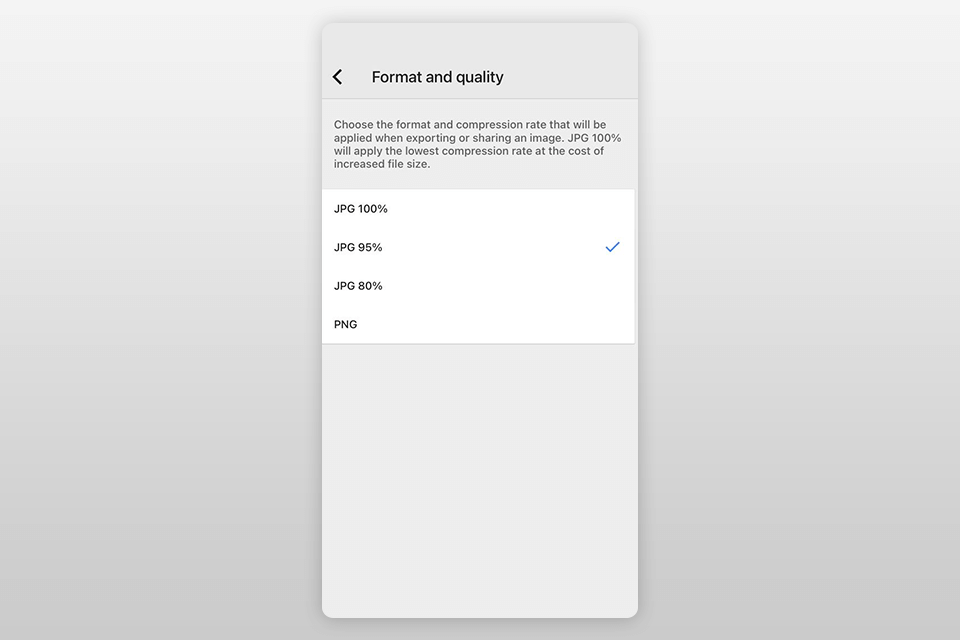
This convenient app for photographers allows you to save an output image in the highest quality possible. Snapseed saves all the edited images as JPG files with a compression rate of 95% by default. However, you can raise this rate to 100% in the Settings menu.
Go to the Format and Quality tab in the Settings menu. The app enables you to set a compression rate to 80%, 90% and 100%.
It will allow you to save your image in PNG format without quality loss. However, keep in mind that a high-resolution file will take up more space.

If you want to make your photos look more professional, download Lightroom and use these free presets to optimize your workflow. With them, you can make your images brighter and enhance colors with a single click.