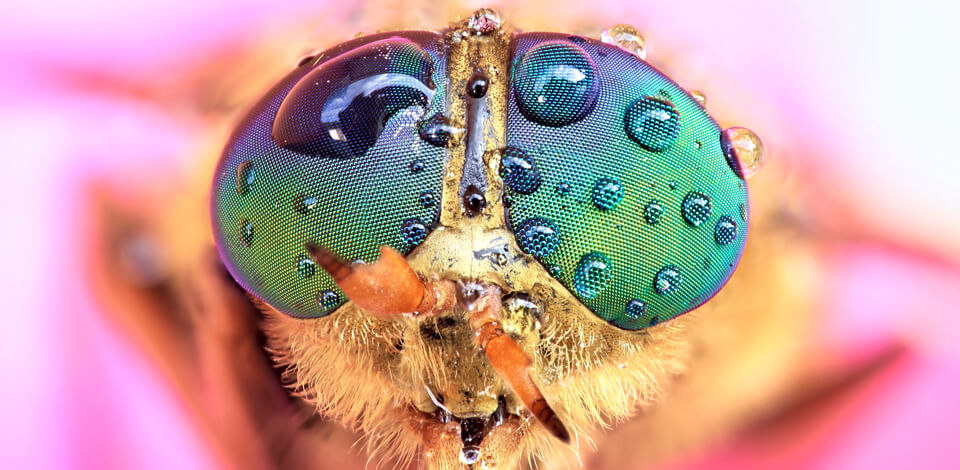
As a photo retoucher at FixThePhoto, I’ve been enhancing all kinds of photos for a long time now. However, nothing needs more care and attention than micro photography. It’s not just about zooming in close, it’s about showing whole new worlds that our eyes can’t usually see.
Micro photography helps us see tiny details, like the crystal shapes in a snowflake or the small ridges on a fingerprint. It combines science and creativity, and requires perfect lighting, a steady camera setup, and specialized tools to achieve the desired result.
Micro photography is a style of taking pictures where you capture things so small that they wouldn’t normally be witnessed with the human eye. It’s different from macro photography because it uses microscopes or special micro photography lenses to show microscopic elements. It is used in science, medicine, and art to show patterns and textures that are invisible without magnification.
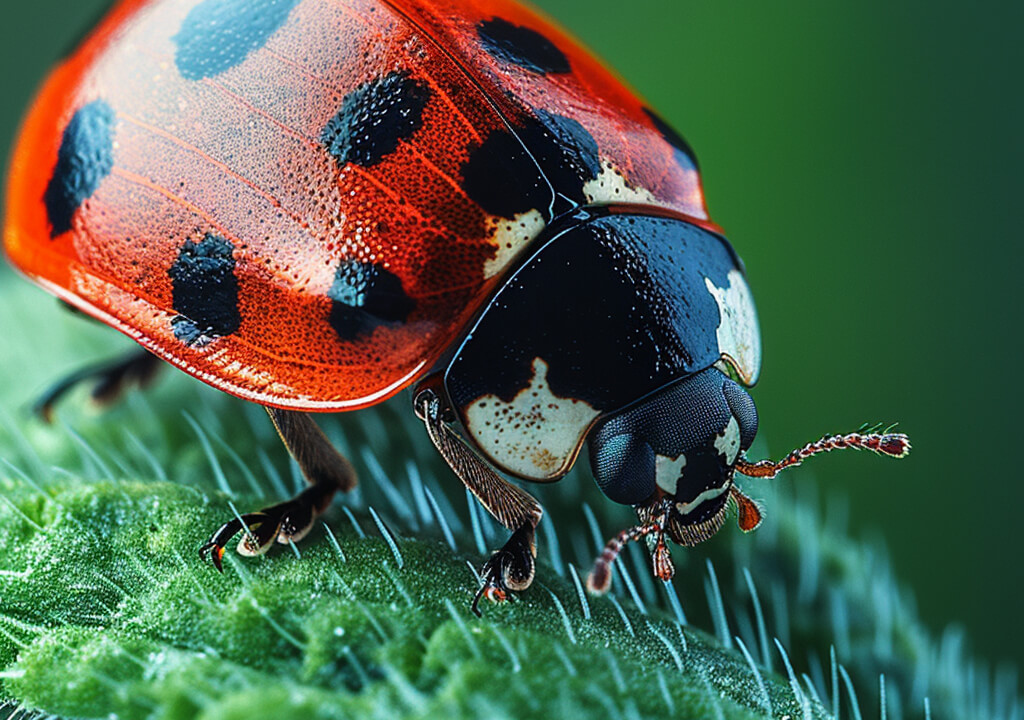
This style becomes even more exciting when combined with creative still life photography ideas. You can turn ordinary things into amazing-looking photos, no matter if it's just pieces of textile, flower parts, or tiny bits of dust that you’re photographing.
Once, I edited a batch of micro photos for a science lab. They showed mold growing on bread. The round spores and branch-like shapes looked super sharp and detailed. While the pictures taught people something, they also looked cool and interesting.
Key tools include:
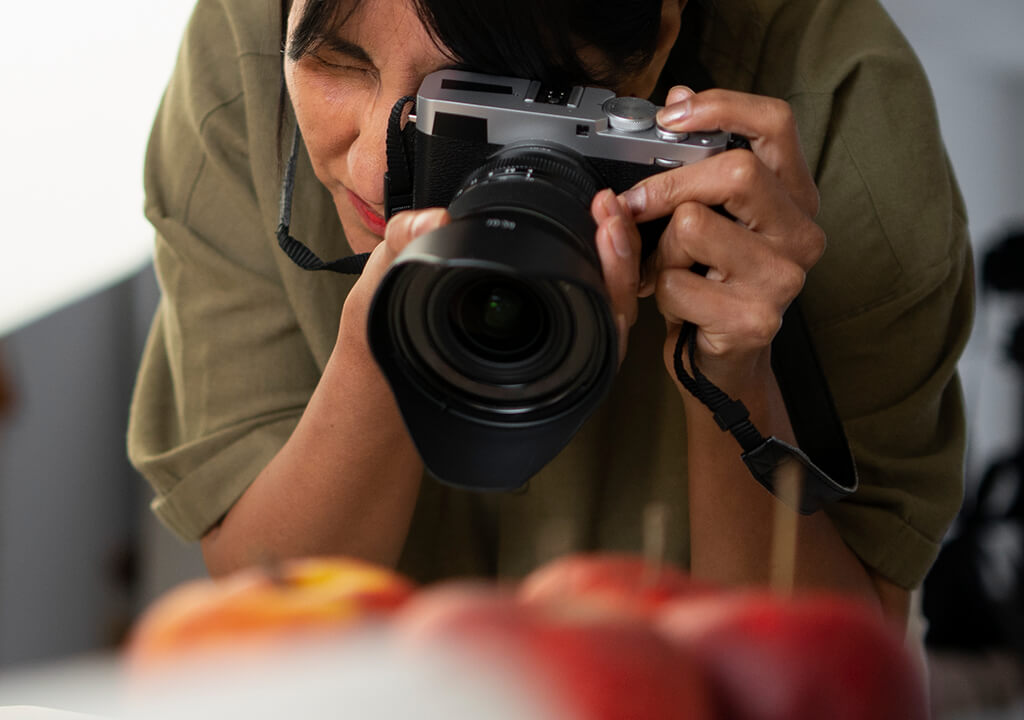
From what I’ve learned, having the right gear is essential. To get really zoomed-in images, you need a micro photography camera setup that lets you attach special lenses, remote triggering (to keep it still), and supports high ISO performance.
Recommended Camera Combo:
At FixThePhoto, we’ve used all kinds of setups, including mirrorless cameras with microscope parts, special scientific photography gear, and even micro lenses for phones. I always tell beginners not to worry if they only have a phone. You can start taking creative micro photography images with your phone and upgrade your gear later.
@macro.viewpoint Photography is feeling. Feel the Autumn moments through my lens 🍁 Gear: #SonyAlpha a7 IV & Sony 90mm 2.8 #macrophotography #naturephotography #Autumn #leaves #fungiphotography #photography #mushrooms ♬ original sound - tony ann
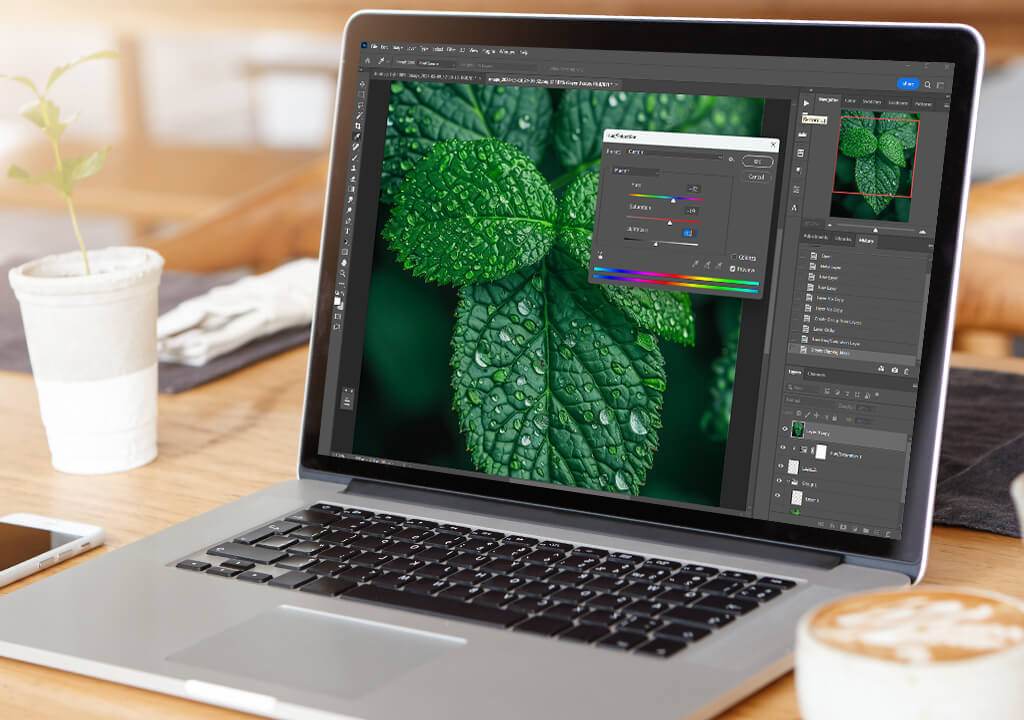
It’s also smart to use a high-resolution monitor when editing. At this level of detail, even the tiniest focus problems will show. And don’t forget how important lighting is: when you're photographing things this small, the way you light them makes a big difference.
Because the camera focuses on such a small area, lighting has to be perfect. Too many shadows or bright spots can ruin your picture.
Editing close-up photos can be both fun and tricky. If you edit a micro photography image too much, the textures can start to look fake or too smooth. But if you under-edit, strange colors or small marks can distract from the photo. This matters a lot in science photos or luxury product shots, where the picture needs to look real and accurate.
That’s why our FixThePhoto team always tries to be careful when editing micro photography images. Such images usually have uneven lighting, color balance issues, or parts that aren’t fully in focus. That’s why we use different tools and techniques, like:

When we work with micro photography, we have to be careful about how sharp the edges look. If we make the edges too sharp, it can cause a weird ghosting effect. This is especially tricky when the picture includes things like insect wings, tiny crystals, or fabric fibers, because they’re see-through or shiny. To make sure everything still looks natural, we use advanced masking and local dodge-and-burn tools to only change certain parts.
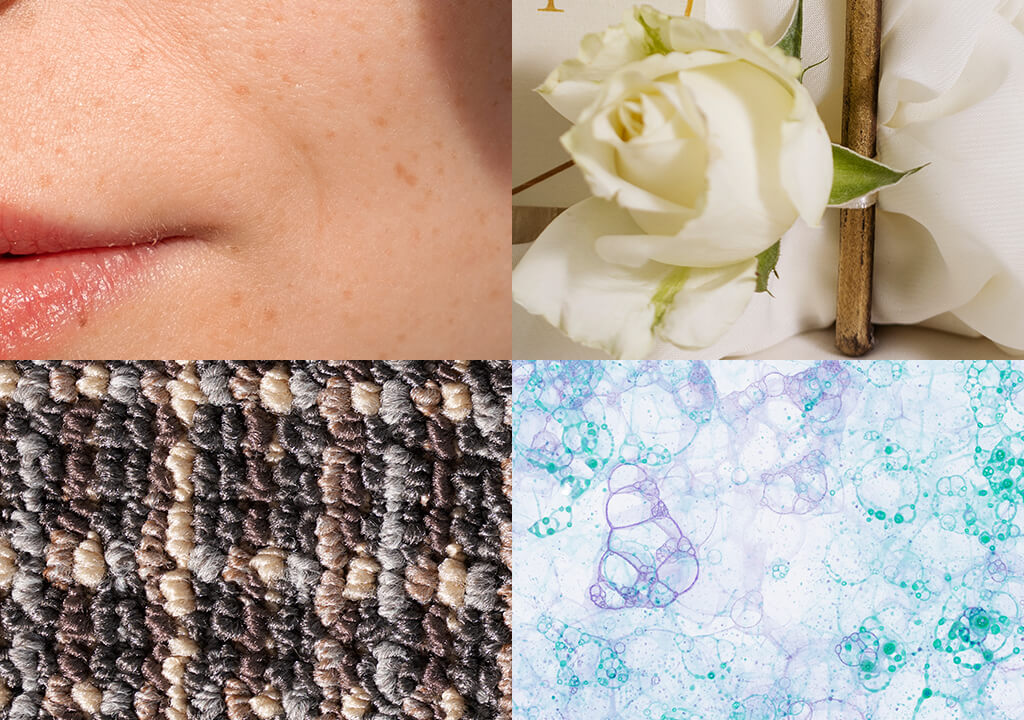
Advice: If you’re editing things like skin pores or fabric texture, don’t sharpen the whole image at once. That can make it look fake. Instead, you can use frequency separation in online Photoshop to keep the image clean. With this tool, you can make small improvements in the areas you want to focus on without changing the rest.
In Lightroom, start by gently adjusting the contrast and clarity. Don’t make the whole photo brighter or darker; use the Adjustment Brush tool to fix small spots instead. Also, look at the colors. Micro shots can sometimes pick up strange color tones from lights or things nearby, so it’s important to check the white balance and color tint.
If you're still learning or want to keep the original look safe, it’s smart to work on duplicate layers. You can also use masks to slowly add your changes without messing up the original. The more carefully you edit, the more natural the final image will look.
Micro photography is different from macro photography; even though both show tiny details, the intent and scale are quite different. Here's a quick comparison:
| Technical Aspect | Micro Photography | Macro Photography |
|---|---|---|
|
Magnification Ratio
|
>1:1 (up to 100:1 with microscope adapters)
|
~1:1 (life-size on sensor)
|
|
Minimum Focusing Distance
|
Extremely close
|
Close
|
|
Sensor Impact
|
High pixel density reveals diffraction easily
|
Diffraction visible but manageable
|
|
Depth of Field
|
Ultra-shallow
|
Shallow
|
|
Aperture Range Used
|
f/4–f/8
|
f/8–f/16
|
|
Lighting Setup
|
Ring light, diffused LED panels
|
On-camera flash, reflectors, natural light
|
Micro photography needs more technical control because you're zoomed in so much more. With macro shots, you can sometimes use your hands to hold the camera if the lighting is good. But for micro shots, you usually need a tripod and special lighting, so the image doesn’t come out too bright or too dark. Also, because we zoom in so close, there's a higher risk of diffraction and color problems, especially from LED lights, which will need to be fixed during editing.
Editing micro photography images is also different. Macro shots often look better when you boost contrast and clarity. But micro photos need more careful sharpening and texture editing so the image stays clean and real. The closer you zoom in, the more every little editing step matters.
If you're using a small camera, it helps to get one of the best micro four-thirds lenses. These lenses help you take sharper pictures and give you more control, especially if you use a tripod and focus by hand when you're close to your subject.
So far, I’ve done micro photography for different kinds of clients:
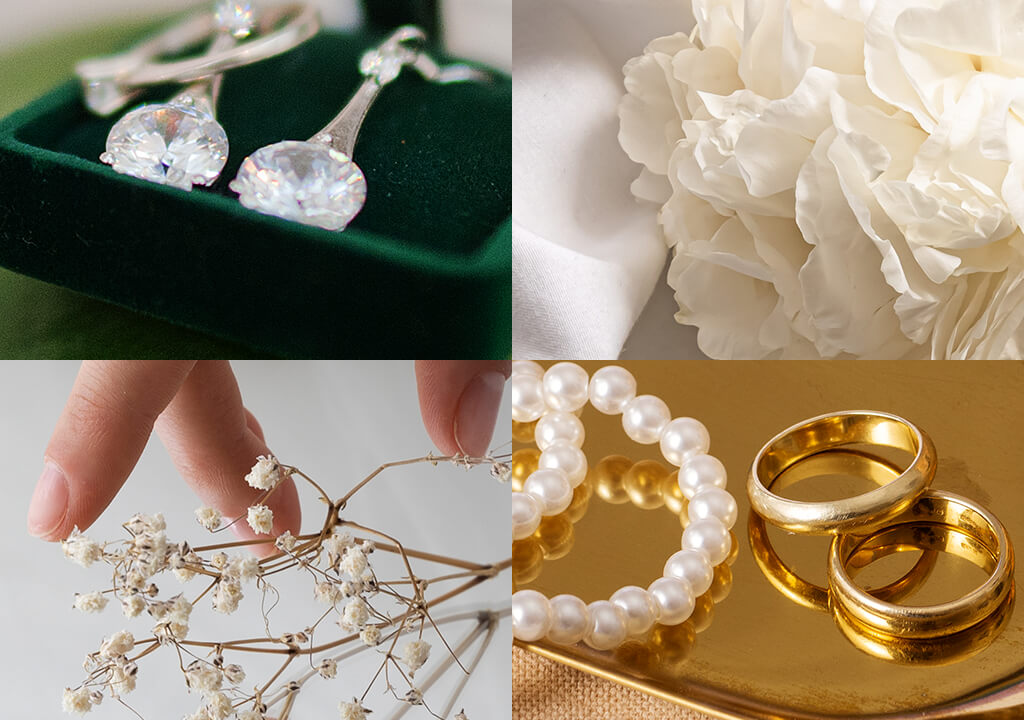
One of my favorite projects was a micro wedding photography shoot, where the bride wanted close-up pictures of lace, shiny diamonds, and fabric patterns to remember the details of the special day.
We used strong lighting and zoomed in a lot to show textures that most people never notice. The final photos looked like pieces of art and felt very personal. It’s a great example of a wedding photography idea that can go beyond just taking ordinary portraits.
When we get files ready to send to clients, we zoom in really close (sometimes up to 200%) to check the areas with lots of details, like embroidery or shiny parts of jewelry. We look closely at the light and shadows, and we make sure the backdrop is smooth, so the picture doesn’t have unwanted noise.
This step is very important when working on skin or jewelry micro photography because if you edit too much, the natural texture can get ruined. The goal is to make the photo look its best without changing how it truly looks. It’s about showing off the small things with flawless precision.
“Before I start editing a micro photo, I zoom in to find small problems with texture or reflectivity. You can’t see them when the photo is at normal size, but clients might spot them when the photo is printed.”


Some phones have special modes for close-up shots, but true micro photography needs extra tools. Even if you get a special micro photography lens, phones have small sensors, don’t work well in low light, and the photo may get ruined by adding too much sharpening or trying to fix things automatically.
We often see phone images that look okay from far away but have problems with texture and color when we zoom in. Automatic sharpening can also ruin the tiny details, like fabric threads or skin pores.
This is why it’s better to send these photos in for manual editing. In the FixThePhoto app, you can just upload your photo and write a note like “make micro details better", and our team will improve the texture, sharpness, and lighting carefully without making the image look fake.
Micro photography lets us see tiny textures and patterns that our eyes can’t normally catch. Whether you’re taking pictures for science, luxury ads, or creative projects, it helps show small things in amazing detail.
However, working with this kind of zoomed-in photography can be hard and expensive.
At FixThePhoto, we carefully test each image before editing it. We look for problems like weird color shifts, soft blur from diffraction, or focus inconsistencies. We zoom in 200% to 400% on calibrated screens to check everything, especially when the photos are for beauty, jewelry, or medical use. This helps us make sure the photo is good enough to edit and won’t fall apart when we make it brighter or sharper.
We also check how the lighting looks and how much noise the camera sensor makes. For example, LED ring lights can sometimes make metal or skin look like it has fake highlights. We fix those before editing. That’s why it’s important to have a good step-by-step workflow – from taking the photo to fixing it – when dealing with micro photography. It matters more here than in most other types of photography.
You don’t need the most expensive gear to begin. You can use a DSLR or mirrorless camera with a special adapter that connects it to a microscope. But if you don’t have that, many people now use clip-on micro lenses that attach to their phones. These phone lenses don’t give images as sharp as the ones from science labs, but they’re good for learning how to zoom in and frame small objects.
Not always. The best-quality microscope lenses and lab stands can be pricey. But if you’re just starting, there are cheaper options like budget macro lenses, using a reversed lens, or micro photography lens kits for smartphones.
Macro photography shows small subjects at the same size as they are in real life – this is called 1:1 magnification. Micro photography zooms in way more, sometimes 5 times, 10 times, or even 100 times closer. This lets you see super tiny details, like skin pores, tiny fibers, or engraved lines, that macro photos can’t show clearly.
When you zoom in that much, even the smallest camera movement, a bit of bad lighting, or even the lens itself can make the image look soft or unclear. That’s why the retouchers at FixThePhoto use tricks like focus stacking and manual texture editing. This helps bring back clear details without making the image look fake.


![How to Take Pics of Shoes to Sell in {{%year}} [+Popular Fails]](/placeholder-450x300.svg)


