Looking for a step-by-step guide on how to make motion blur effect in Adobe Premiere Pro? I will describe 2 methods for creating and adjusting motion blur from different angles and with varied depths. I will touch upon every stage of the creative process, as well as the settings you need to tweak. Besides, I will explain to you what instruments to use.
This method involves basic knowledge of Adobe Premiere Pro, mainly, you need to use the transformation effect. By changing the settings, you can achieve the desired unique result quickly and easily.
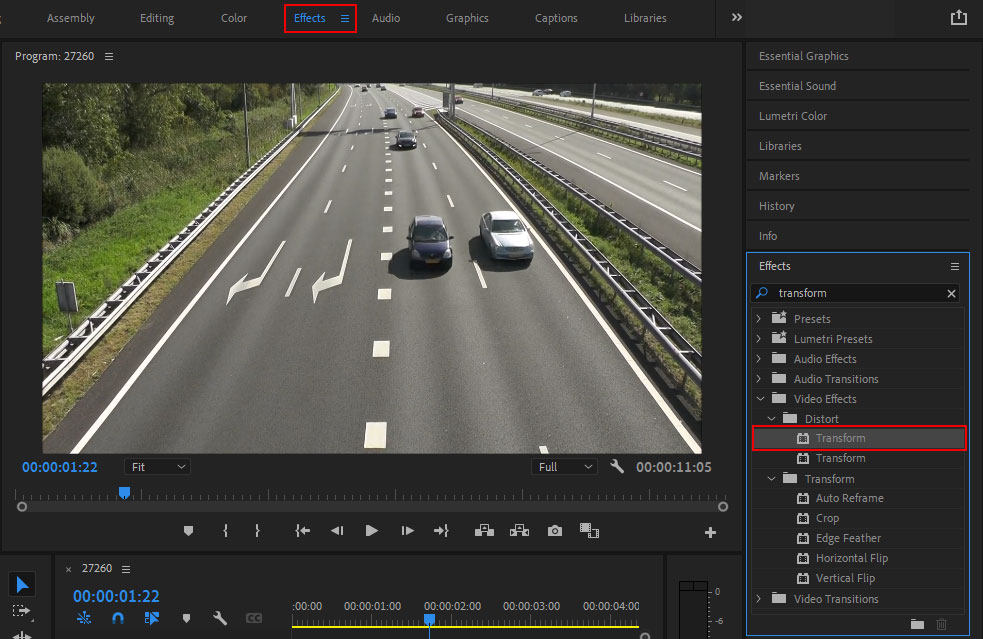
Head to the piece of a video where you want to add a Premiere Pro motion blur effect. Next, click Effects > Video Effects > Distort > Transform. Drag and drop this effect onto the uploaded file.
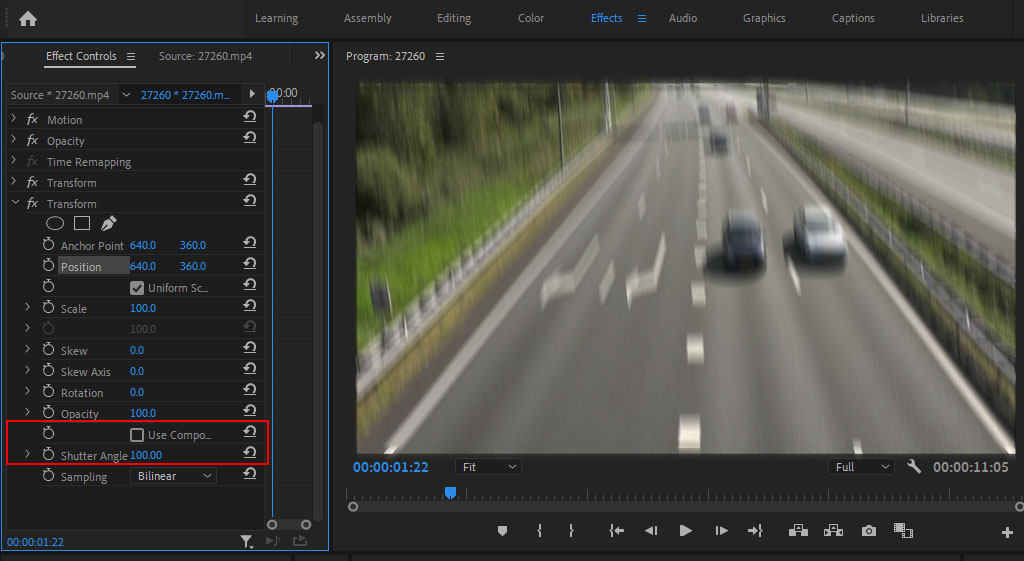
Head to the Control window to fine-tune your effect. Uncheck the “Use composition’s Shutter Angle” box and then alter the value. The larger the shutter angle, the heavier your blurriness will be. When you add motion blur to your video, don’t be afraid to experiment till you see the result that fully satisfies you.
An alternative method for making motion blur effect in Adobe Premiere Pro, which is described in many Premiere Pro tutorials, involved using the “Directional blur”. Going this path, you will be able to adjust the Direction and Blur Length for an accurate result.
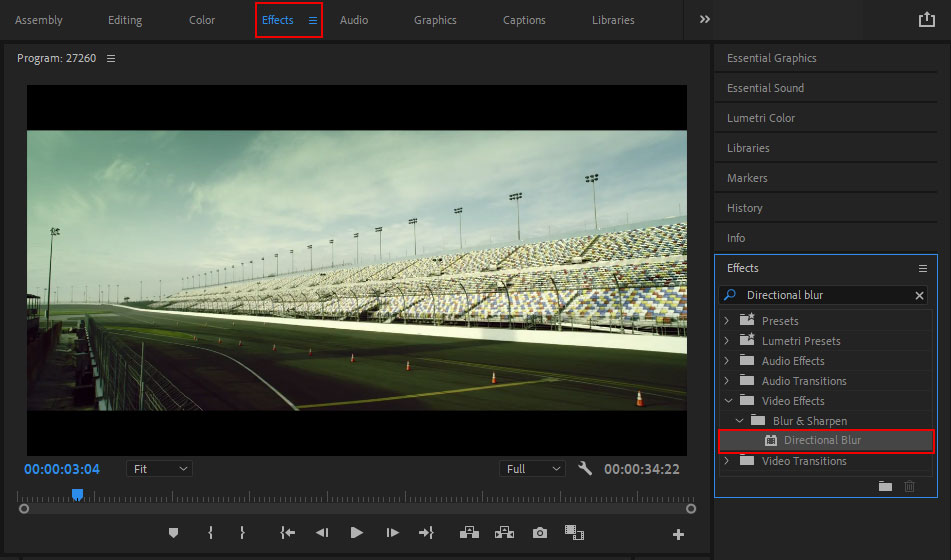
Open the search bar in the Effects panel and type in “Directional Blur”. Drag the effect you’ve found to the workspace.
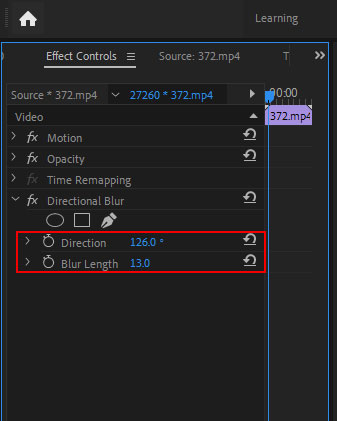
Set the desired settings in the effect control window. Specify an angle and a degree of blur. The higher the value, the heavier the blur you can achieve. Adjust everything for your video based on your vision.
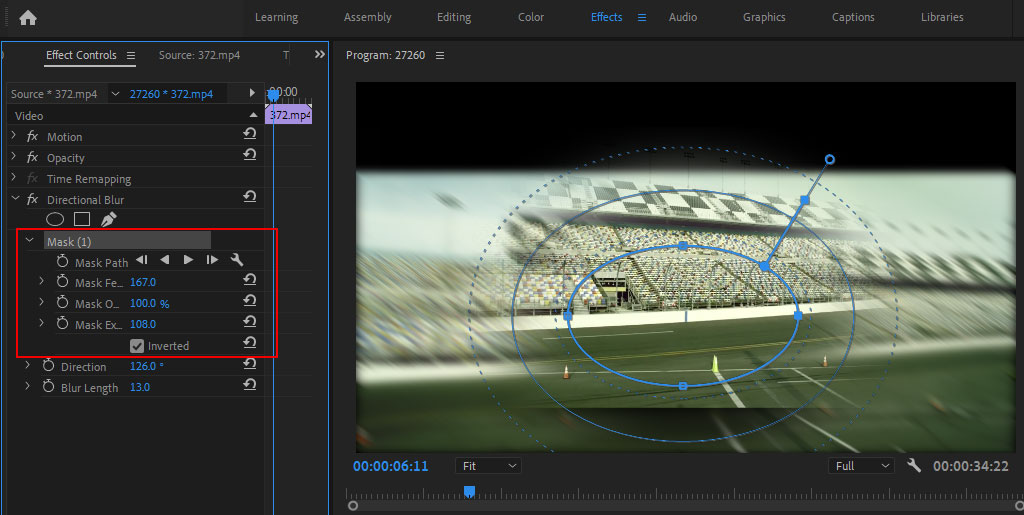
If you are dealing with a moving object, it is necessary to track the mask. For static elements, you can skip this step.
Click the Track Mask arrows. Make sure to customize the mask if it drifts off the object. If your object appears and disappears on the screen, you should start tracking in the middle and move backwards/forwards to finish the track. For more precise tracking, you should concentrate on one frame at a time. Play the track to ascertain your mask stays on track.
To make the edges of the mask softer, it is necessary to increase Mask Feathering.
This effect is the blurriness that appears while an object is moving when a camera captures the frame.
This effect can totally overhaul the perception of video content where objects constantly change their positions. It is frequently used in racing games for increasing realism and a sense of speed. Besides, making motion blur effect in Adobe Premiere Pro, you can also smooth out visuals in a game, especially those rendered at 30fms or slower.
Blur makes the distant objects slightly blurry. The main idea here is that we perceive this effect due to our peripheral vision and such a phenomenon doesn’t interfere with our perception of reality. Motion blur appears when a camera moves and objects acquire a beautiful cinematic effect.
No, display motion blur doesn’t make a toll on FPS.