You should definitely learn how to add fonts in Adobe Express, if you want to create flyers, banners, logos, images, and other visual materials that can instantly capture people’s attention. Using standard fonts is OK for amateurish tasks but those, who strive to deliver specific ideas in a captivating manner, should opt for custom ones. I will show you how to upload fonts to Adobe Express in 7 simple steps.
Launch Adobe Express and open the needed file. The software has a library of sleek templates which you can customize to your needs. For instance, you can change logos, colors, add images and text. If any of these tasks poses difficulties for you, make sure to watch corresponding Adobe Express tutorials. For this guide, I selected one of the poster templates.
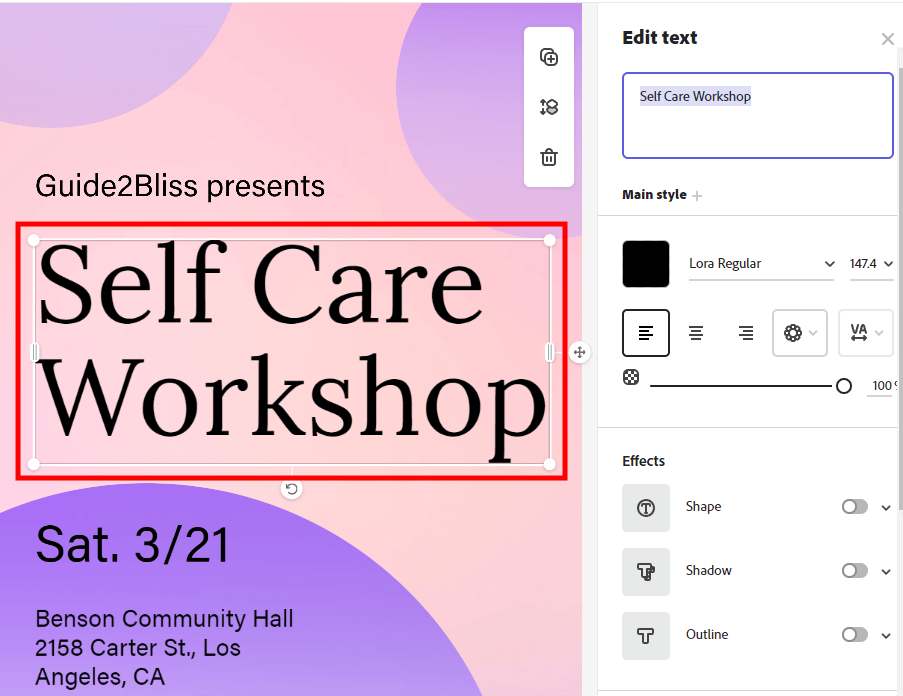
Choose the text and proceed with changing its font. To do so, you need to double-click on the text. I will change the title of the template.
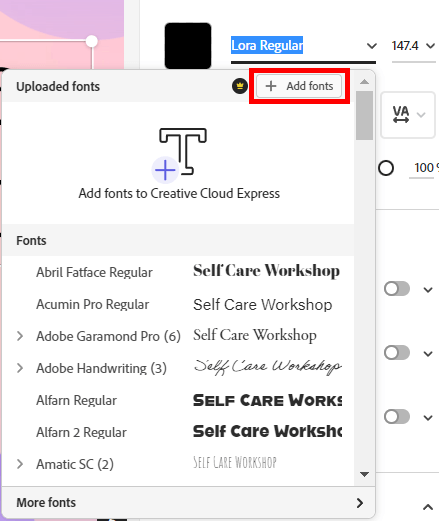
Heading to the section with fonts, you will see a list of standard options. Scroll to the top of the list and click “Add fonts”. If you like any default font, you can apply it instead of importing other variants.
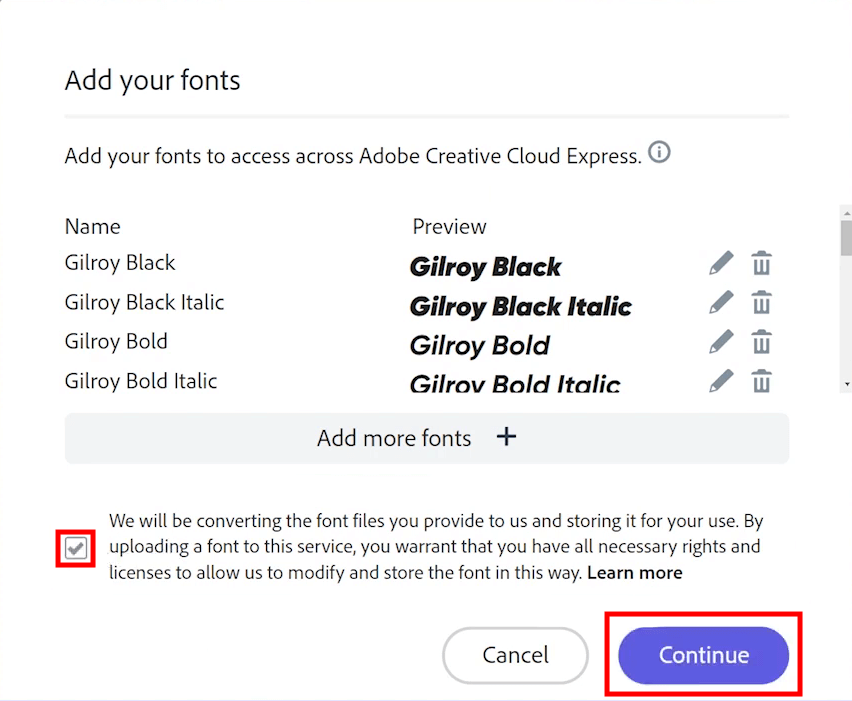
Keep in mind, that the software supports fonts with .otf and .ttf extensions. Besides, they must be smaller than 10 MB. Once you select the desired fonts on your computer, there will appear a window where you need to check the box and click Continue. Then, the program will start loading files automatically.
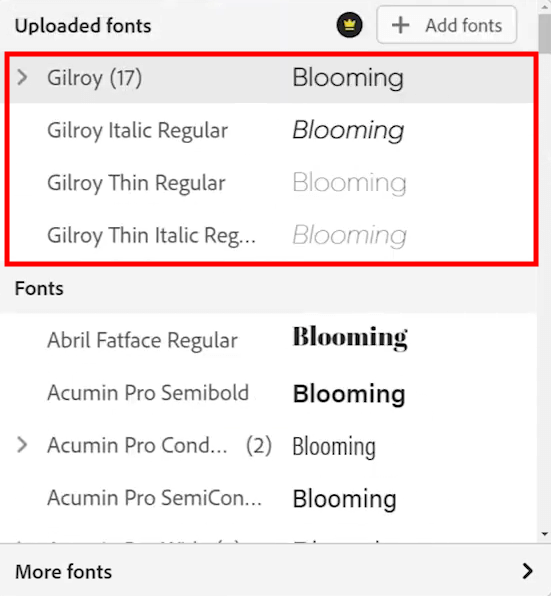
When you add fonts in Adobe Express, new files appear at the top of the list right under the Uploaded fonts heading. If you like these fonts, you are good to start using them. Alternatively, you can modify them for a particular look. If you are fond of creative experiments, you can proceed with animating a picture in Adobe Express.
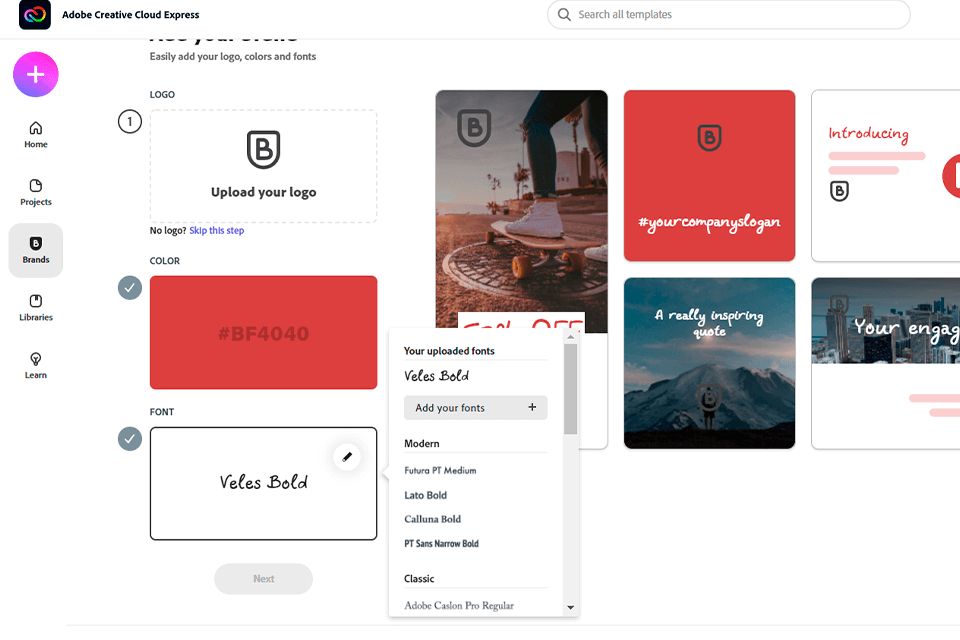
Adding new fonts to the software, you’ll notice that it automatically generates bold and italics versions of every font. No matter how advanced the mimicking algorithms are, the result can look far from perfect.
Sometimes, you need to update the body font with missing faces. The pencil icon next to the front name works perfectly for this task. Clicking it, you will activate the menu where you can add other font face files.
A crucial aspect to consider is that CC Express automatically replaces a font if you’ve created a project with a licensed font and later deleted it from your visual materials. The program will replace it with another option so that you face no issues while opening your project.
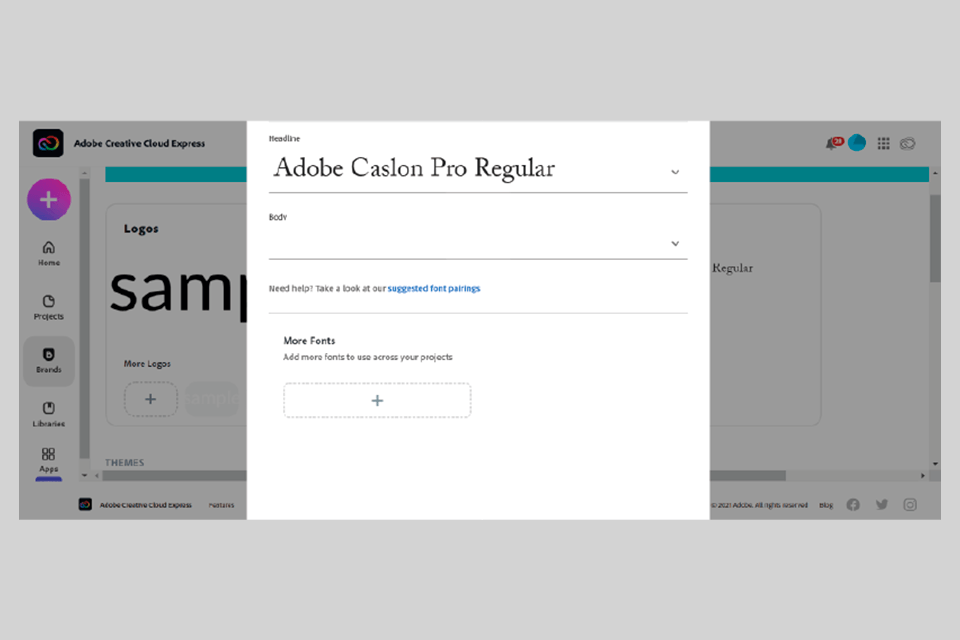
When you select a template from a built-in collection, you’ll see that they all come with default heading fonts and body fonts. The former options are used for higher and larger texts, e.g., a title or section header. Body fonts are designed specifically for longer texts such as paragraphs and secondary text.
While selecting a font for a heading, it is better to go for something easily readable and without ornate elements. Body fonts can be bold and italics. If you are satisfied with the brand you created, you can add and edit heading and body fonts by clicking the + under More Fonts.
If you can’t figure out what fonts will look great together, make use of the suggested font pairing option. You can add fonts in Adobe Express without dealing with quantitative restrictions. Once you’re done importing fonts, you can choose any variant from the font chooser you like.
When your CC Express membership reaches the cut-off point, all fonts uploaded will remain as a part of your brand but you won’t be able to use them in new projects or open those where they were applied. To make sure your content is always at hand, you can duplicate a project and substitute the Proxima Nova font with any font from your personal collection.
Creative Cloud All Apps is a collection of over 20 applications, including the best font managers, and services developed by Adobe. . CC Express is one of these apps.
If you used a licensed font in your project but your Creative Cloud Express membership is no longer valid, you can create a copy of the project with CC Express branding and replace the font with Proxima Nova. Thus, you’ll regain access to your content.
Choosing a free plan, you receive 2GB of storage. This amount is increased to 100GB if you become a premium user.
If you accept a shared brand that comes with a custom font, you have to upload your own licensed copy of that font to use the brand. First, launch the app in a desktop browser. Open your project or create a new one. Click the Brand switcher on the right rail and choose the needed Brand. The program will suggest you upload the custom font to use that Brand in your project. Select the font file to initiate uploading. Now, you can use that Brand in your projects both online and on mobile devices.

Adding custom fonts in Adobe Express may be easier than finding proper fonts. This bundle consists of 50 high-quality fonts available absolutely for free. The range of fonts is truly amazing – from basic options to creative and unusual ones. Thus, by downloading a single pack, you can create eye-catching logos, beautifully formatted documents, and captivating websites that leave a lasting impression on your audience.