
If you think that photographing hats is plain sailing, you’ve probably never tried to do it. In fact, hats are made of different materials, have varied shapes and sizes, and are decorated with miniature elements, which significantly complicates the shooting process.
If you want to become an expert in hat photography, you should study the tips provided below. You will learn how to take images of different hats and always achieve amazing results.
Product photography interests many shooters, but few dare to delve into this world and choose it as their main occupation. Learning these tips, you can make your career path smoother and take high-quality hat photos not only in luxurious studios but also at home using budget-friendly shooting equipment.
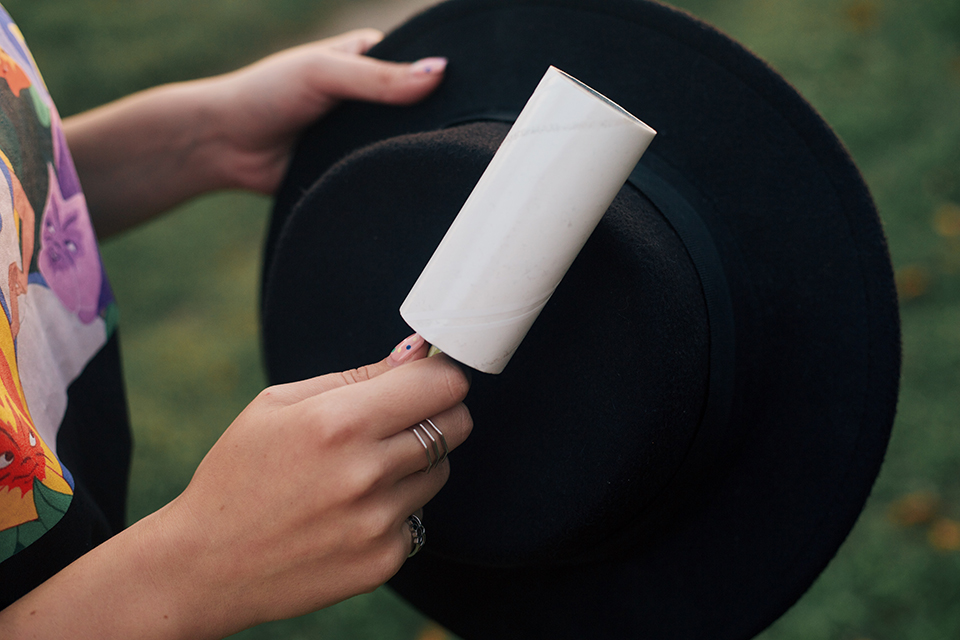
People practicing clothing photography know that preparing an object in advance is obligatory. The same applies to hat photography because it is easier to make an item look neat before the shooting than spend many hours in Photoshop, trying to remove small particles, get rid of wrinkles, etc. Most hats are made of felt or similar fabric, which means they collect lint easily.
It is a great idea to use a sticky lint remover. You need to slide it gently across the surface and it will pick all unwanted particles on a hat. You should also remove a price tag, but if it is impossible, just hide it. If you photograph a hat with brims, use a streamer or an iron to eliminate wrinkles and make a hat hold its shape while you are taking images. To store cleaned hats between the photo sessions, you can use special hat boxes.
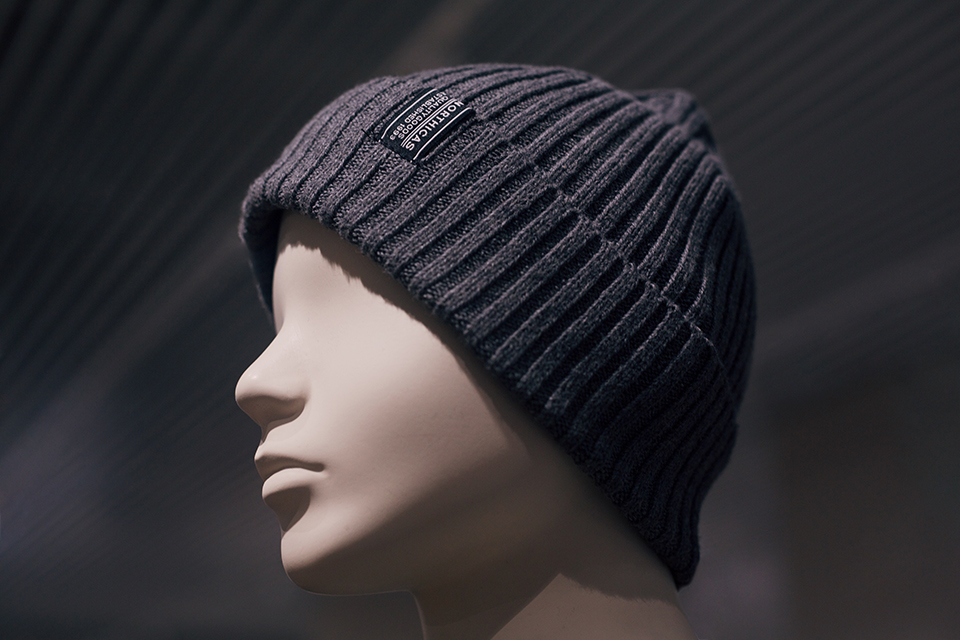
Though photographers usually cooperate with models when it comes to clothes photography, sometimes they need to settle for alternatives. The thing is that a model can distract attention from your product, which is a totally wrong approach if you specialize in Amazon product photography. Besides, you may have a limited budget, so the only way out is to use a mannequin head. Of course, you can get a full-size mannequin, but what’s the point in paying more if you need to focus on a hat.
Such mannequin heads are typically made of foam, so a hat can sit firmly. Besides, using a head mannequin is very convenient when it comes to photographing from different angles. You can place a hat the way you need and make it look stylish. Foam mannequin heads are available in different sizes, so finding a proper variant won’t raise problems.
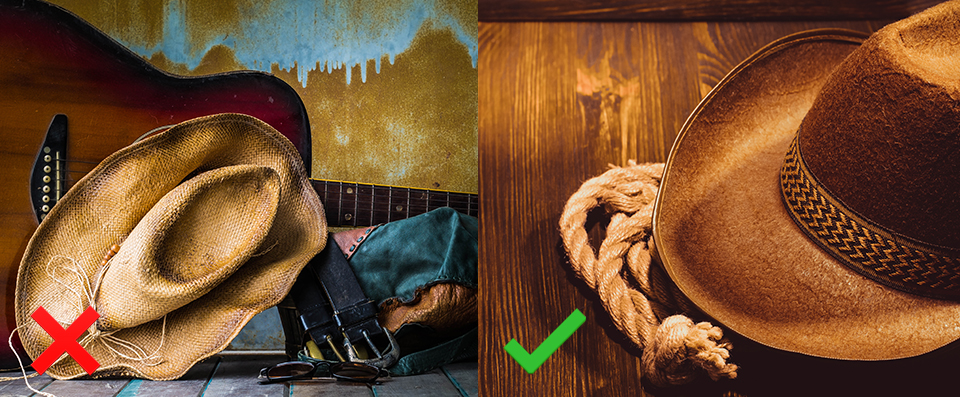
The success of your hat photography depends greatly on the chosen background. You should opt for backgrounds that perfectly complement your object and direct viewers’ attention to it. If a background is too colorful, pattered, or crammed, a hat is likely to get lost and become unnoticeable.
When selecting product photography backdrops, keep in mind that a clean, white variant looks great with almost all types of products. Besides, this is a perfect option if you plan to share photos on eCommerce platforms.
Moreover, if you take an image against a white and light background, you have more possibilities for high-quality editing. Photographers will a limited budget, can use a simple paper roll as a replacement for an expensive studio backdrop. In case you are after more creative product photography ideas, you can use a contrasting background to make a hat pop.

When editing photos, you need to pay attention not only to a hat, but also to a model’s face. Moreover, you must understand the process of removing clothing wrinkles in Photoshop, removing shadows in Photoshop, especially harsh ones caused by a brim of a hat, fixing minor defects and adjusting the contrast. In general, you need to eliminate all visible distractions and imperfections.
Editing can take several hours. If you don’t feel like doing all the editing yourself, delegate the task to experts, who will analyze your images, detect their weak points, fix defects and adjust settings using advanced tools, and deliver you flawless images in a quick way. They follow all modern product editing standards, so you can be sure you’ll get pictures suitable for reputable trading platforms.
After you cleaned and ironed a hat, you need to create an eye-catching composition, which usually involves embellishing the scene with product photography props. I recommend choosing props of complementing colors and restrict their number not to create distractions.
For example, you can use a pin-board and hang a hat on it to show its dimensions and shape. It is also a nice idea to use a coat rack and place a cap on it for a trendy look.
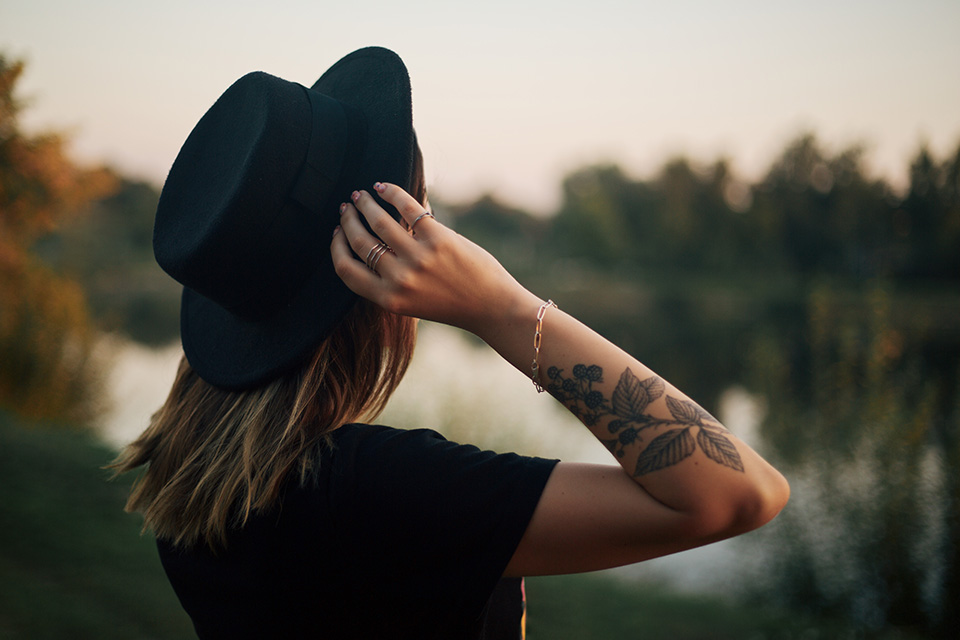
If you specialize in lifestyle product photography, and often invite models to the shooting, it is recommended to choose clothes that will complement a hat. Your main task is to make a hat the only centerpiece of your images. However, don’t get too carried away with experiments and stick to realistic attire.
For instance, you can ask a model to wear a wool coat and a scarf if you photograph a lineup of warm wool hats. For a summertime photo session with a panama hat, choose colorful dresses, T-shirts, and skirts. The better clothes and hats look together; the more eye-pleasing result you’ll get. Create context instead of pairing pieces that fight for viewers’ attention.
Though head mannequins are rather affordable, leaving them visible in final photos isn’t an option. Such photos have an alienating atmosphere, which is opposite to the effect you want to achieve. Besides, customers may think that you skimp on the shooting, which tarnishes your reputation of a reliable seller. A nice alternative, in this case, is to follow the ghost mannequin photography principles and show a flat floating on its own.
To create a 3D invisible mannequin effect in hats photography, you need to take 2 images – one with a hat on a mannequin head and one just of a hat. Start with shooting a hat on a mannequin, positioning it straight, and capturing a bit of space below it. Then, remove a mannequin and snap a photo of a hat as close to the previous shot as possible. When you edit photos, you will merge these 2 pictures using special tools.

This may seem obvious for seasoned shooters, but those just mastering hat photography tend to concentrate on one angle and take images straight on. Remember that people, who ponder on buying a product, always want to see as many details as possible, which means you need to constantly change your position. Even if you use the best lens for product photography, it can’t capture all the needed features of a product from one angle, so don’t hesitate to relocate.
Different hats have different details you need to show in pictures. This may be a shape, size, decorations, color transitions, brim size, additional accessories, and more. Focusing on such details, you may visually differentiate trilby, fedora, boater, homburg, and other types of headwear.
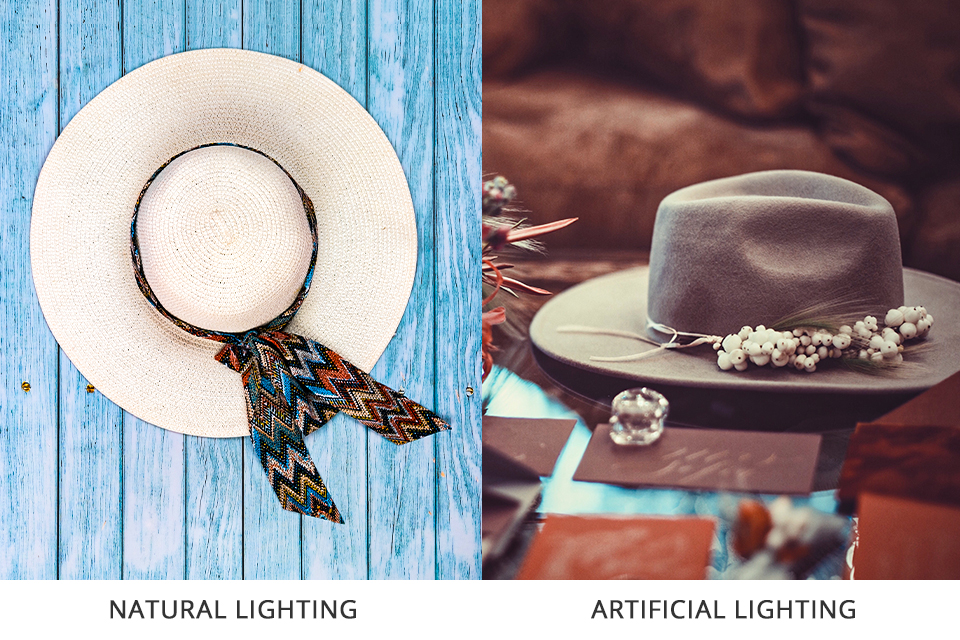
Lighting can either make or break your shooting game. Of course, photographers like taking images in gentle natural lighting and there is hardly an artificial light source that can compete with sunlight. However, if you happen to work in the conditions where natural light is absent, choose high-quality strobe lights for photography or other options. If you use the same lighting setup for a sequence of photo sessions, you will achieve consistency across all your images, which adds a professional feel to your website.
If you opt for artificial lighting, place your main source to the left of a product. Don’t raise it too high – the face height of a model or a mannequin works just fine. If a light source is located too high, a hat will inevitably cast harsh shadows, which cause much trouble during editing. Remember to locate the light slightly in front of a mannequin in order to get a perfectly lit face.
Moreover, you need to use a reflector board. Put it on the right side at a face level so that it can reflect the light from the left and reduce dark shadows on the right part of a face.
Hands get tired rather quickly, so if you plan to take hat photos holding your camera for several hours in a row, you need to rethink your strategy. When learning how to take product photos, it is important to understand that you must always achieve a professional look. The task becomes less onerous if you have a reliable tripod at hand.
You can invest in a professional tripod brand model if you need it for numerous photoshoots. If such a purchase can burn a hole in your pocket, you can pile your books and then place a camera for product photography on them. Just make sure the construction is secure.

If you want to cope with hat editing faster, download these presets created by experienced retouchers. You can apply them to all types of product photos if you want to make them look flawless and catchy. These presets make colors brighter and clearer in no time.


