Chromatic Aberration Photoshop

See unwanted distortion of colors on the edges of your photos and want to get rid of it? Or vice-versa, want to spice up your images with trendy chromatic aberration Photoshop effect? Either way, you’ll find the most comprehensible way to create and remove it or download FREE chromatic aberration filters to make it in several clicks.
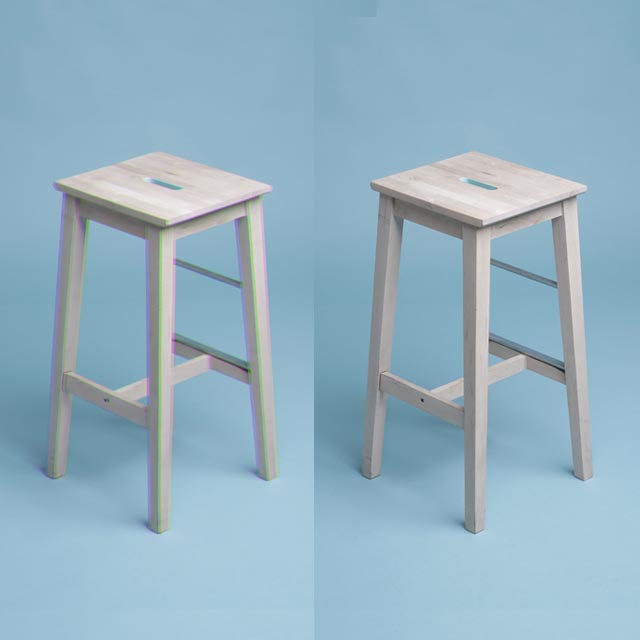
How to Fix Chromatic Aberration in Photoshop in 5 Steps


Aberration appears because light colors have different wavelengths, so the lens of your camera refracts them in a different way. You can usually see it around outside edges of pictures. These are the places where lines show where colors don’t align.
- Download Photoshop free if don’t have it yet.
1. Duplicate the Layer
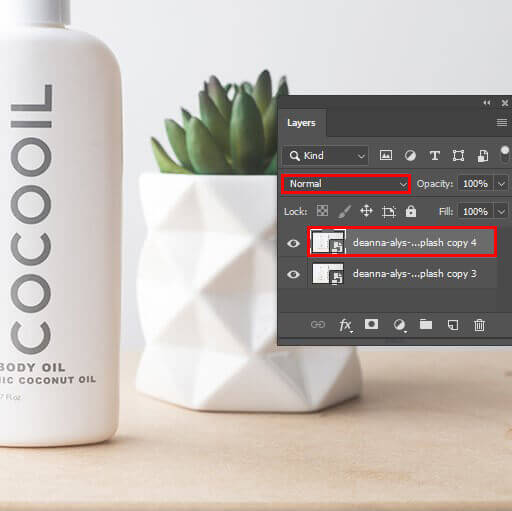
First thing you have to do is duplicate the layer. There are 2 ways to do it: going to the Layer tab at the top of the window - clicking on the Duplicate Layer option or using shortcuts Ctrl+J for PC and Command+J for Mac. Then, just give your layer a name and press “OK”.
This step is necessary because by duplicating your layer, you are sure to have a backup copy of an initial image that will remain unaffected by all the further changes.
2. Create Gaussian Blur
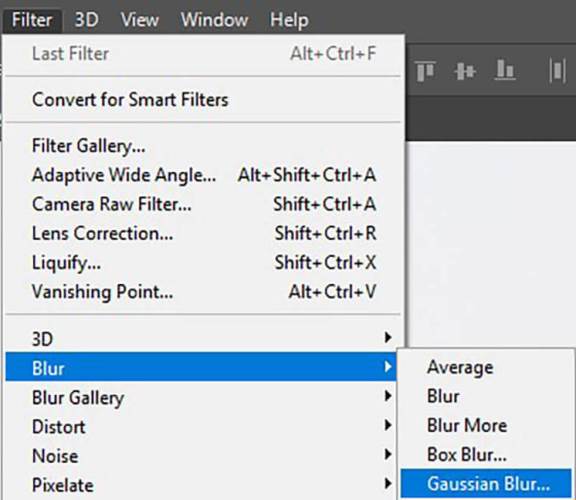
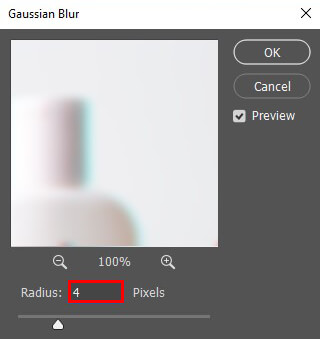
In order to do it, go to the Filter menu, select “Blur” and then choose “Gaussian Blur”. Select the blur radius in a new window.
Use 5-10 radius if you have pictures slight chromatic aberrations. In my case, I have set the radius up to 9. Then, click “OK”.
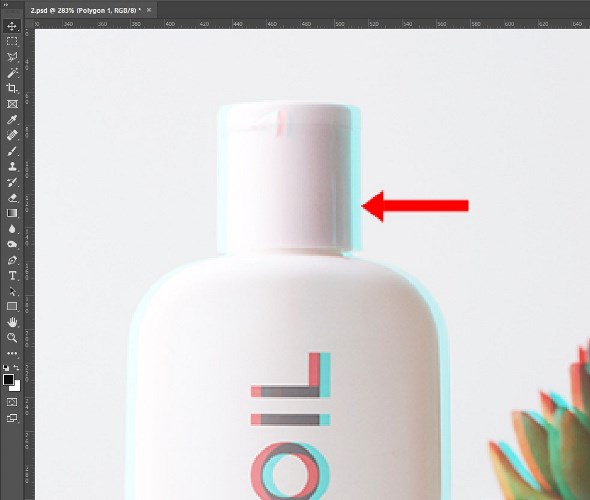
Your photo will become blurry, but it’s all good, we will correct this in the next step.
3. Change the Blend Mode

Open the Blend Mode menu. Its default setting is “Normal”. Click on this menu to see other modes and then click on “color”.
Chromatic aberration effect should be removed at this point. However, if you look closely at your image you’ll see, that this affected other colors too.
4. Add an Inverted Layer Mask
In order to determine what areas of the photos you want to affect and where to remove color aberration, you need to add a mask.
If you use PC, hold “Alt” and press the “Add Layer Mask” shortcut (the second icon at the bottom). If you use Mac hold “Option” and press the same shortcut.
You will notice a black square appear near the thumbnail of your layer. That means you've created an inverted layer mask.
5. Paint Out the Chromatic Aberration

Choose the Paint Brush and set the foreground color to white. After that, zoom in and start painting out the chromatic aberration in your picture.
To finetune, you can simply reduce the opacity, which can be found in the Layers panel, until you get a natural look. Simple as that!
- Learn more about how to mask in Photoshop.
How to Make Chromatic Aberration in Photoshop in 4 Steps
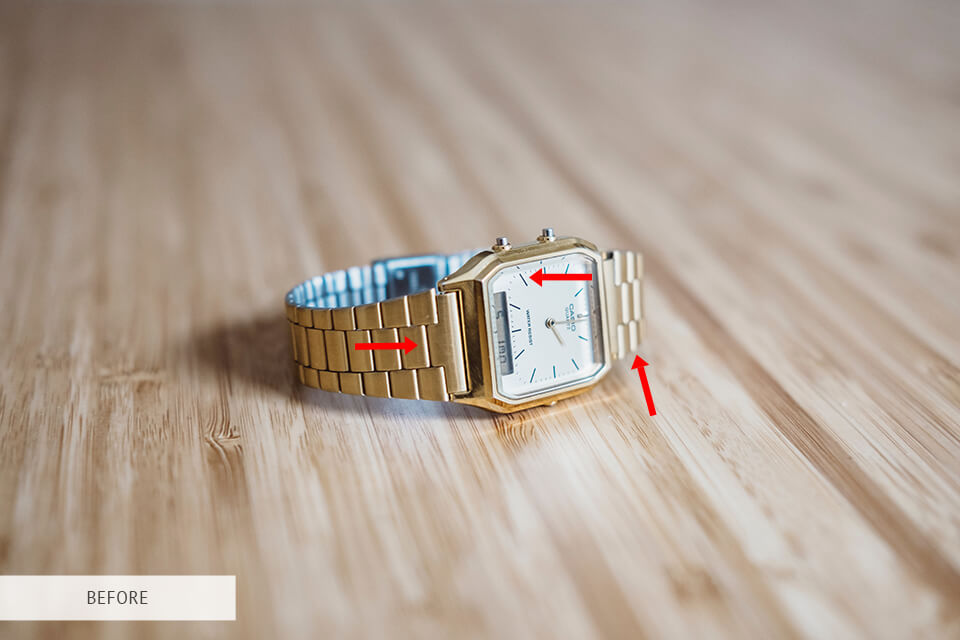
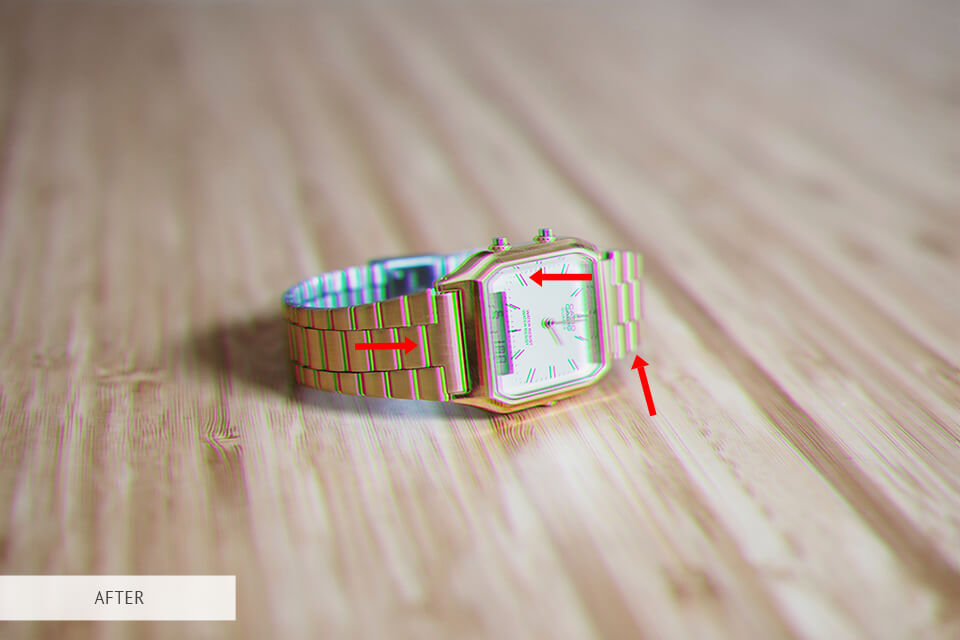
Photo editing styles vary: while some famous photographers try to get rid of chromatic aberration in their photos as it is considered to be a “defect”, others think it creates a trendy effect.
If you add a chromatic aberration effect in the right way, your photos will look super realistic and 3-dimensional.
1. Duplicate the Layer Twice

Mind, that it’s better to add chromatic aberration Photoshop effect at the end of your image editing process.
First, you need to choose whether you want to use all 3 colors (green, red, and blue) for this effect or just one or two of them. I am going to use all 3 colors.
Make 3 layer duplicates. The number of layer duplicates should correspond to the number of colors you are using.
2. Create Levels Adjustment Layers for Each Copy
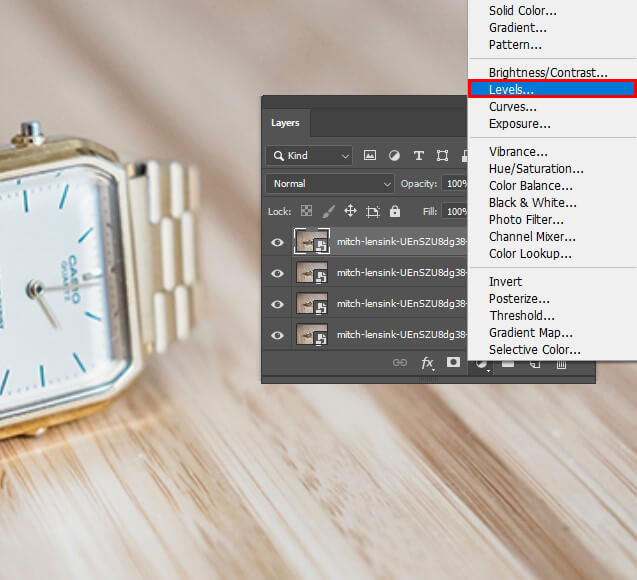
Click “Levels” in the Adjustments panel or select “Levels” from the Panel menu. Also, you can go to “Layer”, click “New Adjustment Layer” and “Level” respectively. Press the OK button in the New Layer dialog box.
One by one, open adjustments layers. Each of them is going to stand for a particular color. Give your layers the corresponding names: “green”, “blue” and “red”, so you wouldn’t confuse anything.
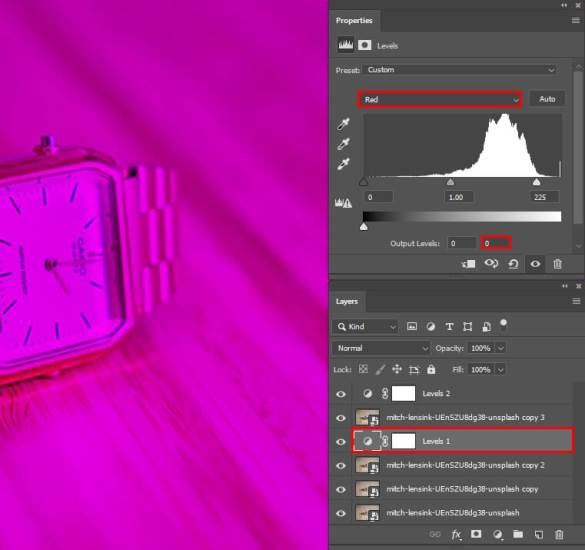
Next, I open my top adjustment layer, which is red. Once the “properties” box pops up, change the output levels of Blue and Green colors to 0. This is going to turn this layer red.
Then, choose the second duplicate. This one is going to be green. In a similar way, change the levels of Red and Blue to 0.
Finally, choose the third duplicate, which is going to be blue. Repeat the same actions for red and green colors.
3. Change the Blend Mode
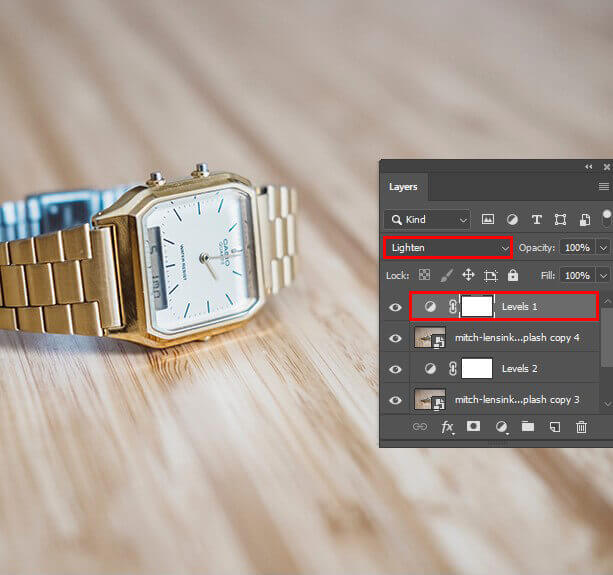
Its default setting is “Normal”. Click on this menu to see other modes and select “Lighten”.
Remember to change the blend mode in all 3 layers, otherwise this method is not going to work.
4. Add Distortion

Activate the Move Tool and select each layer one by one to modify their positions, by dragging them in any direction.
When you are dragging the layers, remember not to go overboard. If you overdo, this will cause a huge distortion that looks distracting.
- Find out how to remove shadows in Photoshop.
5 Ways to Work with Chromatic Aberration Effect Online and Using Apps
If you don’t want to add or remove chromatic aberration in Photoshop, you can try do it online, in mobile apps and other softwares.
1. Afterlight 2


This new version of Afterlight has a great function called “Chroma”.
It adds a nice chromatic aberration filter to your images. To achieve it click “Chroma”, move the slider to the right and intensify the effect.
2. Photo-Kako


This is another website that lets you add chromatic aberration effect online. The process is quite simple: upload the photo, dial in the configurations and that’s it!
It also lets you perform basic image editing.
3. IMGonline


This website is the easiest one for creating chromatic aberration effect online. Just select a picture on your computer or phone and then click OK. Enter other settings and wait for the edited picture to load!
4. Photo Mate R3
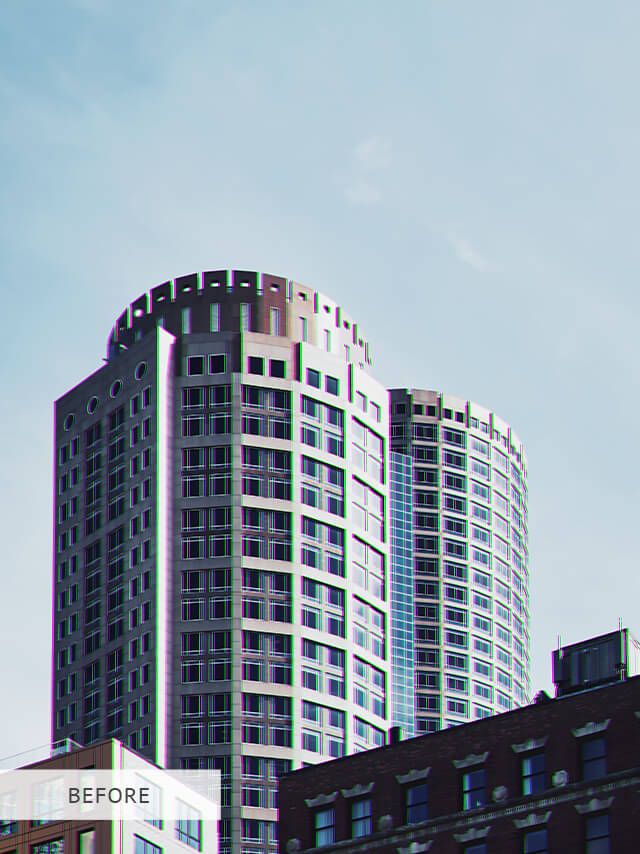
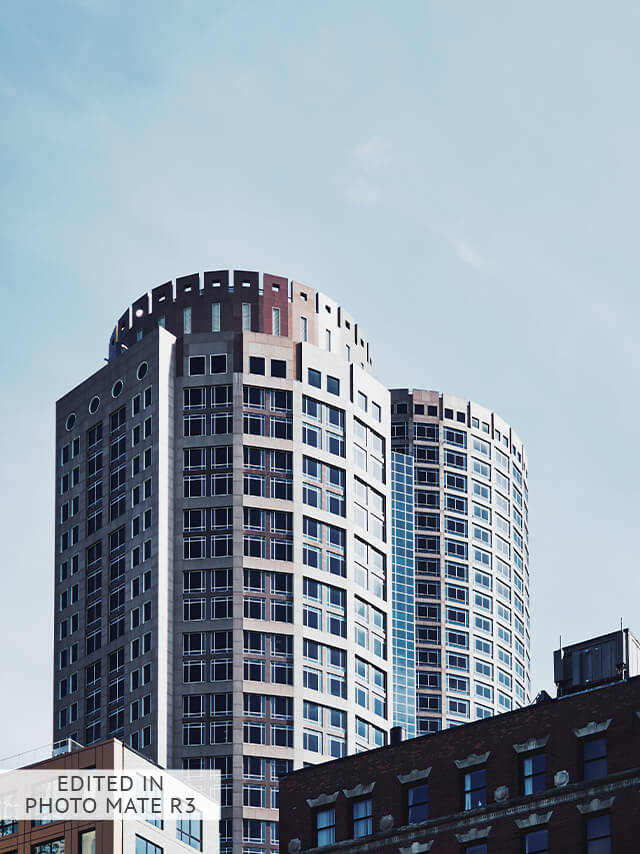
This is an app that provides non-destructive image editing, decodes and supports RAW files.
The difference between this application and other editing apps, is that it has a Lens-Collection function, that gives you a possibility to auto-correct distortion, vignetting, and chromatic aberration.
5. Zoner Photo Studio


This program offers the latest photo editing technology. Although it’s not available for Mac, if you have Windows - it’s perfect for removing color aberration. Simply choose Adjust > Chromatic Aberration, and the problem will be fixed.
- Learn how to fix Photoshop lagging.
Freebies for Photoshop Photo Editing
Add these 5 Photoshop filters to your collection if you would like to achieve looks that imitate chromatic aberration effect and create awesome bright pictures in just a few seconds.
Free PS Action "Lomo"


This free double exposure action will harmonically add a great chromatic aberration effect. A mix of red and blue will give your pictures a completely new look!
Free PS Overlay "Plum"


Use this chromatic aberration overlay in order to make a portrait creative and unique. The unusual combination of dark green and maroon colors will give a special look to your photos.
Free PS Action "Vignette"


Just like color aberration, vignetting is also one of the common lens distortions. Some photographers remove it from their pictures, others like to keep it.
The action adds depth to the image and puts a focus on the main subject and diverts attention from details in the background.
Free PS Overlay "Dream"


This overlay the softest overlay in this collection. A light pink veil spreads all over your photo, reduces sharpness and blurs the background a little bit.
Using this overlay, you will have an opportunity to create lovely and dreamy photos.
Free PS Action "Glitch"


This action offers a glitch effect known from VHS tapes. It is also similar to the chromatic aberration filter.


