
I am a freelance photographer, who often experiences phone camera glitching because of incorrect settings, overflowing memory, dirty lenses, outdated systems, but as my experience shows there are many ways to solve this problem on the spot without contacting service centers on any of the devices you use.
Often dealing with my camera glitches is very annoying, no matter what type of device I’m shooting with an iPhone, Android device, Zoom, or even a backup camera. The most frequent problems I have to deal with are flickering, freezing, distorted images, or inability to launch the camera application.
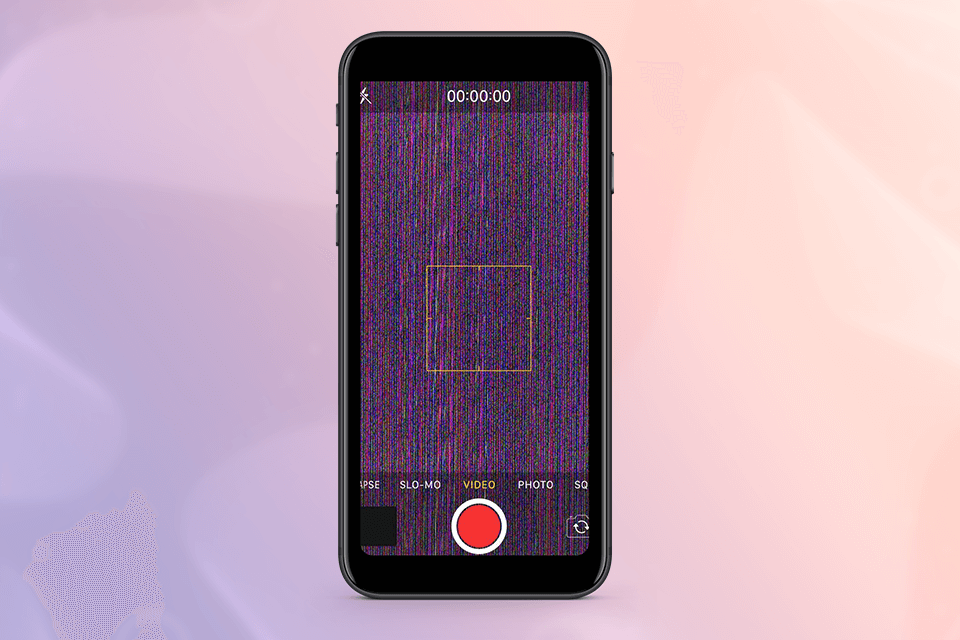
If you are sure that your iPhone camera has not been damaged, check the following reasons:
The following methods almost always help me solve the problems described above:
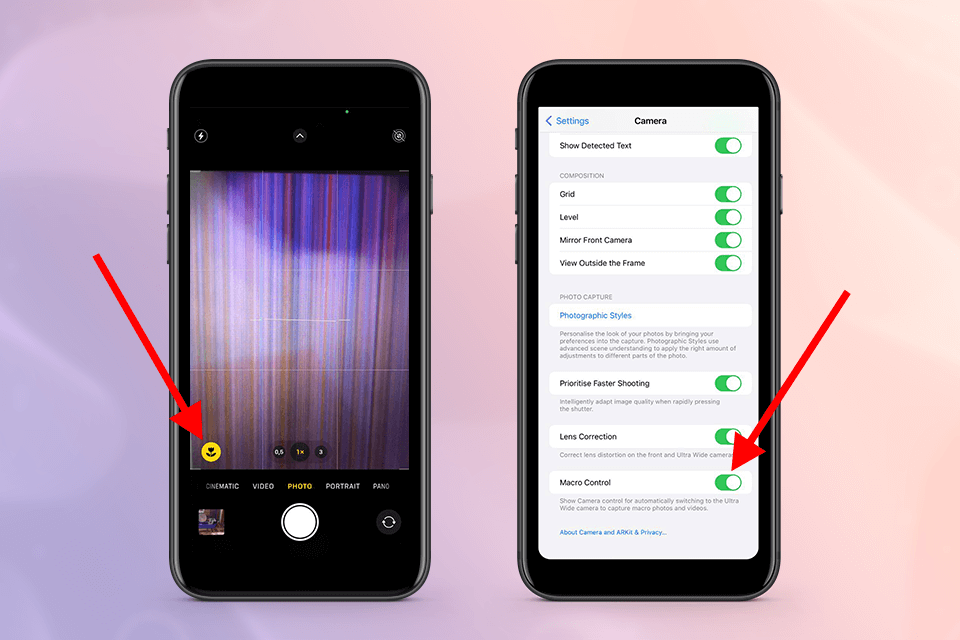
Go to Settings and launch the camera application. Then, switch off Macro Control.
When I do not need the auto Macro mode on my iPhone with the best camera, I turn off it temporarily by clicking on the flower icon when shooting. Another way to fix this blinking is to change the setting.
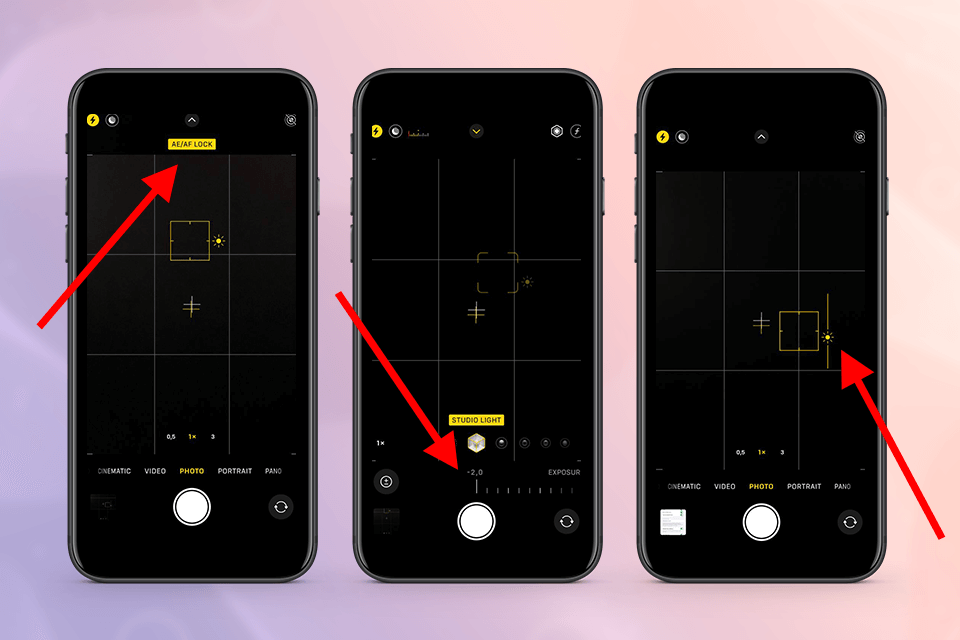
With the exposure slider, it is easy to adjust the image brightness. Besides, it takes into account the lighting conditions by setting the exposure automatically.
If the reason why my iPhone camera glitches is the exposure, I launch the camera application on my device and perform the following steps:
1.To change the focus and set the exposure, you need to tap on the screen. Then, you will see a yellow border with a slider near it.
2.By dragging the slider either up or down, you can easily correct the exposure.
Push and hold the focus point to the AE/AF Lock appear. Then you can lock new configurations.
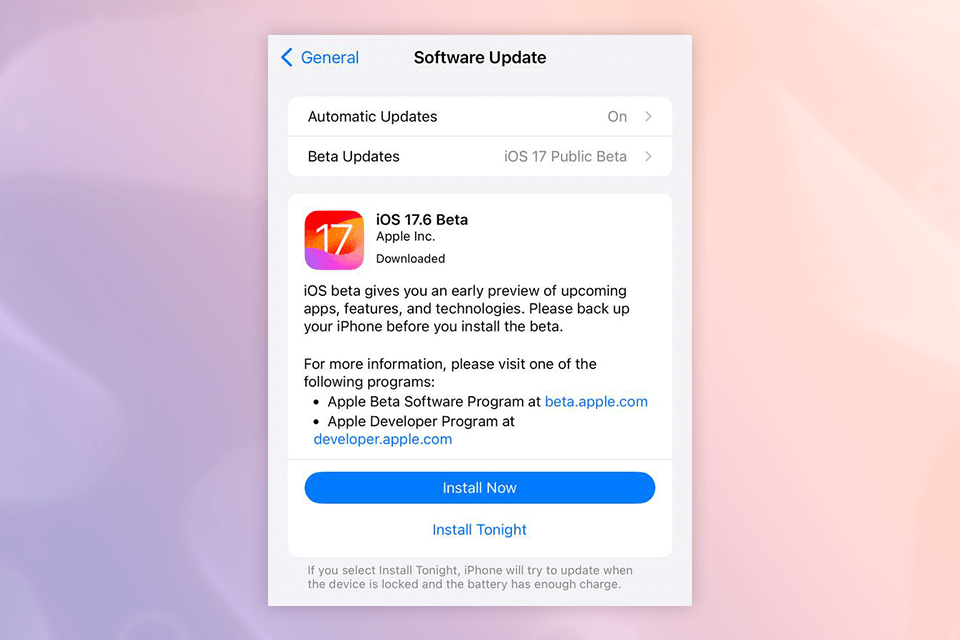
One of the methods to fix any software issue that can lead to such unpleasant results as the camera app blinking or flickering is the installation of the latest version of iOS. Go to Settings > General > Software Update.
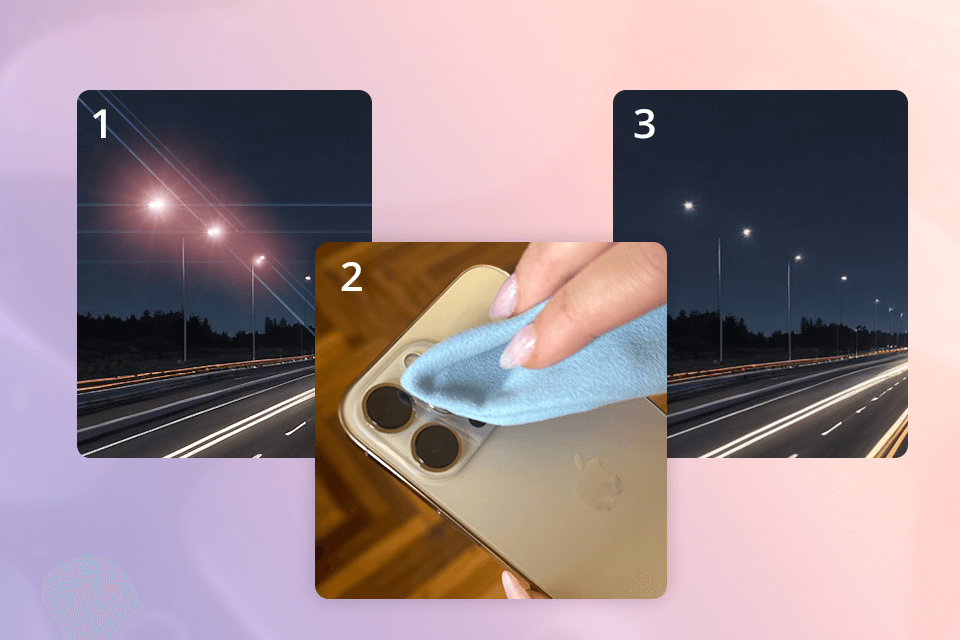
I always use slightly damp microfiber or lint-free wipes to clean up my Apple camera before taking photos. By doing so, I can increase the quality of the image and eliminate such issues as camera blink and flicker. This hack also works for all platforms listed in this guide, as well as for external phone camera lenses.
Sometimes, photographers can fix the technical problems with their cameras by simply rebooting the device. To do this, you need to press the power and volume buttons at once and wait until you see the Apple logo.
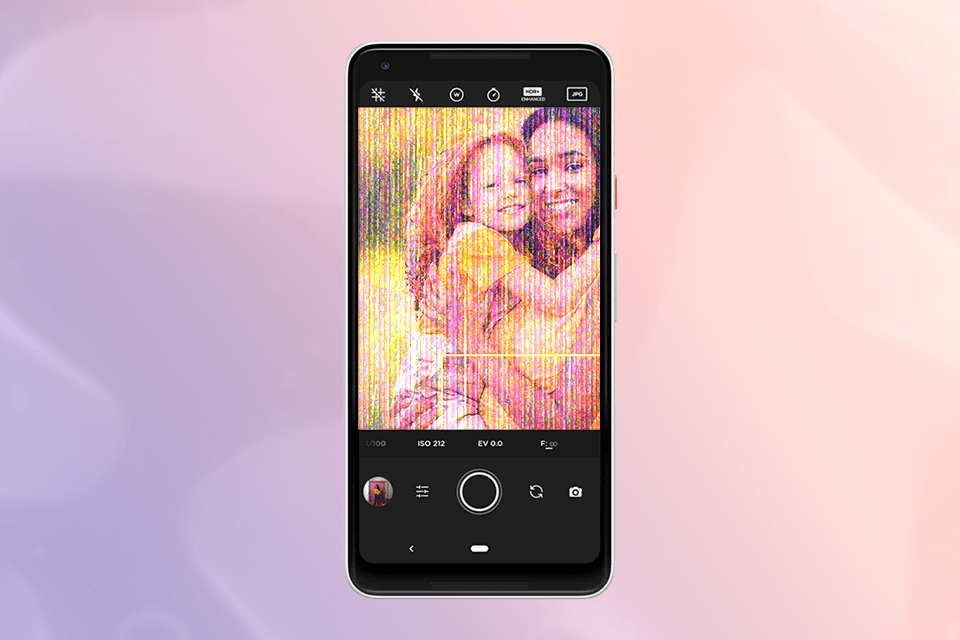
As an experienced photographer, I can assure you that Android users face flickering issues quite often, as the cameras of these devices are constantly synchronizing their anti-banding filter with the external lighting’s frequency.
In the USA, NTSC with the refresh rate of the television signal of 60 Hz is the current standard. As the image on the screen can refresh 60 times per second, you can shoot both 30 or 60 fps videos.
However, using multiple lighting sources means varying frequencies that make the flicker more noticeable when shooting videos or photos.
Memory overflow and malfunction in the app performance are other reasons why my back camera is glitching.
To solve this frequent issue with my Android camera, I take advantage of one of the following methods:
The first one is to switch from an NTSC to a PAL video format, which enables me to set the camera view at 25 or 50 fps. But it should be noted that in such a variety of Android devices only Sony Xperia supports this format.
In this case, installing third-party Android camera apps on a phone will be a sure way to stop camera flicker. If you are looking for a free tool, try Open Camera, but those who are ready to pay should purchase FiLMiC Pro, which is a pro-level camera app with excellent functionality.
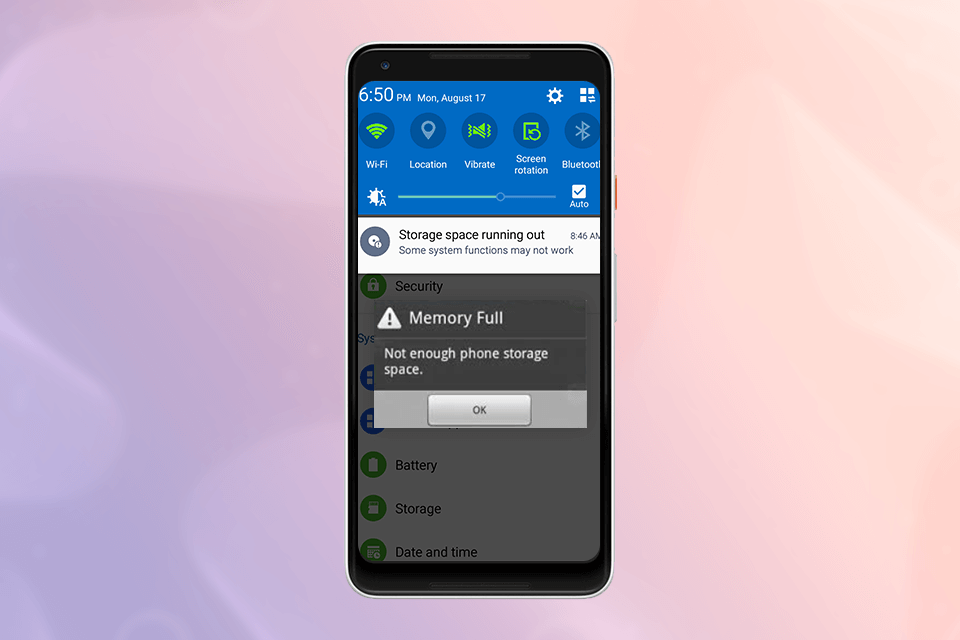
Using your photo gallery, transferring images from the camera to a phone, and removing duplicates or pics you do not like are the actions that can help you with this issue.
However, instead of freeing up my camera memory, I prefer extending it with an external storage like a microSD card.
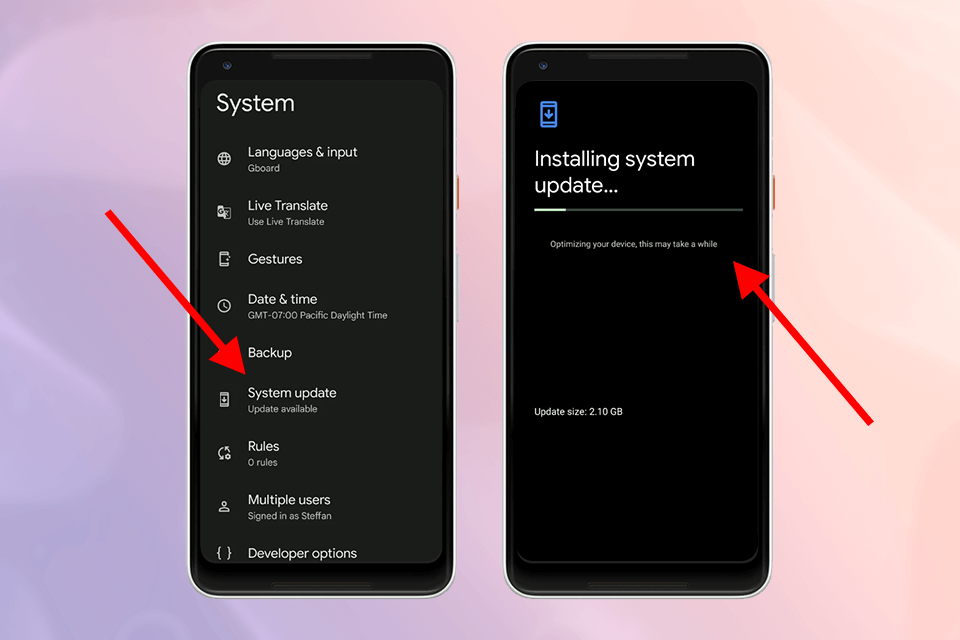
Upgrade the OS of your smartphone and check if the most recent camera app is installed on your device. Very often, the glitches of my smartphone camera cease after the reinstalling of the camera application. In some cases, it is also possible to do a factory reset to erase the glitching app.
Method 4: Seek professional help
If you experience flickering under natural light, back up your files, take your phone to the repair center, and entrust it to professionals.
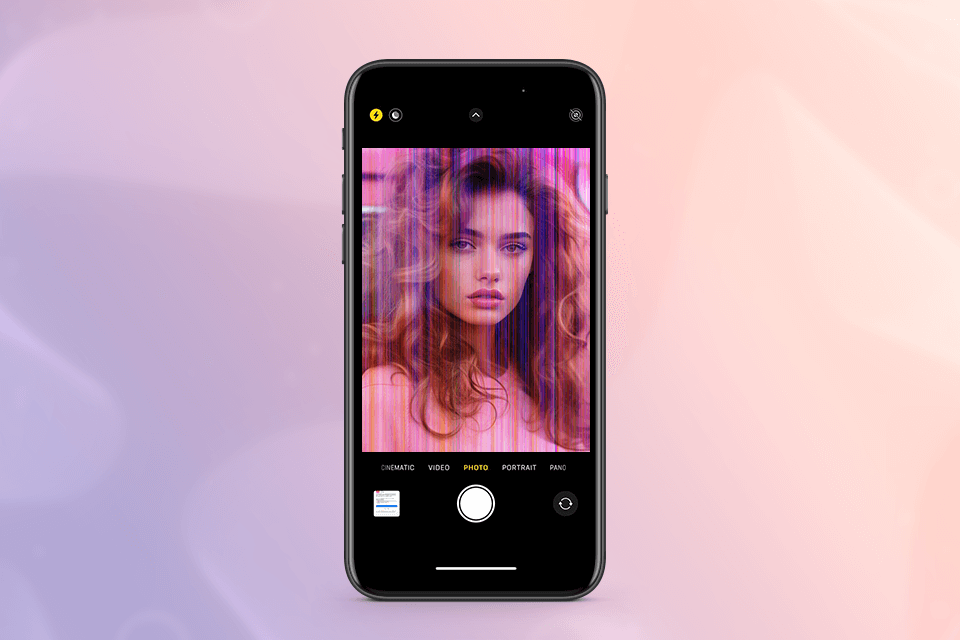
Of course, all the problems and solutions listed above apply to both the rear and front cameras, it's just that the latter can have several specific causes of glitching.
Check the next methods to fix the front camera glitching:

If I find a crack in my screen, I never try to fix it myself. The safest and most effective solution is to address the professionals who will repair the screen or replace it.
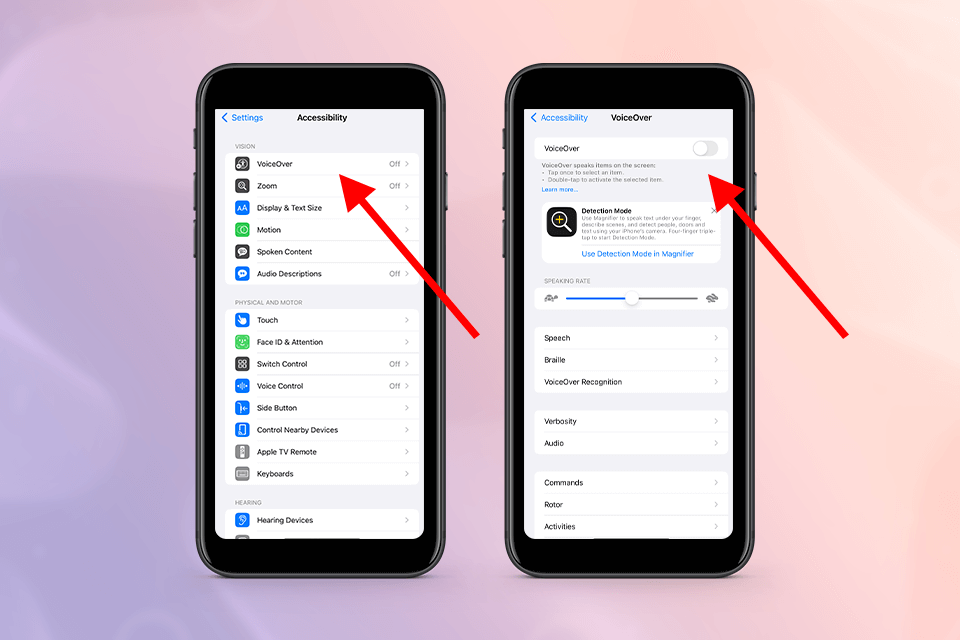
To deactivate this feature, you should unlock your iPhone and follow the next path Settings > General > Accessibility > Voice-Over, and switch off this function.
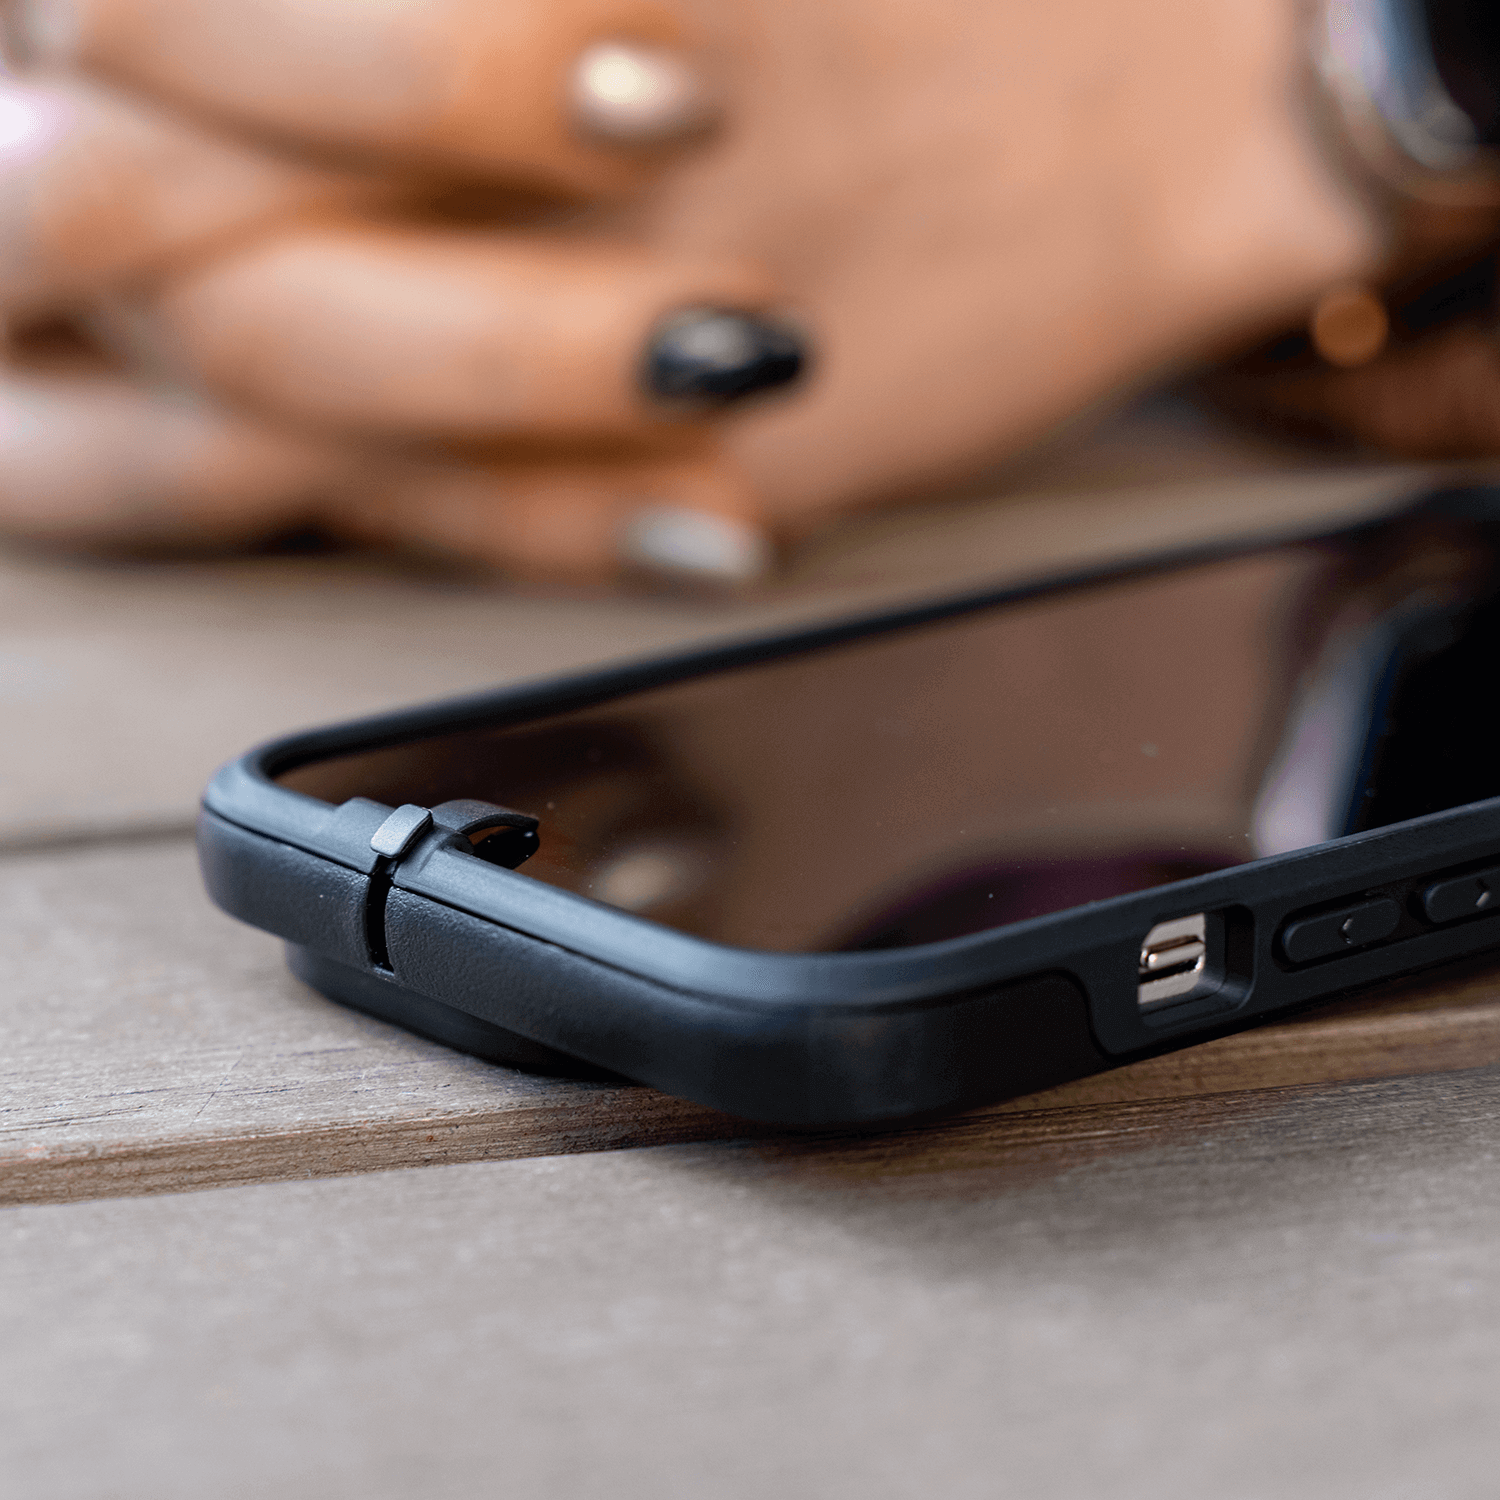
The tight case, which is too small for your phone, messes up with the camera phone performance and the buttons designed to shoot pics. Even minor cracks and defects on the casing can be the cause of camera glitching. So, choosing a perfect case means a lot.
The best way to fix this issue is to contact the phone shop or official service center and have it fixed by experts. Do not do any repair jobs on your own, as you can damage the phone’s internal components.
From my practice, it is always more difficult to find the cause of bugs on a laptop camera, because there are many more reasons. Here are the ones I encountered:
One of the following methods always helps me get rid of my Windows or Apple camera glitching:
Start by turning off and then back on your laptop, as this is one of the most effective ways to fix any temporary software issues.
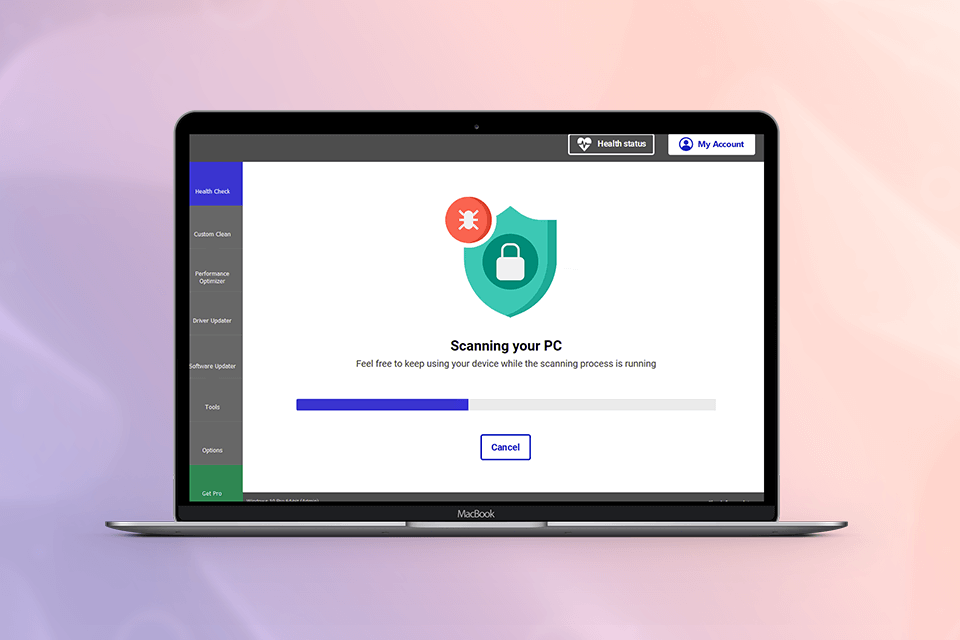
To eliminate laptop camera glitching, use reliable and the most recent antivirus programs and scan the system regularly. By doing so, you can delete any malware that can affect the camera’s performance. My favorite free antivirus, which I personally use, is Kaspersky.
When working on some specific camera application, I clear all data and settings from a device to return it to its default settings. By doing so, I can resolve the most frequent configuration issues.
Take advantage of various webcam software for Windows 7 and other OS to check if the issue has been resolved. This also allows defining whether the source of the failure is a specific app or the state of the whole system.
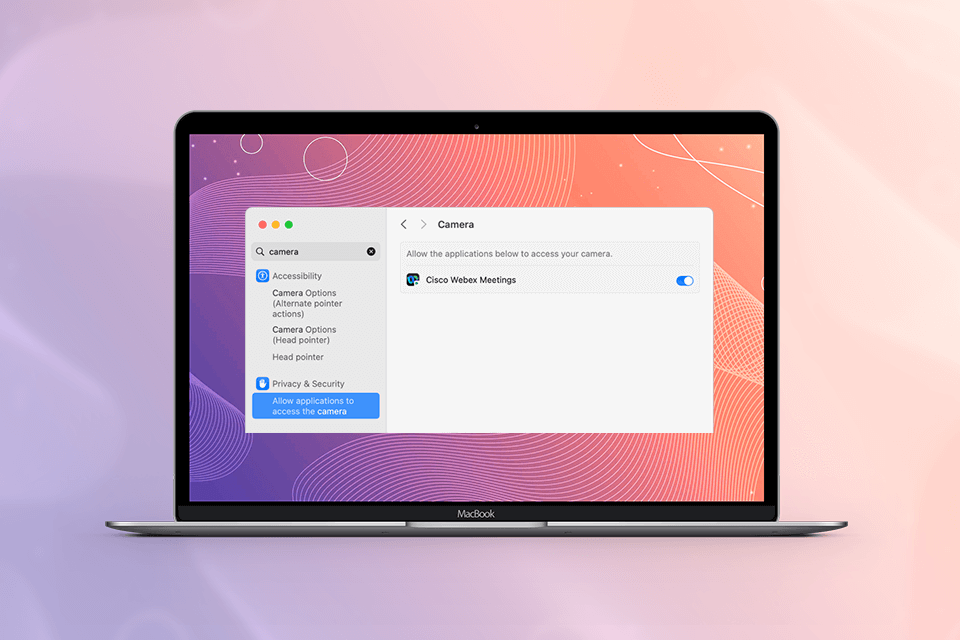
Open the System Setting on Apple laptops to see the camera permissions.
By doing so, you’ll see the list of applications that have access to your camera. Then you can customize the permission for each specific application. You can check the indicator to see if the camera is turned on at the moment.
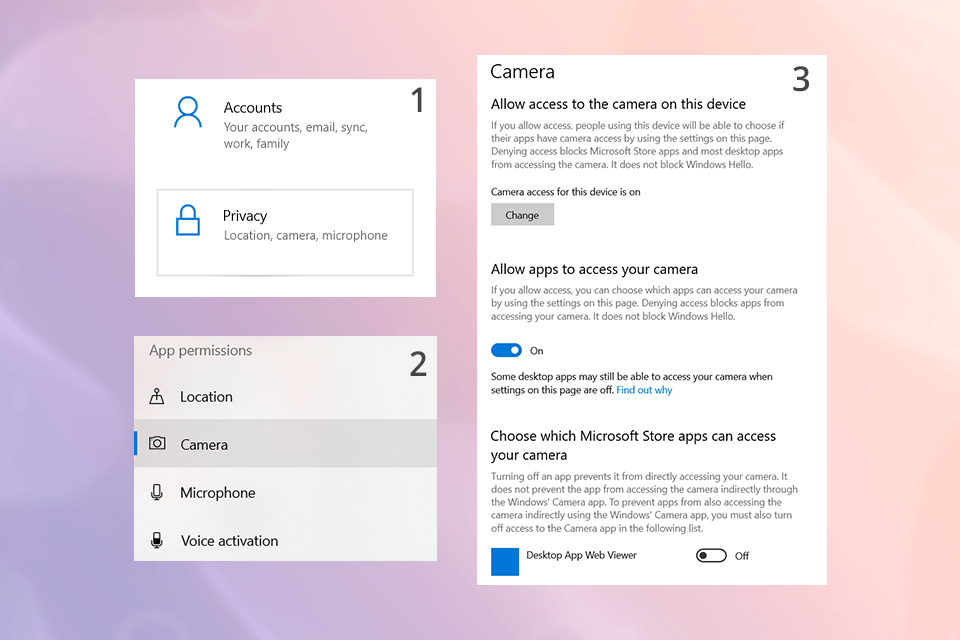
For Windows laptops, you need to do the following actions to manage webcam permissions:
Speaking about external web cameras, any interruptions of the connection can lead to glitches. You should check if all cables are securely connected. When it comes to integrated camera glitching, ensure that all the internal connections are tight and reliable.
If none of the above methods helped, it is most likely to be a problem with hardware. Get in touch with the manufacturer of your device or ask a professional technician for help.

After the last Zoom update, my image started glitching, and when I began to search for the solution to this problem, it turned out that many users had reported experiencing Zoom camera glitching after updating the app.
So, I discovered the following reasons for the deterioration of the image quality in Zoom:
The next methods always help me get rid of camera lag in Zoom, no matter what device I use it on:
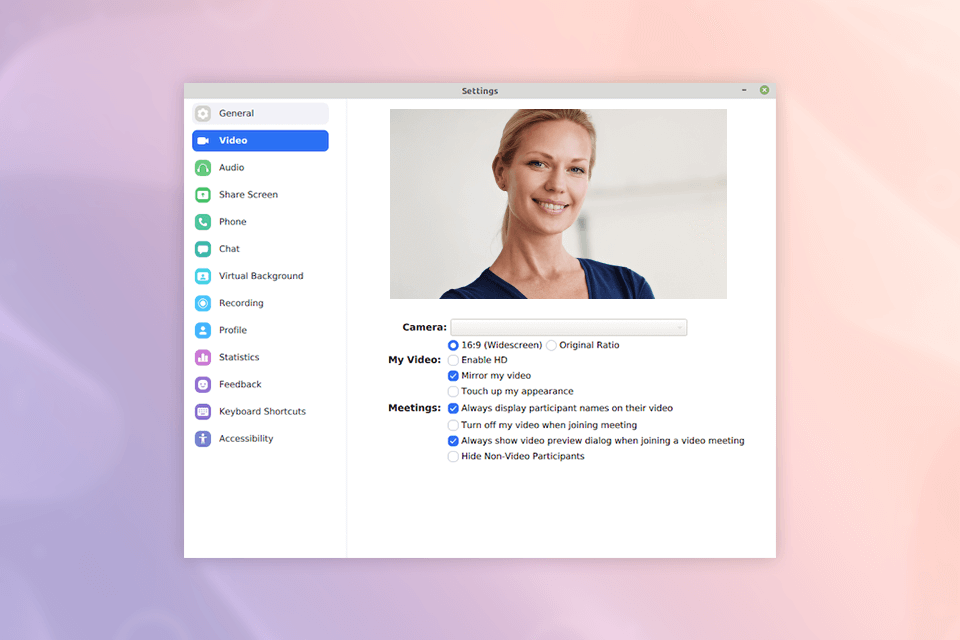
By turning on the de-noise feature, you can enhance video quality. Find the cogwheel under your profile pic and click it to access the Settings. Select the Video tab and click "Advanced" at the lower edge. Switch off the first option to turn on de-noise, which will appear at the top.
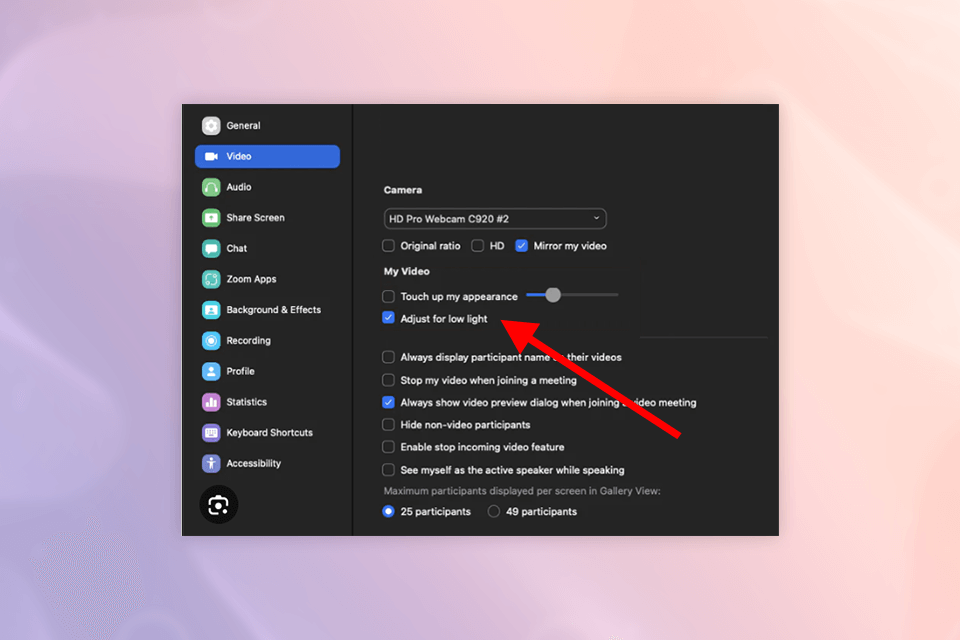
Choose Settings > Video. Find the “Adjust for low light” option under the My Video section and hit Auto from the drop-down list. This option is crucial especially if you do not have powerful lighting for Zoom calls.
If the glitch appears after the application update, a newer update can help resolve the issue. Launch the Zoom application on your PC and press the Check for Updates button under your profile pic.
Establishing a high internet connection can improve the video call experience of mobile users. Low speed of internet connection can deteriorate the quality and cause the Zoom camera glitching. Besides, its interface makes the usage of applications more challenging on mobile devices. Therefore, to enjoy better connectivity and communicate without problems, I advise you to switch to a notebook PC and Wi-Fi internet.
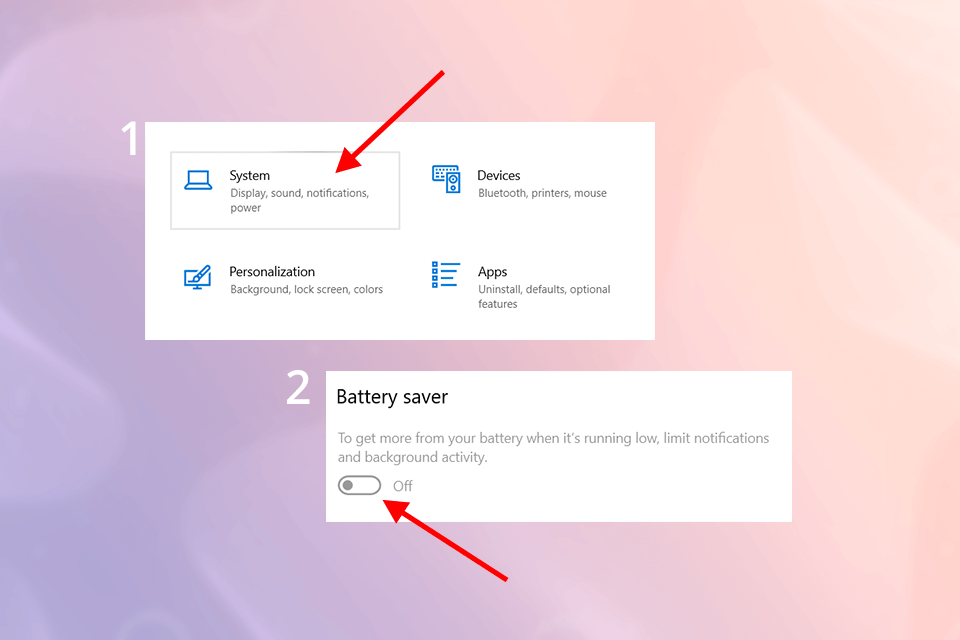
This mode limits data usage to save cellular data, which can become a serious problem. To disable it on Android devices, navigate to Settings > Mobile network and switch off "Data Saver." In addition, if you communicate via Zoom using a laptop, make certain that the battery saver mode is off by following the next path Settings > System > Power & battery > Battery Saver > Turn off now.
The default settings of any device are to restrict third-party applications from accessing your camera for Zoom meetings. You need to allow apps like Zoom before launching the camera manually. I wrote how to do it on macOS and Windows in the previous section, but here's how to enable it on your smartphones:
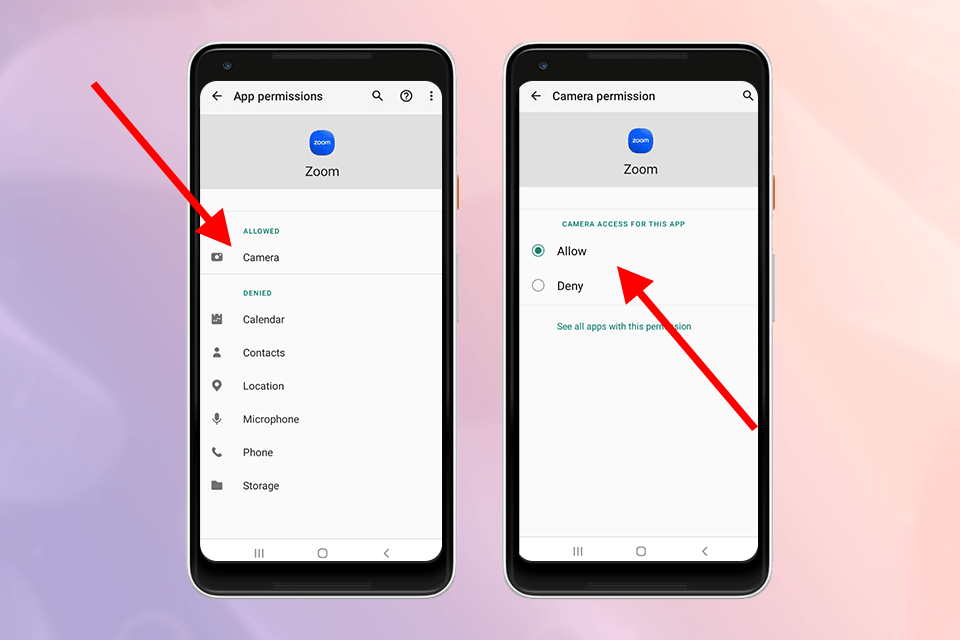
For Android users:
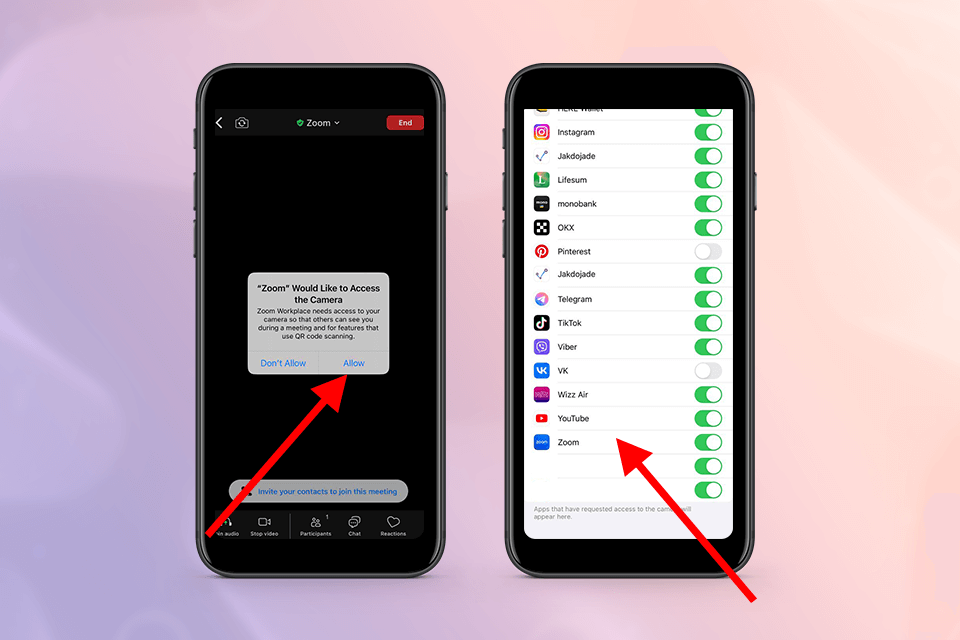
For iOS users:
Make sure that you installed the latest version of Snapchat. If the app should be updated, head to the Google Play Store to look for the most recent updates. Make certain that you allow camera access to Snapchat.
The connection to the web should be stable and fast – this is a must.
Close and launch the FaceTime application again, then try to call via the tool again. Occasionally, a quick redial is required to achieve a more stable connection.
If after restarting the call, the issue still disturbs you, try to turn off FaceTime in your device parameters. Then, launch your device again, restart the application, and make another attempt.
Turn off and turn on your router and modem (if you are using a Wi-Fi connection) again. If you rely on mobile internet, look for a location with a better signal.