25 Tilt Shift Photography Tips With Examples

Tilt-shift photography is a magnificent shooting technique that involves tweaking camera settings or a picture to achieve a miniature look of a subject. You may create the tilt-shift effect either in the picture editing software, for instance, Photoshop, or straight in the camera. In this post, I will describe in detail how to properly take pictures using the tilt-shift technique.
25 Tilt Shift Photos and Tips
Get a hang of the tilt shift photography technique by following the tips presented below. For your convenience, I have divided all of them into separate categories.
1. Take Photo from Above

In case your aim is to make the subjects resemble miniature-scale ones, you need to shoot from a rather high spot, for instance, the balcony, on the last floors or the roof deck of a building. As a result, you will achieve the necessary tilt shift effect.
But keep in mind that it is better not to photograph right from the overhead angle. Otherwise, it will be hard to get the sought-after depth of field.
2. Use Filters in Ps to Imitate the Effect

There is no need to purchase a tilt shift lens if you have Photoshop or. The software already offers several blur filters, a tilt shift one included. This filter beautifully imitates tilt shift lens miniature effect and isn’t difficult to work with. Besides, it will help you get a selective focus in the shot.
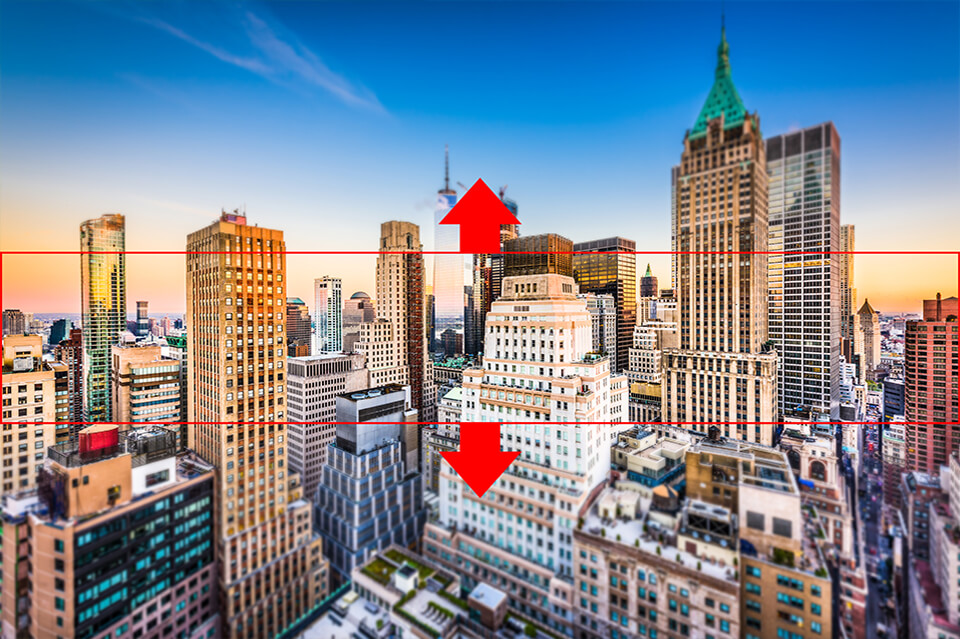
To make the blurring effect more or less intense, try moving the Blur slider or the intensity dial. For a better result, you may change the position of the entire filter or adjust and move only the top and bottom parts separately.
3. Choose Simple Scenes

Tilt shift photography loves minimalism. Minuscule scenes are typically simplistic, so you shouldn’t overcomplicate your own scene as well. Choose a location that doesn’t have many distracting elements, that lets you concentrate on particular subjects, for instance, a building, passers-by, greenery, etc.
4. Choose an Eye-Catching Subject

A captivating subject is one of the key components of a successful tilt-shift shot. If the subject doesn’t catch an eye, people are unlikely to understand the idea you are trying to convey with the picture.
The tilt-shift shooting technique loves intricate details, which a regular flat building won’t be able to produce. For example, a tilt-shift picture of a cathedral with elaborated domes and spires is bound to attract more attention than a picture of a shopping mall that seems flat from the top.
5. Pose People Towards the Back of the Shot
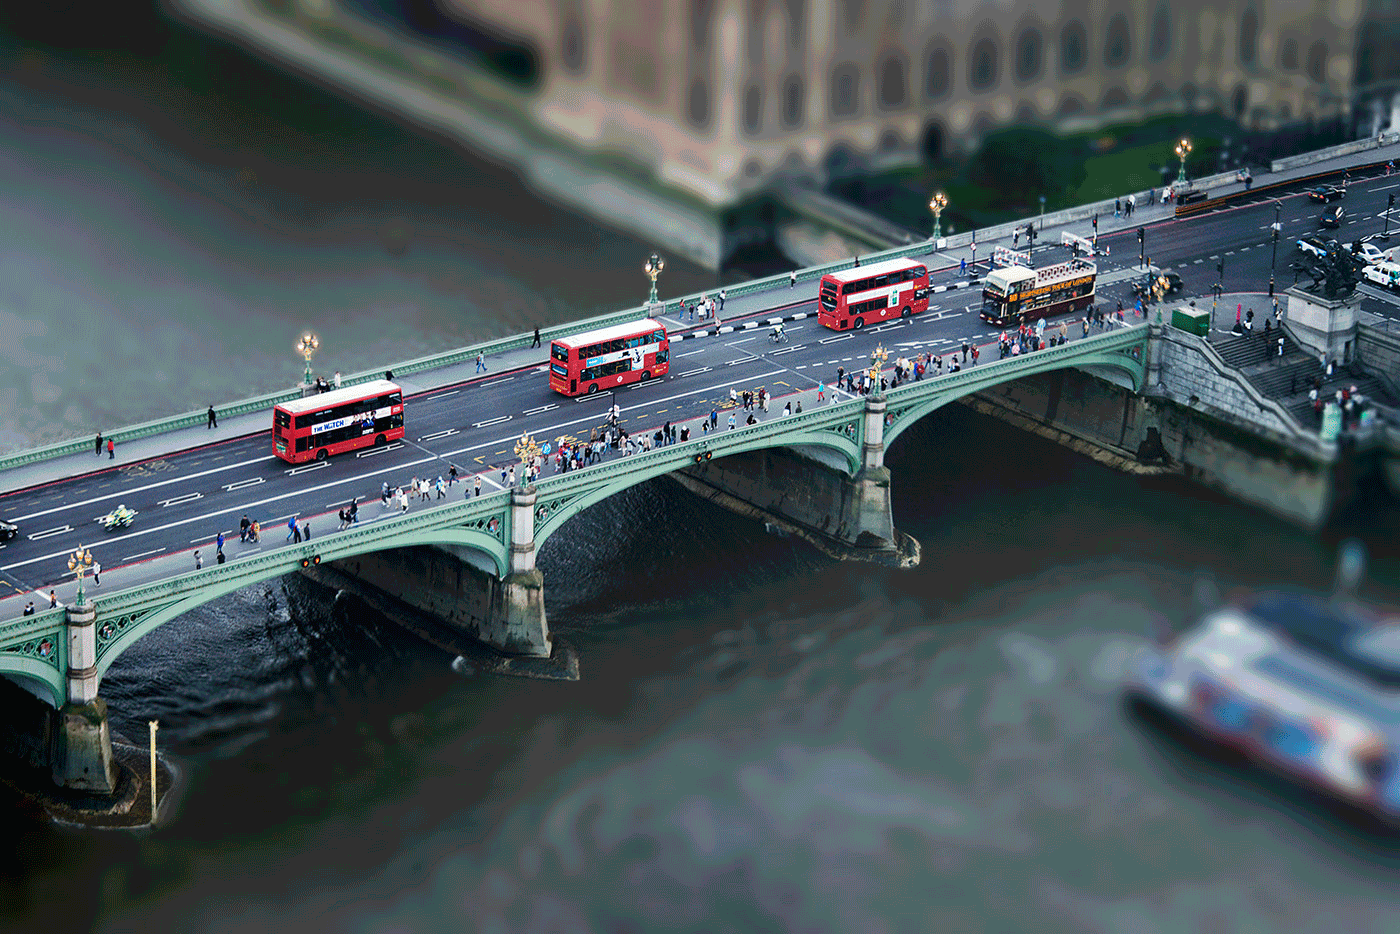
People should be smaller than the other subjects in tilt shift photos. Position them towards the background so that their faces, clothes, etc. aren’t so noticeable. As a result, people will complement the scene rather than divert attention from the main subject.
6. Keep Sharp Focus Point

Since many elements of tilt shift pictures are blurred, you must have a sharp focal point. Besides, it involves determining whether the subject is contrasting enough to stand out. To do this, you need to tilt the lens and pick decent lighting that will match the subject.
7. Enhance the Colors
It won’t hurt to play around with your tilt shift photography in the picture post-production software. Slightly increase saturation, apply color correction and a remarkable result is guaranteed!
8. Have a Tilt and Shift Lens
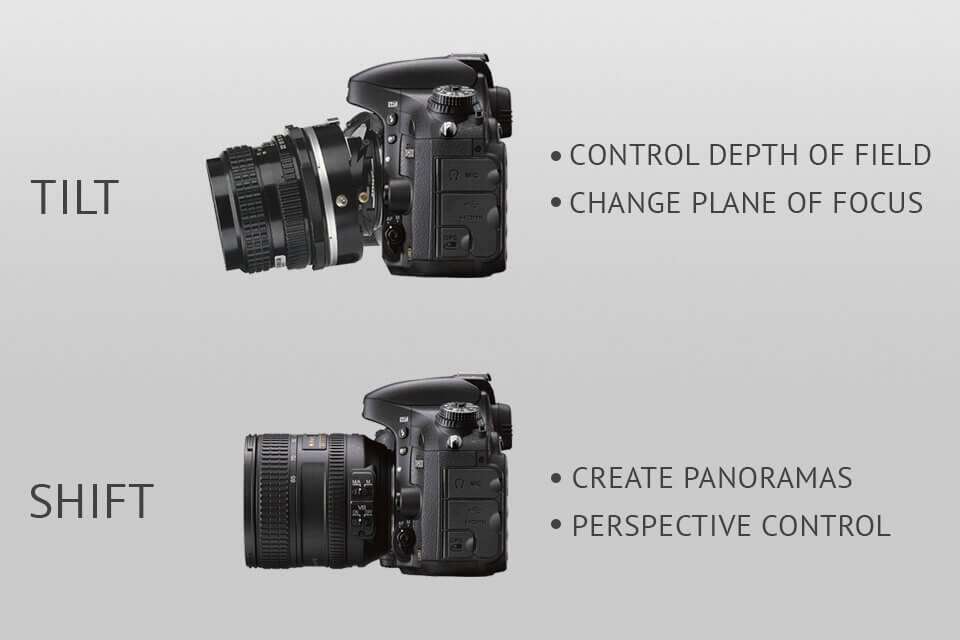
A tilt-shift or perspective-control lens is designed specifically for the slight rotation of the frame’s focal plane with a pitch or yaw and for skewing the frame’s perspective. It happens due to the extra features that enable you to rotate, shift and tilt the lens. Tilt-shift lenses aren’t really affordable but provide shooters with the best possible results. One of my favorite models is Canon TS-E 17mm f/4L.
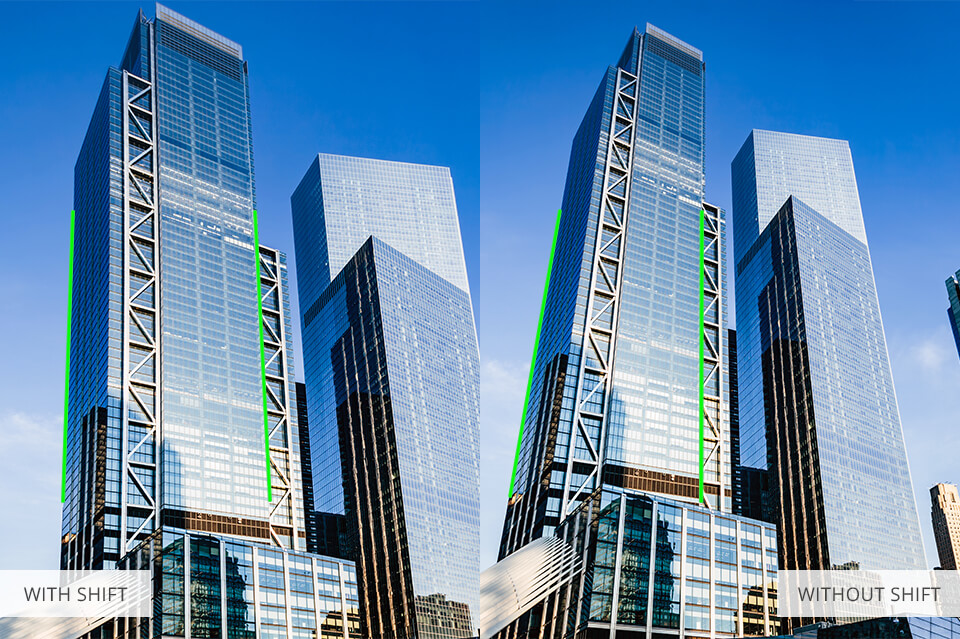
Tilt-shift lenses are quite multi-purpose and are used not only in miniature photography. They are also effective for avoiding reflections and obstructions, fixing converging vertical lines, taking panoramic pictures, raising the depth of field, sideways tilt.
9. Use a DSLR

Tilt shift lens photography requires a DSLR camera. On today’s market, there are a variety of options capable of producing qualitative shots. My personal recommendation is Canon EOS 70D.
- Discover the best DSLR cameras.
10. Use a Tripod

It is practically impossible to get decent tilt shift photos if you don’t shoot with a tripod. Many beginners believe that tripods are heavy, bulky and keep them from moving around freely. In case you are going to photograph with a tilt shift lens, a tripod is something you will have to get used to. Pay attention to Vanguard Alta Pro Tripod, a qualitative and non-expensive model.
- Find out best budget tripods.
11. Use a Drone
Imagine that you want to photography a certain scene but can’t seem to find a suitable building to take a tilt shift shot from. In this case, drones will come to the rescue. The combination of tilt shift and aerial shooting techniques results in exceptional pictures. When searching for the drone, consider the DJI Mavic 2 model.
- Learn how to choose a drone.
12. Use Deep Depth of Field
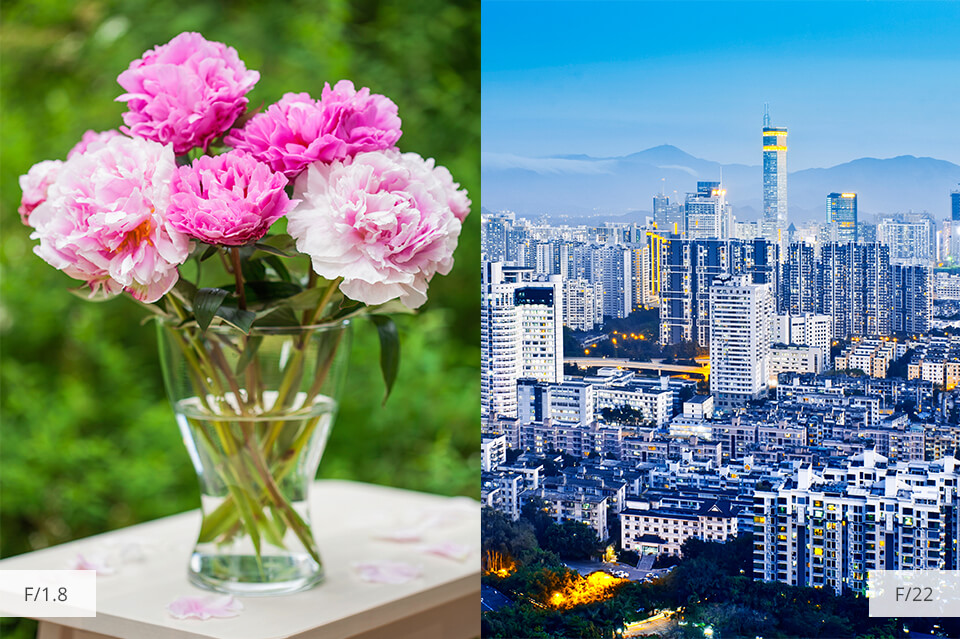
When you set the shallow depth of field, you won’t be able to imitate the use of tilt or swing effect. In case the picture has a finite depth of field, no image post-processing software is capable of producing the same sharpness as the tilt or swing effect to intensify the sharp areas. Those, who don’t shoot with a tilt-shift lens and wish to achieve this effect in software need to remember about that. The recommended aperture values are from f/11 to f/22.
- Learn more about aperture and depth of field.
13. Capture Architecture

If you haven’t tried doing tilt shift lens photography before, shooting architecture may be an excellent starting point. The city is full of gorgeous scenes that are worth capturing. Moreover, photographing cityscapes isn’t so difficult.
14. Capture Landscapes

Landscape photography is another great tilt-shift shooting idea. Water bodies or houses surrounded by greenery, forests, mountains, paths and roads will serve as stunning subjects for your tilt-shift pictures.
15. Capture Construction Work

You may often come across all kinds of construction work in the city. You will notice workers wearing uniforms and plenty of machines that resemble toys.
A construction scene is more intriguing than a regular city one as it continuously changes and develops. With this tilt shift shooting idea, you have a chance to tell a story with a meaning behind it.
In general, tilt shift shots give a deeper understanding of scale and sort of ruins the viewer’s perception of the sizes of some objects in relation to other ones.
16. Capture Landmarks

Landmarks work great with tilt shift photography. We are used to seeing famous landmarks from a certain perspective. So it will be interesting to see how they will look like in a miniature.
17. Transport

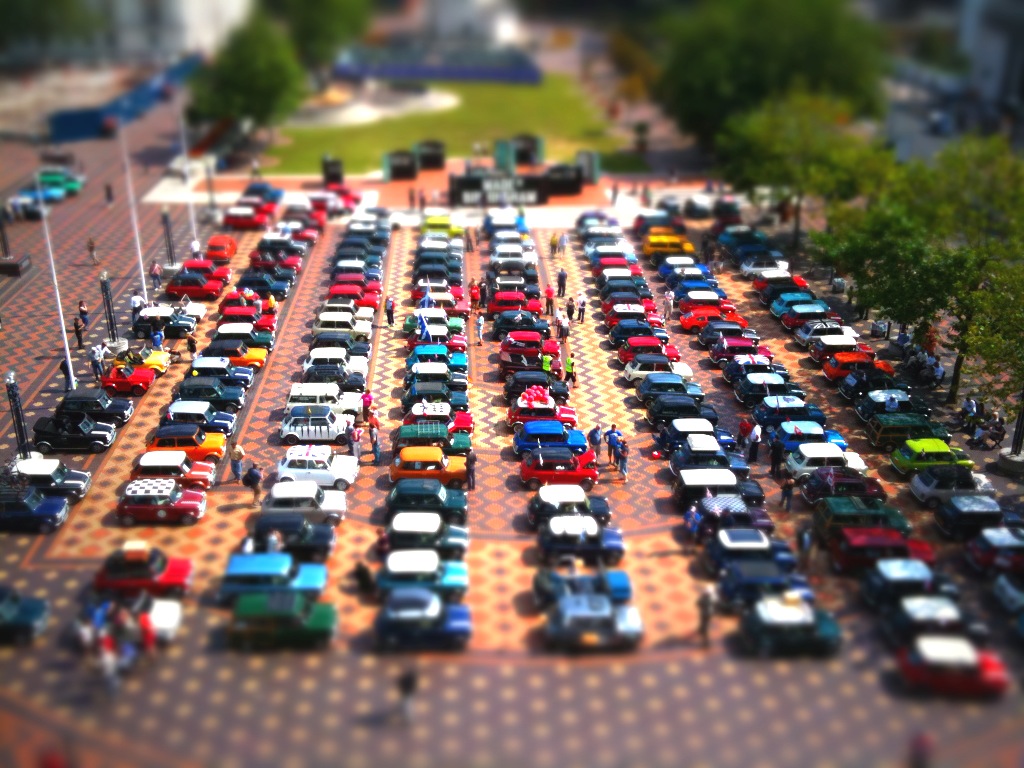
You can take vivid tilt shift photographs with different types of transport – planes, cars, buses, trains, etc. When captured on a tilt shift lens, these large machines resemble kids’ toys, not something a human being would drive or travel by.
City streets are full of various means of transport and places where they are commonly found – airports, railway stations, bus stops. So you can experiment with such tilt shift shots in any way you wish.
18. Sport Events
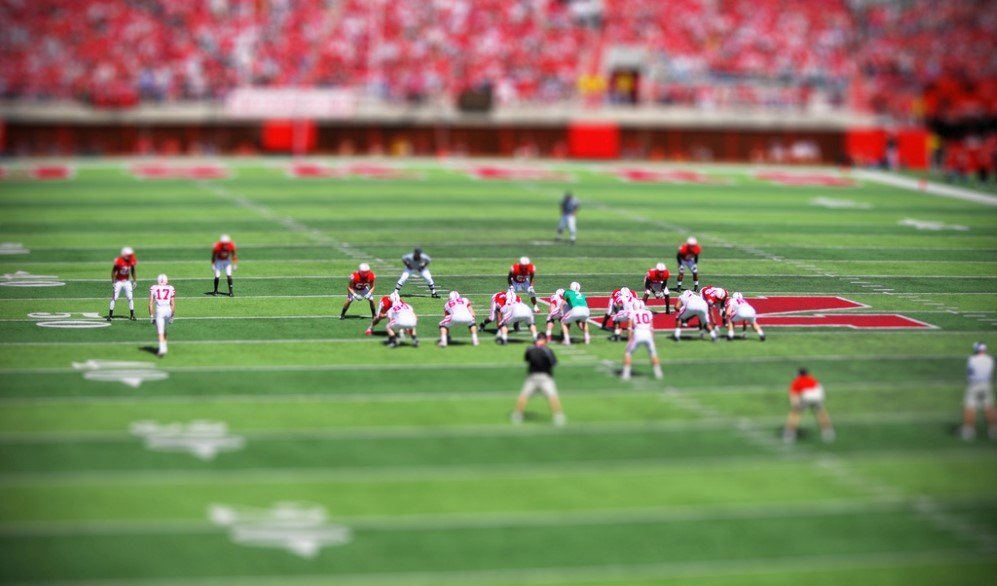
Sport events make up stunning scenes for tilt shift images. The stadium along with people around adds dimension to the picture and tells a particular story. Practically all kinds of sports will perfectly work for the tilt shift shooting. To get a more meaningful shot, try to capture the most important moment of the event/game.
19. Nighttime Cityscapes

Nightlife photography significantly distorts the way viewers perceive what is in front of their eyes. Nighttime tilt-shift shots can’t be compared with those taken during the day. The lighting at night lets you concentrate on several small parts of the scene, making them more attention-grabbing.
20. Photograph Bridges

Bridges are found practically in all modern cities. Bridges are difficult to deal with, but if you manage to capture at least a part of it, that will add visual appeal to an ordinary-looking cityscape.
21. Go to Disney World

This well-known shot of Disney World’s Gold Dust Saloon from Big Thunder Mountain was taken by William Mandra. The photo is truly marvelous since the design and architecture of Disneyland sights are rather extraordinary, something straight out of a cartoon.
That’s why, at first glance, the buildings there don’t look real at all, especially when photographed with a tilt-shift effect. Consider visiting Disney World once you feel inclined to take tilt-shift pictures.
22. Get Creative

If you are open to creative experiments, tilt shift photography is for you. My favorite example is this shot taken by Matt West from the roof of a parking garage. He was holding a paintbrush in his left hand and imitated the action of painting the building. Then, in Photoshop, he applied a tilt shift effect and achieved a striking miniature-scale shot of a city.
23. Look for New Approaches
Some people believe that tilt shift photography is already a fully formed genre that doesn’t need new approaches. Actually, it isn’t true. This tilt shift art project created by the Skrekkogle art design group can be rightfully called one of the most unusual ones. Many of us associate a coin with an object of a small size.
The Strekkogle group decided to distort this association and produced a huge coin. The final shot looks really outstanding and perfectly reflects the initial idea of tilt shift photography.
24. Practice on Paintings

If you don’t own a tilt shift lens or don’t have any shots to apply a tilt shift effect to them, I have a wonderful idea for you. Try experimenting with well-known paintings, like Serena Malyon did. She applied a tilt shift effect to Vincent Van Gogh’s artwork created for the Artcyclopedia in order to concentrate upon the peculiar features of the painting.
It allowed Malyon to put a new slant on the familiar works of art and viewers were encouraged to pay attention to the details they haven’t noticed before.
25. Create Tilt Shift Timelapses
In fact, tilt shift and timelapse shooting techniques can be effectively combined. Tilt shift pictures already look incredible but with time-lapse videos, you can take it up a notch. Record an aerial video and then produce this effect in image editing software, for instance, Photoshop , After Effects or Adobe Premiere.
- Check out the best time lapse cameras.
Freebies for Tilt-Shift Photographs
Now that you can answer the question “What is tilt shift photography”, it is time to learn how to edit such shots. To fasten the process and make it more effective, use one of the following PS actions.
Saturation Boost
Tilt shift photography involves raising the saturation of the shot to achieve a toy-like effect. This action will cope with the task in no time. Apply it to your landscape tilt shift shots.
Cross Process
This action beautifully boosts the colors of the shots, making them more vivid. It is used for intensifying the miniature effect in photographs.
Color Pop
With this action, you will easily increase the vibrancy of colors in tilt shift images. It is suitable for all kinds of tilt shift shooting experiments.
Bright
The action imitates an HDR effect in shots, boosting contrast and sharpness of the details. A perfect match for your tilt shift photographs!
HDR Contrast
Need to increase contrast, make shadows and lights more intense in your cityscape tilt shift shots? Then you won’t find a better action for the task!


