Some Photoshop features are known by everyone, including the Clone Stamp, Healing Brush, and Pen Tool. However, there are also unsung heroes that you might avoid for years until an occasion comes that makes them an absolute necessity for your project. That was how I discovered the Slice Tool in Photoshop.
Back then, I was designing a set of banners for a client, having to produce them in 5 sizes to accommodate various platforms. I was struggling with guides, measurements, and different versions so I was starting to feel overwhelmed.
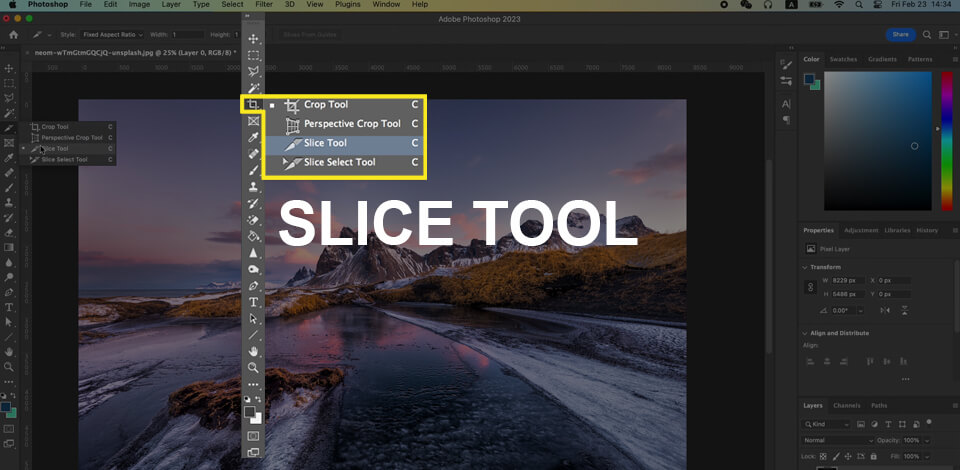
So what does the Slice Tool do in Photoshop? Plainly speaking, it allows you to divide the canvas into smaller sections called "slices", which can then be saved as separate images. It’s among the many time-tested Photoshop tool names that are still relevant today.
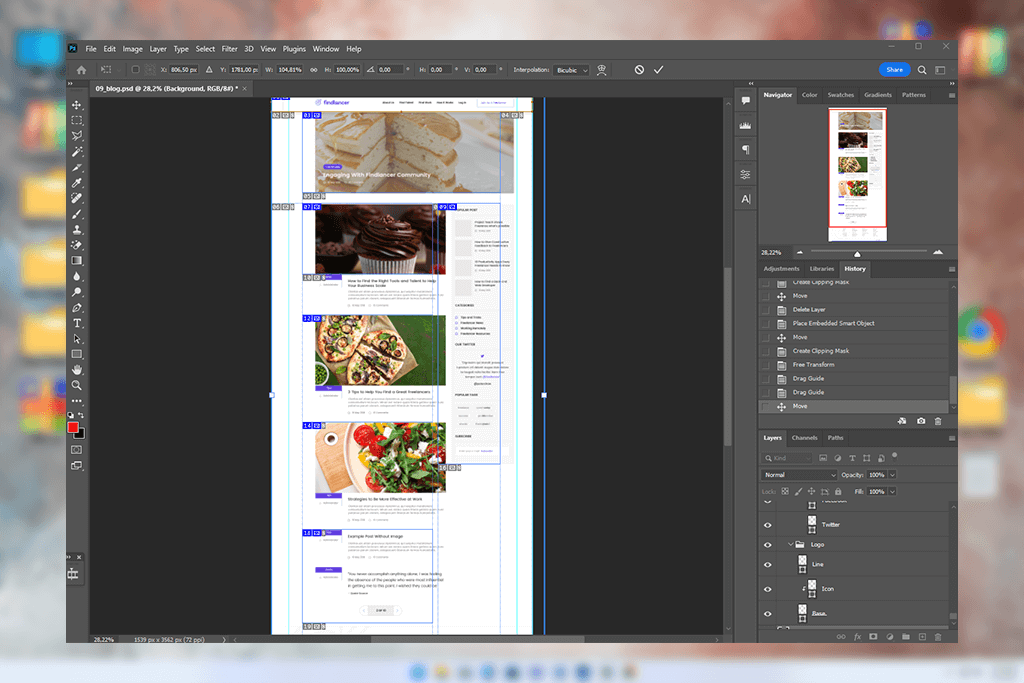
It was initially designed for web designers who wanted to divide images into sections to improve loading times. For example, users created website mockups and then sliced them into separate images that featured individual buttons, headers, and banners, which was extremely efficient and time-saving.
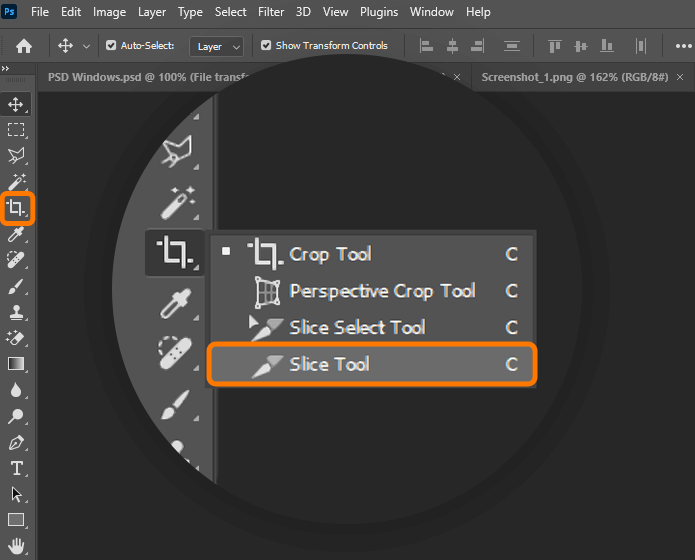
If you’re wondering how to use the Slice tool in Photoshop, the actual process is pleasantly straightforward:
Tip: Double-click an area using the Slice Select tool to change its name. If you don’t, you’ll end with names like “slice_01”, “slice_02”, etc., which can be very difficult to organize.
Designers like to joke that Adobe needs to swap out the Slice Tool in Photoshop for a “Smart Export Zone Tool” that snaps to separate elements and updates if you drag them around. Maybe that feature will become available in the future – who knows?
If you’re dividing an image into equal parts, for example, for a social media grid, start by making a unified expansive layout, which you later split with guides. The Slice Tool snaps to guides, streamlining the task of preserving clean edges.
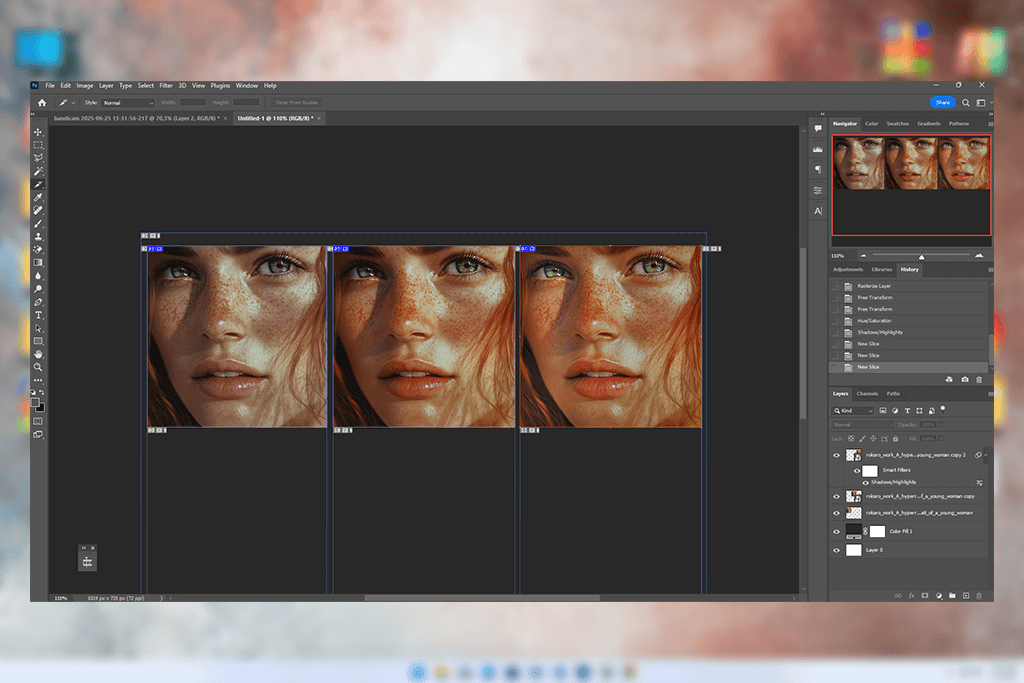
I had an interesting experience learning how to use the Slice Tool in Photoshop CC when I was making before/after images for a skin retouching showcase. It covered 3 stages – raw, basic, and final. I placed them next to each other in a single project, leveraged guides to align them, and then applied the Slice Tool to split them perfectly.
A single export later, I had 3 cropped JPEGs that had the same resolution and didn’t overlap. Such an approach is incredibly time-efficient and makes it easy to preserve a consistent layout across a variety of platforms and formats.
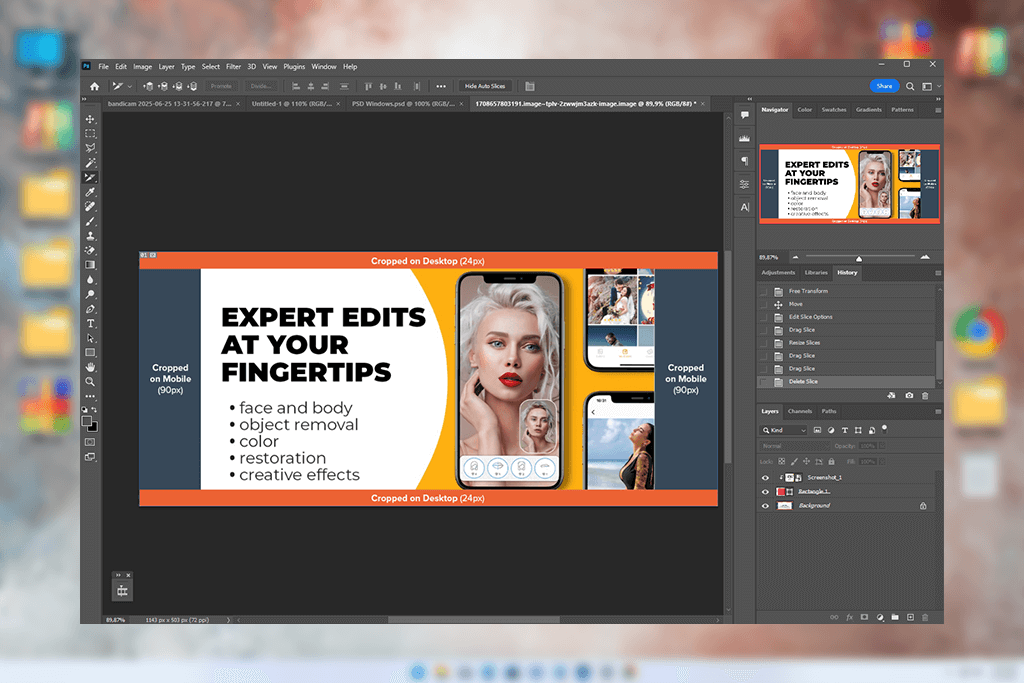
Once, I created a horizontal banner that had to be divided into 3:1:1 format for Facebook ad previews. If I tried to do this using rulers and cropping tools, it would have taken me dozens of minutes. Meanwhile, if you use the Slice Tool in Photoshop to quickly establish the required areas and then fine-tune the result with the help of the Slice Select Tool, you can do it in under a minute.
Even though Facebook imposes highly specific dimension requirements, I could still satisfy them without saving several PSD versions or constantly messing around with visible layers. Different Photoshop selection features are essential for such tasks, and while learning how to use Magic Wand in Photoshop or how to deselect in Photoshop is useful for other scenarios, in my case, the Slice Tool provided all the freedom I needed to get the desired result as quickly as possible.
After people learn what is the Slice Tool in Photoshop, they often wonder what makes it different from the Marquee Tool since they’re both used for isolating and extracting individual sections of your images. However, they work differently, as the latter is better suited for making fast, freeform selections, cropping, and masking. It’s my go-to feature when I need to pick an image area and move it, particularly when handling retouching or layout fine-tuning projects.
Meanwhile, the Slice Tool was developed primarily for structured exporting. It doesn’t affect the layers but rather creates a grid of exportable areas across the entire project. That’s why it’s perfect for creating separate web banners, Instagram tiles, UI zones, and cropped photo sets.
| Feature | Slice Tool | Marquee Tool |
|---|---|---|
|
Best for
|
Saving layout parts
|
Fast free selections
|
|
Linked to layers
|
No
|
No
|
|
Export method
|
Save for Web
|
Copy & Paste
|
|
Precision
|
High (with guides)
|
Manual
|
|
File naming
|
Per slice
|
Manual
|
|
Ease of use
|
Moderate
|
Very easy
|
|
Multi-zone workflow
|
Yes
|
No
|
|
Ideal for
|
Banners, UI grids
|
Cropping or cutouts
|
Marquee is more versatile while Slice offers better accuracy. If my goal is to isolate a single image part on the fly – I choose Marquee. If I have to split up an entire layout into separate intricate JPEGs, I pick the Slice Tool.
Even though both Marquee and Slice have a lot of similarities, their purpose doesn't overlap, as you simply need to pick which tool you need at the moment. Professionals lean into the strengths of both features depending on the occasion, which is why it's also important to learn how to use Marquee Tool in Photoshop to simplify the task of making quick edits.
You can also struggle when dealing with intricate layouts that end up having overlapping slices. I recommend zooming out and then using the Slice Select Tool in Photoshop to locate and rename every section clearly while upholding an easy-to-follow naming convention, particularly when working on a project that will be shared with developers or clients.
Additionally, the dependence on the old Save for Web method can feel outdated, but you can get around it. If you're creating slices just to divide the layout (not for linking), you can leverage Photoshop’s “Generate Image Assets” tool to name layers with file extensions. It’s not a perfect solution, but it provides more export control when dealing with less complex projects.
If slices are snapping in weird ways and you can’t get the alignment right, ensure Snap is enabled and you’re using guides. Additionally, lock all layout parts that you need to prevent from being accidentally shifted.
The Slice Tool is heavily dependent on the Save for Web (Legacy) export system. While it’s somewhat outdated, it still provides terrific precision and organization capabilities. It allows you to freely name, compress, and slice images to deliver the expected results to your clients or developers.
However, I’d still like to see this system updated. Even a basic upgrade like added compatibility with new formats or improved integration with export panels would make this feature feel more contemporary. Personally, I still rely on Save for Web frequently when dealing with slices. It offers the speed and precision I need, even if I like to jest, saying that the Slice Tool is “Photoshop’s fax machine” – dated but still handy.
Nonetheless, when I’m saving five cropped sections of a homepage draft for a client, nothing is more convenient than creating the slices directly and batch-exporting them. It’s quick, dependable, and allows me to avoid the hassle of making ten individual files to achieve the same result.
One aspect you’ll learn to appreciate about the Slice Tool in Photoshop is that it assigns dedicated export parameters to every slice. As such, you can freely set different formats, compression settings, and names for each section when exporting them.
It’s particularly useful when designing asset sets for developers, as they often require both transparent PNGs and compressed JPEGs when putting everything together.
What a lot of users don’t know is that they can optimize file sizes without having to apply identical compression to all slices. That’s useful when making emails, banners, or mobile assets that require fast load times. I don’t need to compress everything the same way.
Lastly, you should manage slices like you would modular assets. When named and saved, they can be reused across any number of projects without requiring any extra editing or management.
Yes, but you have to pick the Slice Select Tool since the standard Slice Tool doesn’t have such functionality.
Pick the Slice Select Tool, click on the unwanted slice, and press Delete. Alternatively, you can press Ctrl+Z if it’s the last action you made.
Not necessarily. I primarily create them for more static elements like banners or email previews that require consistent sizes.
No, you need to click on File > Export > Save for Web (Legacy) and pick which slices to save.
I design a guide layout, then snap my slices to it. This approach is both quick and highly accurate.
No. Slices are represented by overlays. They don't alter the layer structure, but I recommend realigning if you ever need to adjust the layout yourself.


