If you're editing a video and want to add cool slow-motion effects to focus on the main objects in the scene, you should definitely learn how to manipulate time in Adobe Premiere Pro. By making a video play faster or slower, you can deliver more info in a shorter period of time or add an immersive component to it. I have described 5 simple and fast ways of how to cope with such a task.
The simplest method to manipulate time in Premiere Pro is by using the Rate Stretch tool. However, you’d better opt for another instrument if you are dealing with complex cinematic clips or films that require making precise adjustments.
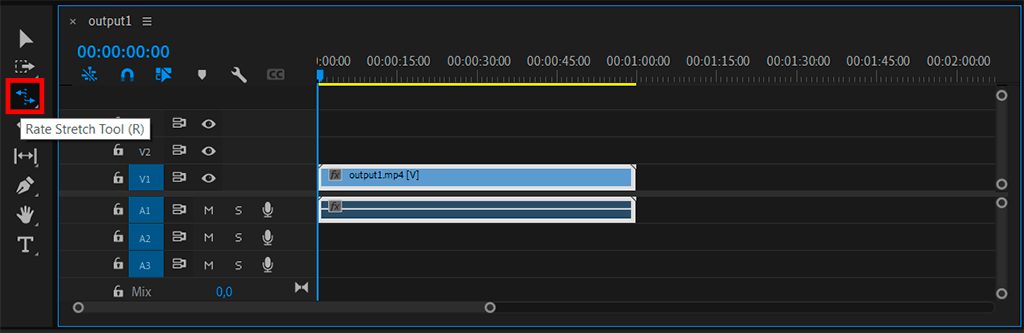
You can either select it from the toolbar or press “R” on the keyboard.
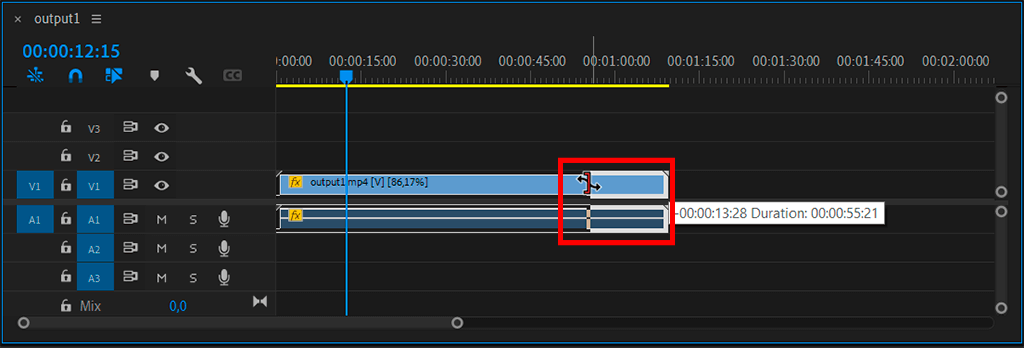
Hover over the edge of the clip and drag to the left/right to speed up or slow down your video. Ready. You can check the speed (%) in the clip name. If it isn’t shown there, click on the Wrench icon and choose “Show Video Names”.
Though this method takes rather a lot of time, it provides access to more settings, so you can fine-tune your videos.
Upload a video and move to the Timeline or Project panel. There you need to select the desired section of the video. Click on the video, hold down “Ctrl” (Win) or “Cmd” (Mac) and select a non-contiguous group.
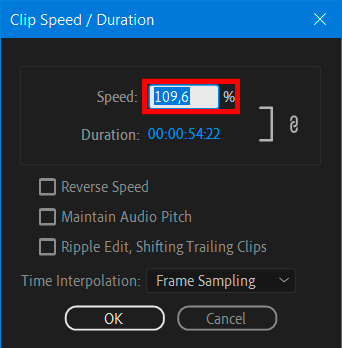
Open the "Speed/Duration" panel in the "Clip" settings and start increasing or decreasing the speed from 100%.
Note:
Using proper settings, you can apply speed/duration changes at the project clip level or at the sequence clip level.
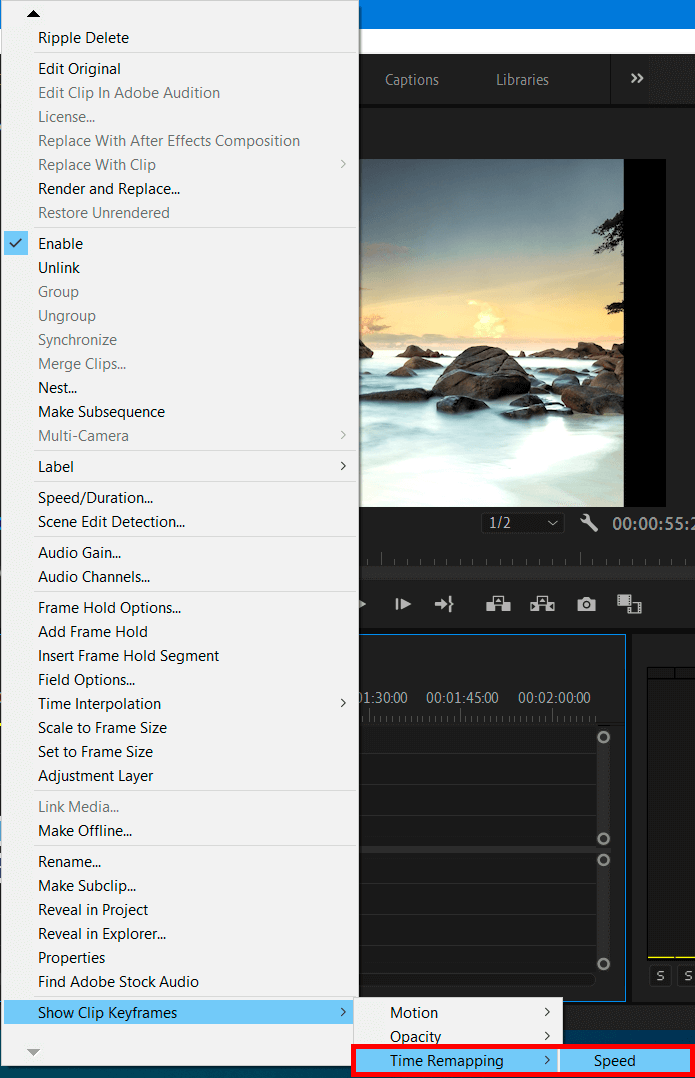
Professional video editors usually use "Time Remapping" when they need to manipulate time in Premiere Pro. This way, it is possible to create slow motion and fast motion effects anywhere in a clip. However, it takes some time to figure out how this feature works.
I recommend working right in the timeline panel. The audio piece of a clip remains unchanged with Time Remapping, although it is linked to the video portion.

Select a specific section of a clip, right-click on it and choose “Show Clip Keyframes” > “Time Remapping” > “Speed”.

Drag the rubber band on both sides of the speed keyframe up or down to increase or decrease the playback speed of that part. (Optional) Press Shift while dragging to constrain rate change values in 5% increments.
Hold down “Shift” and drag the speed keyframe to the left/right to change the speed of the part to the left of the speed keyframe.
Both the speed and the duration of the segment are changed. Speeding up a segment of a clip, you’ll make it shorter, and vice versa. There will appear a tooltip showing the speed change as a percentage of the original speed. It may seem a little awkward at first, but you’ll soon get used to this option.
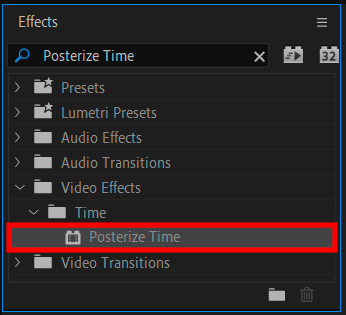
You can also use a built-in effect, which is available in all versions of the video editor, including Premiere Pro free. In order to edit FPS in the frame, go to the “Effect” > “Posterize Time” tab.
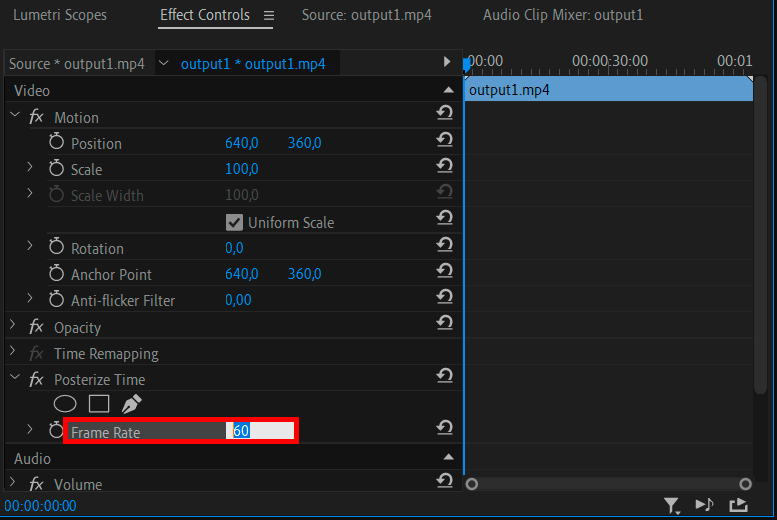
For example, 60fps footage can be locked down to 24 (and then the field is rendered at 60fps) to make it look like a movie, and by reducing the FPS to 12-18, you can get the image in manual or frame animation style.
In addition, nested compositions can be tied to a given frame rate, which in turn, will affect the frame rate. Keep in mind that this effect works with 8, 16 and 32 bits per channel.
This method to manipulate time in Adobe Premiere Pro works on the same basis as the above-mentioned technique, however, in this case, the duration is left intact and all changes are applied on a clip level.
Video editing specialists recommend choosing this method if you originally edited your video in third-party Windows video editing software, because Premiere Pro may import a clip with the wrong frame rate by default.
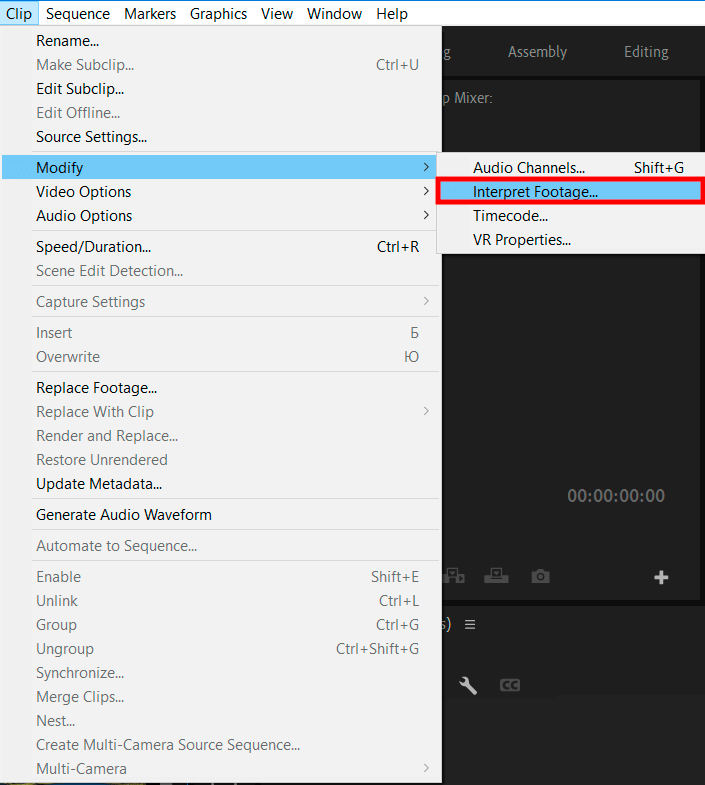
Select your clip in the Project panel and go to “Clip” > “Modify” > “Interpret Footage”.
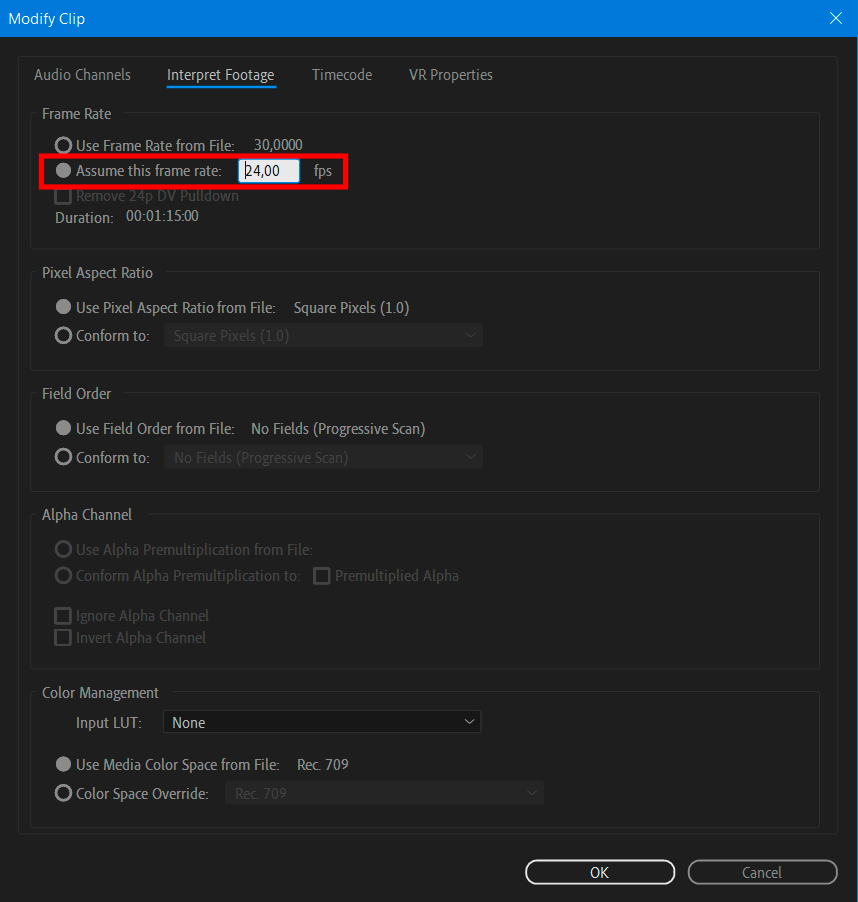
Open the Interpret Footage dialog box to alter the frame rate of a clip at the project level. Check the box next to fps and manually set the desired value. You can also choose "Remover 24p DV Pulldown".
If any of the methods work for you or you are involved in a complicated project and need professional assistance, address our service and we’ll take care of your videos.
Now you know how to manipulate time in Adobe Premiere Pro. You can also perform creative color grading with the help of these LUTs. Make sure you know how to install LUTs in Premiere Pro and get down to work.


