If you have ever tried to sell something online, you probably wondered how to take photos for eBay. On this platform, you can sell your product in a matter of hours if you have decent images. Yes, a good shot is of tremendous importance when selling goods on e-commerce websites. The thing is that this is the only way for a customer to rate a product.
A proper presentation not only demonstrates the range of products but also encourages users to make a purchase. I’ll show you how to take good product photos, as well as how to place an order on eBay.
People usually sell second-hand goods on eBay. No matter what it is, a T-shirt that you wore for a week or a family table that served your family for 200 years. Everything should be clean and neat.
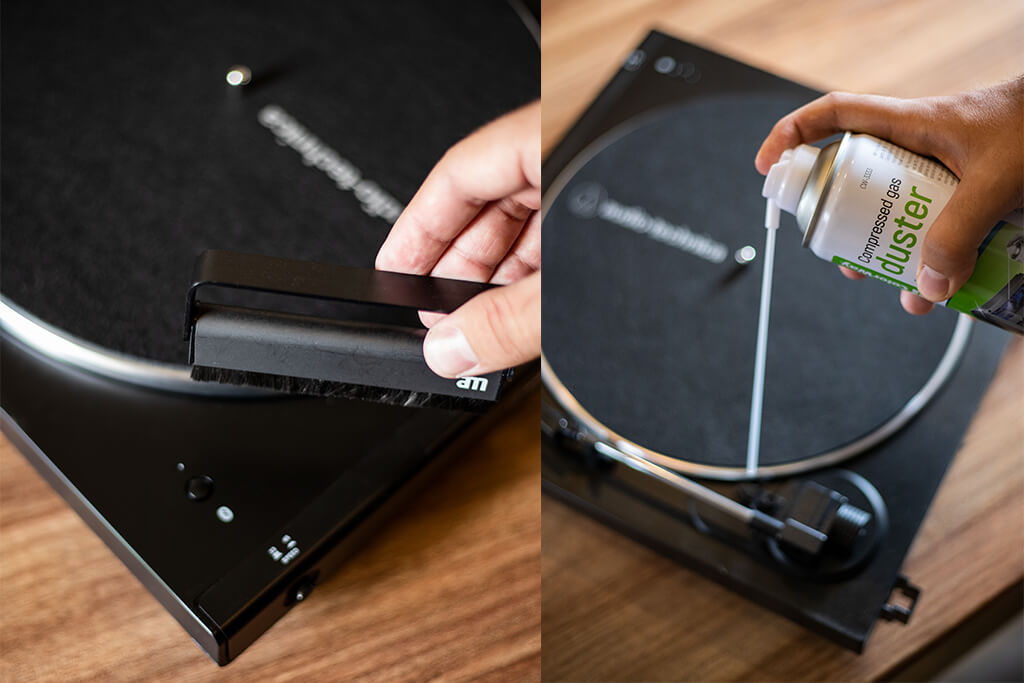
If it is clothes, shoes or a bag, you should wash, clean, and iron them before taking pictures for eBay. If it is a device, remember to remove dust and dirt. Many items that you keep in your hands can collect dust in tiny holes.
Wipe the product with a cloth, take a wet cloth if necessary, dust off with a brush, and use compressed air to clean hard-to-reach places.
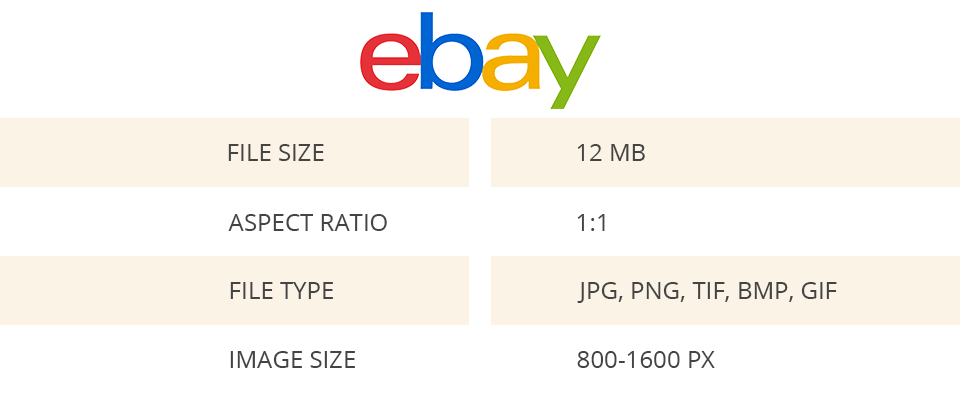
Photo editing requirements for marketplaces, like eBay, are very important because you must understand what to show in a photo and what format you can shoot in. You should know about it before you start taking pictures for eBay, for your efforts not to go in vain.
The main requirement is that an image must be in 1:1 format and weigh less than 12MB. Speaking about the content, you need to take a good color photo with an object perfectly visible without highlights and shadows.
Of course, product photos on white background are an ideal option, but creating such a backdrop at home isn’t very practical. If you are going to sell something big, it becomes even more inconvenient. A regular kitchen table is more than enough for these purposes.
If you don’t have a studio lighting kit, that isn’t a big deal. Light from the window is sufficient for taking a good shot. If your object is too dark, use a reflector. It will light the shadows. For example, I made a reflector myself using foil and cardboard.

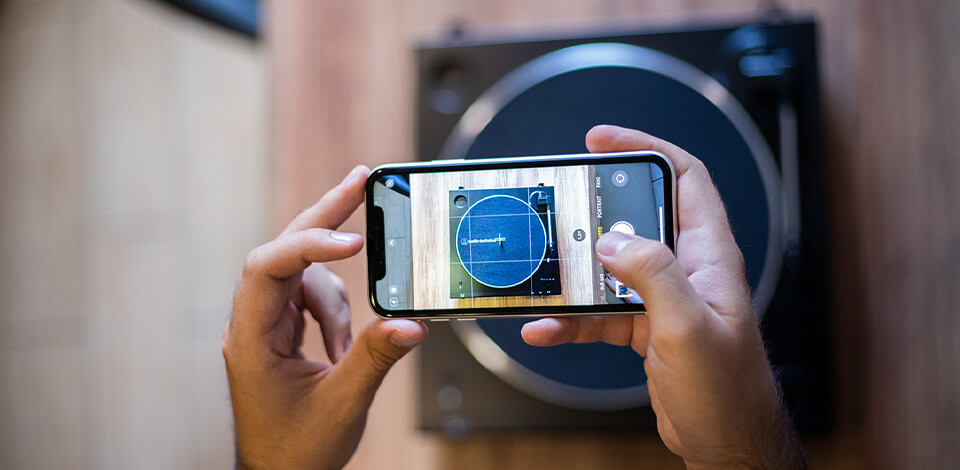
Nobody will scrutinize your pictures on a 40" screen, but they shouldn’t be of too low quality either. Therefore, a modern smartphone can perfectly cope with the task. If you are a lucky owner of one of the best camera phones, you’ll get mesmerizing photos. However, a regular smartphone with a 12MP camera will also do.
Take a few shots using the grid, so you can crop the image to fit the square later. If you have a telephoto lens on your smartphone, use it, but disable the background blur. I used the digital zoom to eliminate distortion.
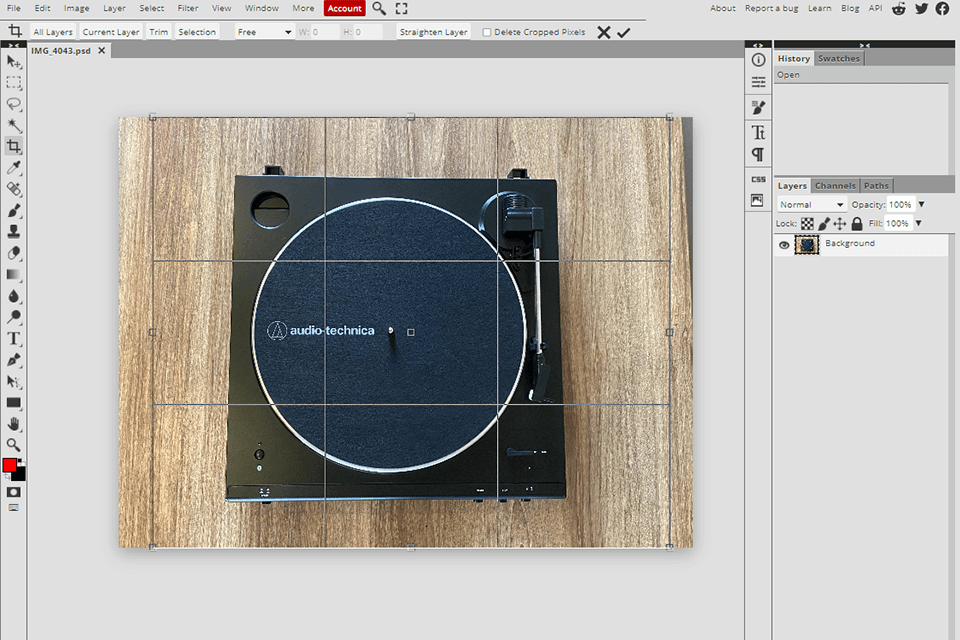
There is a wide range of photo editing software for beginners that you can use to improve your images. Horizon straightening, highlights and contrast correction, removing deep shadows – this is just a glimpse of what you can do to enhance your photos.
Personally, I used the on-site editor. I cropped my image to a 1:1 format and made color corrections using adjustment layers.
Despite the possibility to perform all operations on your own, if you have specific demands, you should address a professional photo editing service. Regardless of the complexity of an order, they can make your image shine in 1-2 days.

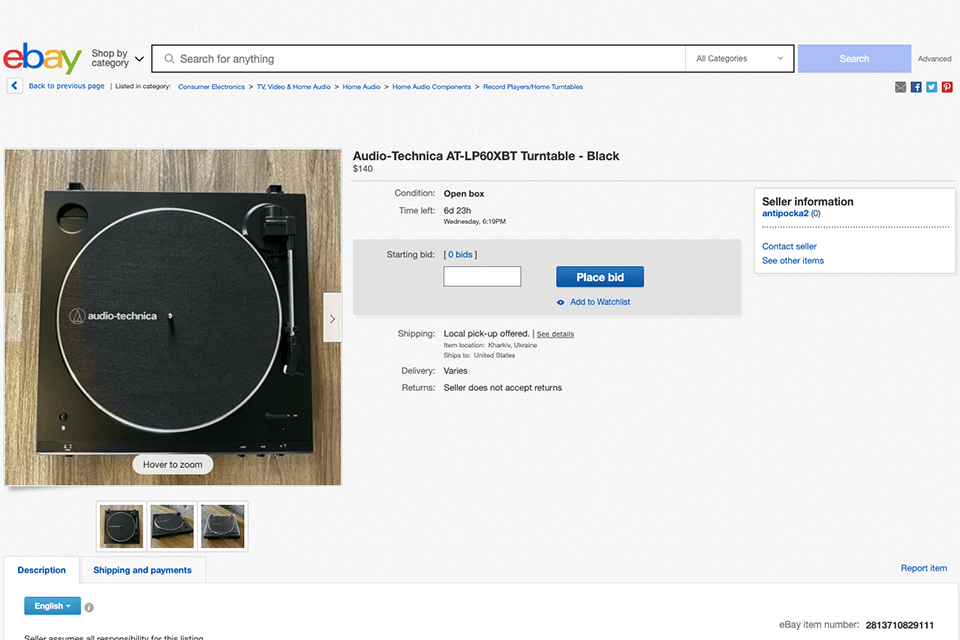
Once you are done with shooting and registration on eBay, you can generate your first ad by clicking on the “Sell” button in the upper right corner. Enter the name of your product or its producer company, and eBay will immediately offer you similar ads.
In case you find an identical product, don’t hesitate to click on the “Select” button and the platform will automatically add the characteristics of the product. If you did not find it, scroll down and click on the “Continue without selecting a product” button.

Fill in all empty fields with characteristics and add pictures. But note that there isn’t a drag & drop feature here, so you have to add pictures via a search through the system. By the way, you can do the simplest color correction right in this window by raising brightness, contrast, and sharpness. Select the Main Photo that users will see first.
Indicate the material, color, size, brand, and state of a product. Buyers can also ask about other parameters, like memory size (if it is a device), insole length (shoes), etc. It is better to specify them at once, not to waste time in the future. Describe and photograph any damages to inform buyers in advance.
Click on the “Preview” button and check how the ad looks. This way you will avoid unexpected problems after the publication. If everything is fine, you can publish it.
If you want to create ads that stand out among others in the shortest time possible, you can apply quick effects. You can use them in the editor I described in this guide.


