
Medical students know well that when applying for a job, the competition for prestigious residency programs is very serious. It is important to follow the specific requirements to make sure that your application is accepted.
The ERAS headshot will let your portfolio stand out in a variety of standard headshots and banal selfies. This guide will provide you with all the required info, you need to possess to take a great headshot photo and become a perfect candidate for a medical residency program.
As shots of pro-level quality are quite expensive, many applicants are looking for ways to take their own images or think of asking a friend to take your shot with a decent camera. Of course, such simple tricks are justified for shooting a standard LinkedIn profile photo, but as for residency images, such ideas do not work well.
Unprofessional pics that look cheap spoil your reputation among faculty members who will perceive you as a person who does not pay attention to detail.
So, turning to professional headshot photographers is the most reasonable decision in this case. They will provide you with valuable advice on how to pose to get an attractive shot. Even if you need to spend $100 on such a headshot, this sum is definitely worth investing in your future career.
Comparing headshot vs portrait, you will notice that their technical requirements are quite different. Inappropriate photos may cause you much trouble, as the Commission members can refuse to accept your application. They receive multiple submissions every day, so if your resume will be ignored because of a poor pic, it would be an absolute disaster.
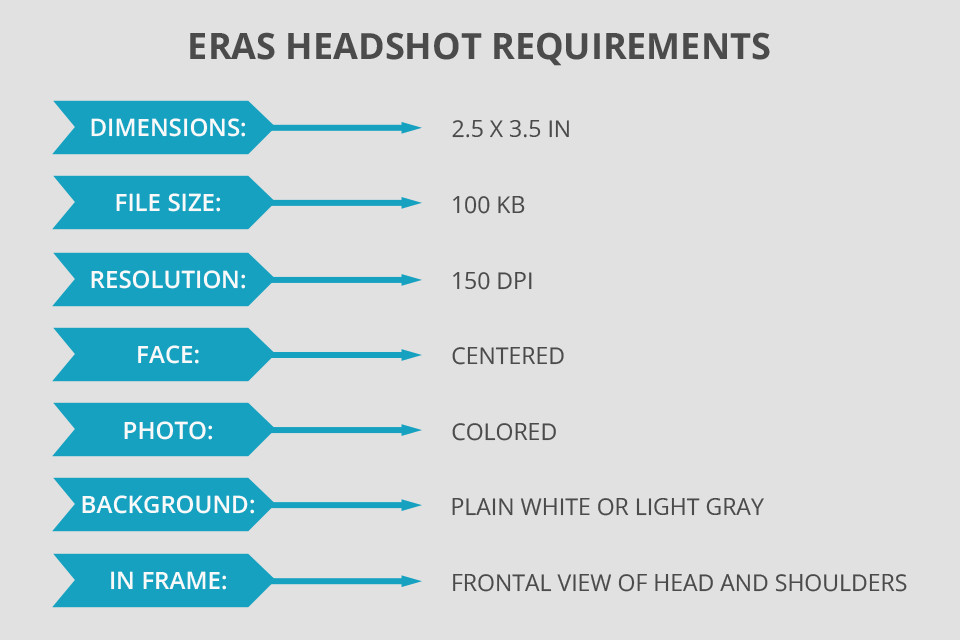
The size of a photo should be about 2.5" x 3.5", other requirements are 150dpi resolution, and 100kb file size. Of course, for an average person, this may sound a bit confusing, but a professional photographer can easily take an ERAS picture that meets all these parameters.
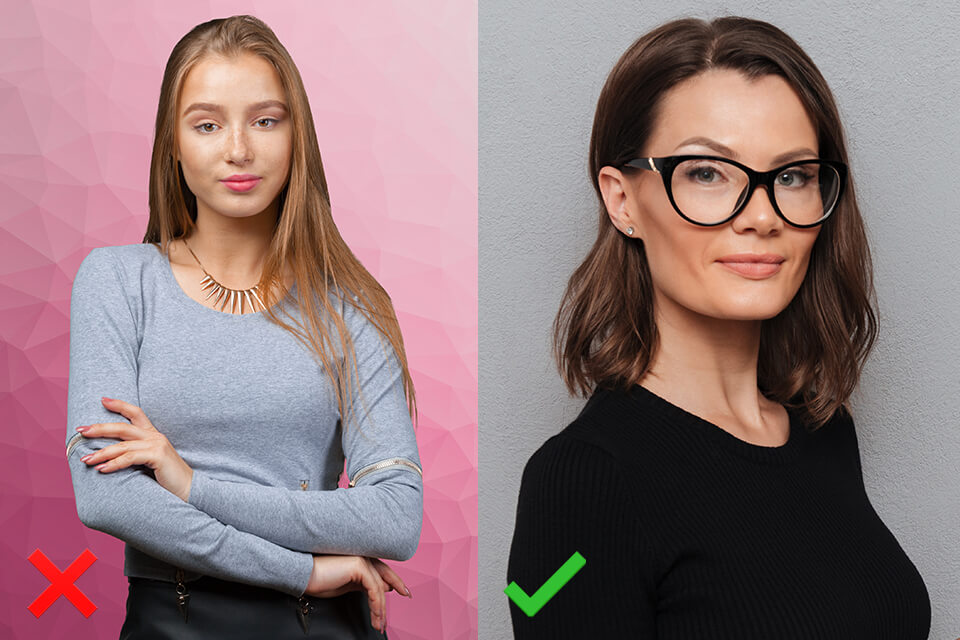
When it comes to residency headshots, a photographer should consider various headshot background ideas to take a pic that is likely to be clicked many times. Posing against white or gray backgrounds will definitely result in more views of your application.
However, some candidates prefer darker backgrounds like blue or gray as these colors create a contrast to highlight every facial feature.
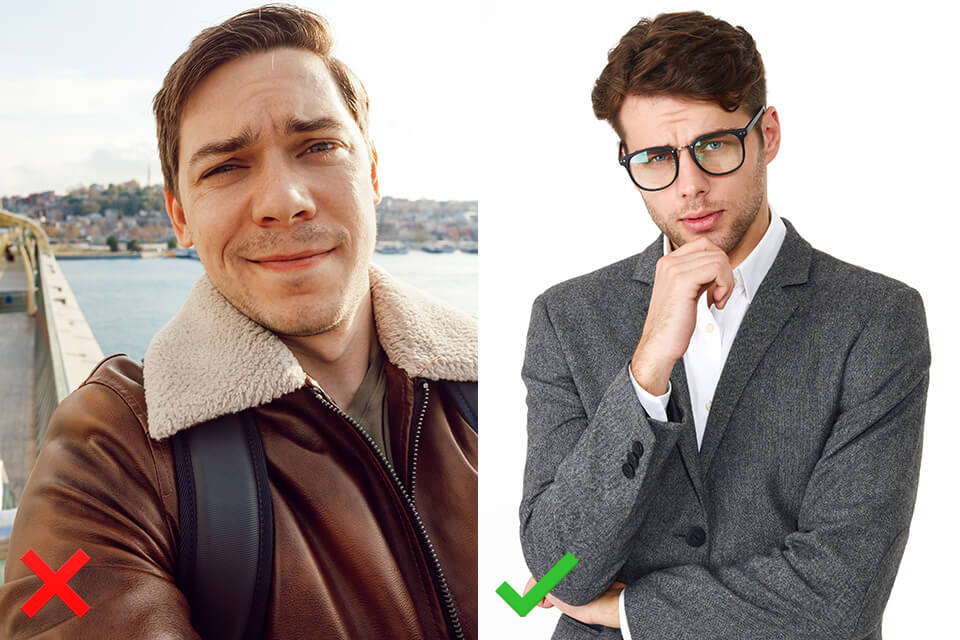
Taking headshots outdoors is a bad decision as the images are likely to feature undesired shadows that will spoil your look. It is always better to conduct a photo shoot in a studio with perfect lighting.
The deadline for residency applications is the middle of September, so start planning your ERAS picture photoshoot in August. If you are going to hire a professional photographer, make sure that the required date is free and that your photo session will happen on time.
Pay attention that a shooter will require some time to prepare your pics, so make certain that the images will be ready when you need them.
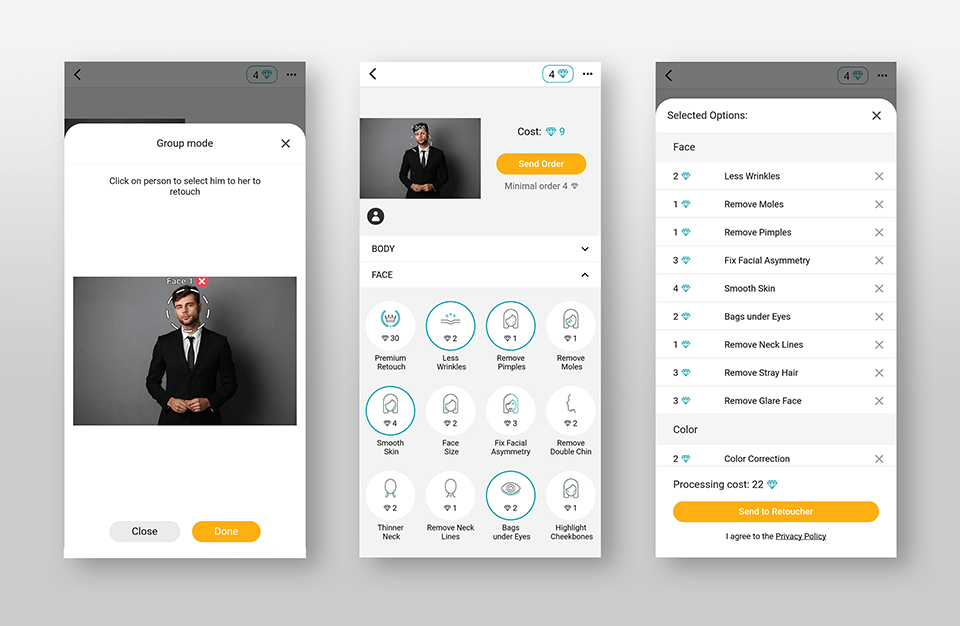


When it comes to residency headshots, the post-editing stage is very important. By lightening your background and smoothening your eyes, as well as removing blemishes, reducing shadows, performing teeth whitening, and color corrections, it is easy to refine your pic achieving amazing results.

But remember that too much retouching will spoil your image making it look artificial. Benefit from free photo editing apps like Fix The Photo Editor & Retiuch, Facetune, and Snapseed to create spectacular compositions, but make sure the one in the photo and the person in the interview is the same person.
Instagram filters are not recommended.
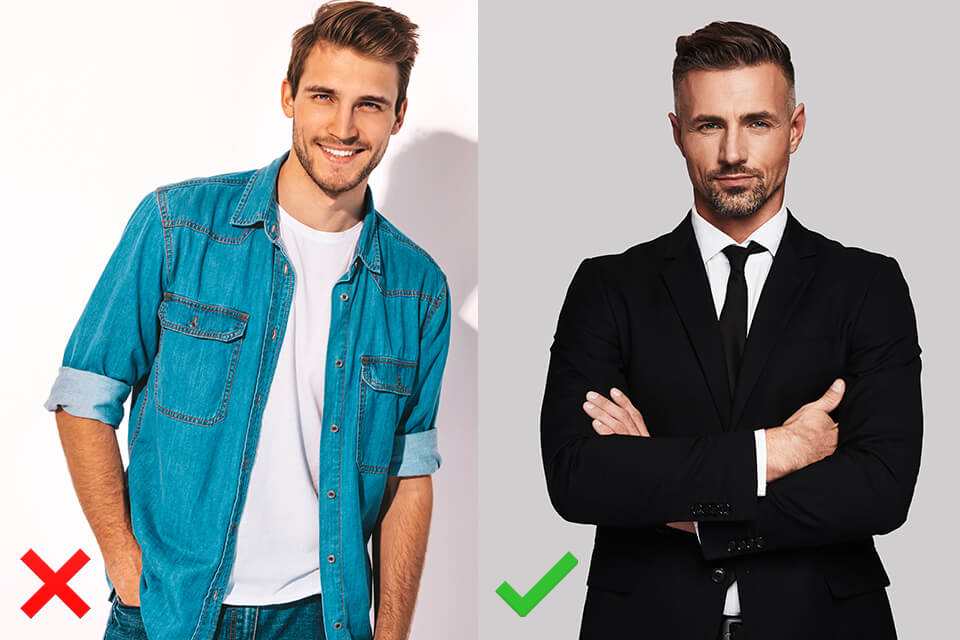
A professional outfit is an absolute must. Formal clothes like a jacket are advisable for both men and women, whereas a tie is a necessity for male candidates. Prefer a solid-colored outfit that lacks patterns but a tie can feature ornaments, which will add a special flavor to your look.
Wearing a white coat for your primary application image should is a bad idea. Of course, a photographer can take an additional shot featuring you in a white coat, but it is generally not recommended for your residency headshots. Besides, much jewelry and low-cut shirts can also spoil the overall impression.
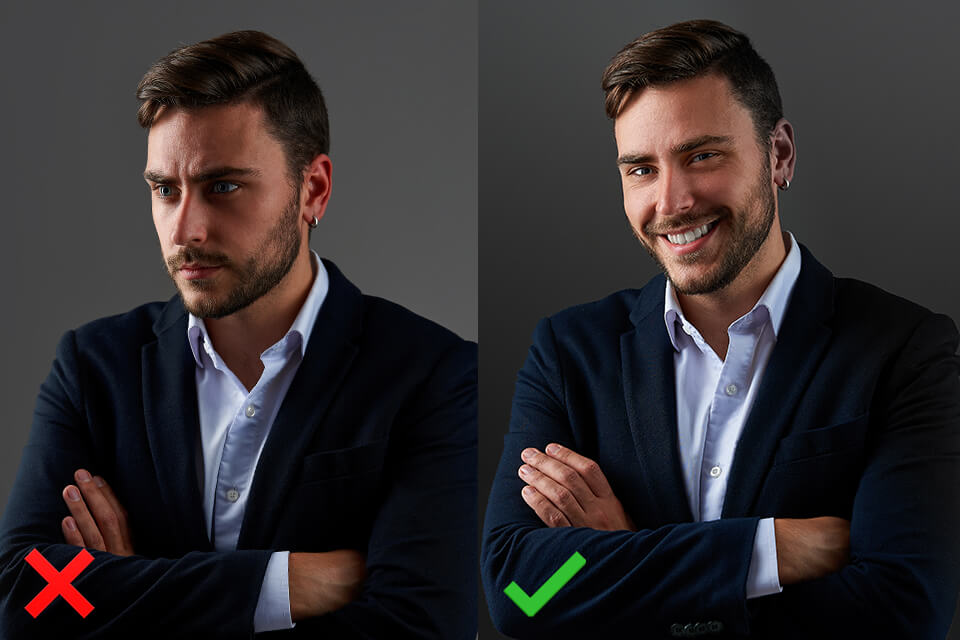
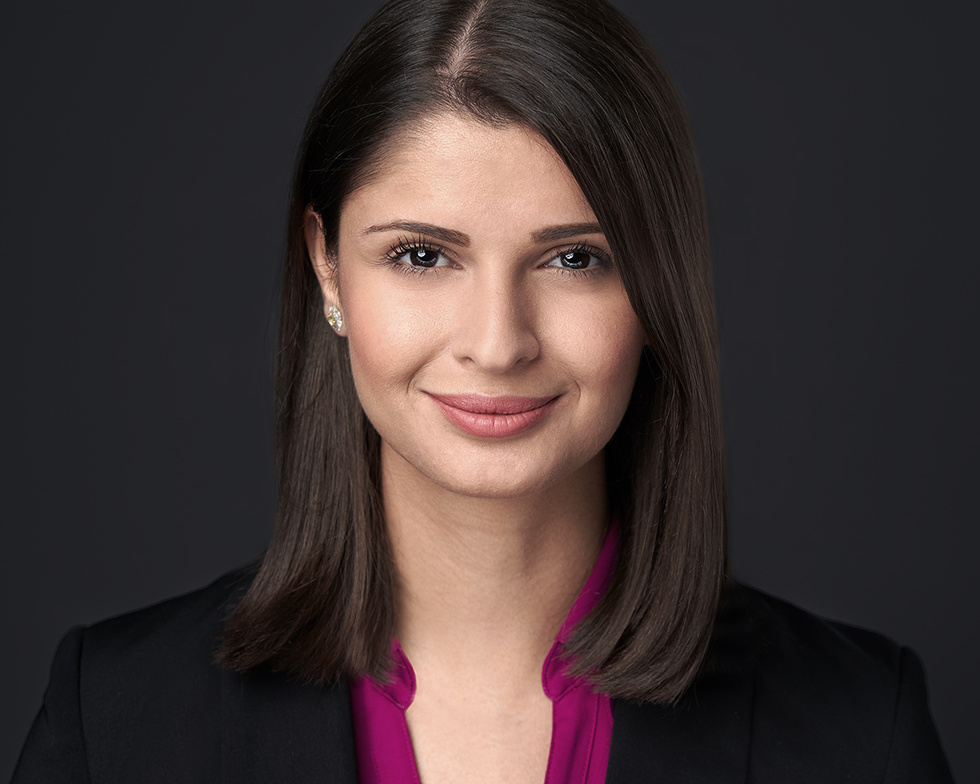
Learning how to smile for pictures naturally is one of the most important ERAS headshot tips. A sincere smile can charm people improving your overall look. This is a sure way to show faculty members your goodwill and positive attitude showing your readiness to work and interact with people. Remember that first impression is crucial in this case.
The owners of pearly whites should smile with their mouths open, while a close-mouth smile is a better decision for those who are not comfortable with their teeth. When trying various headshot poses, be sure to avoid a wooden face.
A perfect hairstyle is another integral part of your look. No matter whether you are going to a studio to have your hair done or want to cope alone, avoid serious experiments.
Remember that your appearance should not differ dramatically from how you look in reality, as the faculty members should recognize an applicant at a face-to-face meeting.
Tie your hair to make your profile appear slimmer. This trick will also let you focus on your face highlighting all its appealing features. If you prefer a blowout, do it on the day your photo session takes place.
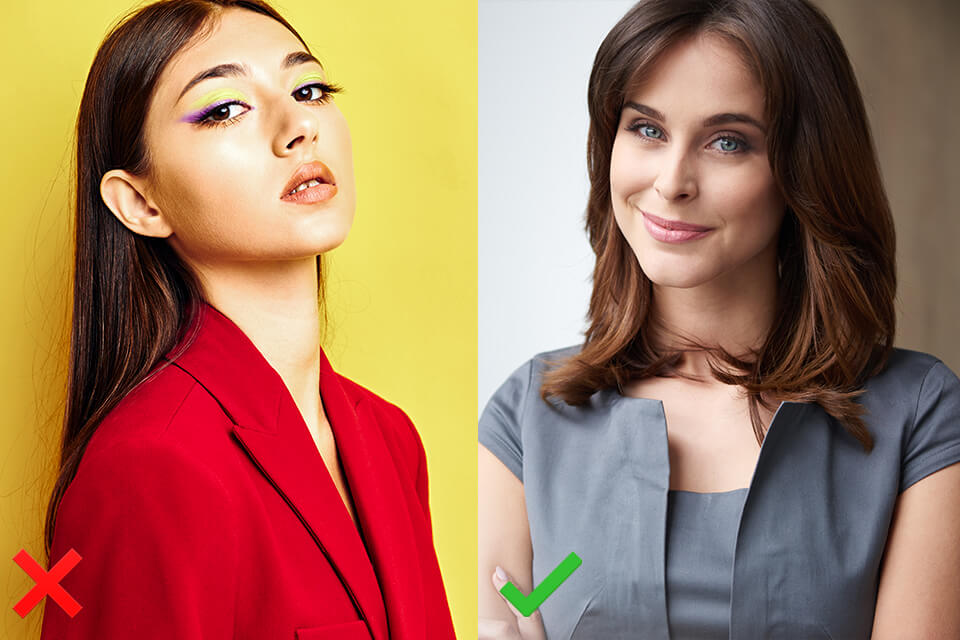
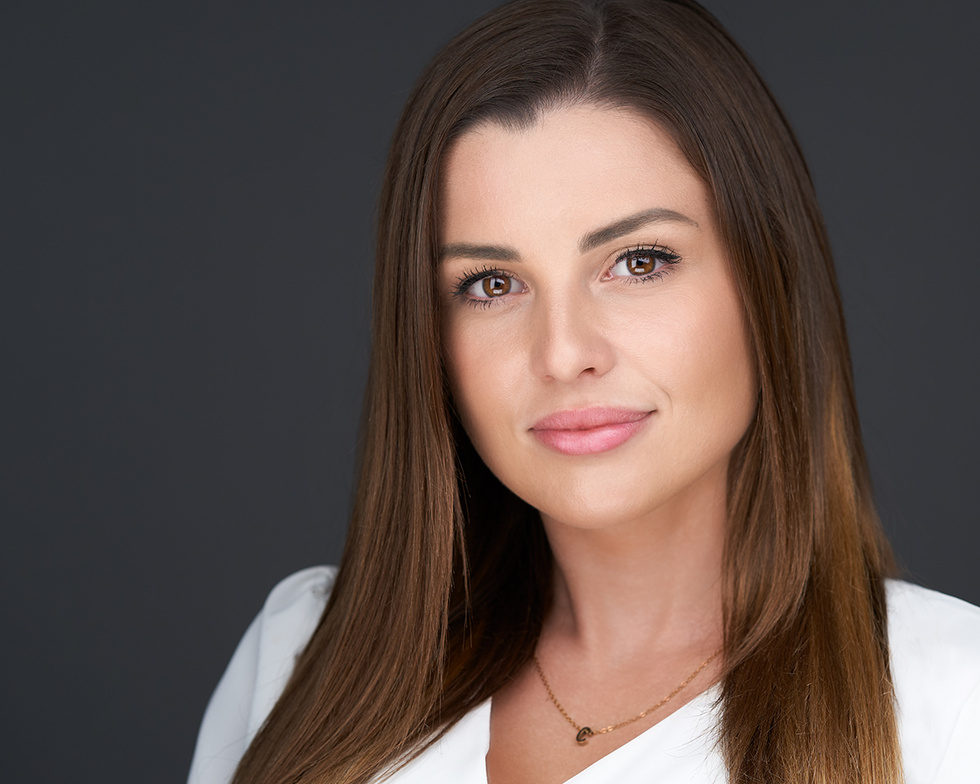
Just like with passport photo tips, make-up can either create an ideal first impression or ruin it completely. Heavy makeup can negatively impact how Committee members will treat your application. Minimalism is the best option in this case.
Wear a bit of makeup to conceal any blemishes that may stick out in a photo. Prefer the liquid foundation as it perfectly lays on the skin. Besides, oil-free (water or alcohol-based) is what you need. The color of lipstick should be one tone darker than in reality.

Ideal skin and a fresh face are what can attract the attention of Committee members. Remember that your face is your visit card, so be sure to hydrate properly, as well as avoid eating junk food and drinking lemonade.
Have a rest before a photo shoot, to look rested and full of energy. It is also important to have a good sleep (at least 8 hours), as this is a sure way of looking good in pictures!
Make certain to wax your body or face hair a minimum of one week before your ERAS photo session in order not to have any reddening that will require much retouching. Removing undesired hair one day before a photo shoot is definitely a bad idea.
Shaving for your ERAS pic is not a necessity. If you have a bear in your everyday life, let it be in your ERAS photo. But a beard should be well-maintained and your face still recognizable to get an image that will make your residence application more competitive.
Unfortunately, you are not allowed to alter or update your ERAS pic after submitting your application. Therefore, learning how to find your angles and mastering the art of headshots on the first try is of paramount importance.
Check when the application process opens for your specialty and make haste to submit your application right on that day. The sooner the faculty members receive your portfolio, the more chances you will have to be invited to the interview in the shortest possible time. Mid-September is the usual time when residency programs start accepting candidates’ resumes. So, be sure to take your ERAS pic far sooner.
According to the statistics, applicants who wear glasses in their headshots are usually invited to an interview oftener. This accessory makes people look smart, hardworking, and promising. However, if you do not usually wear glasses, do not include them in your look when preparing for a photoshoot.
In ERAS photo requirements, it is stated that a pic should have 2.5 x 3.5 inches in 150 dpi format. Besides, the size of an image cannot exceed 100 KB. A colorful pic featuring your full face and shoulders right in the middle is ideal.
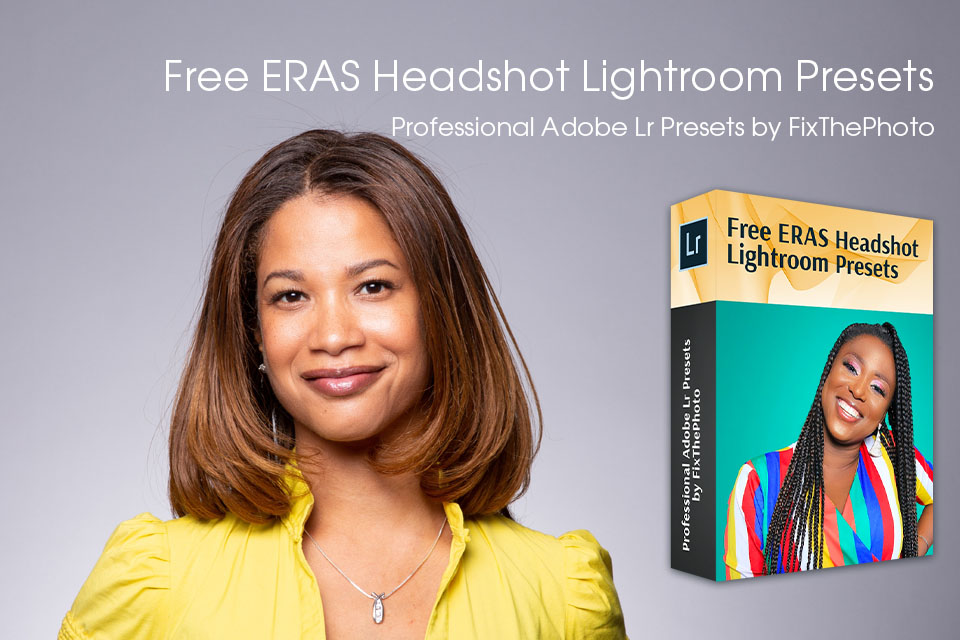
Do you want to refine your ERAS headshots on your own without spending much time on post-processing?
Benefit from these bonus tools that allow correcting lighting, WB, enhancing colors, adjusting the level of contrast and shadows, etc. Use these filters to turn an average pic into an eye-grabbing and natural-looking photo.
This pack is an ideal option for novices, as you can get Lightroom for free, and it only requires you to learn how to install Lightroom presets on Mac & Windows.


