If you have ever tried to capture the starry sky, you know that it is almost impossible to do this with ordinary amateur cameras, and you will also have to tinker with pro-level ones. With incorrect settings, you will most likely see just darkness or blur. If you want the objects in the foreground to be sharp as well, or you want to shoot distant space bodies, then the settings will require even deeper work.
In this detailed guide, I will tell you how to shoot astrophotography, taking into account all the difficulties that you may have. These tips will help both beginners in the world of photography and real pros who want to improve their knowledge.
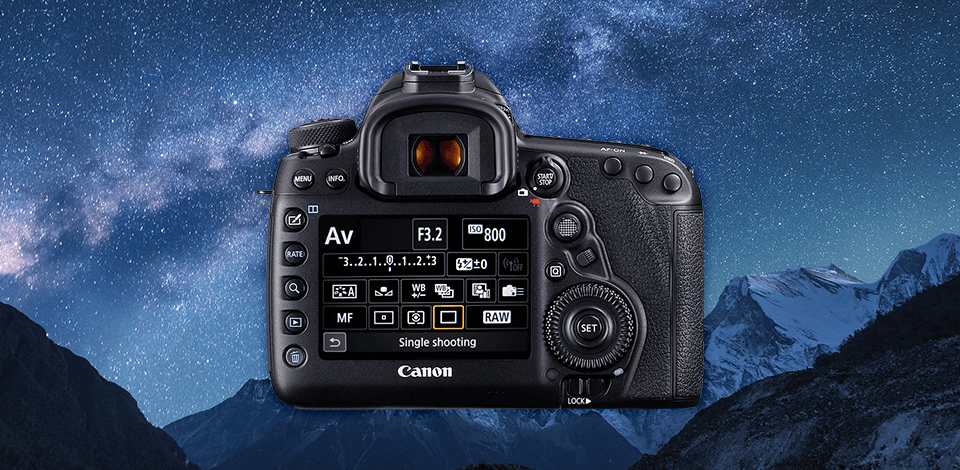
Shooting at night is a complex and demanding process. You need to tweak all the settings, including ISO, shutter speed, aperture, and a host of other settings. Having entered the camera modes, you will definitely need to stop at the manual mode, because no automatic ones can cope with shooting the night sky.
Manual mode can be scary at first with its depth but it is with it that you can achieve the desired shots. It gives you full control over your creative ideas, taking the right measurements in difficult lighting conditions, and getting as involved as possible in your workflow. At the same time, the automatic mode can simply ruin your picture.
Since the starry sky can only be seen in the dark, your camera’s sensor will not get enough light. Thus, you need to make the appropriate camera settings for astrophotography, namely to open the aperture as wide as possible so that it can get enough light.
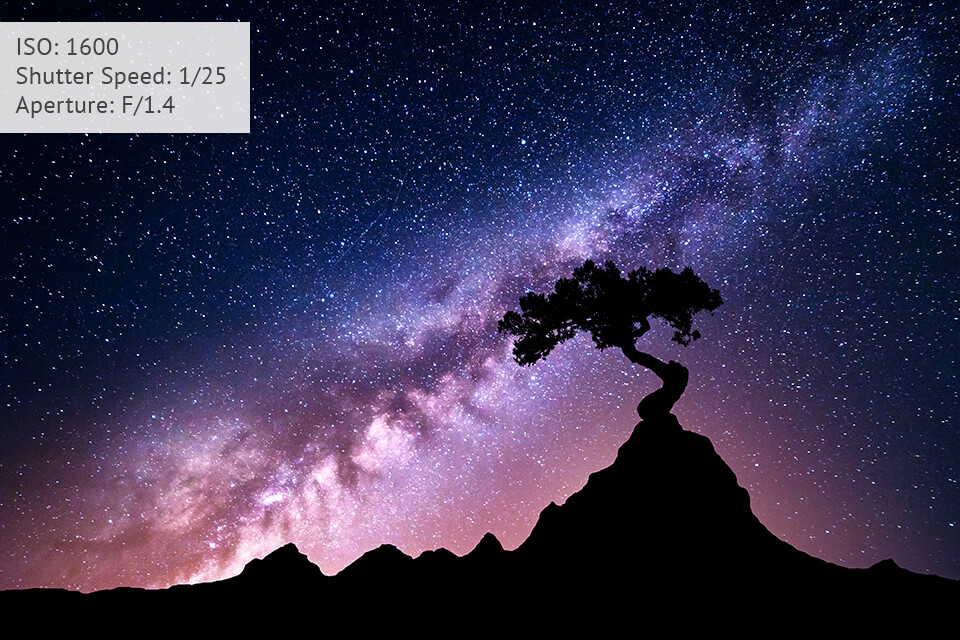
Start with an aperture of f/2.8 and increase this number as much as the lens allows. If that doesn’t work, then you may have a weak lens and it makes sense to take a closer look at the dedicated lens for astrophotography, which can offer you a wide aperture. Amazingly, just a few stops make such a big difference to the brightness of your photo. More specifically, f/1.4 can let in approximately 200% of the light at f/2.
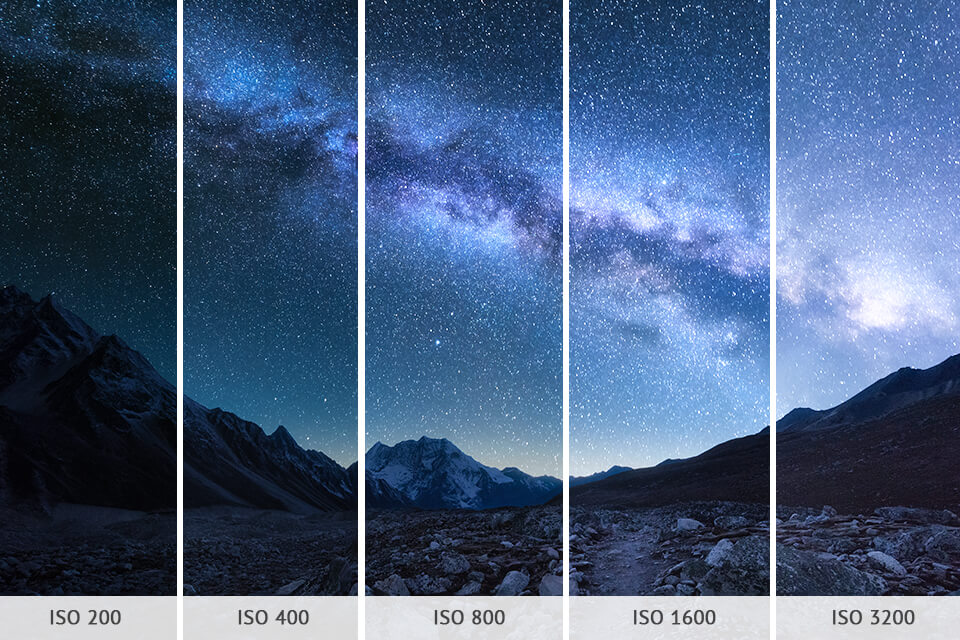
To capture celestial bodies in deep space properly, you need high ISO levels and other appropriate exposure tunes. Some cameras work fine at 800 or 1600 and bring out the moon and stars against a dark sky with long exposures.
By increasing ISO and light sensitivity, be prepared for your DSLR camera to make your shots noisy. If you are using a low light camera that creates a minimum of noise, then it makes sense to climb somewhere higher for a photo shoot.
It is known that the star moves through the night sky faster than we usually think. The longer your camera shutter is open, the longer it will take for a star with its rushlight to remain in your shot. In terms of astrophotography camera settings, the optimal time would be 25 seconds. It will be enough to capture the stars properly.
As a rule, most DSLRs come with the default JPEG formats for your shots. However, I advise you to choose RAW, which stores all the initial data received from the device’s sensor. This format is considered the best in professional photography circles, and if you are going to further improve your photos with astrophotography software, then you can’t do without it.
RAW stores your data at a high bit depth of about 12 bits. They are presented as linear data obtained from an A/D converter. This is perhaps one of the most important astrophotography settings you need to make when preparing to shoot. While editing night sky photos in Photoshop and Lightroom, you will appreciate the importance of this action by taking full control over the image. However, you can set shooting in two formats simultaneously – JPEG and RAW. This is a good idea if you have an advanced camera capable of producing low-noise photos.
Want eye-catching astrophotos but don’t have the necessary skills or enough time to improve them? Contact our professional service and they will do all the work for you. They can improve the appearance of the stars in the sky, add or remove some of them, apply overlays, and make the necessary changes in color.
Try shooting with the daylight white balance setting – it works especially well when saving images as JPEGs. The essence is the light correction based on the whitish color temperature of the stars. However, if there is some light pollution in the sky, then it might not look so good.
You can avoid this with customized white balance or Tungsten mode if the photo is contaminated with reddish highlights. I also advise you to try shooting in RAW format, because the resulting images can be edited, trying on all possible white balance settings on them.
Autofocus is not the strong side of the cameras for astrophotography in low light. It’s best that you select the manual focus mode for your lens. This is because the size and illumination of the stars are too small for the camera to autofocus properly.
Don’t neglect this camera setting for planets, as a shot that is blurry due to poor focus cannot be corrected. You will be able to fix and hide photo noise and star trails, which is something you can’t do with an out-of-focus photo.

This is a simple formula that determines the maximum exposure time that is appropriate for your shot, allowing you to take it while the stars are still sharp. It is calculated by taking into account the focal length of the lens for night photography. It will help you get the right camera settings for astrophotography to take the best night sky shots of your life, or at least set the stage for it.
Below you can find a formula that will help get rid of blurry stars:
500 / (Crop-Factor x Focal Length) = The Best Shutter Speed for Sharp Stars
The crop factor values are determined based on your camera sensor and are as follows:
1x = Full-frame sensor
1.5-1.6x = APS-C sensor cameras
2x = Micro 4/3 cameras
2.7x or higher = Compact cameras

Almost all cameras come with a long exposure noise reduction feature. Its purpose is the elimination of all the noise that can appear when you shoot with long exposure and high ISO. You may think this is a good idea, but it only sounds good. In fact, they fall short of what you can achieve with manipulations in noise reduction software.
What’s more, the shooting process will double because after you click the shutter, you have to wait for the camera to work its magic on it. My advice is just to turn it off and don’t waste your time on questionable results.
Most DSLRs are equipped with a low-pass filter located in front of the sensor that fixes problems caused by anti-aliasing artifacts. Therefore, you can get photos that need sharpening right in your JPEG camera or photo editing software.
By making these settings on the device, you will certainly get an attractive view of the stars, but you risk seeing a very noisy photo. That is why it is better to abandon these camera settings for planets and leave this for top-notch programs.
For darker and noisier areas of the image, it makes sense to apply masks, since they are not too detailed. Whereas you can sharpen lighter areas separately so as not to affect the noise.
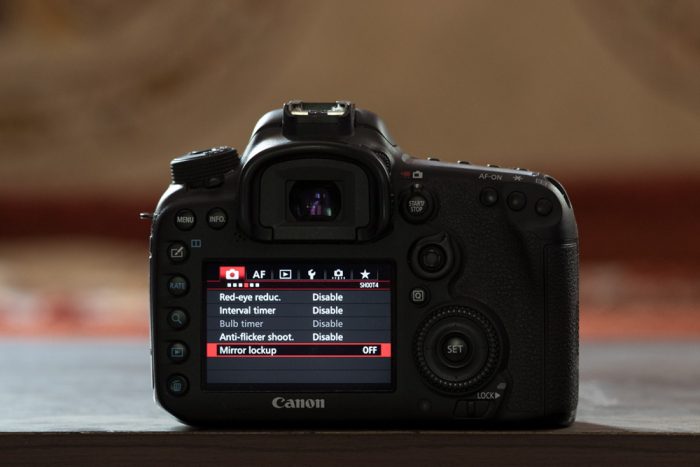
If you prefer long exposure with a strong mount, then you can do without locking the mirror before exposure. However, when working with short exposure for high-res images of planets or binary stars, I suggest doing mirror lockup before exposure. This will help to avoid excessive camera movement and vibration that occurs when the mirror slaps.
Depending on the type of camera, you can do this either by using the controls on the top of the camera or by using the custom settings. However, there are some models where this is not possible, but you can then try to move the mirror up first when using the self-timer. Refer to the user manual to find out which of the above offers your camera.

To achieve the perfect photo of the starry sky with proper clarity and without motion blur, you can’t do it without a remote shutter release or a timer delay. The camera remote is a good solution, but worth the extra cost, while the built-in time delay will cost you nothing, and its result will be no worse than the remote.
You just need to mount the device on a tripod and use the self-timer. 2 seconds is enough, but set it to 5 or 10 if needed. All you have to do next is click and wait a bit for the camera magic to work.
Even if you’re not lucky enough to capture the stars the way you want, don’t worry, you can still achieve an eye-catching result. This pack has been designed by true pros to be a real boon for you when working with night photography ideas. It has everything you need from shooting star overlays to warm daytime skies and more.


