Not everyone is happy with their body and face, and when it comes to photos, people get particularly anxious about fit and beautiful they appear. Thankfully, you can always use Photoshop to easily deal with all the imperfections of your figure. In this article, I’m going to provide a simple plastic surgery Photoshop tutorial and go over what kind of enhancements you can make using this software.
This tutorial will teach you how to conveniently and quickly make someone’s facial features look perfect in Photoshop. This method is so straightforward that you'll have no trouble applying it to photos that don't even particularly need it since it will be just too tempting to rid someone’s face of any flaws.
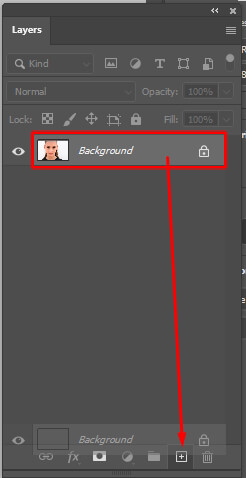
Pick File > Open. Choose the image that needs enhancement. To copy a layer, find the Layers panel, press the layer that has to be duplicated and then employ the Ctrl+J/Cmd+J hotkey combination.
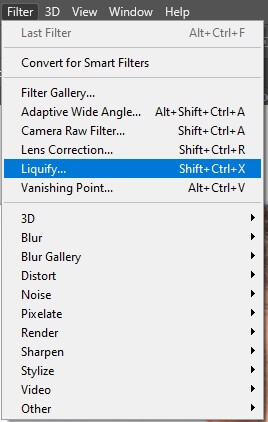
Go to Filter – Liquify to bring up this filter’s menu.
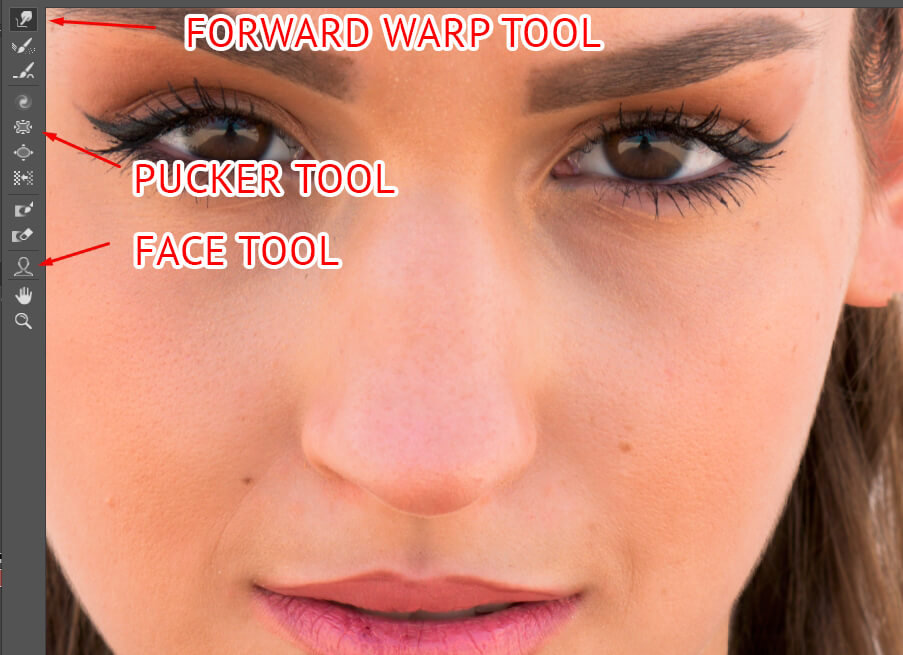
If you want to enhance the various facial features in a photo, you’re going to need tools like the Forward Warp Tool, Pucker Tool, Face Tool.
You should start by determining the most problematic areas of the photo. Once you’ve decided what parts need enhancement, you can begin to smoothly and delicately apply the chosen tool. All distortions are visible instantly so it’s easy to see when you need to stop. To decrease or increase the size of various body parts, you can simply use the Pucker Tool.
Forward Warp Tool allows you to change the outline of any object and “mold” the model into any shape you want.
Face Tool lets you control sliders by simply pressing and dragging different image parts. This feature also allows you to make changes like cheek resizing, nose shape adjustments, or even moving the model’s eyes in different directions that can not be achieved by using regular sliders.
Note: Keep in mind that one of the most frequent retouching mistakes to avoid is changing yourself to the point where you become unrecognizable. Photoshop and other photo editing software only has to highlight your beauty, not turn you into an incomprehensible creature.
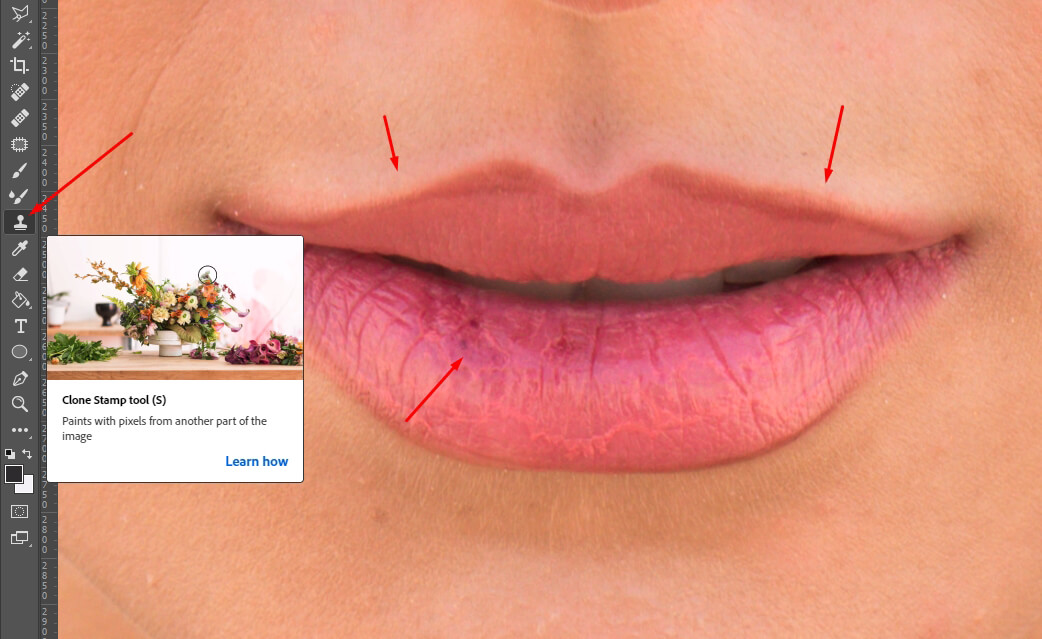
Use the Clone Stamp Tool to outline the lips. You can select this tool from the tool panel. To use it, you have to define the source and target area. Press and hold the Alt key and then click the left mouse button to select the source. Once the source has been defined, the image will be automatically copied whenever you click the mouse again.
This is how the photo will look after you've done all the necessary manipulations. Remember that it will be quite challenging to achieve a realistic result during your first tries, but after a while, you'll be able to deal with any imperfection in your photos. By the way, you can also study some photoshopped models before and after retouching to get inspired with new techniques and learn more about various Photoshop features.

However, if for some reason you didn't manage to create a similar photo, I suggest reaching out to professionals. FixThePhoto will ensure your portrait photos look beautiful and professionally retouched. Our experts will improve the shape of your body, enhance the skin texture, and deal with all visible flaws while ensuring the result is completely realistic.
The social media era of humanity values beauty more than ever before, meaning the average person cares about their appearance even more than they did a decade ago. There are several ways one can go in when trying to achieve the perfect look.
Some invest a huge amount of time and money to receive plastic surgery while others focus on enhancing their photos in Photoshop to ensure they look their best in their social media feeds. These are the types of Photoshop plastic surgery effects that you can achieve.
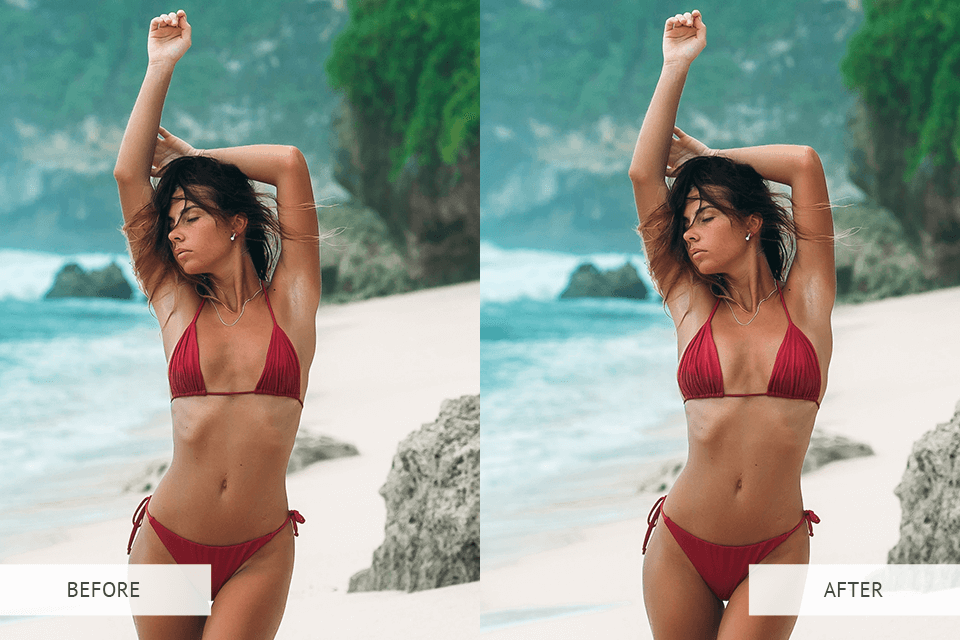
There are multiple ways you can use to make your breasts appear bigger. Possible options include push-up bras, padding, special clothing, a proper posture, or some other trick. However, all of them are relatively risky and can sometimes fail to provide you with the result you need. Thankfully, you can always rely on Photoshop breast enhancement techniques to ensure your breasts will have the perfect size in every photo you post online or share with your friends.
To achieve the desired effect, select the Bloat Tool. Next, set its properties according to the size of the image and the breasts in it. Afterward, carefully press the left mouse button to gradually increase both breasts.
The key here is to not overdo it since you only need to look at a Kim Kardashian Photoshop fail to see an example of botched retouching and how it can change the public perception. When enhancing the breasts, pay attention not to distort the hands, belly, or swimsuit since it will be nearly impossible to fix them later. Additionally, try to avoid making your breasts as big as your head to not confuse everyone who sees the photo.

If you need to remove some excess body fat in Photoshop, I suggest using the Warp Tool. It offers you multiple parameters to tinker with. You can start by changing the size and density of the tool, preferably to low, subtle values. Next, press and hold the left mouse button and start to gradually move the body outline inward to make the waist appear slimmer. If you’ve overdone it, simply cancel the last made changes to fix everything.
Now, if you want to smoothen the skin, select the Lasso tool and highlight the desired area. Then press the Shift+F6 key combination to open the Feather selection window and make the necessary adjustments.
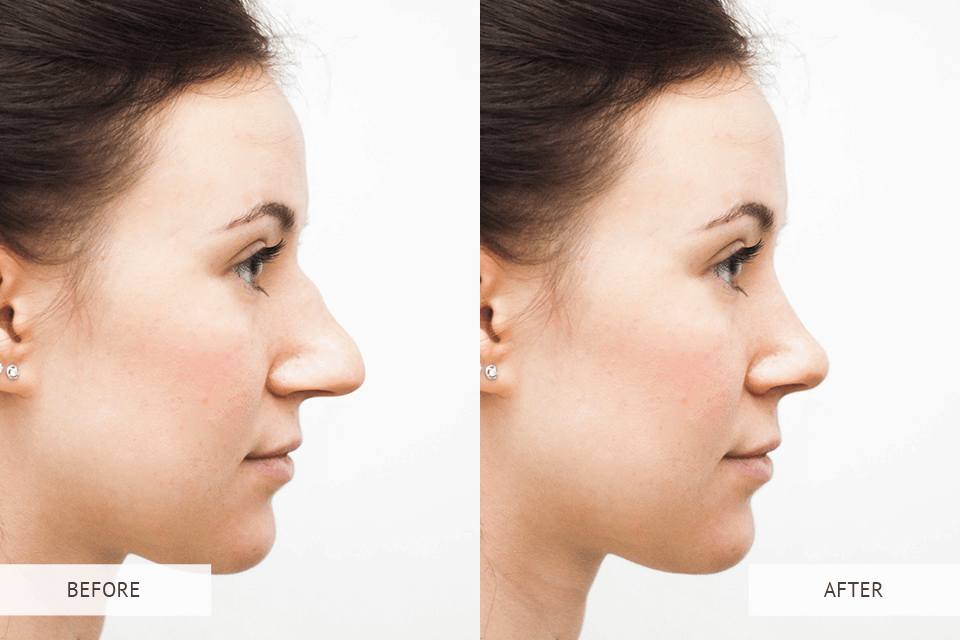
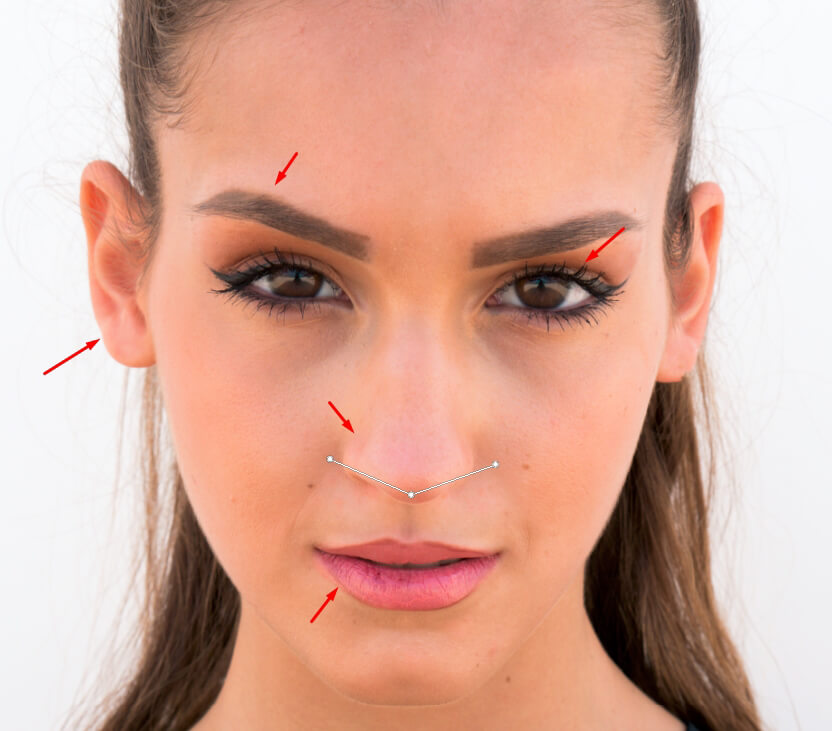
The pandemic caused a boom in the facial plastic surgery industry, making eyelash surgery and face lifting the two most popular procedures after rhinoplasty. To achieve the same effect in Photoshop, use the Lasso Tool to select the area that requires enhancement, Afterward, pick the Pucker Tool and apply it to the nose outline that needs changing. You can adjust its shape and size as you see fit until you’re happy with the result of this nose job Photoshop technique.

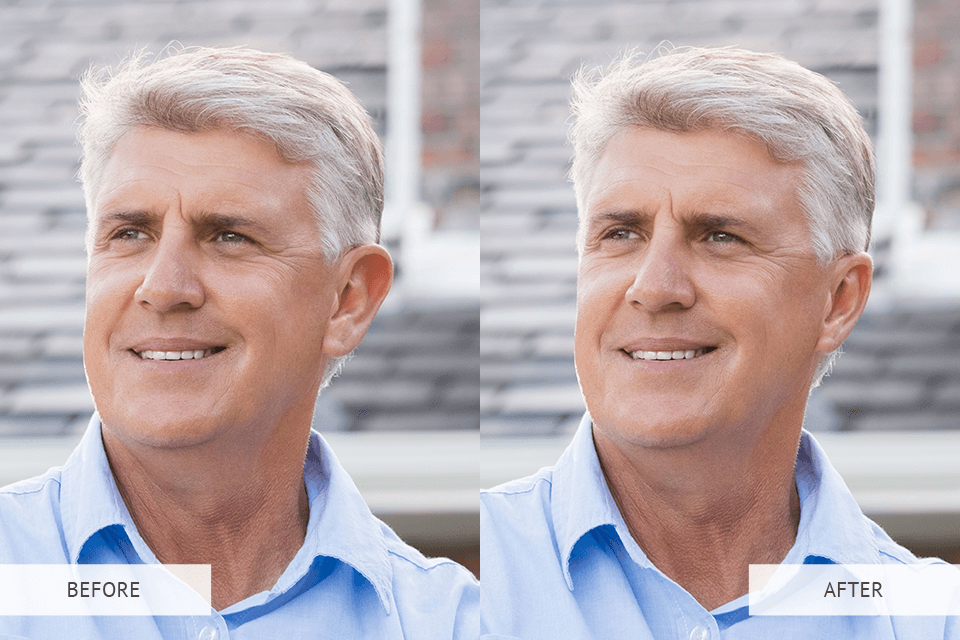
The most common reason why a model’s face might look unappealingly plump in the middle of the photo is the short distance between the subject and the camera. That’s why you have to immediately deal with this flaw when retouching your portrait photos to make the face look smaller. To do so, pick the Lens Correction option and then press D.
Next, you should pick the Warp Tool while keeping all its settings untouched. To make the model's face look slimmer, you need to carefully apply the tool around its entire outline. Simply press and hold the left mouse button and drag it in the desired direction.

Regardless of how dissatisfied you are with your body shape, you can always use Photoshop to make it look slimmer. Many photography post processing services employ Filter–Liquify, as it allows to drag, rotate, mirror, retract, and bloat any part of the image. The created distortions might be either subtle or drastic, and that is the kind of flexibility that makes Liquify a powerful tool for retouching images or creating artistic effects. This filter can be used for editing images that have a color depth of either 8 or 16bit.
If you want to transform the ears in your photos, you have to select the Warp Tool. Remember that the size of the brush should be set in accordance with the photo's resolution. Afterward, use the selected round brush to either move the ear closer to the face or decrease its overall size if it’s too large.
Pro Tip: If you want to do a nice, clean job, it’s advised to use the Freeze Mask and Thaw Mask tools to ensure the neighboring image parts are “frozen” and protected from distortions.
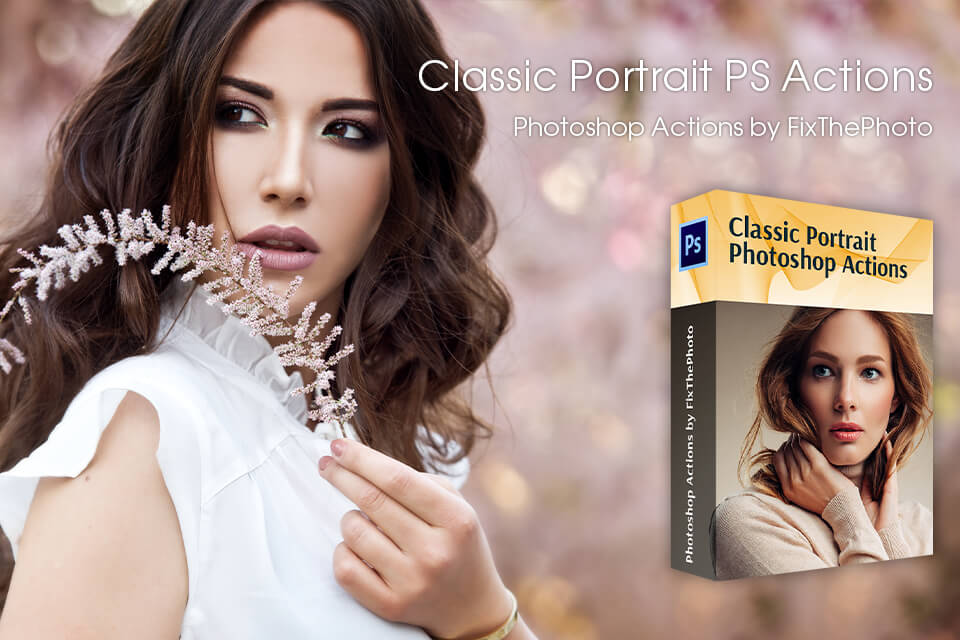
These tools were created by professional image retouchers from FixThePhoto while accounting for all the intricacies of portrait studio photography editing. You can use the provided 80 actions to smoothen the subject’s skin, enhance their eyes, add volume to hair, beautify lips, perform color correction, get rid of skin imperfections, add stylish effects, and much more. These filters are suitable for retouching studio, family, wedding, child, and even outdoor portraits.


