Staging a Kitchen for a Photoshoot: Tips to Impress

When you purchase through affiliate links on our site, we may earn a commission. Here’s how it works.
Physical vs Virtual Kitchen Staging for a Photoshoot

Staging a kitchen for a photoshoot is very important to attract buyers and close a deal quickly. The kitchen is often the heart of the home, where families gather, but it’s also a space that can get messy and needs extra care before selling or renting a house.

As a retoucher at FixThePhoto, I often work on photos of kitchens with outdated designs that can be improved with simple kitchen staging instead of costly renovations. Taking the time to prepare your kitchen properly before the shoot might make it look more appealing to buyers and increase the overall value of the property.

The Importance of Staging

Staging a kitchen for a photoshoot involves several steps to make it look as close to perfect as possible. For staging homes for the photoshoot, special techniques can make the space more visually appealing and help sell the property faster. The main goals of kitchen staging include:

Taking high-quality photos that stand out in listings
Making the kitchen look spacious, tidy, and ready for everyday use
Increasing buyer interest compared to upstaged kitchens
Potentially raising the value of the property
Highlighting the kitchen’s best features, like convenient work areas and modern appliances
Showing the space’s potential, like storage options and countertop functionality

5 Steps to Stage Kitchen

Start staging your kitchen with clear goals in mind. A well-prepared kitchen should meet these key criteria:

  • Clean and fresh, as if it was recently deep-cleaned or renovated
  • Bright and open, with enough space to feel roomy even if the kitchen is small
  • Neutral in style, yet modern and attractive
  • Warm and inviting, making people want to sit at the table or make a cup of tea
  • Free of personal items, allowing anyone to imagine themselves living in the space

Not sure where to begin transforming your kitchen? Follow these simple steps to get it ready for a photoshoot.

Step 1. Clean Every Item and Surface

kitchen staging ideas clean

When staging a kitchen for a photoshoot, cleaning is a key step to make it look bright, fresh, and attractive. Buyers or clients are more likely to connect with a clean and tidy space.

Remove clutter from kitchen counters, shelves, and other surfaces. Keep only a few simple items, like a toaster or a vase, to make sure the place doesn’t look messy.
Clean the stovetop, grates, and exhaust hood. Use gentle cleaners with fruit vinegar to remove grease without damage.
Deep clean all surfaces, starting with vertical ones (like cabinets) and moving to horizontal ones (like countertops). Don’t forget less obvious areas like behind large appliances or under the sink. Use a toothbrush for small spaces and seams. Start from the top and work your way down.
Pay special attention to windows, inside and out, as they let in natural light that makes the kitchen look nicer. Use cleaners with ammonia to avoid streaks and consider removing heavy curtains.
Polish all smooth and shiny surfaces, such as the sink, taps, appliances, and cabinet handles. A good polish can also protect surfaces from dust.
As an extra step, clean the inside of the fridge and oven. Finish by mopping the floors.

Focusing on these details can make your kitchen staging photos much more effective. Clean and organized kitchens look bigger and more inviting in pictures, helping viewers imagine themselves using the space.

If you don’t have time to clean or think hiring a cleaning service is too expensive, virtual staging can be a good option. It allows you to create a clean and polished look without doing cleaning or making big changes.

Step 2. Decluttering and Organizing the Space

kitchen staging ideas organize

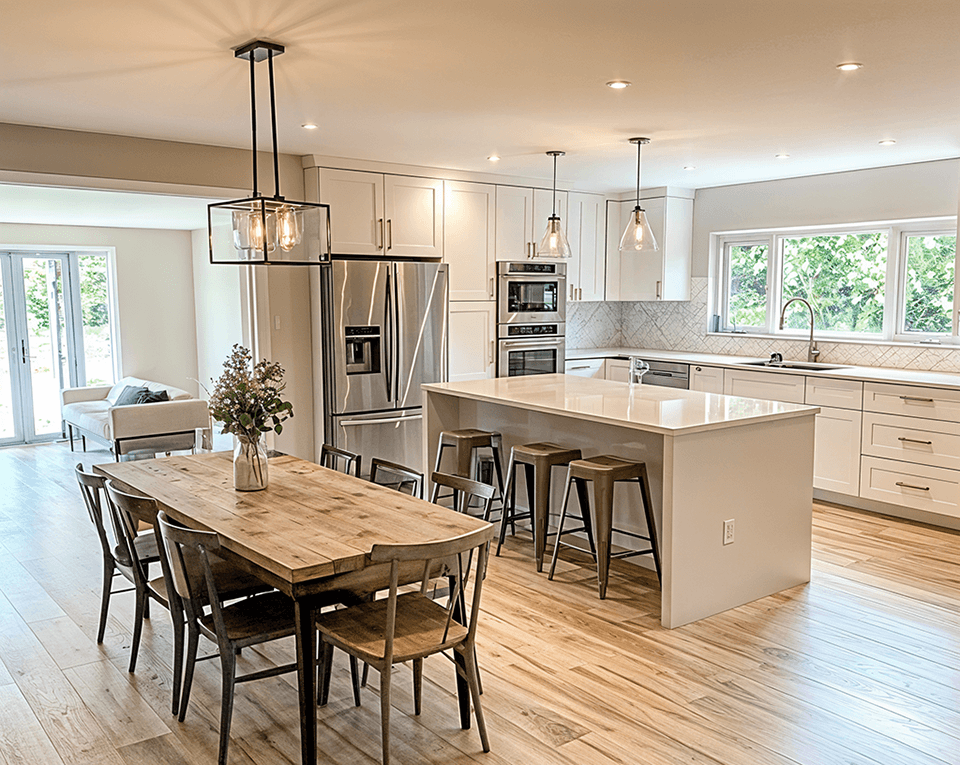
Organizing the kitchen is an essential step in your kitchen staging to make it feel spacious and welcoming for potential buyers. The goal is to create a neat and neutral look, but don’t worry – you can return everything to its usual place after the photoshoot.

Start by removing extra appliances from countertops and shelves. Move medium-sized appliances, like a slow cooker, out of view unless they have a stylish design.
Take away personal items like mugs with names, branded items, or children’s artwork. The kitchen should not feel connected to the current residents.
Keep shelves open and spacious, displaying only a few simple items. Empty space helps buyers imagine the kitchen has plenty of room for work.
Organize cabinets and drawers, as even hidden spaces can give an impression of tidiness in photos.
Use drawer dividers or labeled organizers to make storage areas look clean and practical.

If you prefer, virtual staging tools can digitally arrange and improve the look of your interior photography, saving you time and effort. The best part is that you don’t need to move your items permanently – you can keep them in their usual spots after the shoot.

Step 3. Managing Lighting for Better Photos

kitchen staging ideas light

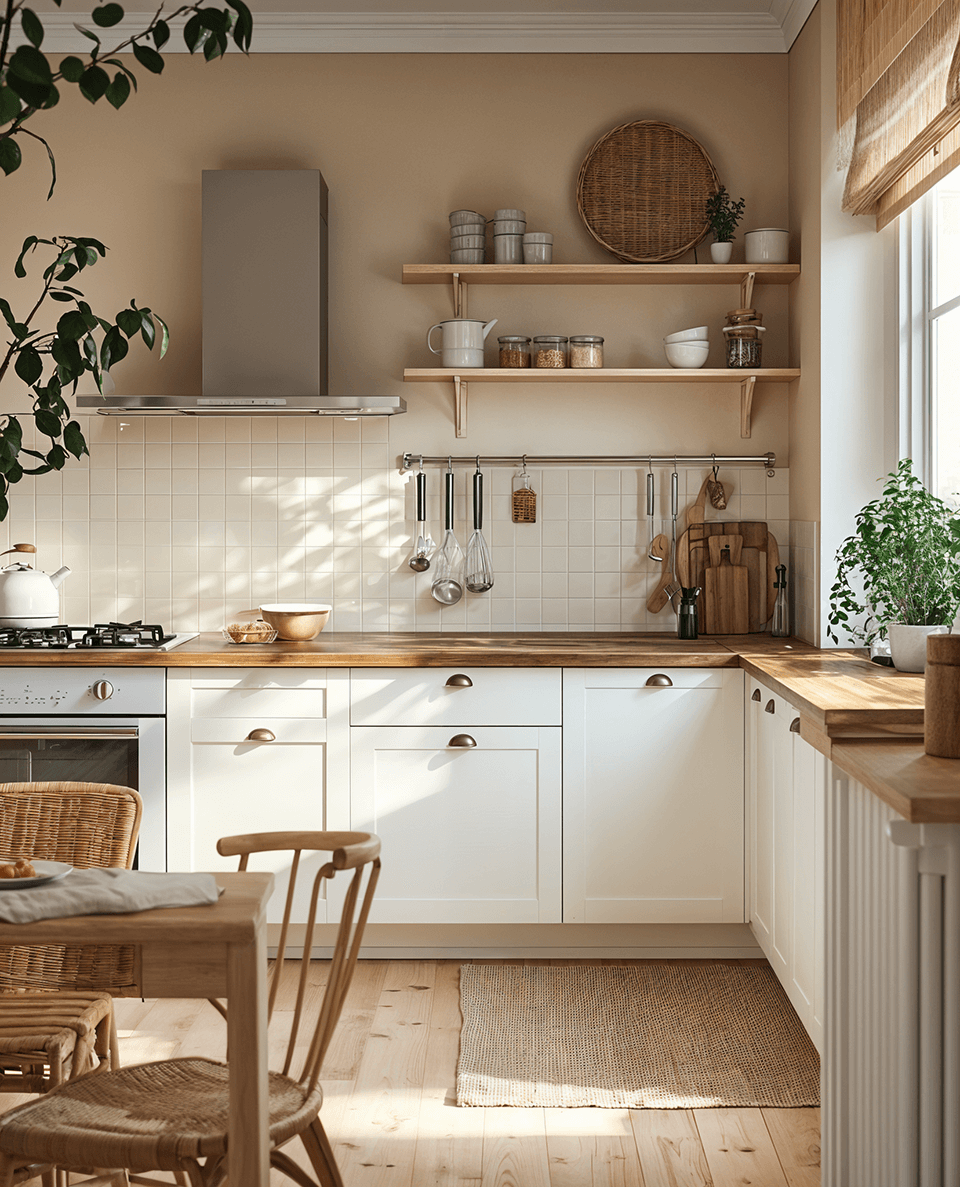
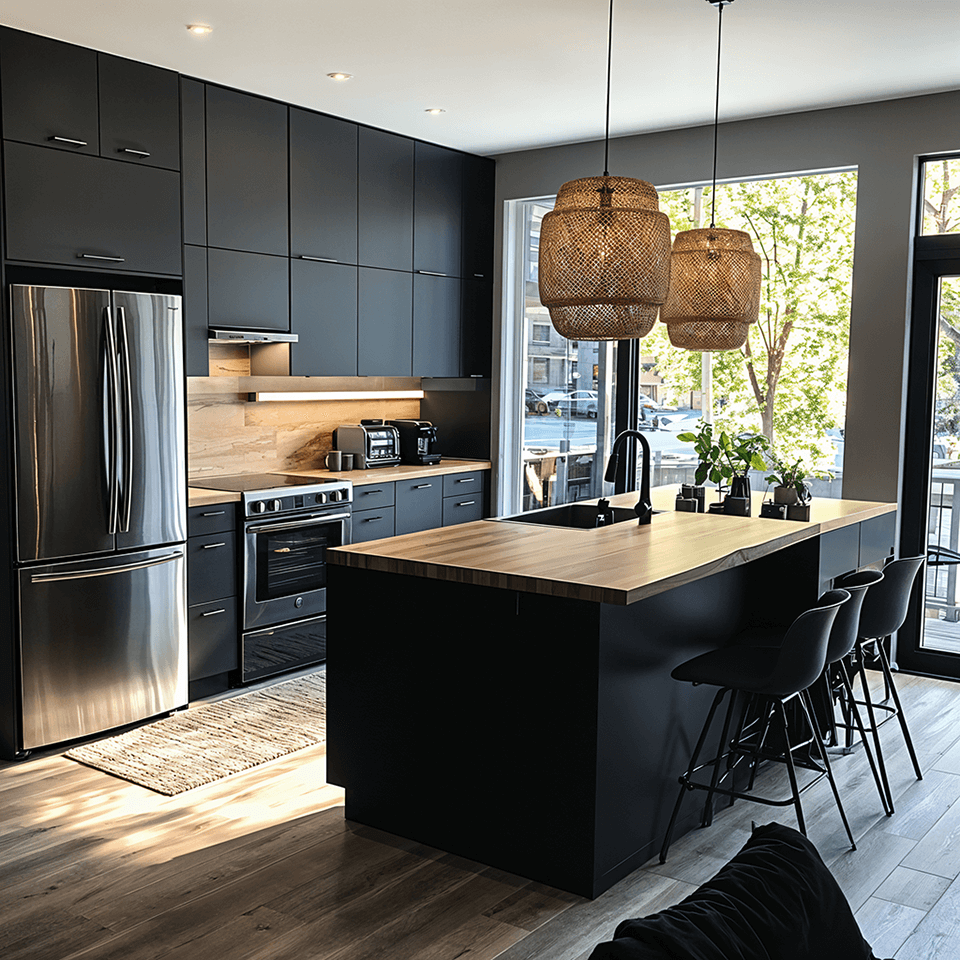
Lighting is a powerful way to make your kitchen look more appealing and inviting. Whether you use natural lighting for real estate photography or adjust it digitally, good lighting can bring out the textures and finishes in your kitchen, giving your photos a polished, professional look.

Most people prefer light colors in kitchen staging and well-lit work areas. This is especially true for key zones like the work triangle, which includes the table, stove, sink, or fridge.

Start with natural light. Open the curtains or blinds, or use sheer ones, to let in as much sunlight as possible. This will make the room feel brighter and warmer.
For darker spots, like under cabinets or around the kitchen island, add artificial lights like LED strips or small spotlights to highlight key areas and make the space more welcoming.
Use soft, diffused light to avoid harsh shadows. This creates a balanced look that shows details without making flaws stand out. Replace bulbs if needed, choosing medium-brightness ones with warm tones instead of cool tones. Special light fixtures can also help spread light evenly.

If natural or artificial lighting isn’t enough, virtual staging software can adjust the lighting in your photos. It can brighten areas or add light digitally to reveal the kitchen’s features. This is especially helpful for small kitchens or spaces with little sunlight, allowing you to create the perfect look without making real changes on-site.

Step 4. Making Small Updates

kitchen staging ideas update

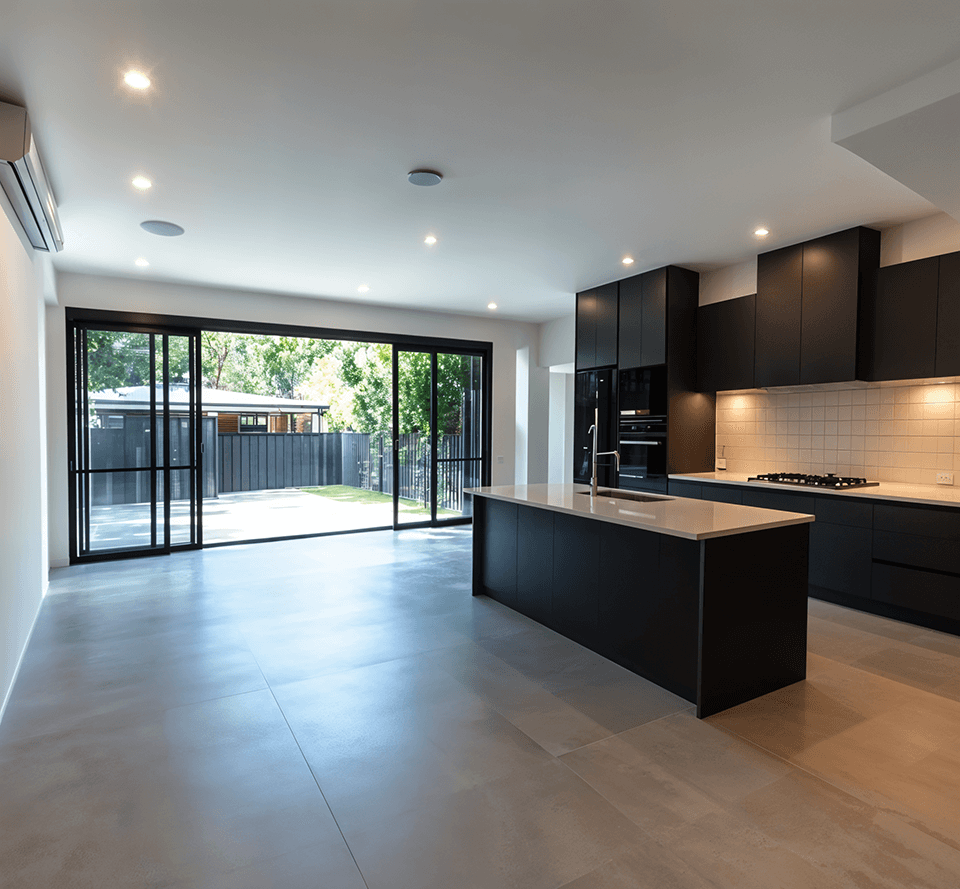
Another kitchen staging tip is to check if there is anything outdated or in need of repair, and fix these issues to give the space a fresh look.

A simple way to update the kitchen is by replacing hardware like knobs or handles. Choose finishes like chrome or matte to make your kitchen look more modern.
Painting is an affordable and effective option. Use light, neutral colors for the walls, and refresh cabinet doors with varnish or stain for a brighter look.
If the countertops look outdated and don’t match current styles (like natural stone with flecks), try a durable self-adhesive film that mimics marble or granite.
Short on time to replace stained areas on the floor or counters? Cover them with a stylish rug or mat. Rugs can also help define different zones in the kitchen.
fixthephoto virtual staging services before fixthephoto virtual staging services after

Want to Make Your Kitchen Stand Out in Photos?

FixThePhoto experts can add virtual decor, adjust lighting, and update styles to make your kitchen more attractive to buyers. Show your kitchen’s full potential with realistic virtual staging that saves time and makes your property more appealing.

Virtual staging is incredibly useful in refreshing a kitchen. It lets you add trendy decor or change the colors digitally, making the space look brighter. These changes help show the kitchen’s full potential. With the right updates and virtual touches, a staged kitchen can attract various buyers or viewers.

Step 5. Adding the Finishing Touches

kitchen staging ideas decor

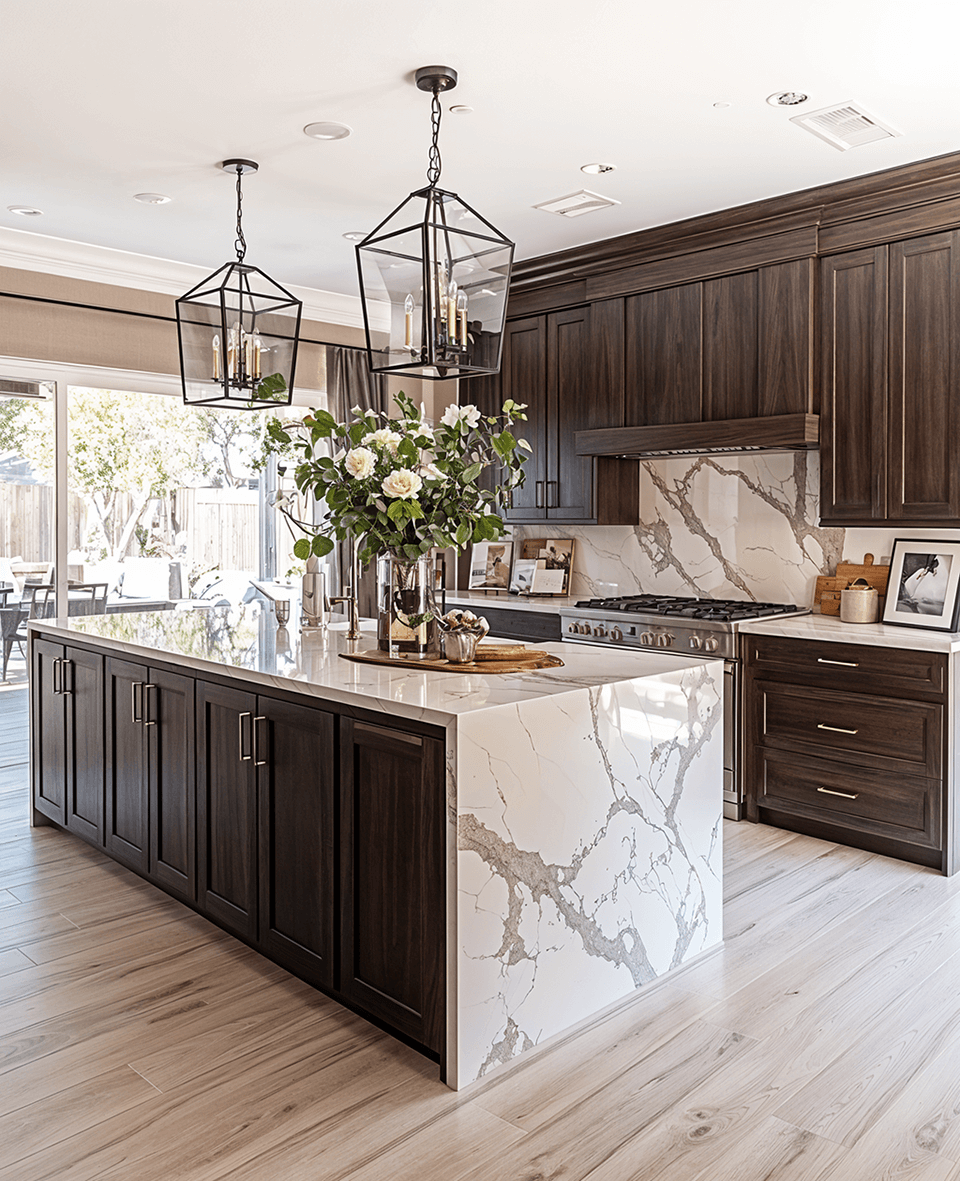
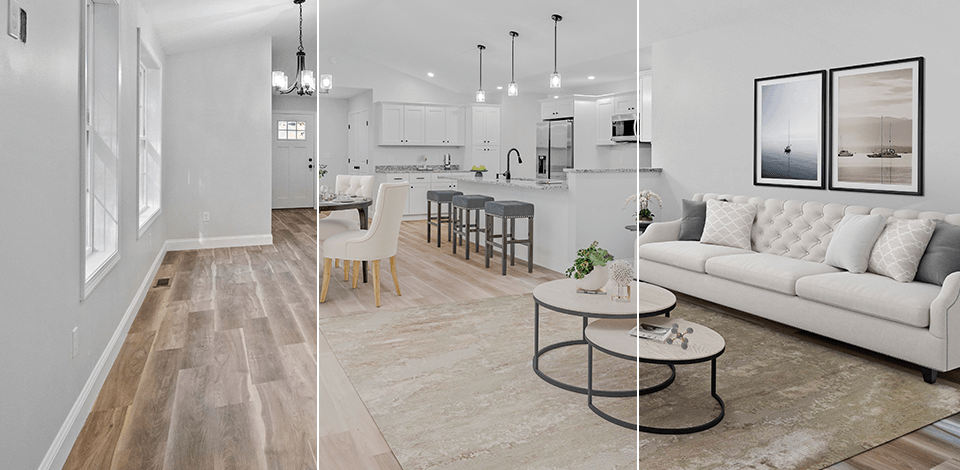
Decorating is an important final step that improves the kitchen’s look and makes it more appealing. By combining real and virtual kitchen staging, you can find the perfect mix of personality and style, improving both the photos and the way people engage with them. The key is to keep things simple and stick to a neutral style.

Start by adding a few items that create a warm, homey feel, like fresh flowers or small plants.
Simple touches, like place settings, can make the kitchen feel welcoming and highlight its role as a social space for dining and gatherings.
Small props, like an open cookbook or a coffee maker, can make the space feel inviting without making the kitchen too overwhelming.
Make sure the decorations match the kitchen’s theme. For example, rustic kitchens look great with wooden accents and vintage jars, while modern kitchens benefit from minimalist touches like black and white dishes or smart appliances.

With virtual staging tools, you can try different styles digitally, showing various looks to appeal to the clients. This mix of real and virtual staging helps create an attractive and universal kitchen setup for photos.

Physical vs Virtual: Cheap vs Fast

It can be hard to keep a kitchen looking perfect, especially if you’re still using it for cooking and everyday tasks. Virtual staging is a great way to make a kitchen look better without changing anything physically. By using kitchen photography tips and virtual staging, you can make the space more versatile.

When staging a kitchen virtually, the process starts with taking good photos of the kitchen. Then, these photos are edited to add things like furniture, decorations, and other design elements that make the kitchen look more inviting and useful. This digital method creates a stylish and open feel, helping people imagine how they could use the kitchen.

fixthephoto real estate photo editing services before fixthephoto real estate photo editing services after

Want to Improve the Look of Your Kitchen Shots?

Bad lighting, crooked angles, or unwanted marks can make your photos look unappealing. The FixThePhoto team can help make your kitchen look attractive and realistic, just like in a professional real estate listing.

Here are some other benefits of using virtual staging compared to physical kitchen staging:

Physical Virtual
✔️ The changes stay in your kitchen after staging
The kitchen doesn’t need to be physically changed
✔️ People can visit the kitchen in person to see it in a real setting
People can’t experience the setup in person
Making changes takes hours or even days
✔️ Changes take only a few clicks and are done in minutes
You might spend money on cleaning, repairs, or new furniture
✔️ No extra costs for cleaning, repairs, or furniture
Over time, the setup can change or get dirty
✔️ The design stays the same over time, no matter how it’s used
You need to arrange visits that fit everyone’s schedule
✔️ You can share the setup with everyone at any time, without needing a visit
There’s usually only one final design with limited changes
✔️ You can create many different styles and designs to fit various needs

Virtual kitchen staging is great for showing how flexible a space can be. You can easily change colors, textures, and moods to fit different styles. This makes it simple to add or change furniture, decor, or even lighting to match what buyers like, especially if you know their preferences beforehand.

To make staging work well, it helps to use virtual furniture and decor that match the kitchen’s look, like adding chairs by the counter or using simple accents that go well with modern kitchen appliances.

Tata Rossi

Tech Trends Journalist

Tata Rossi is a photographer-advisor, key contributor at FixThePhoto, sharing her expertise about photography and 55% of photos you see at our blog are taken by her. She is a Bachelor of Fine Arts in Photography from the Massachusetts College of Art and Design. She is the main so-called teacher in our team, conducting courses on photography and editing for beginners and anyone interested.

Read Tata's full bio

Tetiana Kostylieva

Photo & Video Insights Blogger

Tetiana Kostylieva is the content creator, who takes photos and videos for almost all FixThePhoto blog articles. Her career started in 2013 as a caricature artist at events. Now, she leads our editorial team, testing new ideas and ensuring the content is helpful and engaging. She likes vintage cameras and, in all articles, she always compares them with modern ones showing that it isn’t obligatory to invest in brand-new equipment to produce amazing results.

Read Tetiana's full bio

Contents:
adobe special offer adobe special offer