Steam is so fleeting, it’s nearly impossible to take realistic shots. A photographer has to often deal with a situation when the steam fades out or a lens fails to capture it properly, which makes it difficult to take a high-quality photo.
I decided to help photographers who want to discover how to photograph steam and do not know what camera settings to use.
In this article, I will describe how to fix common lighting issues, select the right angles, and enhance pictures to give them a professional feel.
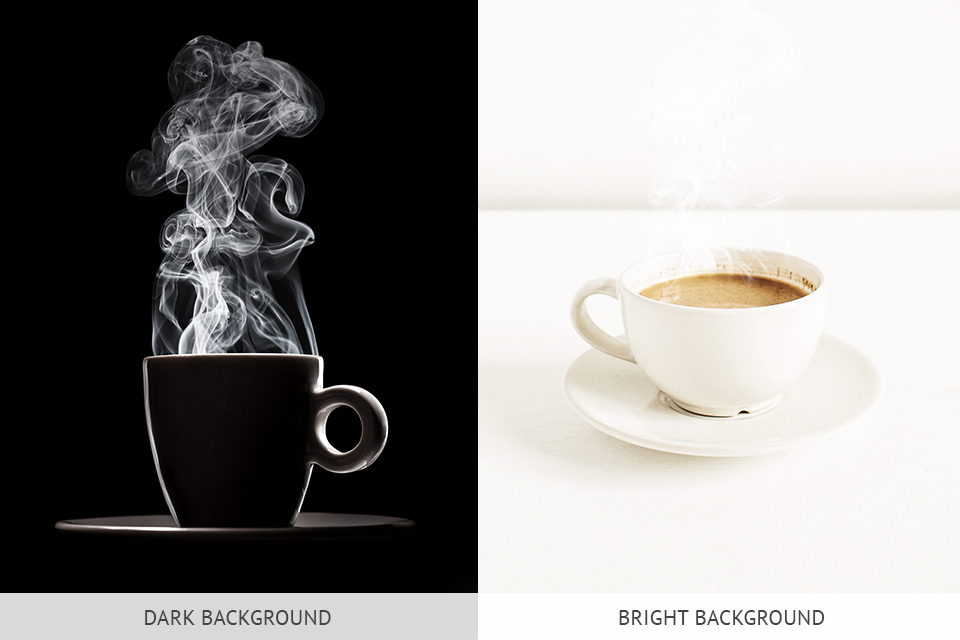
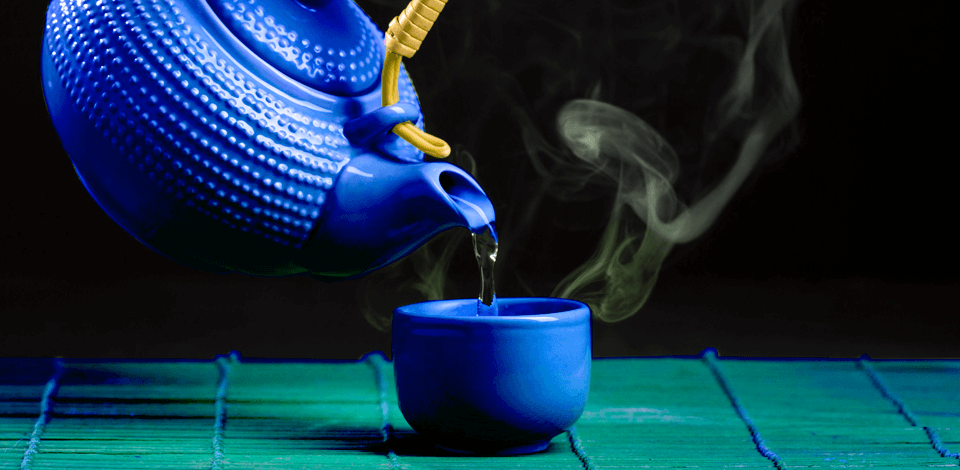
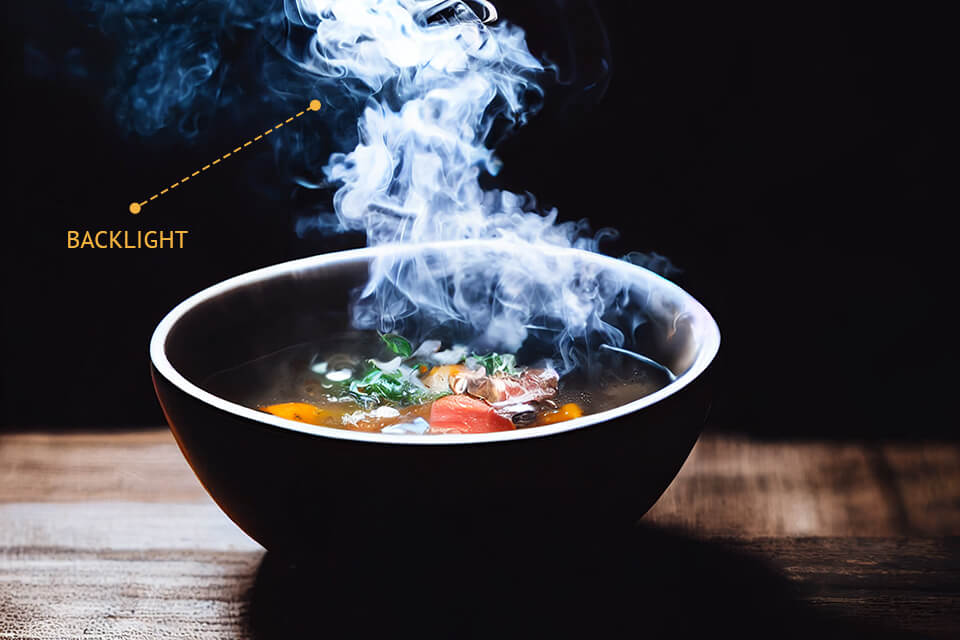
I prefer to use dark backgrounds or choose neutral colors when capturing intricate swirls of steam, as it allows me to take striking photos. It may be an arduous task to find a suitable background that can be used on the go, but you can use any food photography prop to create the right atmosphere.
When using backgrounds with vibrant colors or many distracting elements, it may be difficult to emphasize the steam and capture its exquisite beauty.
When I need to photograph a steaming cup of coffee or a dish, I use a matte black or deep brown backdrop. These hues are perfect for situations when I need to add some visibility to the steam and add a dramatic feel to my pictures by emphasizing specific details.
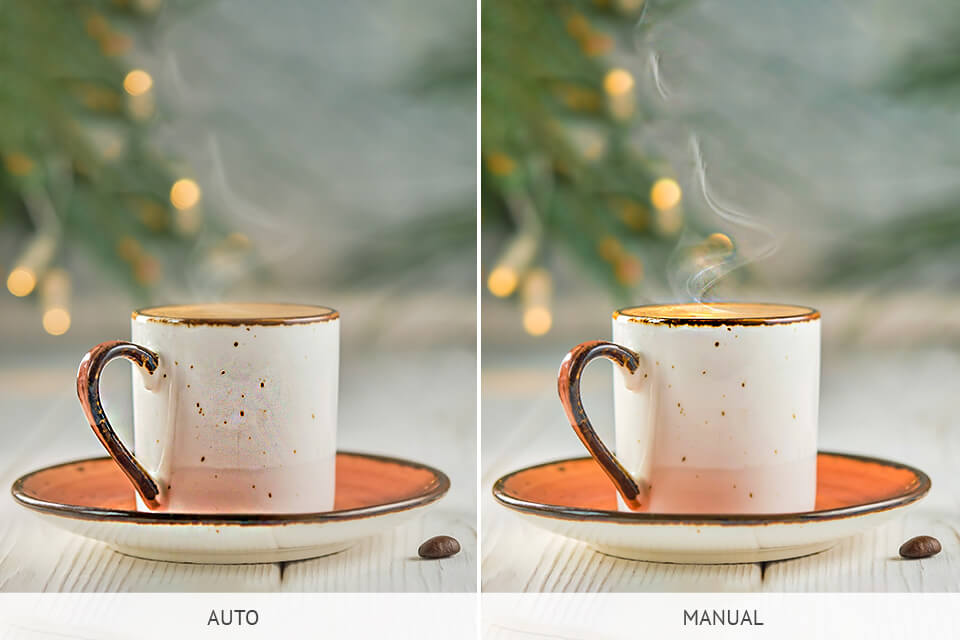
When taking photos of steam, it may be risky to use default camera settings, as you won’t be able to achieve the result you need even if you utilize a decent camera for food photography, like my Sony A7III. Those who want to learn how to photograph steam trains should also avoid using an auto mode.
When working in an automated mode, you may fail to capture important details. As a result, your output photos will look blurry or there won’t be any steam visible in the frame. Due to this, I use the following settings.
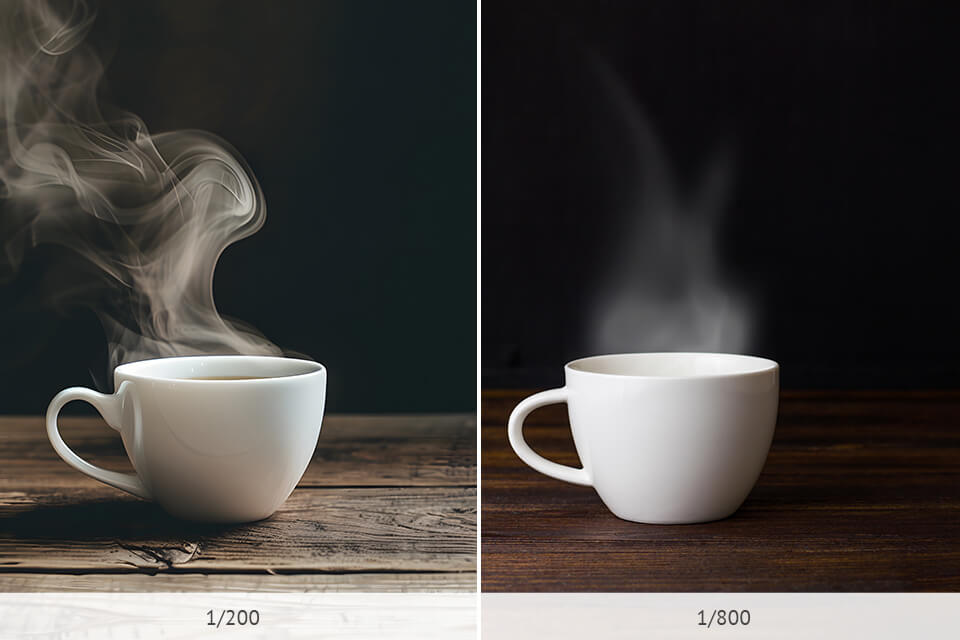
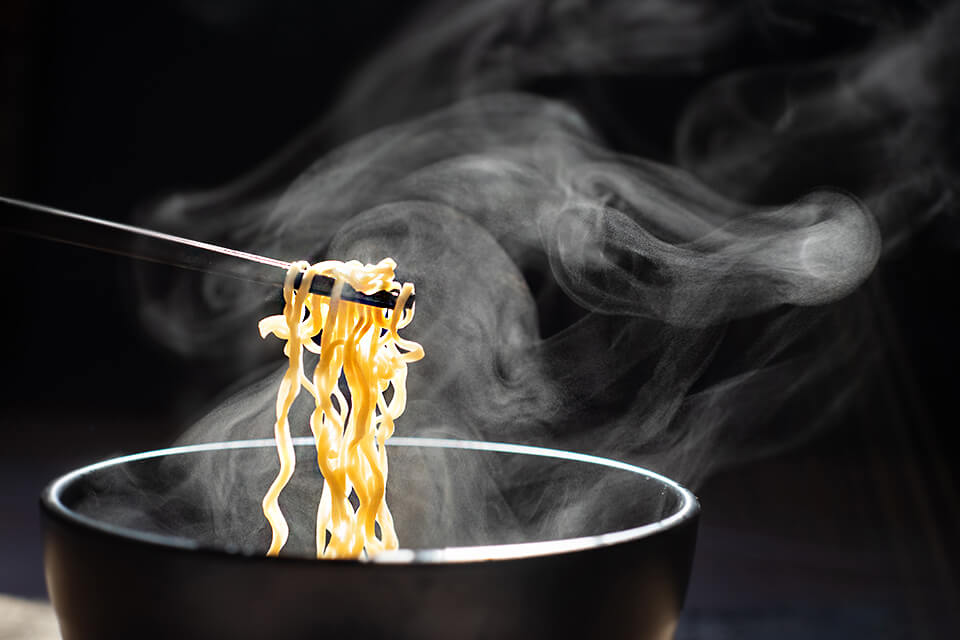
Shutter speed. I usually set it to 1/250 or higher to ensure that I will be able to capture steam in movement. Using such settings allows me to capture the steam and avoid unwanted blur. If you use a slow shutter speed, the steam will look too soft, which will make it hard to notice.
Depth. I prefer to use a shallow depth of field to emphasize the steam. This way, I can capture the steam and make it more noticeable while simultaneously adding some depth to my photos and making them more attention-grabbing.
Aperture. When taking photos, I prefer to work with a wide aperture ranging from f/2.8 to f/4. It enables me to focus on the steam and make the background blurry while drawing a viewer’s gaze to the specific elements in the frame.
For instance, when I needed to photograph steaming coffee, I decided to set the aperture to f/2.8 to achieve a mesmerizing result.
When I use slow shutter speeds, using a tripod allows me to stabilize my camera and capture photos without any sign of blur. For instance, when I was taking pictures of a cup of tea, it was tiresome to wait until the right swirls were formed. After mounting a camera on a tripod, I was able to wait until I was happy with the shape of the steam and captured the swirls perfectly.
Besides, when using a tripod, it will be easier for you to make tiny adjustments to fix lighting issues or change the position of the main object in the frame. I prefer to work with the Manfrotto Befree tripod when working in studio and use an easy-to-adjust Joby for more advanced tasks.
In most cases, I utilize a continuous LED light for photography to photograph steam as it allows me to adjust the intensity and select the right angle. When taking pics of dumplings, I decided to use a small LED panel with a diffuser to ensure that the light remains soft.
If you aren’t satisfied with the way you have captured steam, try using a secondary source of light. Be sure that it is weaker than the main light and select a suitable angle for it. This way, it may be easier for you to capture the steam. In some cases, I prefer to use a small white reflector and put it in front of the main object to reflect some light and give the steam a more voluminous look.
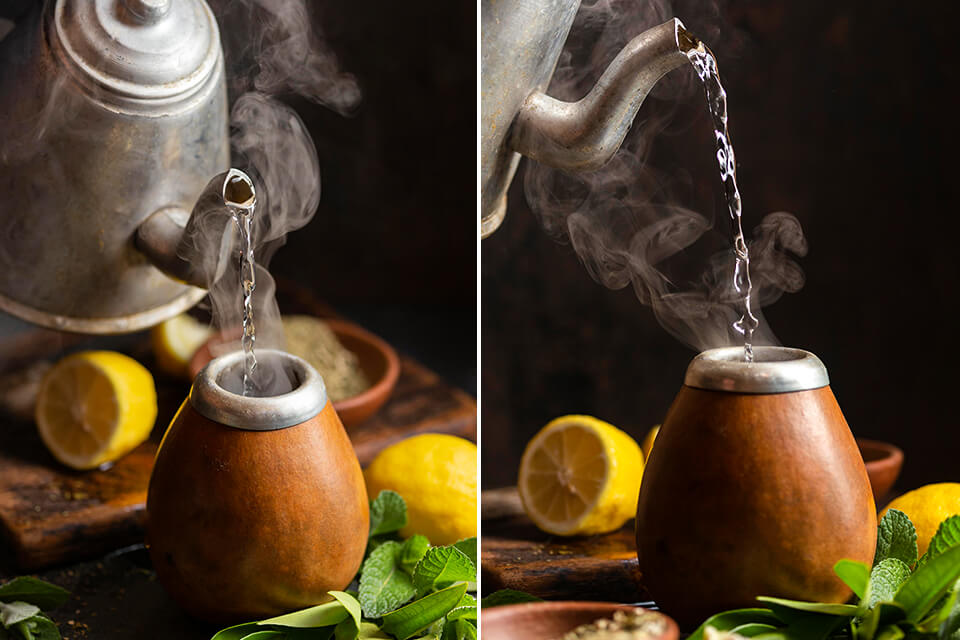
Boiling water technique. Using this time-tested technique, I can easily achieve the result I am interested in. When taking pics of hot dishes, I take a kettle of boiling water and pour some of water into the bowl to take nice shots.
Using a smaller, hidden cup. If I am not satisfied with the amount of steam, I sometimes place a small cup with hot water behind the dish I want to capture. Using this food photography trick is quite useful when I need to capture pics of coffee, soup, and hot dishes.
Steaming cotton balls. If I want to create barely noticeable steam, I put cotton balls in boiling water and then take them out and put them around the dish. This technique is especially useful for long photoshoots when I need to take photos of steam.
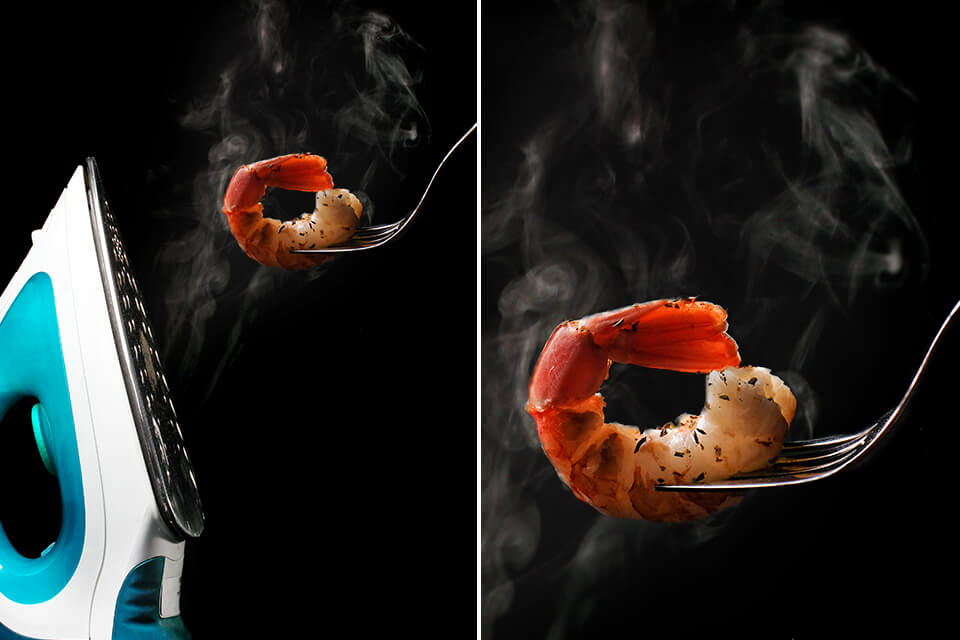
Clothing steamer method. This method is best when I have to capture a lot of dishes or take shots of meals that have cooled down. You just need to direct the nozzle toward the main object and select the right angle to ensure that the steam swirls are perfectly visible in the frame. This technique even allows you to photograph steam with flash and use other photography gear.
Microwaving and plastic wrap. When I need to capture realistic steam, I take a pre-cooked dish covered by a plastic wrap and then put it in the microwave to heat it up. Then, I remove the wrap and start taking photos right away.
You can use a variety of food photography angles. However, only some of them are suitable for capturing steam. If you take pics from low angles, you may notice them fogging up, so it will be challenging for you to take a great shot. However, if you take photos from high angles, including the overhead angle, it will be difficult to notice the steam.
To take great shots, I prefer to take photos from eye level or capture angled shots to highlight the steam and capture the right atmosphere. This angle is best suited for situations when I need to focus on the swirls to capture steam in movement.
I also like using a 45-degree angle, as it allows me to capture both the steam and food. Due to this, I can create a well-balanced composition and capture mouth-watering photos of food.

In addition, when editing my photos, I often minimize clarity. For instance, when I decided to photograph steaming tea, I later had to make the steam softer by adjusting the clarity setting. It helped me to achieve a more striking result. If clarity values are too high, the steam may look unrealistic.


