If you deal with product, car, and jewelry photos, then you absolutely need to know how to create a reflection in Photoshop. Creating reflections is rather easy, and they can be used for imitating effects like water or a shiny surface. If you deal with product, car, and jewelry photos, then you absolutely need to know how to create a reflection in Photoshop. Creating reflections is rather easy, and they can be used for imitating effects like water or a shiny surface.
Reflections enhance an image with a certain polish and luster effect and can be used for realizing interesting product photography ideas. This effect can usually be found in advertising images of various perfume bottles or expensive beverages.
Let’s see how to create a reflection of an object by looking at an example. For this task, I picked one of the most popular products – a soda can.

After adding your image, you need to duplicate it. You can do so using Ctrl + J (Cmd + J). Now, create a new empty layer by clicking the “+” icon in the Layers menu and place it between “Background” and “Background copy.” Choose the Paint Bucket tool (G) and fill the layer with white color.
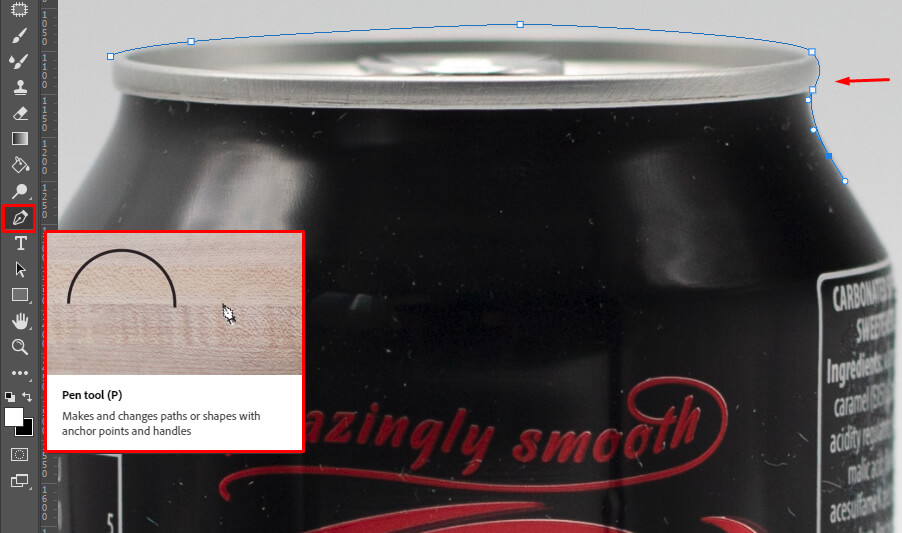
To highlight your object, you need to pick the Pen Tool (P) and create a path around the product that you’ll need to cut out. Do so with small increments and curve the lines to make the selection as precise as possible.
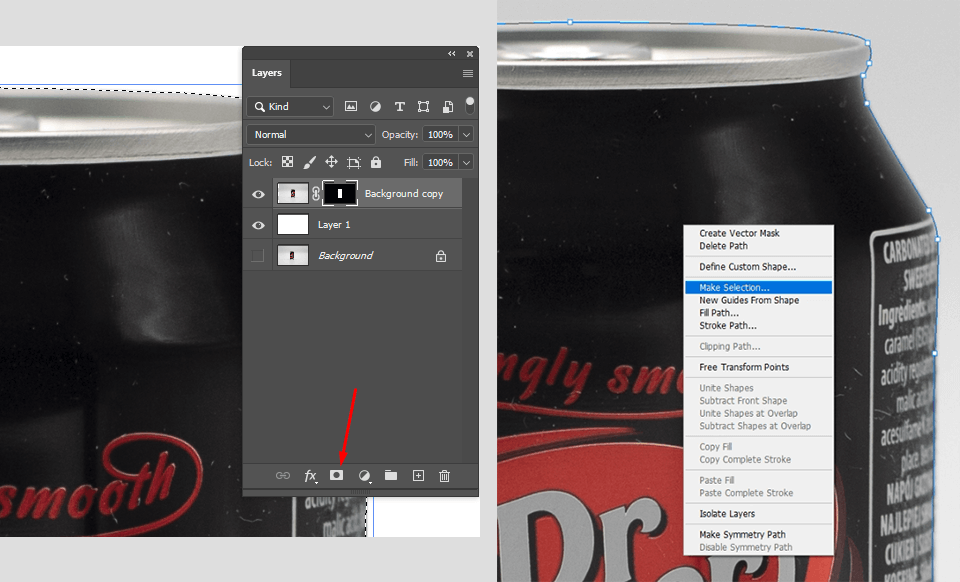
Once you’re done creating paths, click the right mouse button inside the highlighted area and choose Make Selection from the list. The Work Path will transform into a selection on the Layers panel. Choose Add Mask, a small grey rectangle with a dark circle on the Layers panel.
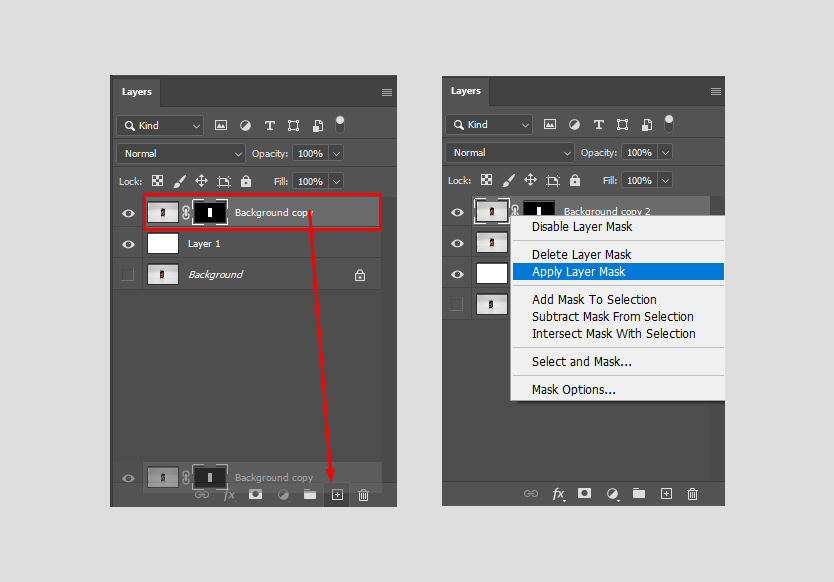
Duplicate the layer with the mask and press the right mouse button on the new layer, and then choose Apply Layer Mask.
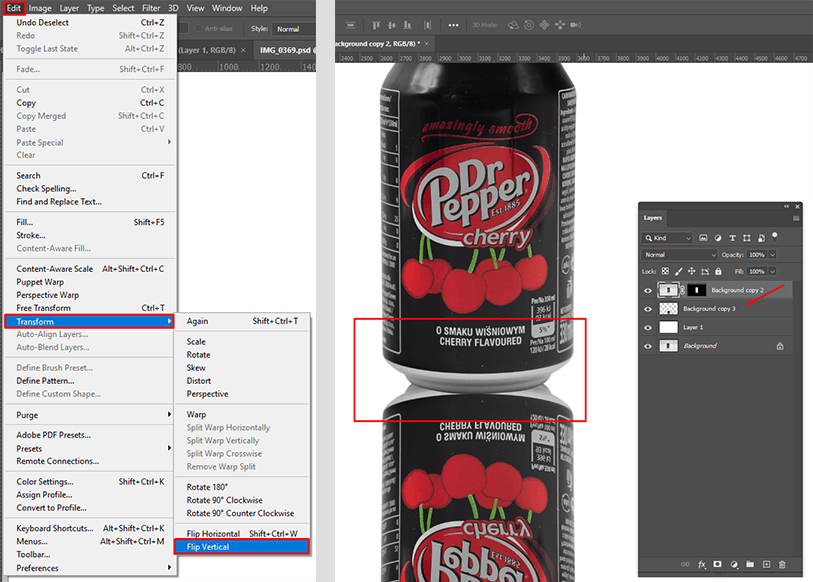
To create an object reflection in Photoshop, select Edit – Transform – Flip Vertical – to create a vertical reflection. Put the new layer under the main one and place them as shown in the example.
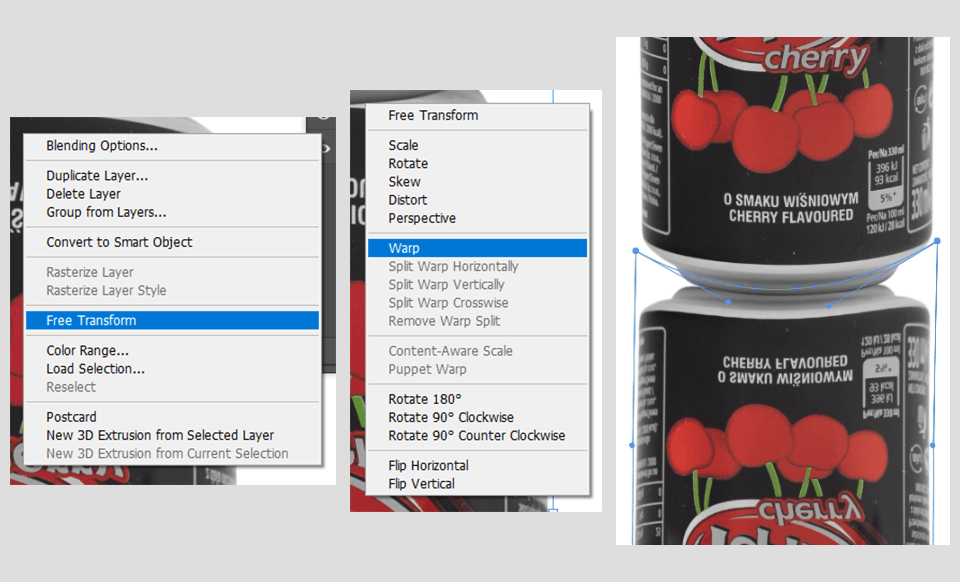
Now pick any selection tool (M) from the toolset and click the right mouse button on the reflected object, then Warp. Distort the bottom of the object in a way that makes it look realistic. This is a rather complex step so if you suffer any problems, consider resorting to professional photo retouching services for help.
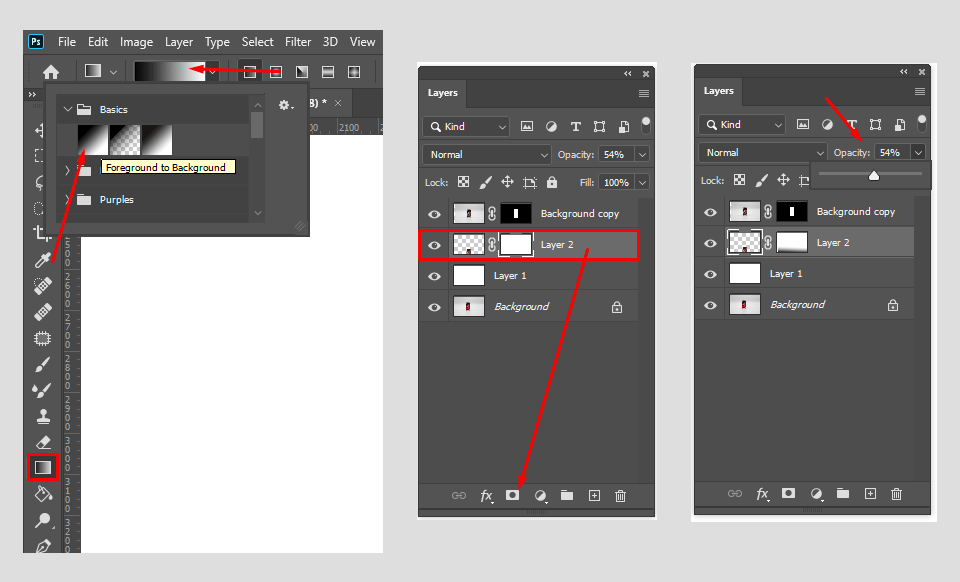
To make a reflection in Photoshop CC slowly fade away, you need to apply the Gradient Tool (G) and pick the black-and-white option in the Gradient settings. Create a layer mask by pressing the appropriate icon on the bottom of the Layers window and change the layer’s Opacity to 50%.
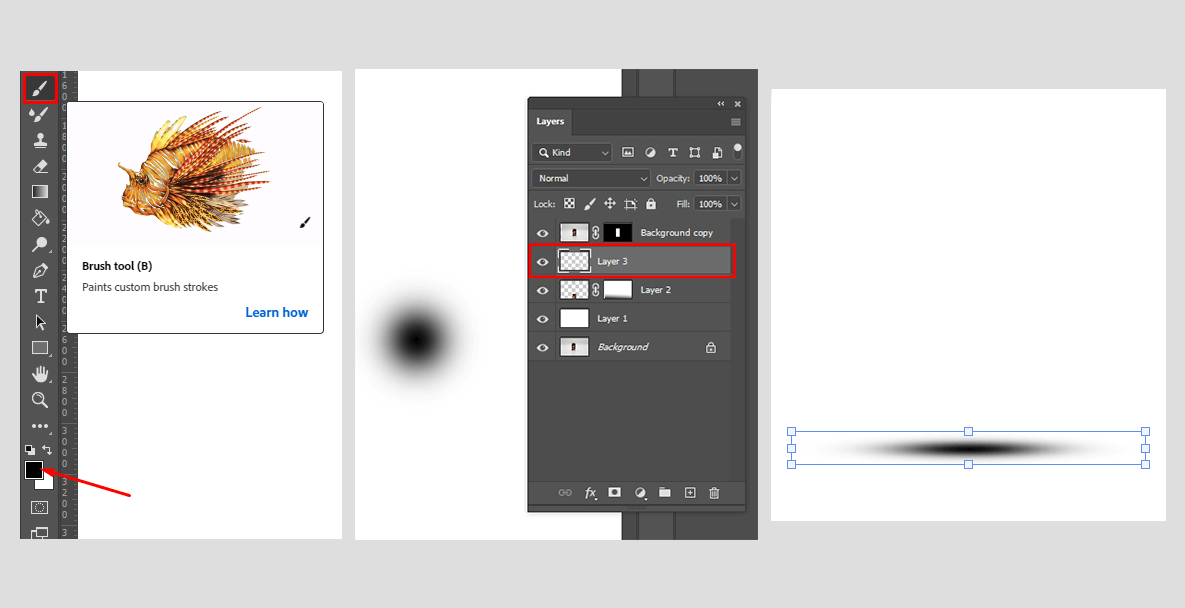
Pick the Brush Tool (B) and set it to black. Create a new layer by pressing the “+” at the bottom of the Layers menu. Adjust the brush to these settings:
Opacity: 100%
Flow: 100%
Hardness: 0%
Place a dot with the brush on any empty area. Now, choose the Move tool (V) and stretch the dot out to make it look like a shadow.
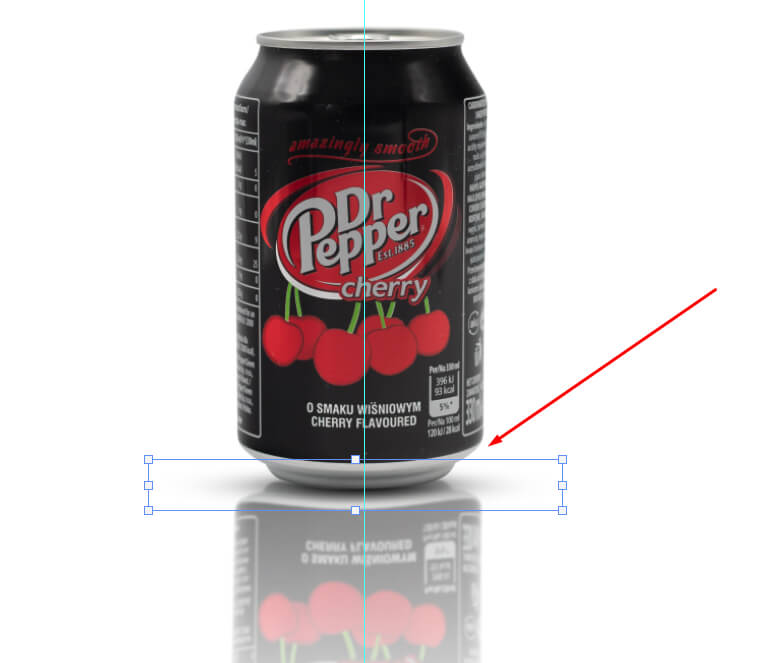
Place this layer between the mask layer and the gradient layer. Move the layer beneath the object.
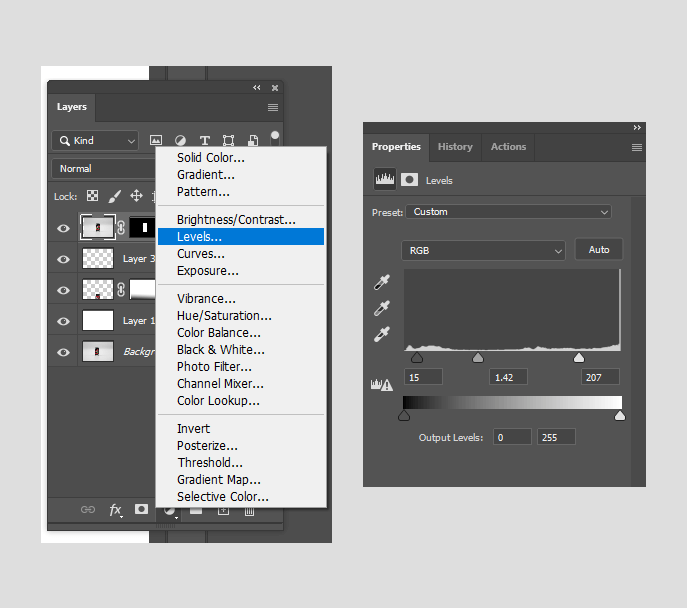
Now you need to work with color. Create a New Adjustment Layer by pressing the black/white circle on the bottom of the Layers menu, and then choose Levels. Set the values as you see in the example, but feel free to fine-tune the results so that they match your image better.
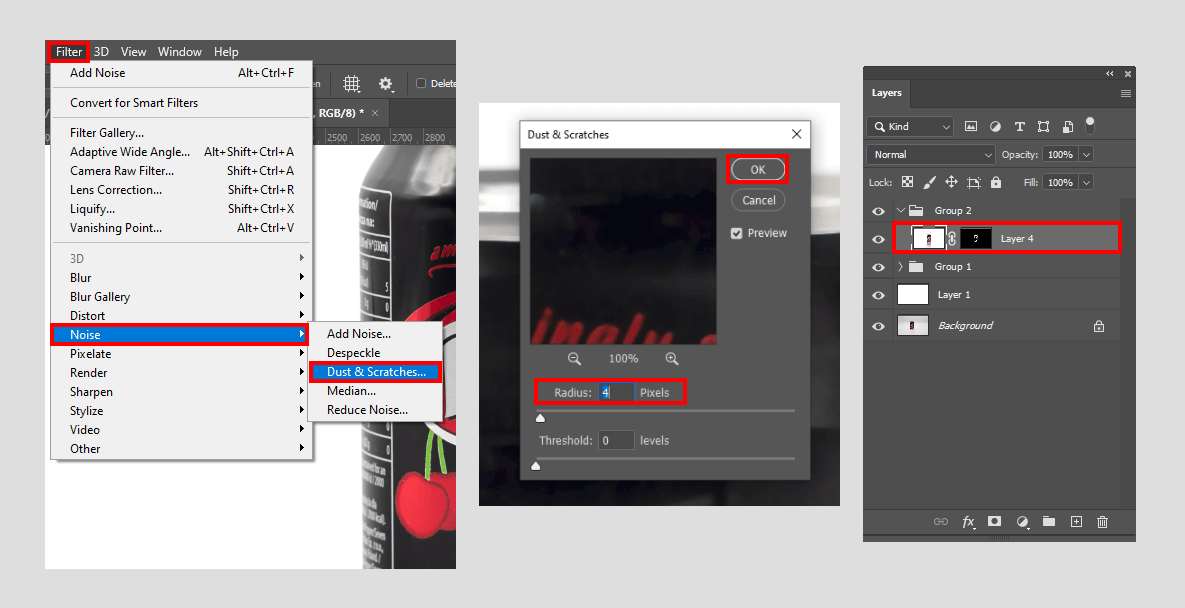
No matter how diligently you wiped the object before the photoshoot, you won’t achieve a perfect result. Go to Filter – Noise – Dust & Scratches, set it to about 4-5, and zoom in on the dusted areas to ensure they’re being cleaned.
Add a black mask to the layer, and then use a white Brush tool (B) to apply the effect only to dust specks.
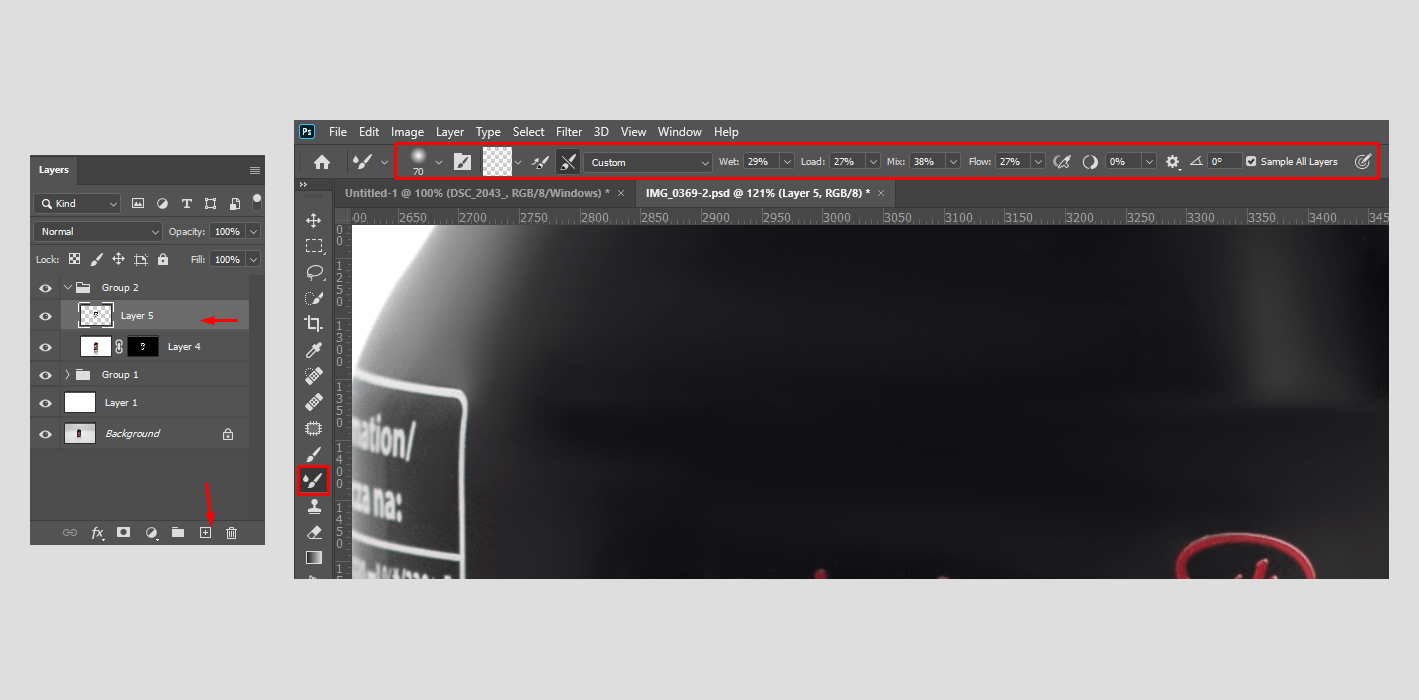
Create an empty layer by pressing “+ “on the bottom of the Layers window. Select the Mixer Brush tool (B), which you can find by pressing the Brush tool icon. Set it to somewhere around these values:
Wet: 30%
Load: 30%
Mix: 40%
Flow: 30%
Now use the brush to smoothen out the irregularities on the object by adding strokes from one color to another.
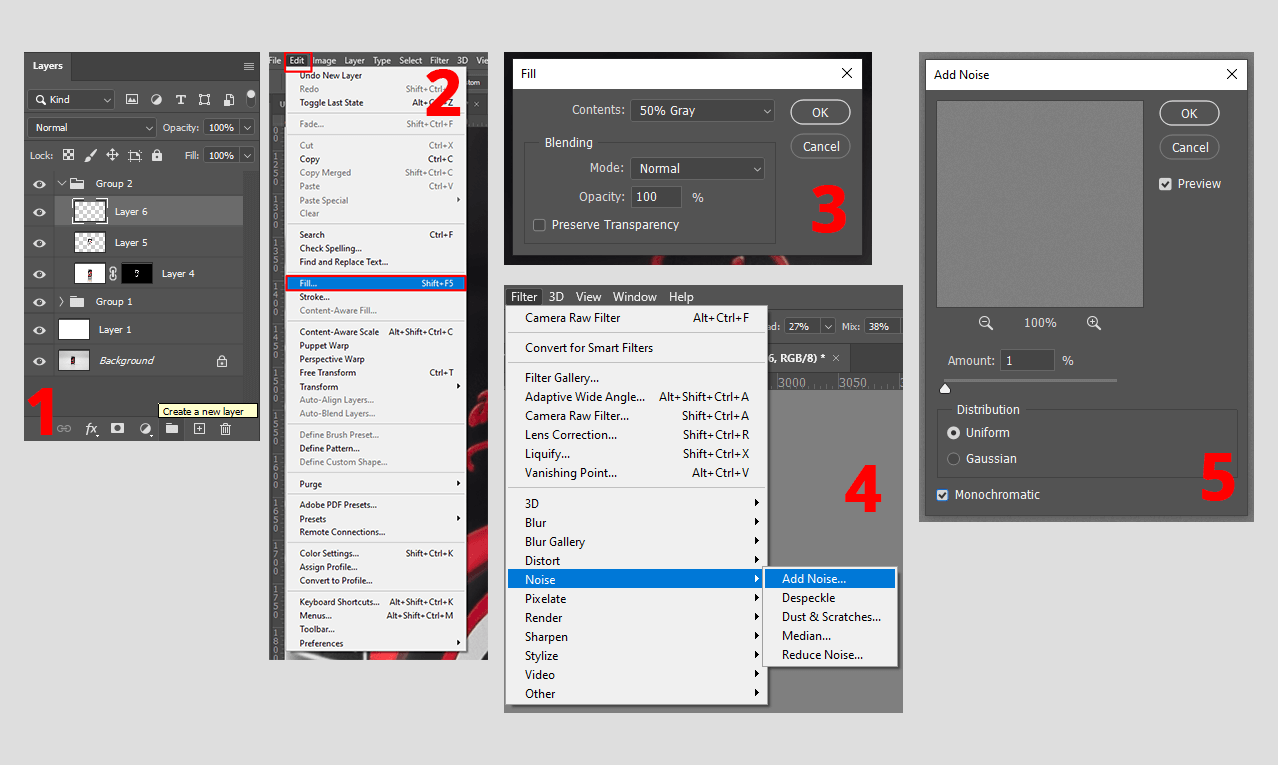
Go to Edit – Fill and set Gray to 50%. Next, choose Filter – Noise – Add Noise, set the value to 1, and add a checkmark next to Monochromatic.
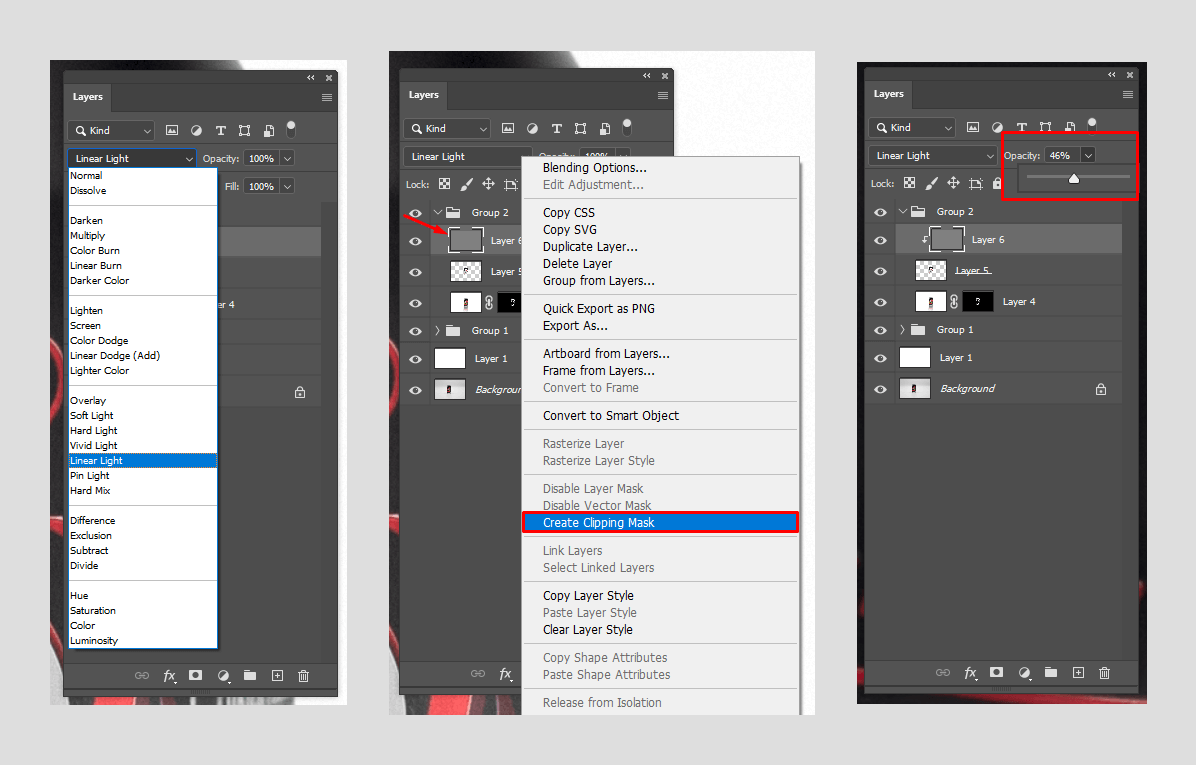
After pressing on the layer created in the previous step, choose Linear Light. Then click the right mouse button and pick Create Clipping Mask. Set the layer opacity at about 50% to make the texture look realistic.
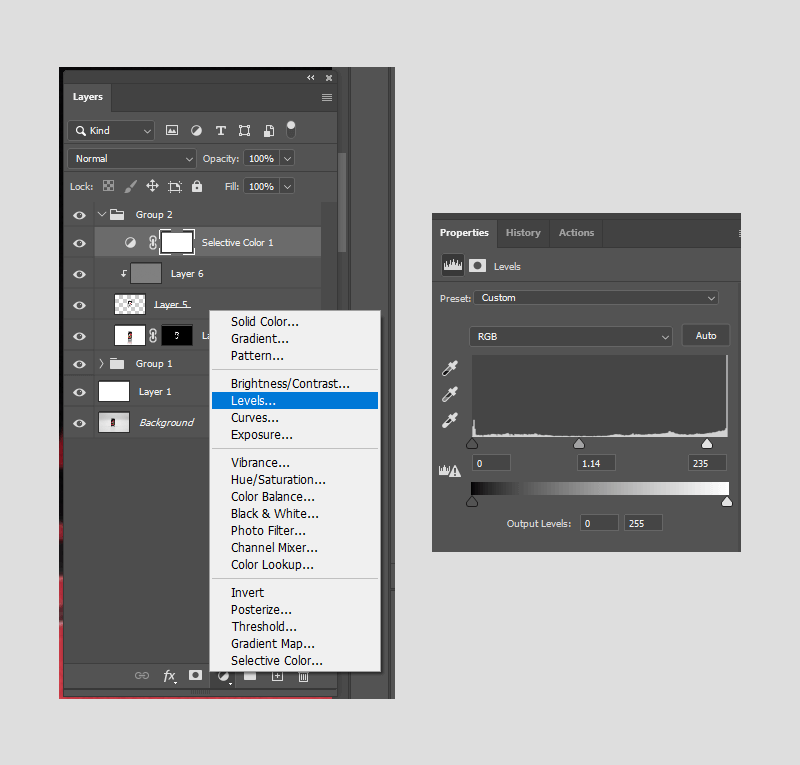
Repeat Step 9 by adding even more contrast. Create a New Adjustment Layer – Levels. Copy the settings provided in the example.
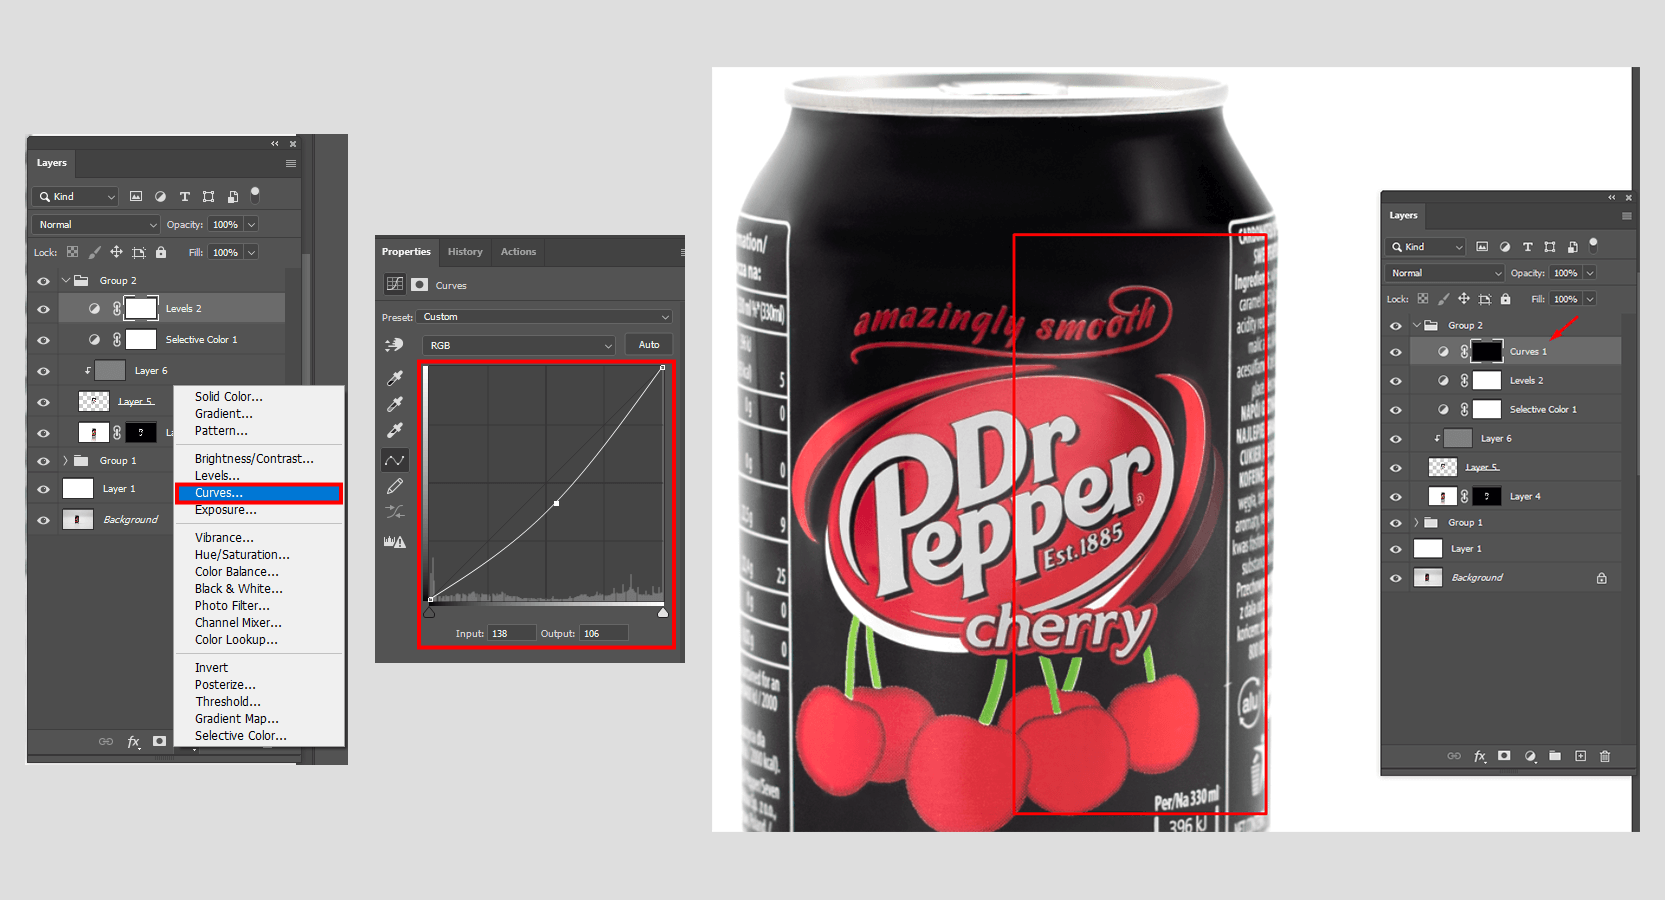
If your object has an undesired lighting/flash/reflection spot, then you need to darken it. This can be done via New Adjustment Layer – Curves. Set the value as seen in the example, then apply a mask (white rectangle with a dark circle on the bottom of the Layers menu) to this layer. Select a white brush (B) and draw over the needed area to make it darker.

Done, now you know how to create a reflection in Photoshop. Once you have mastered this technique, you can utilize this skill to improve the visual appeal of jewelry after jewelry retouching, giving your photos a professional and polished look. You can also learn how to remove background or how to add drop shadow in Photoshop.
A reflection created in Photoshop can significantly enhance the quality and appearance of photos by adding depth, realism, and artistic flair.
The addition of a reflection can breathe life into various types of photos. For landscape photography, a reflection can amplify the scenic beauty by mirroring the natural elements, such as mountains, trees, or colorful skies, in a calm body of water. This effect adds a sense of symmetry and tranquility to the image, amplifying its visual impact.
Architectural photography can also benefit from reflections, especially when capturing buildings with glass facades. By adding a reflection, the image gains an extra dimension, showcasing the structure's grandeur and emphasizing its modern design.
In product photography, reflections can enhance the appeal of commercial images by adding a glossy, high-end look. This technique is particularly useful for showcasing jewelry, cosmetics, or luxury items, as the reflection imparts a sense of sophistication and elegance.
I think you’ve noticed that half of this lesson deals with color adjustments. To make your product image editing workflow faster, you can make use of special effects for PS, which will help you change the contrast, clean up the background, and add saturation to your objects in a couple of clicks.


