If you are wondering how to correct chromatic aberration in Lightroom, you need to understand what causes it. Chromatic aberration (CA) occurs because of lens distortion. You might notice this effect in images with contrasting areas when some objects acquire an unusual glow. This glow might be of red, green, blue, yellow, purple, or magenta colors, among some others.
In short, it’s caused by a defect in the lens that prevents it from focusing the colors properly. You can quickly fix this issue in Lightroom using the available tools. Read on to find out how you can perform this task in a few simple steps.
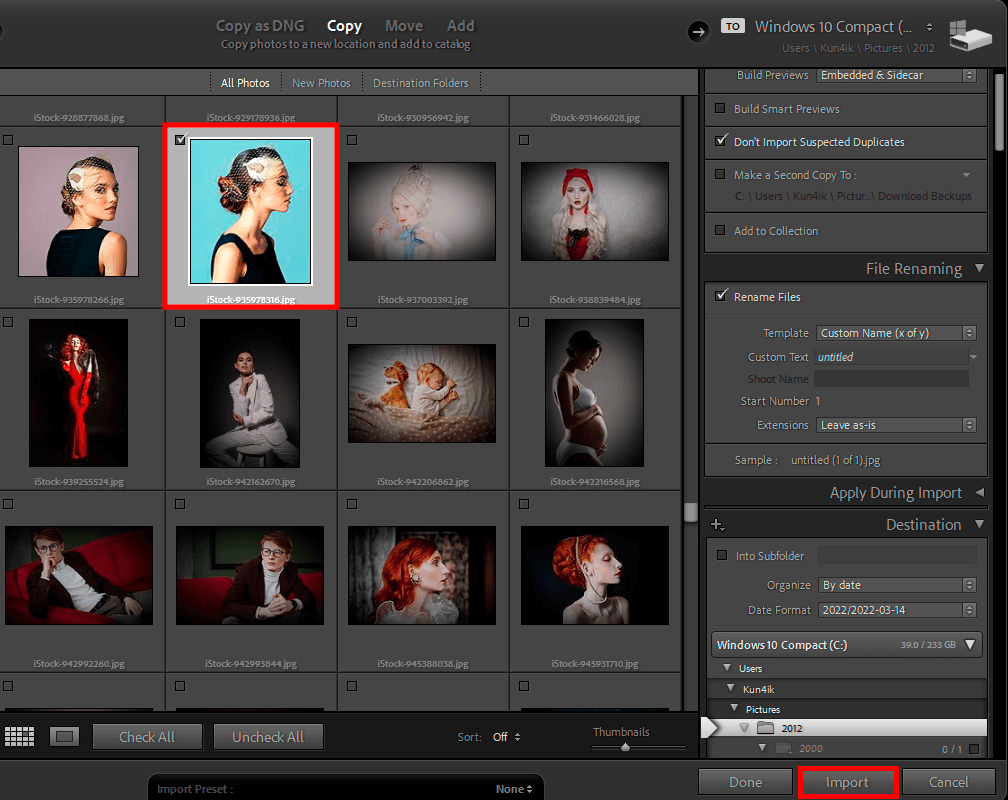
If you need to fix the chromatic aberration issue, open your photo in the Develop Panel of Adobe Lightroom.
Then zoom in on the area of the photo where this issue is noticeable.
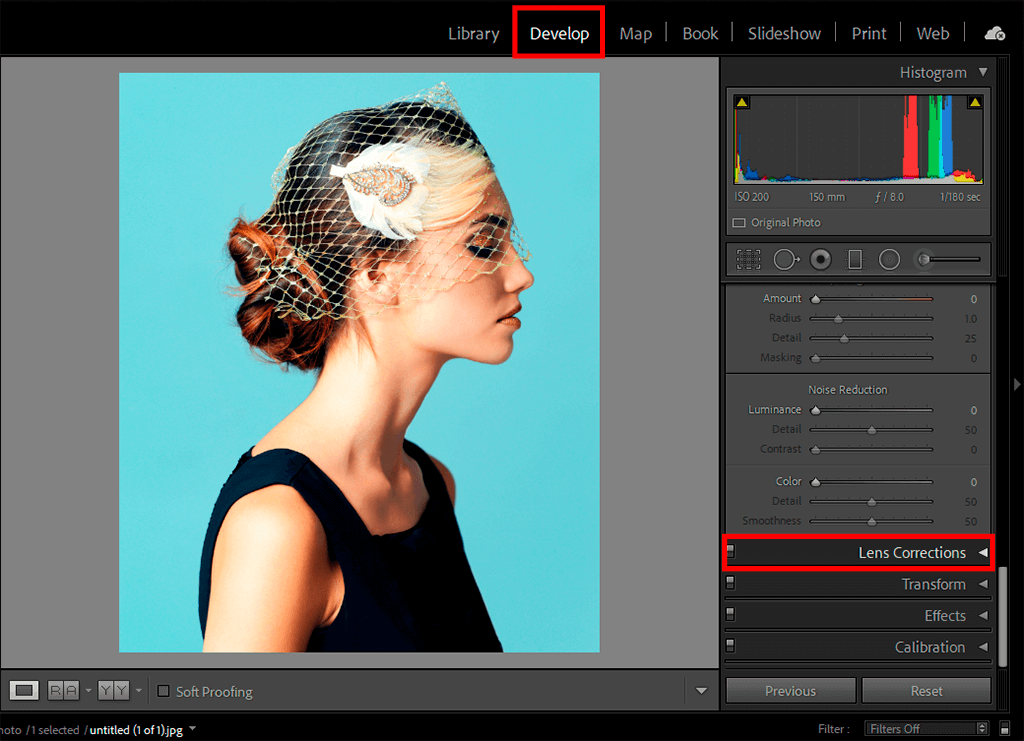
If you want to edit photos in Lightroom, go to the ‘Lens Correction’ menu in the ‘Develop’ module. You can find it by going to the ‘Basic’ or ‘Color’ tab.
There are 4 main options in the Lens Corrections menu, such as Basic, Profile, Color, and Manual. It’s better to select the first option on the left, namely, the Basic section.
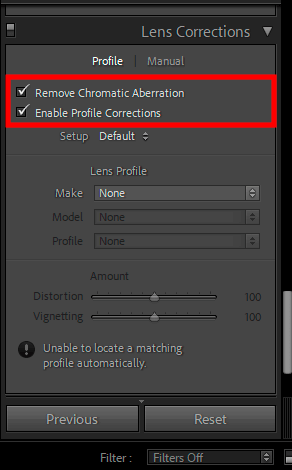
Click on the Enable Profile Corrections and Remove Chromatic Aberration features. Lr features in-built camera and lens profiles, which allows you to edit your images automatically. After clicking on these tools, you will see that the program will automatically make chromatic aberration less noticeable. This software can also minimize purple fringing and other effects that affect the overall quality of a photo.
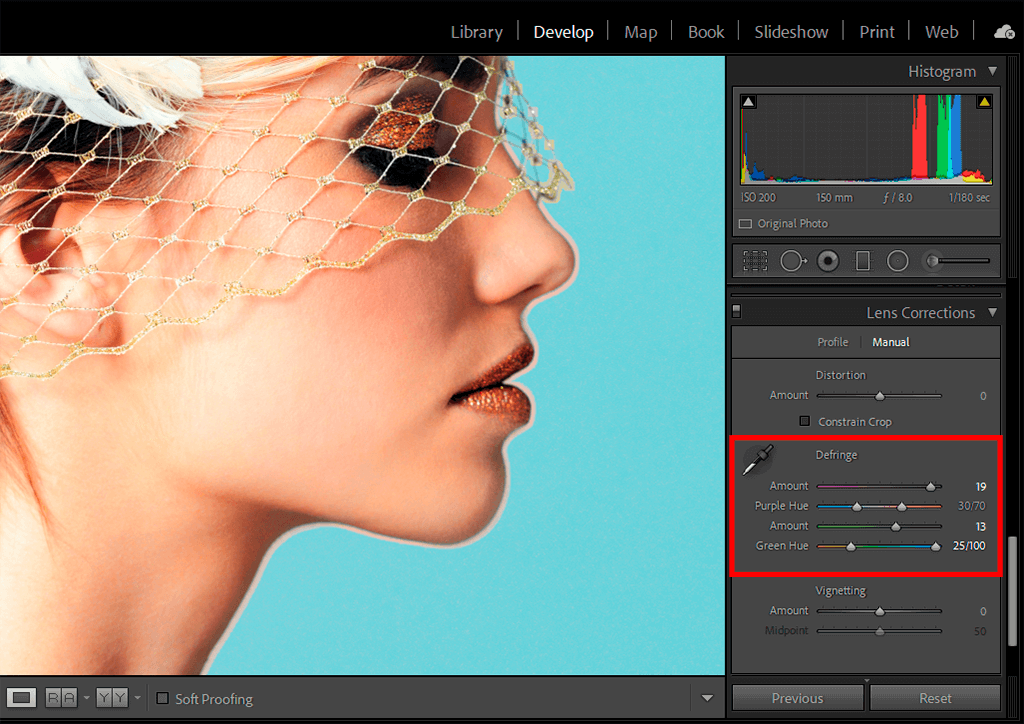
In some cases, you might decide to perform extra adjustments to improve your image. If you are wondering how to correct chromatic aberration in Lightroom and see that your photo requires further editing, click on the “Manual” and configure the settings manually.
To remove the unwanted effect, you need to move sliders until you see that there is no sign of color fringe anymore. For better precision, you can use the eyedropper tool that allows you to delete the purple or green fringes.
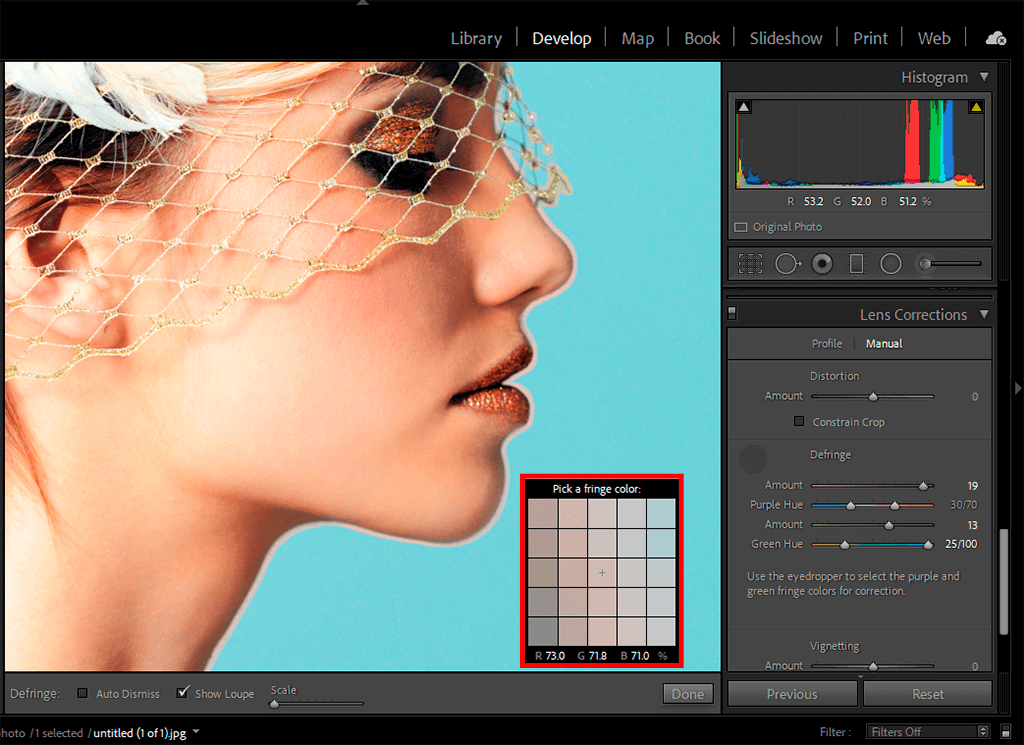
With the help of the dropper tool, select the parts of your image with noticeable Purple or Green Chromatic Aberration. After selecting the areas that you need to edit, use the dropper to remove the aberration from them.
If the tool doesn’t seem to be working, hover it above another area with a high purple or green contrast. In case the program can’t find enough information about this area, you will see a message notifying you that it’s impossible to detect the purple or green fringe color. Then, you will be asked to sample another area.
When you hover the dropper and see that it changes color, select this area of a photo. With the help of Purple Hue and/or Green Hue and Amount sliders, you can control the intensity of chromatic aberration manually.
In case you don’t have enough time, you can outsource this task to professional retouchers.
If you don’t have a lot of editing experience, read these handy tips to learn how to correct chromatic aberration in Lightroom without spending much time.
Don’t take photos in locations with high contrast between two parts of a scene. Chromatic aberration becomes more noticeable when there are a lot of deep shadows and overexposed areas in the frame. Make sure to avoid bright outdoor lighting, backlighting, and reflective surfaces, including water surfaces and white backgrounds. Besides, it’s better not to use bright light sources that might result in highlights.
If you are using a zoom lens, it might be difficult to avoid chromatic aberration altogether, especially if you take photos at short and long focal lengths. However, if you notice some signs of chromatic aberration in your photos, you can minimize them by taking photos at the middle of the focal range.
It’s better to fix this issue before taking photos. If you are wondering how to fix chromatic aberration in Lightroom without wasting a lot of time, make sure to shoot photos in RAW. It will make easier for you to edit your image’s chromatic aberration afterward.

You can also use these presets to edit many photos at once. To speed up post-processing, try applying these handy presets. This bundle allows you to adjust the WB, sharpness, fix contrast, tweak colors, make shadows deeper and improve the color temperature. These presets will come in handy for photographers who need to give their photos a stylish look worthy of a glossy magazine’s pages and apparel catalogs. Now when you know how to remove chromatic aberration in Lightroom, you can further enhance your photos with the help of these presets. They allow you to edit your wedding, lifestyle and candid photos to give them a professional feel.
The effects from this collection are compatible with RAW and JPG formats. You can use them in Lightroom 4-6, CC, Classic, and Lightroom Mobile. If you don’t have enough time to perform color correction manually, these presets will become a great solution for optimizing your workflow.


