How to Make a DIY Softbox for $14
When you purchase through affiliate links on our site, we may earn a commission. Here’s how it works.
DIY softboxes are a great photo gear if you need to photograph objects without sharp shadows or create soft lighting. Softbox is a kind of light modifier used in the studio or for amateur portraits source.
How to Make a DIY Softbox in 11 Steps?
If you have a limited budget, then you can make a softbox at home. Thus, you will get a great softbox for photographing products and studio portraits.
Step 1. Prepare All Required Materials

To build a softbox, you will need:
- Cardboard (boxes can be cut)
- Tape
- Aluminium foil
- Glue
- Duct tape
- Screws and nuts
- A roll of paper (at least 40 inches wide and 50 in length or 101,6 and 127 centimeters)
- Black spray
Step 2. Draw and Measure the Layout for the Softbox
In this tutorial, I’ll show you how to create a 30x25 inch softbox (76.2x63.5). But this method is suitable for any DIY softbox dimensions. Just do not forget about the proportions, otherwise, it will turn out geometrically incorrect.

First of all, you need to draw the four sides of the softbox in the shape of a trapezoid. The first two sides will be large. The other two are shorter.
The bottom of the large trapezoid will be 30 inches long (76.2 cm). The angle of the side walls is 45 degrees. The top should be of the same length as your flash. In my case, it is 3 inches (7.62 cm). Then we repeat everything again. In the end, we get two big sides of our cheap DIY softbox.
Then, let's move on to the short sides. The bottom is 25 inches long (63.5 cm) and the top is equal to the height of the flash head. The angle of inclination is not so important. It is a little more than 60 degrees. However, it’s easier to just use the wall length, like the previous time.
- Learn about DIY photography lighting.
Step 3. Cut the Walls on the Cardboard

Now you have all four sides of the DIY photo light box: two large and two small ones. So, it's time to work with cardboard.
Don’t forget to leave a small amount of cardboard at the top, about 2-3 inches long, as our flash will go there. Cut each piece with a cutter and set the finished items aside.
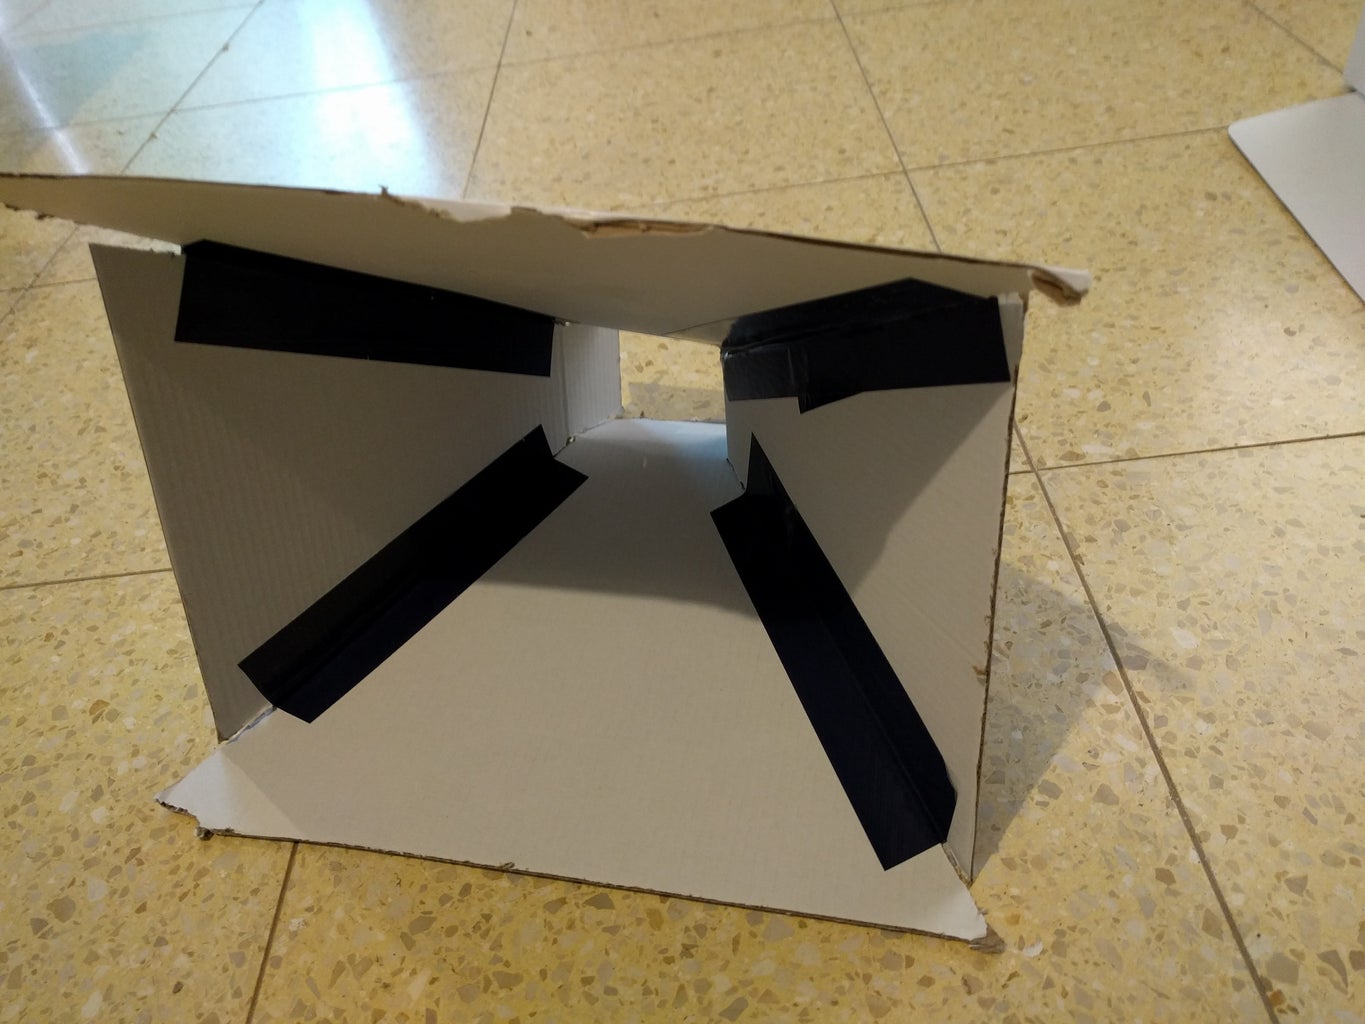
Step 4. Create the Inside Part for Your Future Softbox

Once you have cut out everything you need for the DIY softlight construction, use little glue to stick aluminum foil to each piece of cardboard (but only on one side).
You can use aluminum tape around the edges to make the structure more reliable. This part will reflect the light of the flash and make it stronger and more powerful. Only two layers of aluminum foil can guarantee that the surface will remain reflective for a long time.
- Check out more studio lighting kits.
Step 5. Add Velcro Tape
Take two short sides (of those with a short part at the top) and two tapes. One should be about 6 inches (15.24 cm) and the other should be 2 inches (5.08 cm). Besides, there is a little secret: two layers of tape will make your design more stable. These two belts will hold the flash in place and keep it from falling.
Step 6. Do the Gluing and Installation
First, you need to take the big side, the short one, the other big one and the remaining one. Using tape and glue, connect the parts. Don’t forget about the tape on top – that’s where the flash is going.
To check whether it is assembled correctly, lift the softbox, holding it by the upper part. If it is motionless, then everything is correct. If it moves and is unstable, add more tape until it is more secure.
- Check out my article on photography light bulbs.
Step 7. Color Your Softbox

After waiting for a few minutes, you can start painting the softbox light DIY to make it look better and more professional. Use old newspapers or tapes to protect parts that you don’t want to paint, such as the top hole. I used black aerosol to simplify this process. When the paint dries, add another layer of color, and then leave it to dry all night.
Step 8. Make and Install Tripod Mount

If your DIY softbox light is almost done, then it's time to make an adapter for a tripod. Use an aluminum L-shaped bracket, place it on the larger side of the softbox.
Make a few holes in the softbox in the middle of the small side. Then, using screws and nuts, fix the bracket in place. Make sure it is stable and immobile.
To use this bracket, you may need a swivel paper stand. It is easy to find, for example, on Amazon. To install it, you just need to gently insert the L-shaped bracket into the hole.
- Check out info on the best light meters.
Step 9. Make the Diffuser Panel

Then attach the paper diffuser panel. Put the paper on the floor and glue it to the softbox by placing it on top of the sheet. Glue each side carefully.
If you want a more even and soft light, then you should take several layers of paper. More layers will provide less light penetration through your homemade softbox. You can add a new layer of paper at any time if necessary.
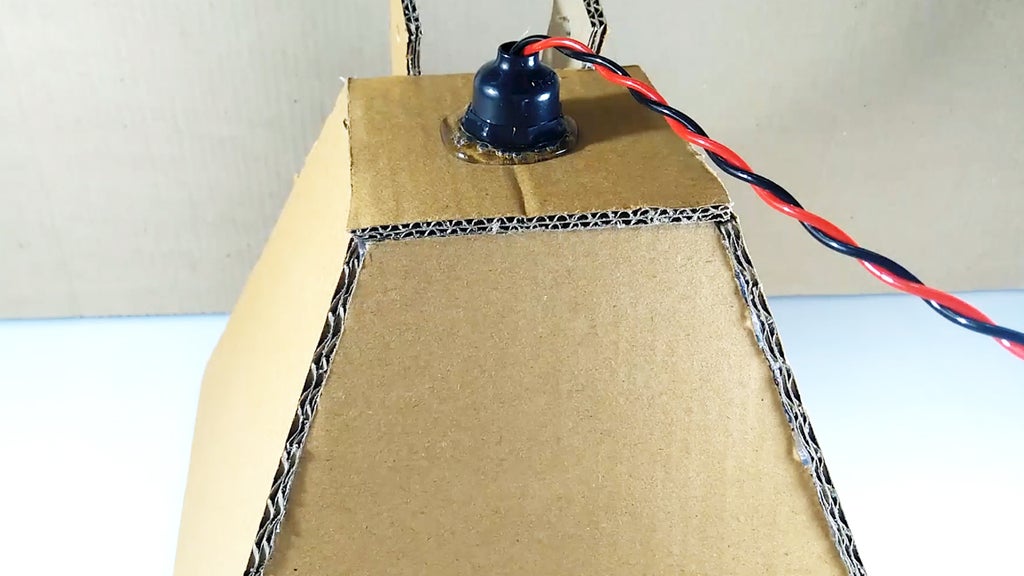
Step 10. Install Flash
To mount the flash, place the softbox in the light, and then put the flash in the hole. Hold the flash gently and insert it into the hole, pressing until it fits snugly. Secure it with adhesive tape.
It is better to install the flash horizontally because you get more freedom of movement for your DIY softbox. For example, you can direct it down, up or at a 45° angle.
- Learn about the best reflector boards.
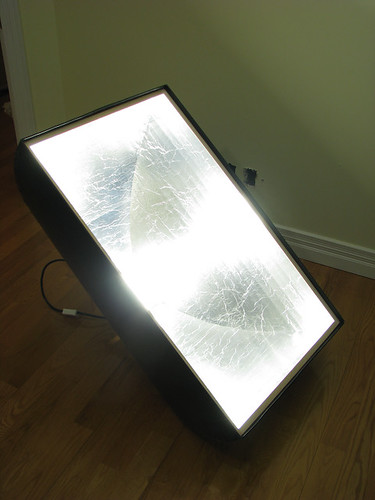
Step 11. Take Several Photos
After you make a softbox, you need to test it. Experiment and take a few shots. It can give you a soft enough light to illuminate the model completely.
As a rule, I do not use other light sources except softbox when I photograph in my studio.
You can use this lighting solution to take stunning portraits and fashion shots. It allows you to focus on the model and create an amazing dramatic effect.
- Find out useful information about different types of photography.
DIY Softbox Tutorials on YouTube
I showed you my own way to make a DIY softbox. There are many other ways and softboxes too. I have collected the best YouTube tutorials on how to create your own DIY softboxes.
1. DIYSoftbox Light 2026
After watching this video, you will discover how to make DIY studio lighting softbox spending no more than 10 dollars. Follow the author’s advice and you can build a creative and useful accessory for your studio. It costs less than many options on sale in 2026.
2. DIYSoftbox Light (Very Cheap) - How to Make Your Own Softbox
The author draws attention to the fact that lighting is a key factor to take your work to another level. This simple Softbox is also cheap. The author spent only $16 on it.
3. DIY Soft Box for Under $10 | Build A Dollar Store Soft Box
Buying equipment for your photo studio can ruin your budget, so this video about how to make a softbox will certainly come in handy. The author will tell you how to build an excellent softbox using affordable and inexpensive materials from a regular dollar store.
4. DIYSoftbox for $7
Dustin McLean will teach you how to build softboxes from cardboard and the “251 Quarter White” diffusion. It only costs $7.
5. DIY: How to make LED Softbox
This is another way to get DIY studio lighting at a minimal cost. Judging by the comments, this is a really cool tutorial! Check it out!
Freebies
After you made your DIY softbox and got some cool pics, it's time to think about photo post-processing in Photoshop or Lightroom. Use these free plugins to add a perfect look to your photos!
Contrast

Add this filter to your image and your colors will become deep and rich. If you have taken pictures in poor lighting conditions, it will help improve exposure and make gloomy pictures shine.
Sun Shine

This Ps action will be useful if your image is too bright. It will make colors softer and help achieve the desired result. This plugin will increase the purity of the color, eliminating unnecessary shadows and reducing clarity. As a result, the colors will look more even and not so striking.
Fashion
This action helps you balance and enhance your images. After applying it, you will get an eye-catching picture rich in crisp textures and details.
Double Exposure
Use this overlay if you want to combine cityscapes with portrait shots. The picture will look realistic and nice.
Touch of Bronze
This overlay gives your portrait shots a luxurious and stylish touch. It blends perfectly with sunlit outdoor pictures and adds a rich bronze effect to them.