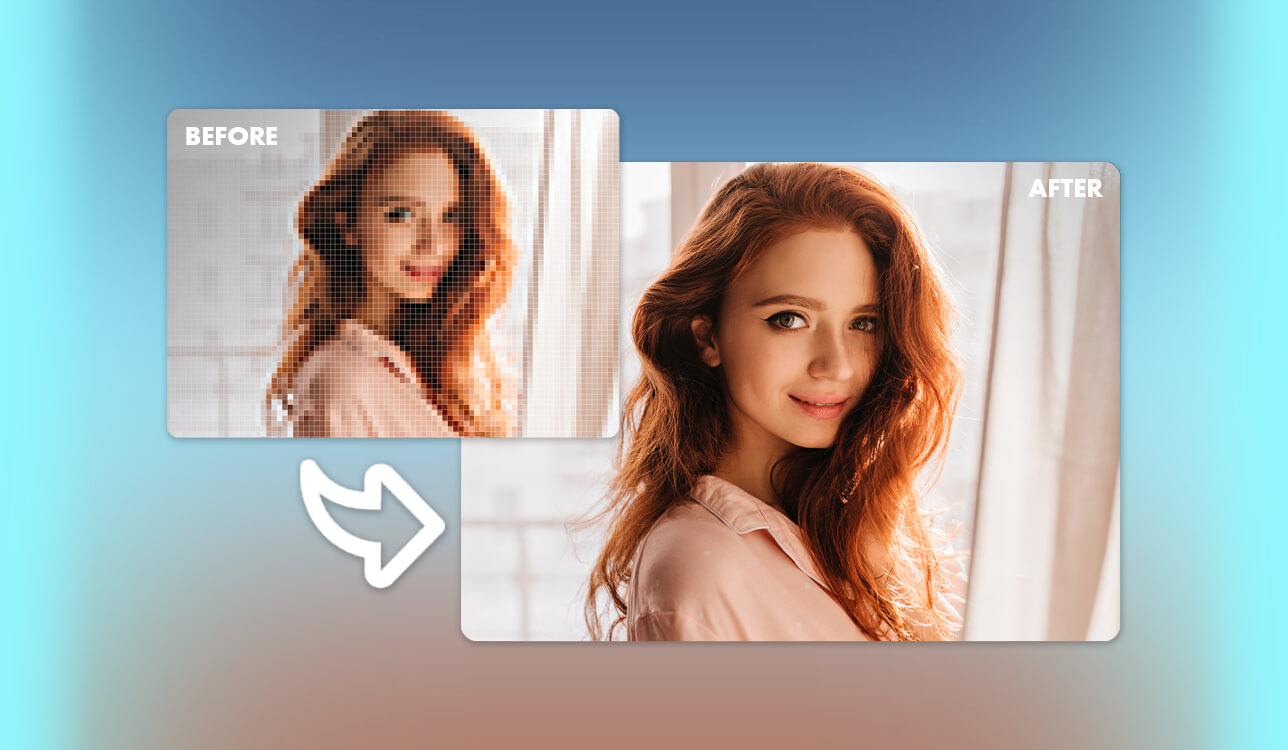
After dedicating years of my life to retouching photos for FixThePhoto, I’ve learned all the best ways to increase the resolution of an image. Some methods just scale up the pixels, resulting in a softer image, while others rely on interpolation or AI to make up for missing detail.
The optimal way is determined by the original photo, desired output size, and amount of detail you want to restore. This is particularly relevant when working on portraits, product pictures, vintage photos, and marketing materials for sites, social media, portfolios, and large-format prints.
These methods will be of interest to everyone who wants to:
Choosing how to increase the image resolution means knowing what the issue with your picture is. If it's merely too small, then it requires upscaling. If there’s a sufficient number of pixels, but the photo still looks soft, then you might need to apply sharpening and noise reduction. Cropped images tend to look better after AI reconstruction, while damaged or severely compressed photos usually demand manual editing.
Before picking an approach, look at the following: the original pixel size, the degree to which the picture has to be enlarged, and what it will be used for. Social media images typically require less work than a photo that has to be printed out in a large format or used for commercial purposes.
| Method | Best suited for | Main advantage |
|---|---|---|
|
AI upscaling
|
Small or low-resolution photos
|
Adds pixels and recreates missing detail
|
|
Manual resampling
|
Moderate enlargement with accurate size requirements
|
Provides more control over dimensions and quality
|
|
Super Resolution
|
Cropped images that still offer useful detail
|
Boosts pixel dimensions while preserving texture
|
|
Sharpening and noise reduction
|
Soft photos that are already big enough
|
Enhances perceived clarity without significant enlargement
|
|
Professional retouching
|
Damaged, compressed, or commercially relevant visuals
|
Combines enlargement with manual correction
|
For most cases, begin with the least disruptive option. Start by evaluating if sharpening is enough, then apply moderate upscaling, and only then turn to more aggressive AI reconstruction if your image really lacks detail.
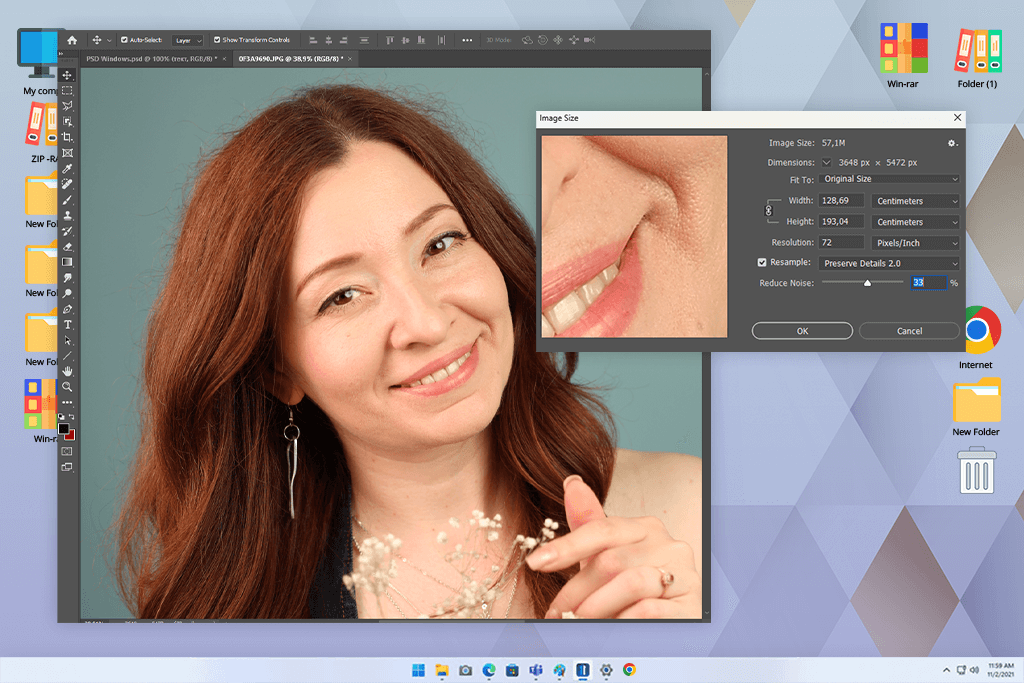
The first way I try when deciding how to increase the resolution of an image without losing quality is employing photo sharpening software like Adobe Photoshop since it offers bicubic interpolation, which boosts the quantity of pixels mathematically, enlarging the image without lowering its quality.
You simply have to do the following:
This approach is recommended to anyone who wants to increase resolution in Photoshop without any dramatic transformations. It does a solid job preserving detail, but it can still lead to pixelation if you’re too aggressive with the upscaling.
My advice: begin with 2x upscaling. A 4x version results in a significantly bigger file, but it can also cause exaggerated JPG blocks, halos, artificial skin texture, or wrongly recreated text.
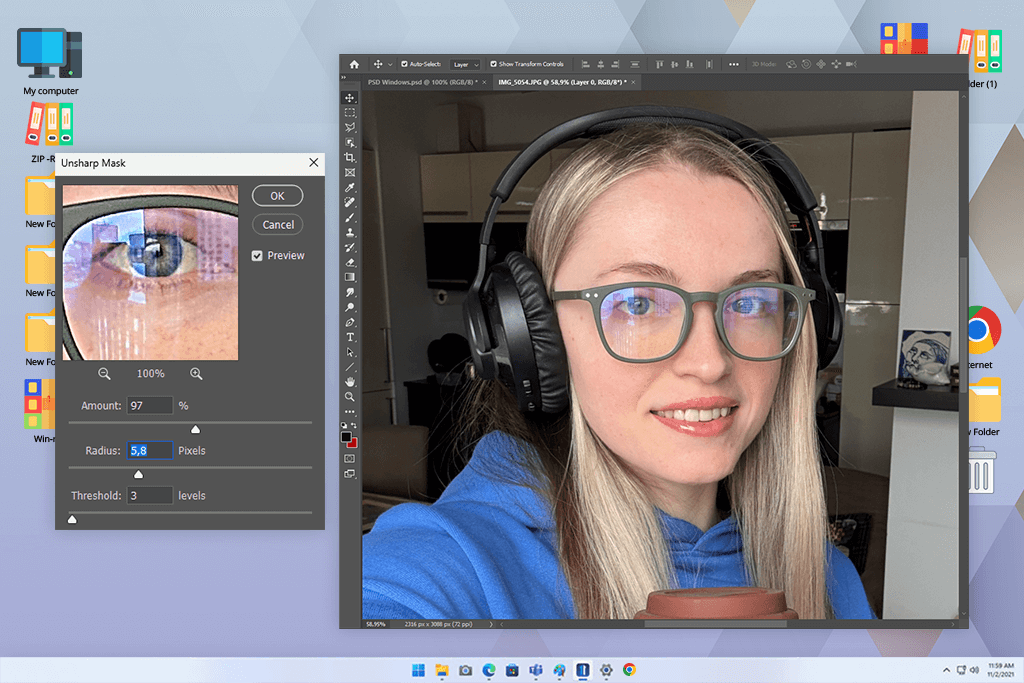
In some situations, learning how to increase image quality has nothing to do with resolution changes. It’s possible that all you have to do is apply the "Sharpen" filter in Photoshop or use plugins like Nik Collection's Sharpener Pro.
By leveraging noise reduction software, you can boost the contrast near edges to boost the level of detail and ensure your images are more eye-catching.
This approach is my go-to for moderate enlargement when I know the exact required export dimensions. It can also be useful for print since it helps you analyze how pixel dimensions, inches, and PPI are interconnected.
Don’t upscale a small image directly to multiple times its original resolution. I typically enlarge the photo in a single controlled step and then adjust the sharpness, noise, and edge artifacts separately.
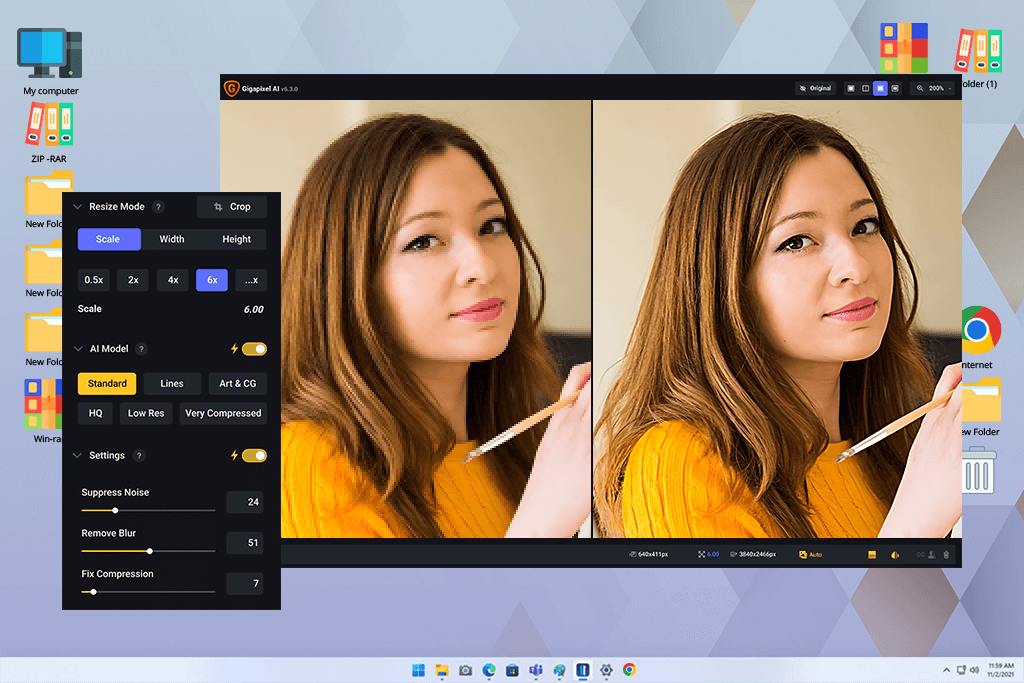
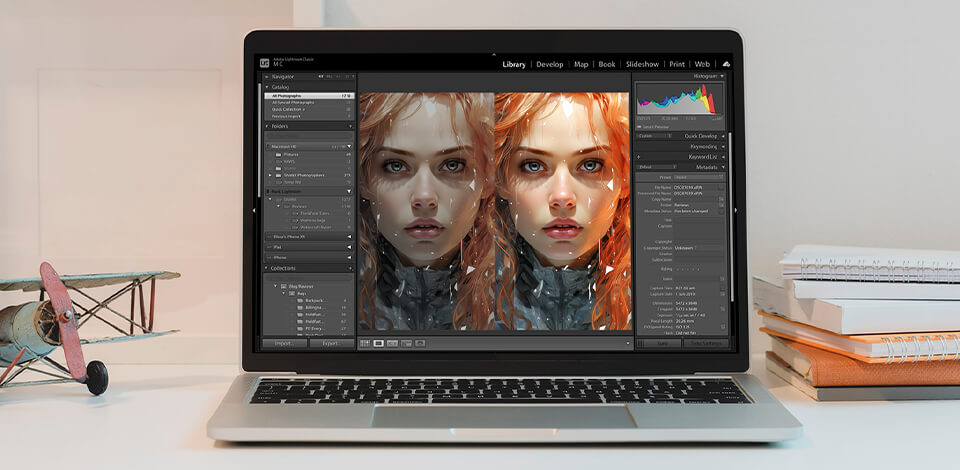
Lately, many photo-enhancing solutions have received new AI-based technology, making it easier than ever to learn how to increase image resolution with AI. Software like Topaz Labs' Gigapixel AI takes advantage of machine learning algorithms to identify and enhance parts with potentially missing details.
AI photo editors employ smart algorithms to predict and recreate details, which is why they’re so often used for substantial upscaling.
Super Resolution helped me handle wildlife crops, portraits, architecture, and detailed product pictures. However, the results aren’t as impressive if the original is very blurry or has dramatic motion blur since upscaling can’t recover image data that was never captured.
My advice: use lens corrections and make regular RAW adjustments before applying sharpening, but be sure to examine the image after upscaling since noise and artifacts will become more noticeable.

If you don’t have time to learn how to increase the photo resolution yourself, or simply want to spend your time on other creative tasks, you can delegate this part of your job to FixThePhoto. Our professional retouchers will deliver the result you need while ensuring you don’t have to lift a finger.
My advice: evaluate sharpness at the final output or print size. An image that appears a bit oversharpened at 100% can look sharp upon reduction, while a bigger print typically requires different settings than an Instagram post.
Other than employing photo editing software, you can boost the picture resolution before shooting. This means picking the right camera and settings.
The best way to increase the resolution of an image is to get a camera with a high megapixel count, like a DSLR. Such a camera will capture more pixels per inch, ensuring your photos are clearer and have more detail.
By investing in a camera that can take photos at higher resolutions, you'll receive highly detailed images straight from the start. This allows you to avoid doing upscaling during post-production since the original photo already offers the foundation you need to deliver pro-grade images.
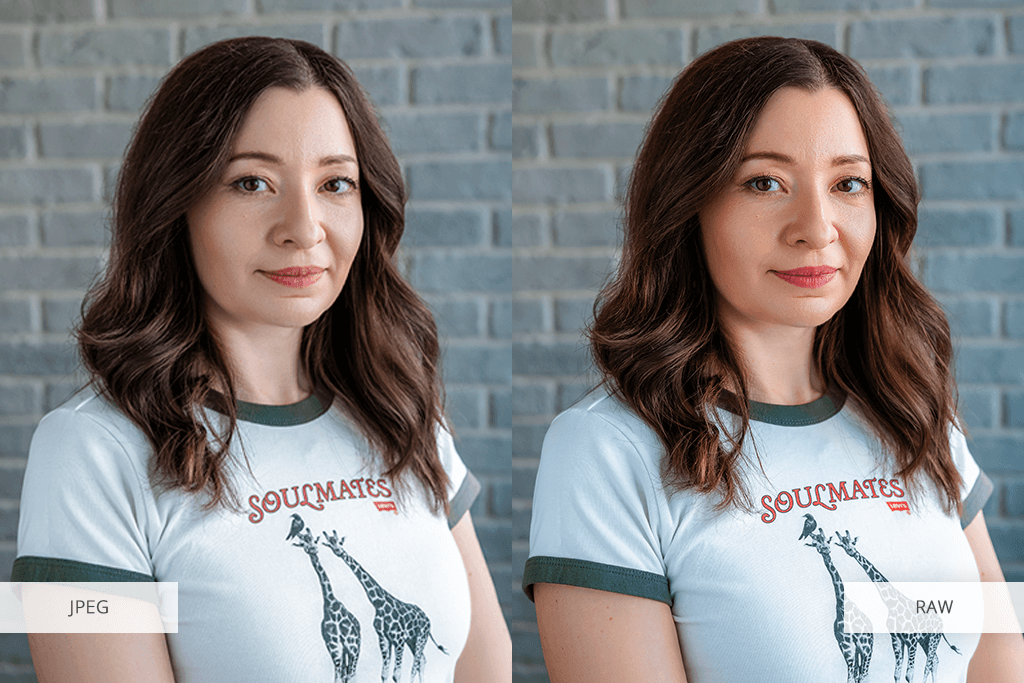
RAW format is recommended for taking photos (compared to JPG) since it captures more visual data and saves all detail received by the camera sensor. RAW photos contain information regarding the color depth and exposure, streamlining the post-processing stage.
Additionally, this format makes it easier to adjust the exposure and get the perfect color balance and sharpness level without compromising on the image quality. Such versatility enables photographers to make precise changes without creating artifacts or losing detail.
By choosing the RAW format to take photos, you get maximum mileage out of your camera, receiving vibrant, clear, and highly detailed pictures.
If you want to know how to increase image resolution for free, you should start by ensuring the photos you take don’t suffer from severe missed focus, strong motion blur, or camera shake. AI features can increase sharpness, but they can result in artificial edges and textures rather than recovering the original details. As such, it’s recommended to create the cleanest possible source image before moving on to post-processing.
For static subjects, it’s a good idea to employ a timer or remote shutter release. This helps avoid vibration created by hitting the shutter button and is particularly relevant for product, interior, and long-exposure shots. Even with the best AI image upscaler, a sharp and properly exposed source image will always result in a cleaner and more realistic output.
JPEG is a good choice for sites, email, and social media, but repeated compression can drastically lower the quality.
PNG is appropriate for graphics, screenshots, transparency, and images with text.
TIFF is recommended for high-quality printing, archival projects, and further manipulations.
PSD saves layers when the photo still has to be retouched.
For important projects, I save a lossless master version and export smaller JPG files separately that I later upload online.
Before upscaling a photo, I determine the desired output rather than simply picking the biggest available option.
For print, stick to this formula:
required pixels = print size in inches × target PPI
For instance, an 8 × 10-inch print saved at 300 PPI needs about:
A lower PPI can still work for posters and banners that will be viewed from afar. Smaller photography prints, books, and portfolios usually require a denser file.
For blogs and social media, your focus should be on pixel dimensions, platform recommendations, compression, and file size. Converting a web image from 72 to 300 PPI without adding pixels won’t increase the sharpness.
After learning how to increase the resolution of an image online, you’ll likely be interested in enhancing it with filters. By applying the provided presets, you can streamline your image editing workflow while enjoying professional results. You can preview the output by simply hovering over the presets.
Before you get to that, you need to figure out how to add Lightroom presets and how to add Photoshop actions to ensure your images look more captivating and creative.
Image resolution determines the level of detail stored in a photo. It’s usually measured in PPI (pixel per inch) or DPI (dots per inch). Higher resolution means that the file includes more pixels, ensuring you can enjoy clearer and more vivid imagery. This parameter is essential to account for when printing images, creating detailed digital displays, and upscaling photos.
Yes, you can take the photos at higher resolutions with a better camera, choose RAW as the shooting format for increased data preservation, etc.
Over-sharpening can result in unwanted artifacts like halos around edges and visual noise, lowering the quality of your photo. When applying sharpening, make sure you preview the change before saving it.
To showcase photos online, ensure you’ve optimized them for screen resolution (typically 72 or 96 DPI) and verify display size to get rid of pixelation. To print high-quality pictures, the files need to be saved in the highest available resolution (300 DPI or more) to ensure the output looks clear and sharp.
Vectorization lets you transform raster images (pixel-based) into vector graphics (mathematically defined shapes), which aren't affected by the resolution. They can be upscaled without sacrificing quality, which is ideal for logos and graphic designs that you need available in multiple sizes.





![Luminar Neo Free Trial [Test 7 Days FREE]](http://fixthephoto.com/blog/images/gallery/news_main__preview_23496.png)