![]() A shadow catcher in After Effects is a new updated feature that helps add shadows from 3D objects into a scene without showing the objects themselves. Imagine you have a virtual object and a light shining on it. This tool is useful for combining CGI objects with real-life videos, making the final footage look realistic.
A shadow catcher in After Effects is a new updated feature that helps add shadows from 3D objects into a scene without showing the objects themselves. Imagine you have a virtual object and a light shining on it. This tool is useful for combining CGI objects with real-life videos, making the final footage look realistic.
Normally, both the object and its shadow would appear in the scene. But with a shadow catcher, only the shadow is visible. The object stays hidden.
After Effects has three cool new features that help 3D objects blend naturally into real-life videos:
I am a freelance video editor, and I was editing a video ad for a small business. They gave me a video of a table and asked me to add a 3D-rendered coffee mug on top of it. But there was a problem - the mug looked fake because it had no shadow. It seemed like it was floating above the table instead of sitting on it.
I needed to make the mug look real by adding a shadow that matched the table and the lighting in the video. To do this, I tested the shadow catcher tool in After Effects free version.
Here’s what I did:
After using the shadow catcher technique in this free Adobe software, the mug finally looked like it belonged in the scene. The shadow made it look realistic and grounded. My client was happy, and the ad got great feedback for looking so professional.
I tested different free rendering software, and I have to say, After Effects did the best job. My colleagues from the FixThePhoto team, Vadym Antypenko and Ann Young, helped me with the comparison. Here are the key takeaways:
|
Feature |
After Effects |
Blender |
Nuke |
|
Shadow Catcher
|
Advanced, built into 3D layers with compositing tools
|
Has a shadow catcher node for rendering shadows in cycles or Eevee
|
Shadow catching through advanced 3D compositing workflows
|
|
Ease of Use
|
Moderate: Requires familiarity with 3D layers and light setups
|
Harder, uses node-based tools
|
Very complex, pro-level
|
|
Dynamic Shadows for Animated Objects
|
✔️
|
✔️
|
❌
|
|
Customizability
|
Detailed control over shadow diffusion, blending, and lighting
|
Extensive control over lighting, materials, and rendering properties
|
Full control for intricate shadow compositing
|
|
Integration with Video
|
Seamless: Direct compositing with live-action footage
|
Moderate: Requires external compositing tools for seamless integration
|
Seamless: Built specifically for high-end compositing in film and video
|
|
Node-Based Shadow Compositing
|
❌
|
❌
|
✔️
|
|
Cost
|
Subscription-based ($20.99/month for After Effects alone)
|
Free
|
Expensive (Professional license required)
|
|
Best For
|
Motion designers and editors needing an all-in-one compositing and shadow catching solution
|
3D artists needing advanced rendering with shadow integration
|
Professional VFX artists working on high-budget productions
|
|
Learning Curve
|
Moderate for basic use, steep for advanced workflows
|
Steep: Requires understanding of 3D rendering and nodes
|
Very steep: Designed for advanced VFX users
|
|
Shadow Capture from Multiple Sources
|
✔️
|
✔️
|
✔️
|
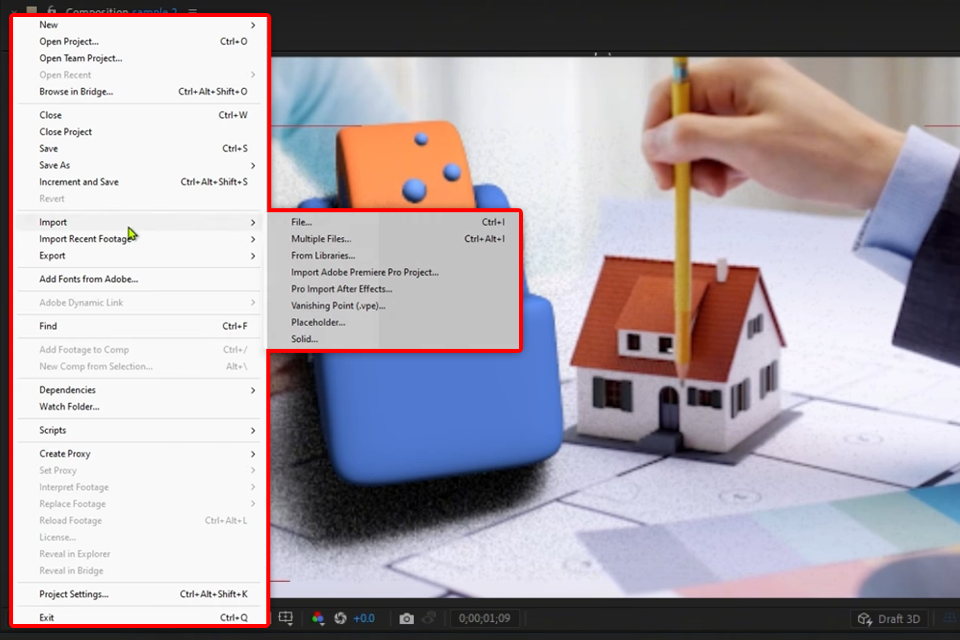
Before you begin, make sure you're using the latest After Effects version. If you’ve never used After Effects before, you’ll need to download it from Adobe’s official website. Once installed, take some time to explore its tools and features so you can get familiar with how everything works.
![]() The beta version of After Effects has been improved to make videos preview faster and smoother. It also has better HDR support, which helps designers see colors and brightness more accurately, making high-quality videos look even better.
The beta version of After Effects has been improved to make videos preview faster and smoother. It also has better HDR support, which helps designers see colors and brightness more accurately, making high-quality videos look even better.
Follow these steps:
Step 1: Set Up Your Scene
First, add the background video and place the 3D object or text you want to use into your composition. Make sure the lighting in your scene matches the lighting in the video so the shadows look real.
Step 2: Add a Solid Layer
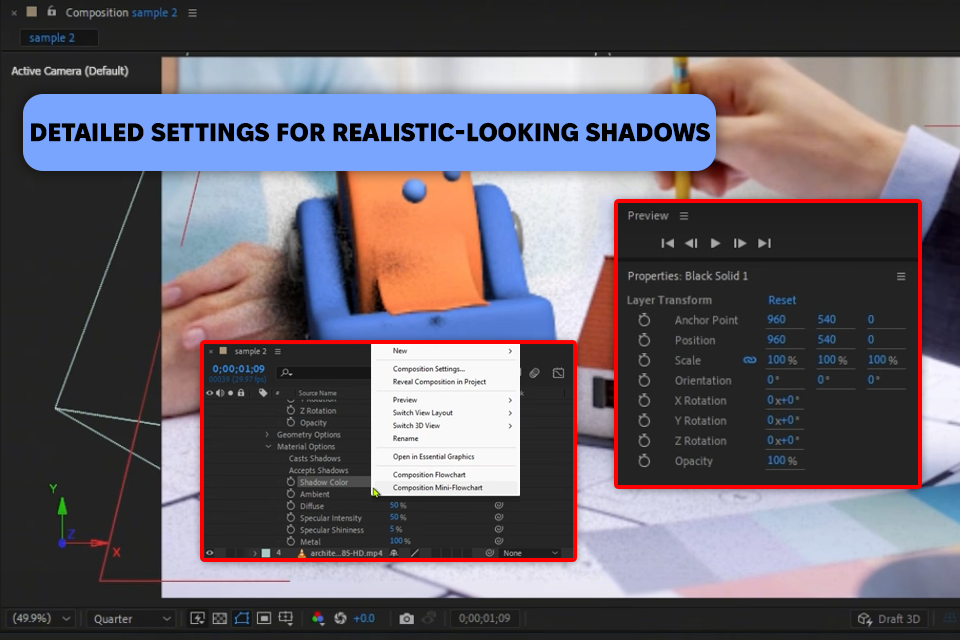
Next, create a solid layer where the shadows will go. To do this, go to Layer > New > Solid. Pick a color, usually gray or white, so the shadows are easy to see and edit. Place this solid layer under your 3D object in the timeline.
Step 3: Enable Shadows in 3D Layers
Now, click on the 3D Layer box for both your object and the solid layer (you'll see a small cube next to the layer name).

Add a light to your scene by going to Layer > New > Light and choose a Spotlight. This will help cast shadows in a certain direction.
Step 4: Adjust Shadow Settings
Click on the Light Options for the spotlight layer and enable Cast Shadows.

You can then adjust the Shadow Darkness and Shadow Diffusion to make the shadows lighter or softer, depending on what looks best.
Step 5: Apply Shadow Catcher Technique
To make sure only the shadow shows, you need to make the solid layer invisible except for the shadows. First, add the Shift Channels effect to the solid layer and change the setting from "Take Alpha From" to "Full On." Then, add the Set Matte effect and use the shadow layer to mask everything except the shadow.
Step 6: Composite the Shadow
Finally, put the shadow catcher layer over the background footage and change its blending mode (use Multiply to make it blend naturally). Adjust the opacity to make the shadow fit perfectly with the scene.
After testing the shadow catcher in After Effects, the experts at FixThePhoto shared some helpful tips to make your shadows look realistic, even if you don’t use third-party 3D modeling software. Here’s what you need to know:
«Match the lighting. Make sure the virtual light in your scene looks like the light in the real video. Match the direction, brightness, and color of the light to help the shadow blend naturally.»

Julia Newman
Tech & Privacy Expert
«Adjust shadow diffusion. If the shadows are too sharp, they might look unnatural. Use the Shadow Diffusion setting to make the shadows softer, like in real life.»

Robin Owens
Tech & Hardware Specialist
«Use a neutral shadow surface. Make your shadow catcher layer a neutral color, like gray, and keep it flat. This will make it easier to separate the shadow and avoid strange color mixes when adding it to the footage.»

Tata Rossi
Content Editor
«Perfect the shadow’s blending mode. Set your shadow catcher layer’s blending mode to Multiply for a more realistic look. You can also adjust the opacity to make sure the shadow is just right — not too strong or too weak.»

Kate Debela
Hardware & Software Testing Specialist
«Add motion blur for moving objects. If your 3D object or the camera is moving, turn on Motion Blur. This makes the shadow move naturally with the object.»

Tani Adams
Content Marketing Editor
«Use masking for complex scenes. If your shadow is falling on different surfaces (like a table and the floor), use masks to position and blend the shadow properly with the scene.»
Nataly Omelchenko
Tech Innovations Tester
«Try different camera angles. Test the shadow from different camera angles by simulating your camera's perspective to make sure it looks realistic from all perspectives. Use the 3D Camera Tracker if your camera moves in the video.»

Tati Taylor
Content Marketing Editor
«Adjust shadow color and opacity. Shadows usually aren’t pure black. Add a little color to match the lighting in your footage and adjust the opacity so the shadow looks natural and doesn’t stand out too much.»

Vadym Antypenko
Tech Gear Specialist
«Render in full quality. Always render your scene in high quality to catch any issues with how the shadow blends, its edges, or its brightness. Lower-quality previews might hide small problems.»

Eva Williams
Lead Content Writer


