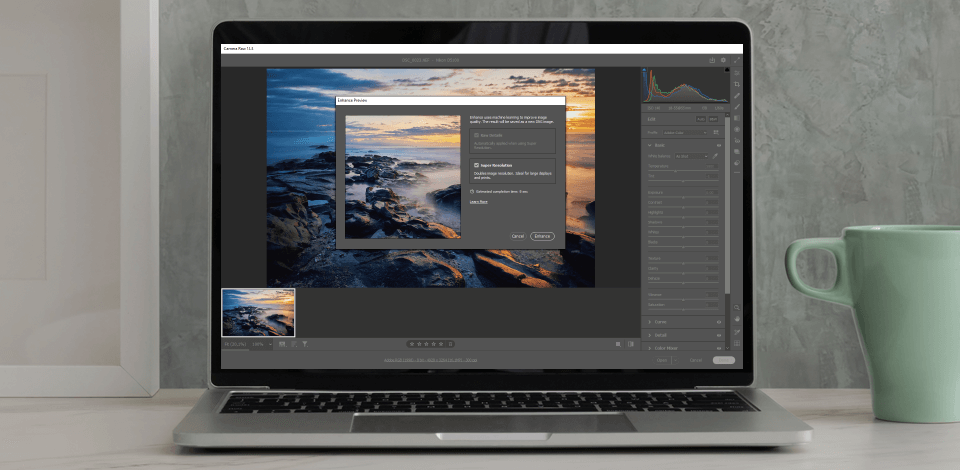
The 13.2 edition of Camera RAW is supplied with a new feature titled Super Resolution, which is capable of upsampling any photo up to four times compared to its original megapixel count, essentially doubling the length and height of the original. For instance, a 12MP photo will be transformed into a 48MP one, while a 48MP photo can go as high as 192MP.
The Adobe Camera Super Resolution function doubles the linear resolution of an image by quadrupling the overall pixel count while providing superior results compared to all existing upsampling methods. Instead of relying on classic upsampling technologies like Preserve Details and Bicubic Smoother, Super Resolution employs AI upsampling tech that is claimed to have been trained on “millions of images” to provide previously unseen result quality.
The developer has also clearly listed what type of files won’t be compatible with the Adobe Photoshop new Super Resolution feature:
Note: The Super Resolution feature allows increasing the resolution of any RAW format file up to 4 times as long as the resulting megapixel count doesn’t go above 500. For instance, one of the journalists already tried this feature on 102MP photos taken with Fujifilm GFX 100 and GFX 100S cameras and has managed to create stunning 400MP images.
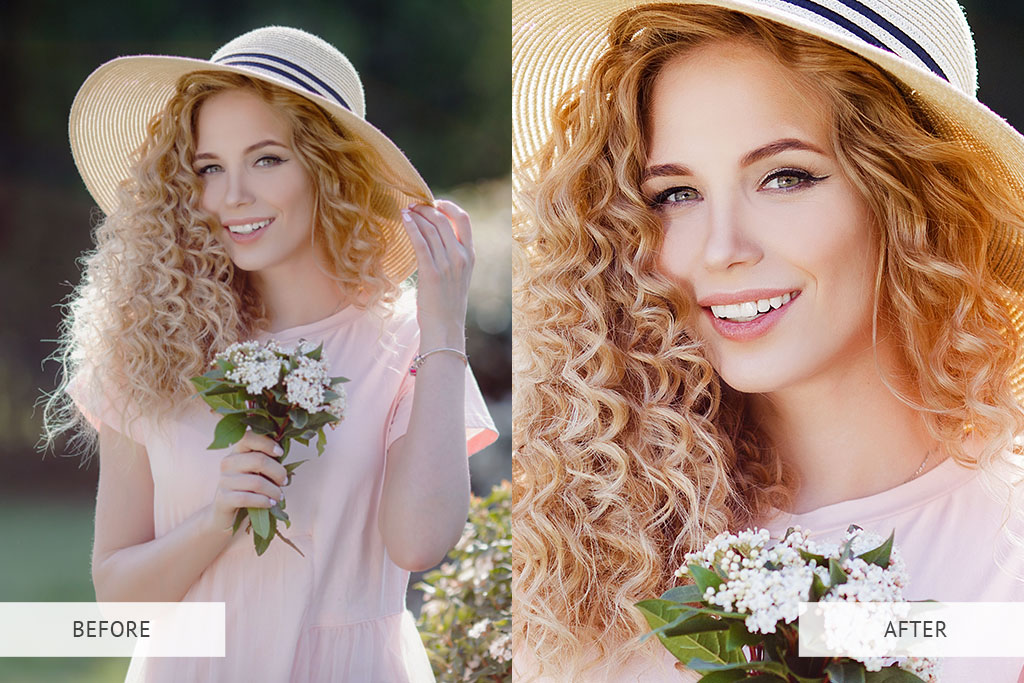
You can start trying out the Adobe new Super Resolution feature by importing a RAW file. You can also open RAW images in Photoshop directly using the Camera Raw app. To do so, you have to follow these steps:
1. Import the photo using Camera Raw.
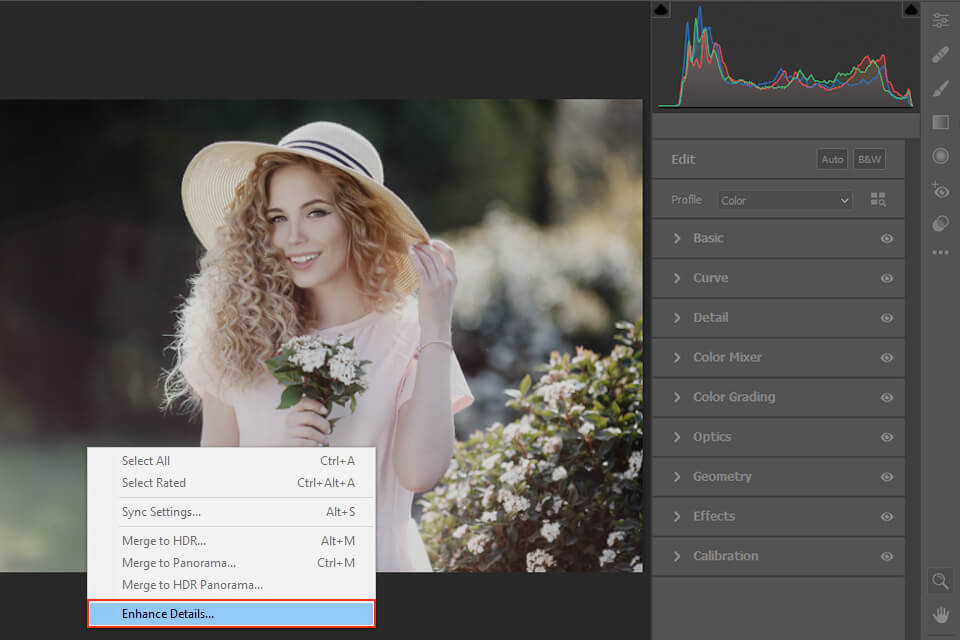
2. When viewing the filmstrip, Right-click (Windows)/Control-click (Mac) the photo and pick Enhance Details from the pop-up window.
3. Once looking at the Enhance Preview options, pick Super Resolution. You’ll be shown the estimated completion duration. After the enhancement has been performed, click and hold the highlighted photo section to compare it to the original photo. Alternatively, you can click and drag the mouse to examine other photo parts. Lastly, you can press the zoom icon in the bottom right corner to display the entire photo.
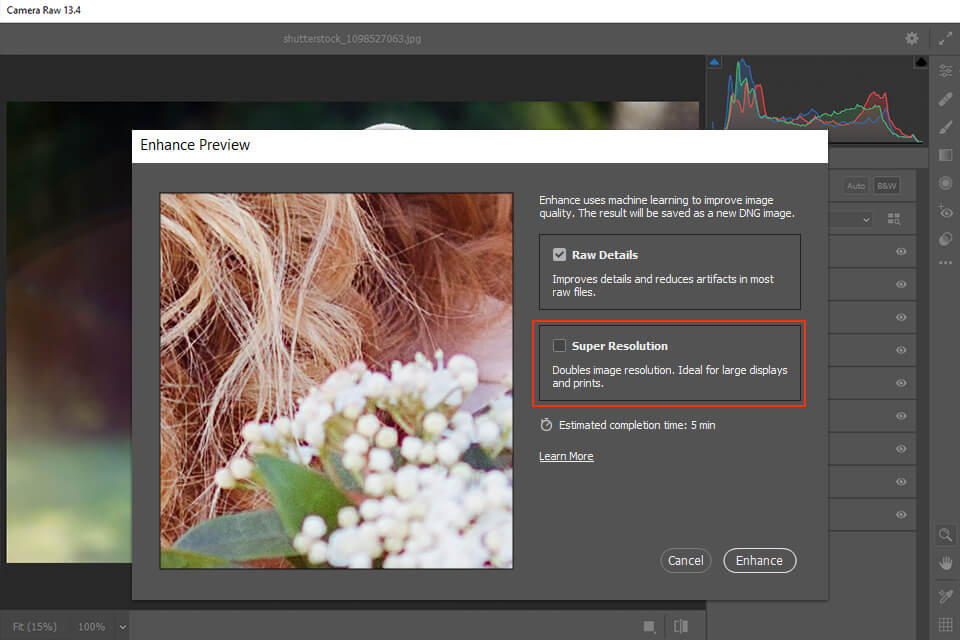
4. Press Enhance to generate an improved DNG version of the photo. The enhanced photo will have an identical name as the original but will be saved in .dng format.
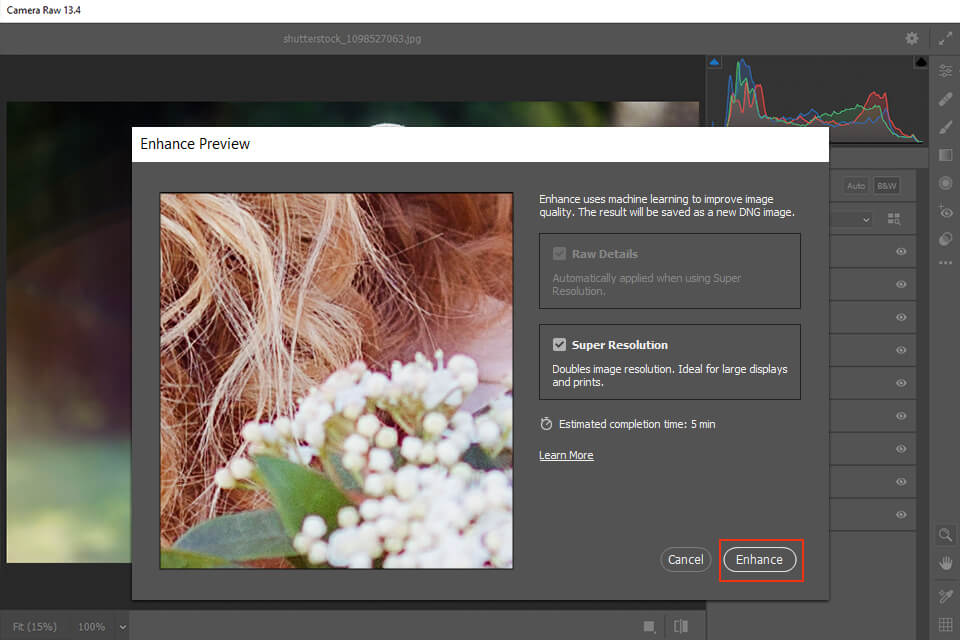
Pro Tip: According to the information presented by Adobe, the Super Resolution feature differs from other photo sharpening software because it actively uses the computing resources provided by the GPU so it’s a good idea to get as good of a graphics card for your PC as you can afford. According to the official statement, the processing time can differ quite a bit and range from a couple of seconds on a high-end GPU to multiple minutes on a budget model just to enhance a single file.
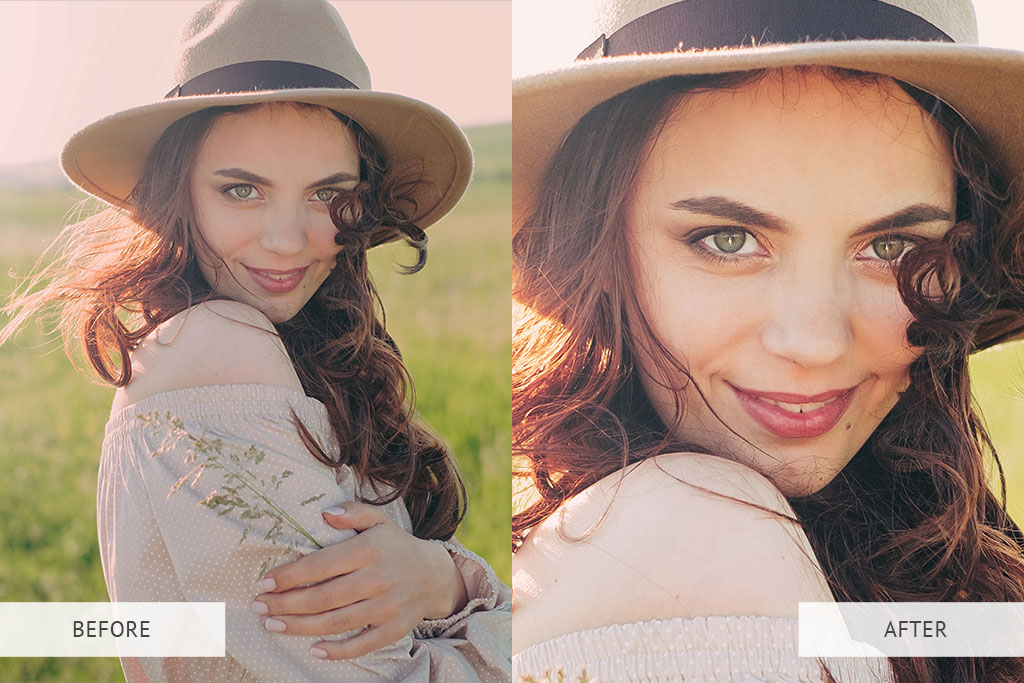
For the first couple of months, using the Adobe Camera Super Resolution function in Lightroom was incredibly difficult. Thankfully, as of June 2021, this feature was integrated into the software.
One of the most attractive aspects of Super Resolution is how convenient it is. It’s not hidden behind multiple menus and complex toolbars and doesn’t force you to learn dozens of parameters that need to be adjusted before you can get the result you want. Since the applied enhancement is non-destructive, you risk nothing by trying it out as long as you remember that increasing the resolution of a photo by 4 requires a significantly larger amount of storage space.
That’s why many photographers prefer to apply this feature to individual photos rather than entire batches. However, if you aren’t limited in the amount of storage space you can use, that shouldn’t be an issue.
Take an image, import it into Lightroom, and complete these straightforward steps to enhance its resolution:
1. Right-click on the image (or hold the Command or Control key while clicking) and pick Enhance.
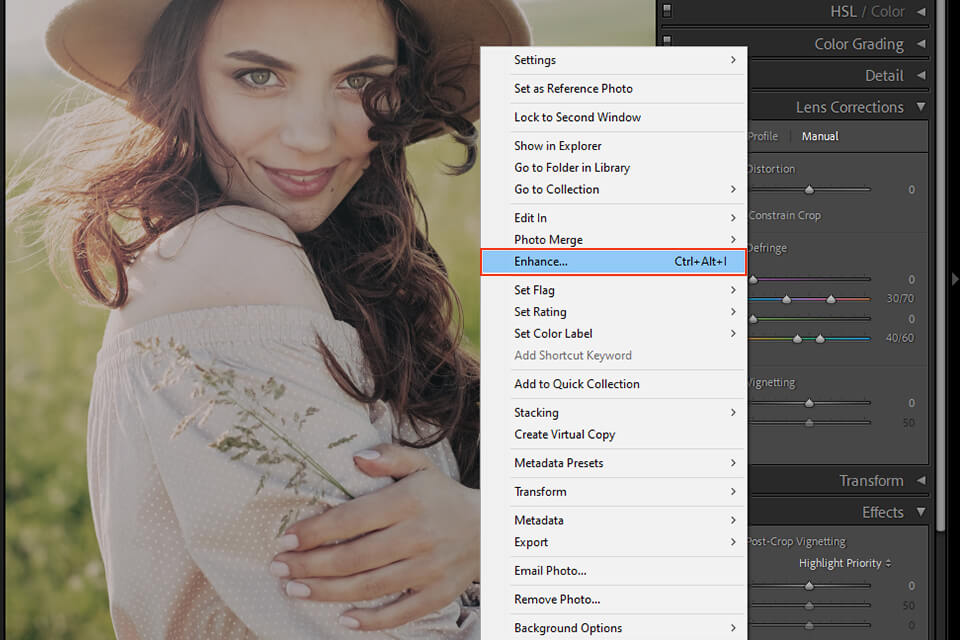
2. Once the Enhance Preview window is displayed, enable the Super Resolution box and click Enhance. Be sure that the Raw Details button isn’t chosen.
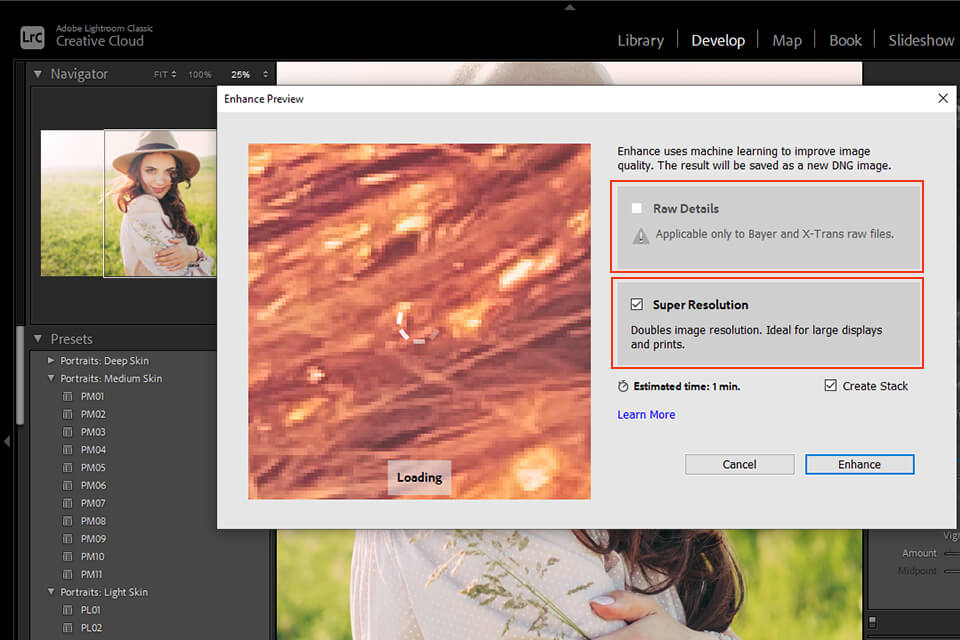
3. Continue working on the newly created DNG image.
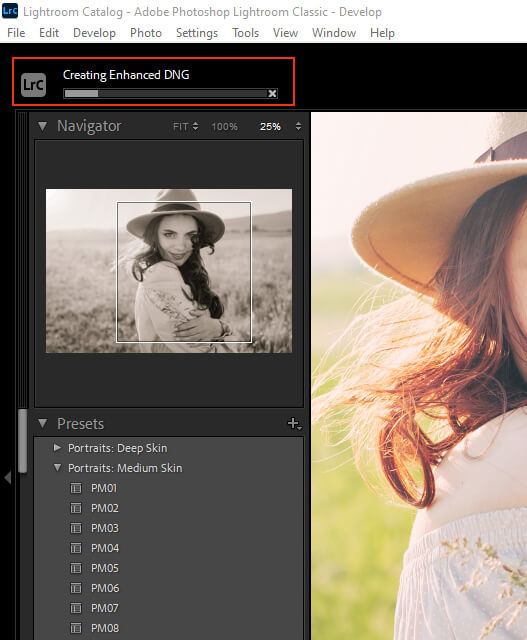
The Adobe Photoshop new Super Resolution function relies on machine learning to boost the resolution of your photos while providing higher quality results than all of its competitors. If you need more proof, check out the relevant post on Adobe’s official blog.
That said, there aren't that many cases where this feature is required. If you're simply posting photos on Instagram or Facebook, this function won't be of any use. In reality, Super Resolution is mainly beneficial for the following purposes:
The results delivered by Super Resolution are also largely dependent on the objects featured in the image. Brick walls, cobblestones, and other objects with a lot of thick and thin lines come out looking fine. Sometimes you can also improve the legibility of different signs and text.
However, when it comes to human faces, Super Resolution isn’t guaranteed to provide a satisfying effect. Sometimes, applying this feature can lead to the appearance of artefacts and it can also strengthen the moire and chromatic aberrations that are already present in the shot.
In all other cases, Super Resolution is an innovative and unique addition that takes advantage of machine learning – but it’s not a feature that you have to apply to every image you edit.
If you need to perform full-cycle image editing, we suggest using these actions that are suitable for all types of photos. With their help, you can drastically cut down the time you spend editing images while still receiving fantastic results. In just a couple of clicks, these Photoshop actions will transform your bland photos into stunning works of photography. This bundle comes with a long list of professional tools that were designed to meet all current standards and trends.