Creating a homemade photography studio is the perfect way to save many dollars on top-of-the-line equipment that you can easily make at home. As a rule, a three-point lighting setup, lightboxes, reflectors, and softboxes are the standard configuration for a photo studio, which will cost you a pretty penny in total. However, not everyone knows that this equipment can be made on his own or replaced with some household appliances.
All the instructions and tips given here are suitable for beginner photographers who want a simple photo studio at home to practice and gain more experience, as well as for experienced photographers who don’t mind putting in a little effort to save some money.
If you specialize in product photography, then the scope of equipment needed will not be so large. Just a few key components and a DIY photo studio without a professional studio lighting kit is ready.
The main element of the product DIY photo studio is the place where the product will be located. This should be a table on which you will properly place the goods and decorate the composition. The height of such a table should not be moderate, otherwise, it will be inconvenient for a photographer to perform a photo session.
Given all these requirements, I decided that a folding table is exactly what you need in this situation because it’s easy to use and maintain. What’s more, it’s portable, so it’s easy to carry around and change locations. I do not recommend placing the table near the window, as you need a stable light for a product photo.

When choosing product photography backdrops for your DIY photography studio, I advise you to take a closer look at a white seamless paper. It is recognized as the best option for such shooting, unlike a multi-colored background that can distract viewers’ from the main element.
If you still want to play around with backgrounds, then pay attention to the background paper pack. It contains samples with different textures and colors. Try to avoid brightly colored objects around the shooting location, as they may reflect on the surface of your product.
After you have chosen and bought a suitable background, proceed with installation. Attach the backdrop to a ceiling, wall, or another surface that can support it using tape on top of the paper. The size of the object to which you will attach the background depends on the average size of your product. Next, spread it around the table, fixing the edges with clamps.

The key to a successful photoshoot is proper lighting. For product photography, experts most often prefer the photo light box. Making a DIY light box is easy – find an empty plastic box and some white paper. Next, simply place the lamps on the sides of the product location. In general, you can manage without a plastic box.
For proper illumination and to prevent unwanted shadows, you only need 2 table lamps. You can also replace them with two LED lights for photography. Point the lights of your DIY home photography studio in a certain direction and ensure that you can adjust them at any time without much effort.

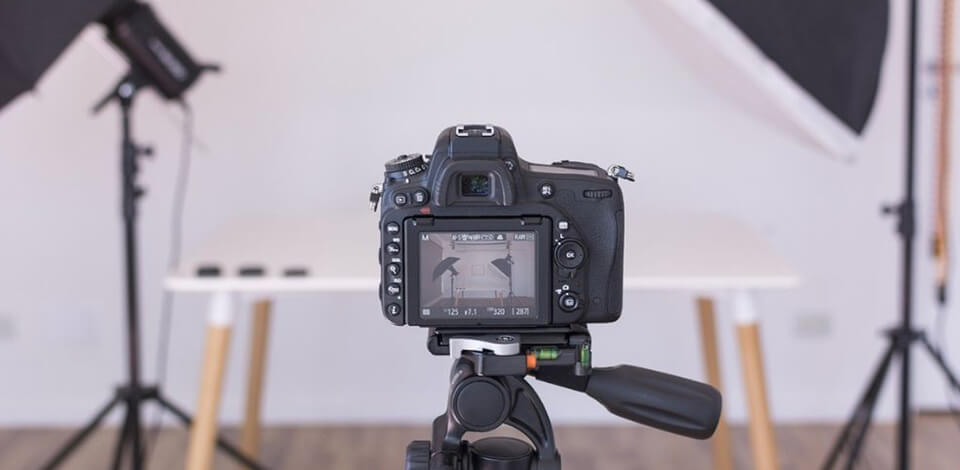
If you are shooting on a camera and you have a tripod, just position it as close to the table as possible so you do not have to use the zoom. For product photos, you need the sharpest focus.
If you do not have a monopod from any tripod brand, just put the camera on a table. It's better to prop up the lens with something to prevent the camera from moving when pressed. If there is a control panel - use it.
Last, but not least, is to prepare a product for the shooting. You should thoroughly clean it, removing all dirt, stains, and other contaminants. When you start placing the object in your homemade photography studio, don’t forget to wear gloves to avoid leaving fingerprints, which can be seen in a photo.
Speaking of proper cleaning of textured products, I recommend using an anti-dust spray. For cleansing glass and metal items, consider a mirror care spray and a micro fiber cloth, and when preparing textiles for shooting, be sure to iron and steam them.

If you are interested in creating space for your portrait photography ideas, this is easier than it might seem at first glance. I will show you how to simulate professional equipment using DIY photography lighting at home and using the tools at hand.

Portrait photography requires more space because it takes a lot to take a full-length photo. The most foolish thing you can do is to arrange the studio in the middle of the room. This will make additional inconvenience for you, models and your relatives, who live under the same roof.
Of course, you can try to make it mobile, but it can turn out to be a real waste of time and efforts. The best option is to allocate a separate small room for this, where you will always have a studio and nothing else.

There are many ways to make a beautiful DIY photo backdrop. If you need a white background, just take a regular sheet or even an old curtain. Even if folds appear on such an impromptu background, it’s not a big deal, because by setting a large aperture, you won’t notice them in a photo.
In the case of a black background or another color, you can visit a needlework store and buy a few meters of the fabric you like. There is an even easier way – just paint the wall in the color that you will most often use when photographing.A very popular choice is a white background, but you may try some other tones, such as gray or dark, to achieve the main goal – create a monochrome backdrop. Gradient is good too. But be careful with too complicated patterns, as they may provoke additional challenges during shooting.

If you’ve settled on a fabric backdrop for your DIY photography studio, then you should consider securing it properly. Usually, photographers buy a backdrop support system for this, but I suggest you make its analog at home. One option is a frame build of PVC pipes or you can also find galvanized pipes to make this construction more durable and stable.
If you have enough space, try making a cube-shaped frame. With such an invention, you will always be sure that your backdrops will not fall just when you least need it. In case you don’t have much space in your studio, a rectangular frame that looks like a doorway is also a great alternative.

To figure out how to properly place your lights, you need to consider your needs as a photographer. If you still can’t figure it out, turn to the classic – a three-point lighting system. Its main light is the key light that illuminates your model, while the other lights set opposite act as fill light, the purpose of which is to soften the shadows.
Make DIY softboxes instead of buying the main light, and a DIY photography reflector to replace the additional lights. To reflect light onto the darker side of your model, use the reflector board. To make better use of the lighting in your DIY home photography studio, compare hard light vs soft light, and learn the most suitable lighting configurations for portrait photography, in particular, Rembrandt lighting.

The simple white background portrait photos will soon become boring, so adding cheap photography props or creating DIY photography props is a great decision. Almost anything you have at home can be a photography prop – various furniture, beautiful houseplants, and all sorts of cute bits and bobs. Think of different styles of further shootings and choose appropriate subjects.
For portrait photos of women, you can choose flowers, and beautiful interior pillows, various vintage items, whether electronics or furniture. When photographing children, pick up bright beautiful toys. A must-have for a portrait shoot in a homemade photography studio is the posing stool placed in front of the backdrop for your model. As an analog, you can consider a spectacular sofa or easy chair.

To make photos look stunning, based on the studio photography requirements, take advantage of these tools designed specifically for product shots. Using this toolset, you can fix lighting, color, and white balance issues, adjust contrast, smooth shadows, etc. Just in a few clicks, your photos will acquire a professional look.
The toolkit is versatile and suitable for a wide range of products: from jewelry to car photography retouching. All you have to do is learn how to install Lightroom presets on Mac & Windows.


