A photo diary represents the perfect mix between a photography album and a diary. You can fill it with both text and pictures to commemorate noteworthy life events. If you haven’t done scrapbooking before, then journaling with pictures might come across as a serious challenge. Thankfully, you can take advantage of this handy tutorial as well as a bunch of helpful suggestions to make life easier for yourself. Simply follow the steps below and you’ll receive a fantastic result in no time.
Before you begin, choose what kind of memories you’d like to store in your photo diary. It can contain pictures from a specific time period, or you can use each page for one day of the month, or just have it filled with the best moments from your latest vacation. This decision will affect the rest of your design so think about it carefully.
Once you’ll be able to tackle larger projects, you can make a journal about your pregnancy, the first year of your child’s life, or a 365-day diary that encompasses the entire year.

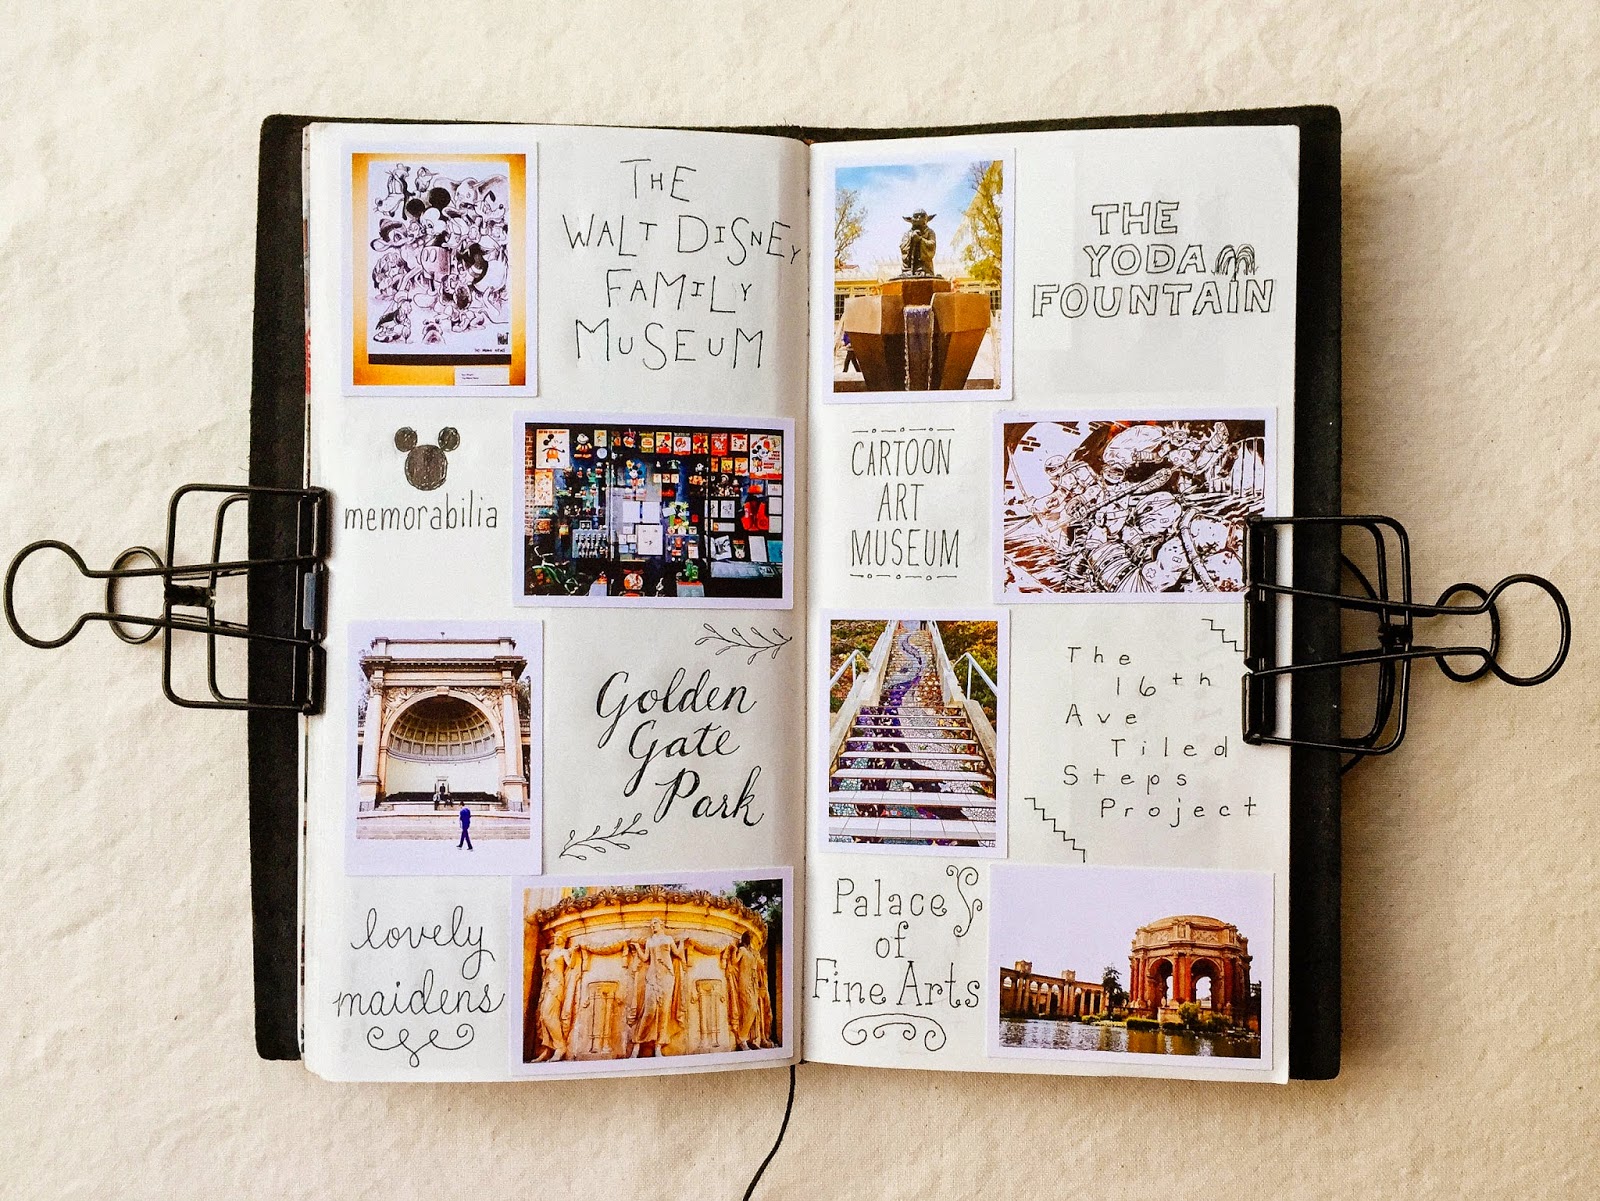
Before you rush off to purchase a bunch of arts and crafts supplies, you first have to determine what picture journal style you’re going with. Frankly, the number of potential styles isn’t limited to anything other than your imagination. For instance, if you want to create a vintage-looking journal, you have to make its pages look aged. For this purpose, you can’t go wrong with brown and cream paper as well as retro-styled embellishments.
A romantic picture diary will probably heavily rely on a large number of embellishments and patterned paper. The way you decorate the pages here can often be even more important than the photos themselves. On the other hand, if you want to focus the viewer’s attention entirely on the images, then all you have to do is pick a simple, minimalist style that doesn’t have any exploding colors or eye-catching embellishments.
If you’re stuck picking between different styles, start by creating some digital mockups: there’s an array of photo album software out there to help you with this task. Consider using a solution like FlipBuilder or Presto Yearbooks.

Pick a notebook that offers the desired size, binding type, number of pages, and page style (blank, grid, etc.). The most popular sizes are 12x12” and 8.5x11” but you can purchase notebooks in other sizes as well. Another important aspect is the cover – does the original cover look good enough for you or would you like to embellish it so that it better matches the photos that you’re going to put inside?
Lastly, look at the paper quality. Your goal should be to get a notebook that offers pages, which are sufficiently thick for attaching photos and are smooth enough for writing. Scrapbooking albums are great for this purpose since their thick pages won't break or get damaged when you attach pictures and various decorations to them, which can be a serious issue with regular paper.

The next step is picking and printing the pictures that you’ll add to your photo diary. Since the number of pages that you get isn’t infinite, you have to carefully plan what photos you’re going to include. Consider printing pictures in different sizes to make the journal more interesting. Make the more notable photos larger while interspersing them with smaller pictures.
If you own a photo printing app, it can help you conveniently handle the printing part of the job. Apps like Shutterfly or Printastic are both worth giving a shot at.
If you’re interested in a simple photo journaling system, consider using a photo box. Just pick the size of the photos you’re going to use and choose an appropriate box.


The type of picture journal you decide to go with will heavily determine what kind of supplies you need to get. The notebook, paper embellishments, and other decorations can be bought at your nearby crafts store or ordered online. Such vendors offer special scrapbooking paper, stamps, and washi tapes that can do wonders for helping you unleash your creativity and implement the design you have in mind.
If you want to avoid spending too much on supplies, consider using some things that you already own. Leftover wrapping paper and recycled newspapers can serve as fantastic embellishments and you can decorate the diary with eye-catching lettering rather than pricy stickers. Old stamps are also a terrific decoration item that fits vintage or travel-themed journals perfectly.

While the photo might already tell you everything you need to know about the memory depicted in it, it won’t be a proper photography journal if you don’t write some details about it. Write something about the people in the photo, the location, or just an interesting fact that is related to what you can see in the picture.
Alternatively, you can write an inspiring quote along the lines of “We don’t remember days, we remember moments” to make sure you’ll feel uplifted when you decide to check out the journal some years later down the line.
Another important detail you shouldn’t forget to add is the date and location. While you might think you’ll never forget the where and when of all the photos you take, the same won’t necessarily be true in a decade or two from now.

Now that you have the album/notebook, the necessary materials, and the printed photos, the next step is to tie all these elements together. Don’t start by immediately gluing stuff to blank pages before you’ve settled on the layout. Think about where you want different pictures to be and what embellishments will look good near them.
Stick to a single style throughout the diary to create a uniform look. If you want to have a sense of continuity, avoid flipping between styles on each page since then all the depicted events will feel detached from each other. That said, there’s no harm to using a slightly different style to emphasize a couple of pages in your journal as long as you don’t go overboard with it.
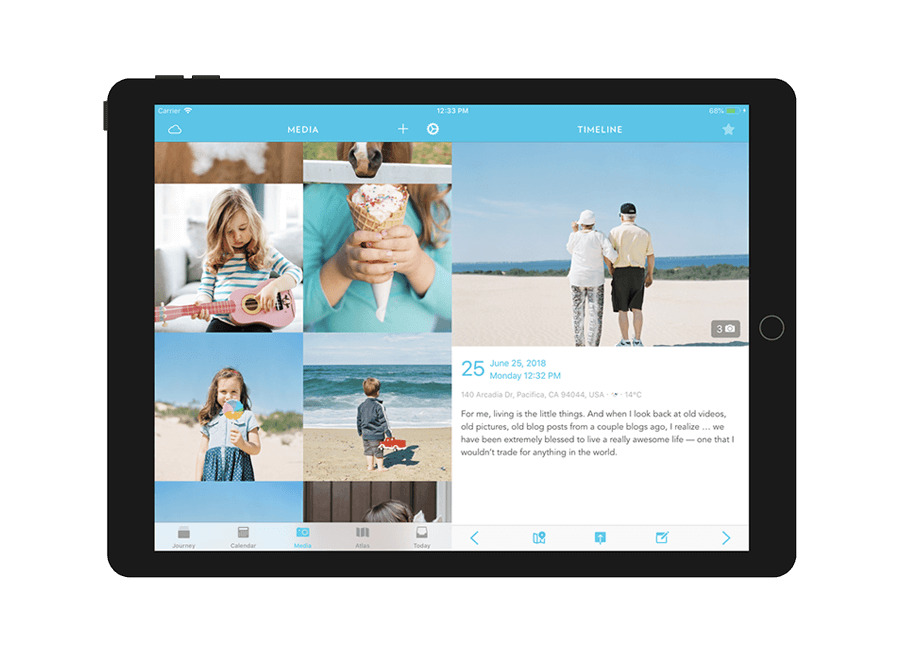
If you’re not a fan of the whole arts & crafts routine or lack the time necessary to design a proper scrapbook, there’s always the option of creating a digital photo journal. The web is filled with apps and software suitable for this task, with the most convenient options arguably being Snapfish and Picaboo.
Afterward, you can transfer the design to a photo lab for printing. You start that process by picking a photo printing service that you can entrust with your images. Do some research about the service you're considering approaching while putting the most weight on customer reviews.
The main point of this approach is to design the diary with the help of tools meant for making digital albums. Typically, photo labs offer special photo printing software for creating such a project. Using such tools is extremely convenient since they allow you to add as many images and text as needed. They are also handy because of the offered ability to create and save journal projects, which allows you to work on them in stages.
If you want to share your diary with others, the most convenient method for doing so is social media. While such a diary won’t have the same personal feel as a physical one, this approach won’t cost you a dime and if you’re already an active user, you won’t even have to learn a new online platform or tool. It’s also handy for creating a backup of your images.
Probably the best option for this type of picture diary is Instagram. It offers all the features you can want including editing, a huge community, and free usage. If you're interested in alternatives, consider checking out Pinterest and Flickr.

Learning how to properly adjust all available parameters can be both hard and time-consuming. Nonetheless, your journal photos have to look as visually appealing and memorable as possible if you want them to make a lasting impression. Thankfully, you can achieve fantastic results with read-made presets. These ones were designed by professional photographers who know exactly what to do to grab the viewer’s attention. On your part, you simply have to add presets to Lightroom and you’ll be ready to start applying them in a matter of clicks.


