Luminar Paint Mask
Verdict: Luminar Paint Mask is a useful tool for masking objects with the help of AI, which allows you to save a ton of time and nerves. Learning how to employ this feature is also satisfyingly easy. I appreciate the mask’s ability to hide and obscure specific areas of a photo as well as fine-tune effects in specific image parts.
Luminar Paint Mask lets you conveniently apply brush strokes to increase or decrease the masking area. This feature can be used even by complete newbies that don’t have any previous experience using masking tools.
Luminar Paint Mask lets you automatically create object masks in just one click. Employ this tool to mask people, skies, houses, cars, water bodies, trees, mountains, and much more by pressing one button. The implemented user-friendly and advanced features along with the handy UI ensure Luminar stands out from other AI photo editors as being suitable for beginners and professionals alike.
The Paint Mask tool is a great option if your goal is to add some manual changes. You can either employ this feature on its own or combine it with others, for instance, you can employ Mask AI first. Once you use Mask AI, the software will take a moment to examine and detect all the objects in the image. You merely have to click on the desired object(s) to create an automatic mask.
Masking can be extremely efficient but the quality of the results often depends on the image. If your image is more complex, you can sometimes be disappointed with the result. If that happens, you can deal with this issue by filling in the gaps with the help of the masking brush.
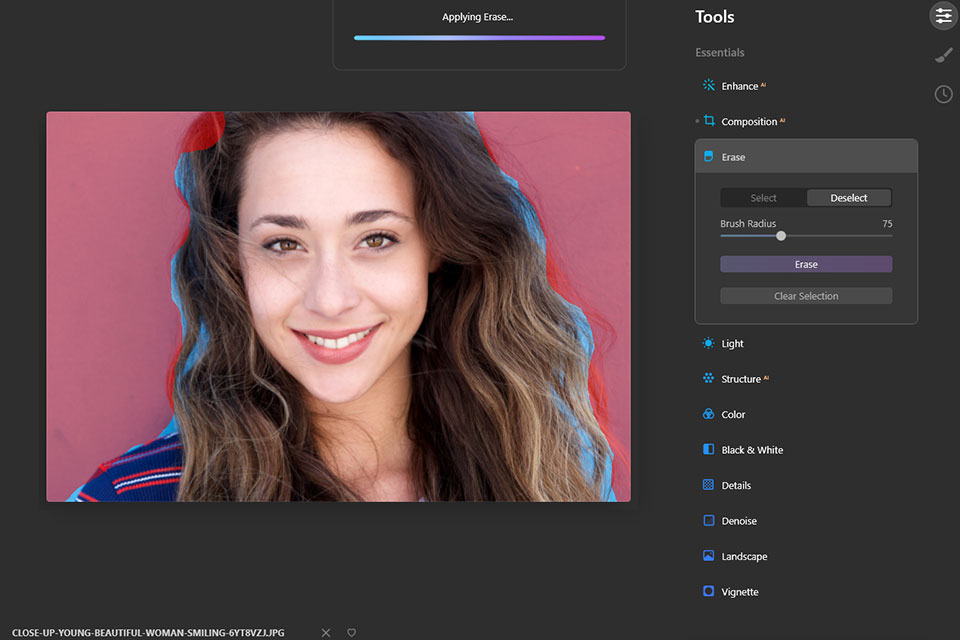
The Paint Mask feature can be set to Brush or Erase mode for increasing or decreasing the masked image part. Pick the Brush mode to alter the mask and later switch to the Erase mode if you want to erase unwanted masked parts to fine-tune the selection area.
Obviously, manually selecting and adjusting the masked areas is rather inconvenient since doing things this way requires more time and effort. Thankfully, Luminar Neo comes with automated object selection and AI-based instant masking functionality to help you out.
Click on any object in the image, whether it be a person, tree, sky, water, building, or something else, Luminar Neo will create an automatic mask for it while allowing you to apply edits specifically to the selected object without changing the rest of the image.
When it comes down to it, the Mask feature makes Luminar one of the best photo editing software for PC since it lets you save tons of time on creating manual masks while also providing the ability to tweak the masked area manually should such a need arise.
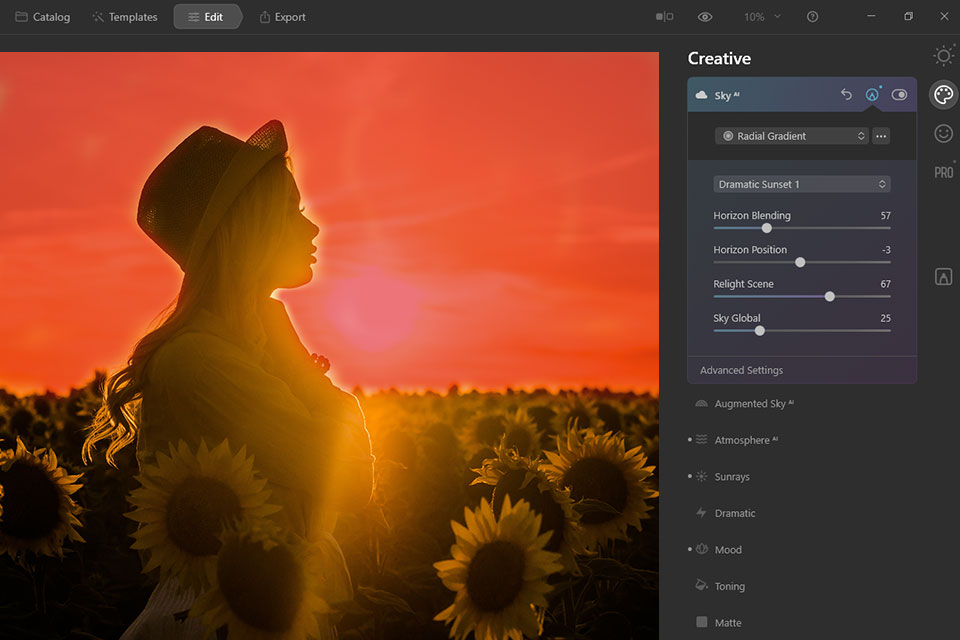
Employ the brush to pick photo parts that you’d like to enhance with the Dramatic tool. Masked parts can be recognized by the applied translucent red mask. It will be visible while you’re using the brush tool as well. Another way to enable it is to click the 3-dot icon and pick Show Mask at the bottom of the appeared menu.
After you’ve applied the initial mask, you’ll be able to expand or decrease the masked area as you see fit. Click the 3-dot icon again to access mask controls. You’ll be presented with the following options:
Fill. This feature expands the mask across the entire photo. Once you’ve employed this option, you can pick Paint Mask and switch to the Erase mode to decrease the covered area.
Invert. This inverts the applied mask by reversing the chosen opacity and transparency figures.
Clear. This option completely deletes the mask. Once you select this function, you’ll be able to apply the Paint Mask, Gradient Mask, or Radial Mask feature to return details to the photo.
Copy. This function copies the existing mask to the clipboard. You can apply the copied masked area by adding a new mask with any suitable tool and pasting the previous selection.
Paste. This function adds the mask copied to the clipboard to a different mask.
Density. Allows you to adjust the transparency of the image area around the mask to ensure the mask fades into the backdrop more naturally.
Feather. Blurs masked edges to fade the mask edits into the photo more realistically.
Show Mask/Hide Mask. This function changes the mask’s visibility. If your press Show Mask to display the masked area as a red overlay. If you want to enjoy maximum precision, make sure the overlay is visible while you’re adjusting the mask area. You can click Hide Mask to get rid of the red overlay.
Draw the mask until you’re happy with the result. Employ the Radius, Softness, and Opacity sliders to tweak the Brush and Erase tools. During the editing process, you can undo the previous brush strokes at any time. You merely have to pick Edit > Undo or press Ctrlz+Z (Windows) or Cmd+Z (macOS).
Masking functionality can be found in a lot of menus across Luminar, for instance in the color controls section. For instance, you can pick a mountain and adjust its colors without being forced to mask it out manually or changing the affected tones across the rest of the photo. The AI masking tool can also be employed for selectively applying the Denoise feature, structure, or sharpness. The same adjustments can be performed manually if needed.
Such functionality lets you separate the foreground from the backdrop, tweak specific colors without changing other photo areas, blend photos, apply filters, and much more.
You can get Luminar Neo on Skylum’s official website for $99 or by paying $14.95 for a monthly subscription. Alternatively, you can get Luminar AI for just $47. Both solutions come with 24/7 technical support and a 1-month money-back guarantee for all users who weren’t happy with the provided functionality.
Luminar Neo offers superior preset and tool performance compared to Luminar AI. Another key distinction of the newer version is its “modular engine”. The implemented Modules allow you to evenly spread out the load while employing different editing features in Luminar Neo to enjoy superior photo processing speeds.
This state-of-the-art software is extremely user-friendly while being suitable for both casual and professional use. Luminar’s UI is convenient, intuitive, and pleasantly minimalistic.
Luminar Neo offers fast, smooth performance. Its predecessor is also decent in this regard but some of its features could take a while to apply. Meanwhile, the tools included in Neo make the changes instantly and without any delays as long as you have a computer or laptop that is powerful enough to support it.
Local Masking allows you to layer several edits. This is useful in situations when you have to introduce high-precision tweaks to a photo or edit several parts of a photo separately. Open the photo that you want to enhance in Single Image Edit Mode and then select the Local Masking icon from the right-side panel.
Yes, this edit can be performed fairly easily with the help of the Portrait Background removal tool, which you can find by going to Edit > Masking > Layer properties. You’ll be presented with a menu of options, among which you’ll find Portrait Background. Simply click on Remove and you’ll be done.


