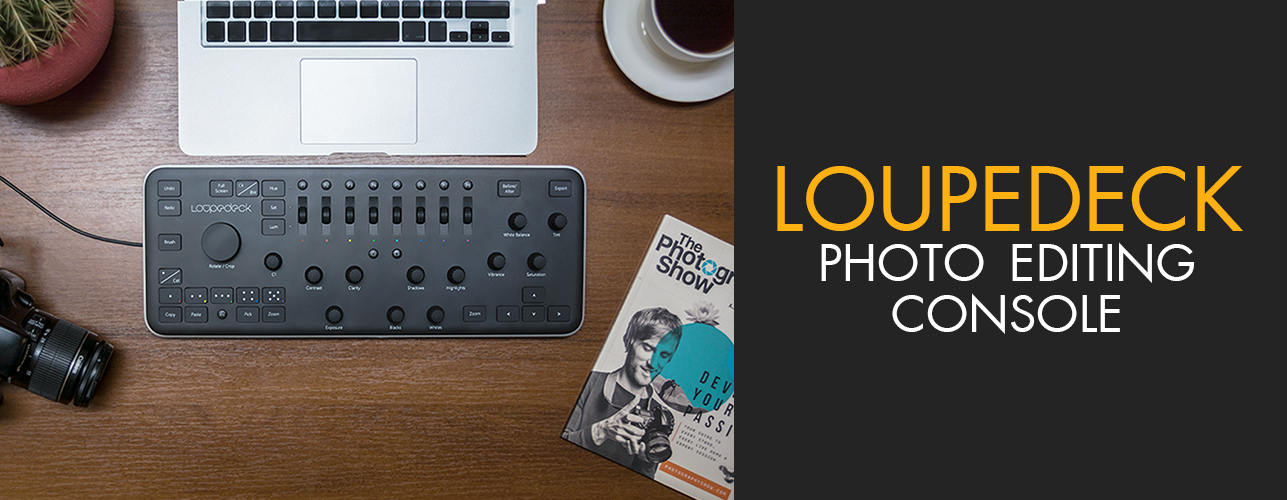
Loupedeck Photo Editing Console
When you purchase through affiliate links on our site, we may earn a commission. Here’s how it works.
Does a Loupedeck photo editing console help edit photos faster or is it just a waste of your money? Can it stay on par with the best keyboard for photo editing?
Loupedeck is a photo console for editing digital photos on Adobe Lightroom for either Windows or Mac. It is built specifically to speed up your photo editing.
Today I want to tell you why this thing is better than using a mouse, and how I decreased the amount of time to edit a series of wedding and travel photos.
.jpg)
After successful crowdfunding in September 2017, Indiegogo Company, Finland, launched the production and sale of the world's first specialized controller for Lightroom (read more on their official website)
The developers of Loupedeck have gone on a serious path and created a stable partnership with Adobe Co, so their software already looks more professional and it's easy to use than analogues. The Midi2lr Loupedeck system existed before it, but only guys from Indiegogo were able to raise it to the level that we see in this console.
Specifically for my review Valeriya Kostyukovskaya, Sales and Marketing Coordinator in Loupedeck Co, answered a few questions appeared about how to use this photo editing console below.
Loupedeck - Unboxing and Setup:

The Loupedeck price is $245. I did not write the Loupedeck review on the first day after the purchase, because I did not want it to be impulsive, and at that time I didn’t study this device in detail.
- Read more about how to get Lightroom free.
Loupedeck is the most carefully packed thing I've seen. It was a branded fabric bag with a logo, and it had a box of recycled paper with a logo too. Thank the guys from Indiegogo for being eco-friendly.
 Loupedeck comes in three boxes
Inside, there was something we all used to - a stylish black box with letters engraved on it and a small description of the product. And what is inside this box? Another box!
Honestly, I don't know why they needed so many boxes. That last one would be enough, it looks stylish and comfortable, you just remove the cover and your Loupedeck is in front of you.
 Stylish minimalistic Loupedeck’s design
What can I say about the device itself – firstly, it looks stylish, the design is very pleasant. When I showed it to my friends, they decided that Loupedeck is used for working with music.
When you take this photo editing console into your hands, you immediately pay attention to the weight and material. It is made of plastic, it's light - 1kg. This is not the worst type of plastic. I would like to change the buttons, as when pressing some of them the main body of device bends.
By the way, if you like silence during work, well, it will be difficult to work with this controller. When you press the buttons, especially those that are on the left side, a loud sound is made. You’ll get used to it in time, but I would like a quieter and short stroke of keys and buttons.
 Unreasonable cable connector
Loupedeck stands on 4 legs at a slight angle for convenience. But the cable began to annoy after 5 minutes of using. There is no Bluetooth connection, the cable is short and very uncomfortable.
For the cable there are special slots, but it is slightly larger than the cells, and it’s hard to use it. I don't understand why they could not place the cable in front, then there would not be any problems.
- FixThePhoto: "The wire under the right foot interferes, it has to be shoved into the slots all the time, what is the reason for its location exactly here? Why was it impossible to arrange the output of the wire on the forepart?"
- Valeriya: "The Loupedeck designers wanted the border to be one solid piece without any holes or slots from the wire. That's why it was put under the device. There are two wire output channels for more convenient use. This Design of Loupedeck was highly appreciated in design competitions worldwide.”
Inside there was a connection instruction in 2 stages (go to loupedeck.com and download the software) which I actually did.
Loupedeck Configuring
After downloading the software, you need to run Lightroom and you can start working. In the same way, you can customize the keys. But I just started to explore the program.
 Application for setting up Loupedeck
The interface is very simple – the menu shows the highlighted buttons, which you can customize on the right. Other buttons can’t be customized.
By pressing the Settings button, you can adjust the sensitivity and speed. Honestly, I did not understand what changes the Sensitivity setting, but I recommend taking the Speed to maximum, then you can change the value of tuning you want by jerking. For more precise settings, you just need to rotate them slowly. Do not activate Double Speed, this will make Lightroom too sensitive.
- FixThePhoto: "I increase handles sensitivity in the settings, but nothing changes at all. The speed changes, but the sensitivity is not."
- Valeriya: “Currently we are working with speed control to make it better. On Windows, speed control works very well, but on Mac there are some problems.”
 No free customization of buttons and sliders
You can also configure the secondary key actions by the Fn button. In total, there are 11 customizable keys and 1 handle, and many secondary actions for them with this Fn button. But I will upset you - you cannot adjust everything that you want for these buttons and the handle, because there are pre-selected actions from which you have to choose.
Remember, if you use a monitor with a resolution of less than 1280×720, the program window will not fit into your screen.
Loupedeck Photo Editing
 Visually Loupedeck is divided into 3 zones
What distinguishes Loupedeck from its competitors? Its buttons and handles are specially designed for the Lightroom workflow. Their location on the body is clever, no piling, everything is on its place and divided into 3 visual zones, each of which we will consider in detail.
Zone 1: Managing Color Channels, Presets and Customizable Buttons
 1st zone is designed for quick work with color channels
What makes all the photographers crazy about Loupedeck is the eight control wheels for the main color channels and the ability to adjust the colors from red to purple separately. You can forget about using a mouse for correcting each channel.
What's also cool, is that the creators took into account the possibility of switching between HSL thanks to three buttons with LEDs. You use three buttons to decide if you want to adjust the Hue, Saturation or Luminance of these colors.
This Lightroom controller has unique MIDI control system that no one used before. These wheels work as buttons too. If you press them, this color setting will be reset to 0.
Let's say that you need to adjust the skin tone on all your photos. Just slide red, orange and yellow in the desired direction, and then use the Copy and Paste buttons, which we'll discuss later, and apply this setting to all photos.
I'm sure that you, like me, have hundreds of Lightroom Presets Premium Collections, but you use only a few of them. For this, Loupedeck has special buttons for presets P1-P8, which are synchronized with all your presets in Lightroom. They can be configured for the most commonly used presets.
 You can link 8 presets to buttons
Under color adjustment buttons you will see two small buttons "C2" and "C3", which you can customize according to any Lightroom action you need. For myself, I set up Send Image to Photoshop, as I usually make photo retouching after color correction, and Toggle Spot Removal tool after clicking which you take the mouse and do what you need.
But I would like more freedom in setting up these buttons, and more customizable buttons on the console, since "C2" and "C3" are the only buttons that you can configure. Although at least two more buttons would fit on the body.
- FixThePhoto: “Why cannot I configure all the other buttons?”
- Valeriya: "We are making more and more customizable parameters for our software so that we can cover as many different styles as possible for Lightroom, but we do not open all buttons completely. If you need any function or "automation", please tell us what you need and we will investigate whether it is possible to do this with Lightroom. Many ideas are very good, but Adobe Lightroom does not support them at the moment.”
Zone 2: Hot Key Replacements and a Rotate/Crop Wheel
On the left side of this device there are almost all Loupedeck's buttons, as well as the only customizable wheel "C1", which we'll talk about first.
 2nd zone is for quick image culling
As you can see, there are only six settings, where Vertical Transform and Horizontal Transform are rarely used. I don't really need them, especially on a single customizable wheel. Vignette is also used quite rarely, so I chose Noise reduction.
 Some features will be useless due to restrictions
Let's look at Rotate/Crop. With it, you can crop and flip your photo. But in fact, this is an extremely inconvenient thing, because to crop your photo without rotation, you need to turn a photo first, and then use the held down "Fn" key to return the photo to its normal position by rotating it back.
 Cropping with the Loupedeck is not as pleasant as we would like
Since the sensitivity of the Rotate/Crop wheel is decreased with the "Fn" key pressed, this process becomes too long. To accept the cutting, you just need to press the wheel itself. Don’t be surprised with a very loud sound. It’s like the sound of emptiness that exists between the board and the working surface.
- FixThePhoto: “Pressing the Rotate/Crop handle causes a very loud sound, why?”
- Valeriya: "There is a switch built into the axis of the handles. It must be rigid enough not to press it during rotation accidentally."
To move while image cropping, use the arrows on the right side of the Loupedeck, but they move you around the image in jerky, which is very inconvenient. My advice is just take the mouse.
Most Loupedeck reviews on YouTube inform that this Lightroom editing console can replace the best Air mouse and keyboard. Don’t believe them. The mouse cannot be replaced with anything other than a graphic tablet, the keyboard is also needed for some hot keys. Although I admit, every day I turn to the keyboard less and less when I work with Loupedeck.
- Read more about best tablets for photo editing.
- FixThePhoto: "When I click Zoom, the picture becomes closer, but I cannot move through it, is it fixable?"
- Valeriya: "Lightroom does not offer any navigation when Lightroom is in an "enlarged" state. The mouse is the only tool you can use to move around in this area. But we're working on it, trying to get it to work with the cursors."
- FixThePhoto: "I see two identical Zoom buttons with the same action. Why cannot they be customized in different ways and why are two buttons necessary?"
- Valeriya: "Zoom buttons will be opened a little later. There will be different functions (at least, depending on different applications for editing), for example:
- Zoom in 100% / Zoom out 100%
- “Zoom in” in steps / “Zoom out” in steps” - Read about best Apple laptops for photo editing.
 Convenient work with photos’ rating
At the bottom of this zone you will find a convenient image marks control. It's a great thing when you have a lot of pictures and you need to mark them somehow. I use this function for wedding photos to divide a photoshoot into group photos, macro, groom and bride portraits, ceremony photos and party shots.
Moreover, I use them to separate good and bad looking images by marking them with a sign or a certain color. The "*/Col" button allows you to switch between these modes. After I sort out the successful shots, I use them to separate the portrait shots from the rest, it's very easy. "Fn" button activates the secondary functions of the buttons, some of which can be customized.
 Optional feature set with Fn button
Now about the buttons "Copy" and "Paste". They are needed to copy the settings of one photo and insert it into another or all at once. This is very useful when you correct the same color problem on the one photoshoot.
In order to choose the photos to apply these settings, use a "Pick" button. The "Zoom" button caused me a couple of questions, as there are two of them, but they perform the same functions.
"Brush" button activates the brush. You customize it with all the wheels, and then take the mouse and start editing. In the upper left corner there are "Undo" and "Redo" buttons which allow cancel the action or vice versa. By the way, a lot of Loupedeck reviews note that it is not possible to use Reset, but it is - you have to hold down the "Fn" key and click on "Undo", then all your actions are reset.
The "Clr/BW" button switches between color and black & white mode. After switching, you can continue editing with the help of wheels.
Ok, now let's move on to my favorite button - "Full Screen". Why is this my favorite one? As soon as I started working with Loupedeck, I realized that can remove all preset settings from the eyes, because they all lie on my desk on Loupedeck. So, after half an hour of working with Lightroom, it looked like this:
 Full Screen function is very fast
This interface is more convenient, but I did not know what to do with the window on the right. It is removed only when I did not touch the color correction wheels. When they moved, this window reappeared, and at that moment I came across the "Full Screen" button and it absolutely changed my work in Lightroom. When you click on it, you will see the edited photo only.
The best thing is that you can continue color correction, since you do not need to interact with the elements on the screen. This is a good feature that allows you to fully concentrate on your photo. It is especially true for photographers who work on laptops.
I used this photo editing console for Lightroom on my MacBook Air 13 and, having a fairly small screen, the “Full Screen” mode let me forget about this problem. Periodically, this function stops working on my MacBook, but after a while it resumes work.
Zone 3: Basic Wheels for Color Correction
 3rd zone is designed to correct light
That's the base that is most loved in Loupedeck - it's handles for color correction. I can proudly say that this is the best choice on the market of MIDI Lightroom controllers. They are eleven and each is responsible for changing a particular parameter in Lightroom.
They have an "infinite lifespan", and do not have a certain limit, you can twist them as much as you want. They have excellent sensitivity and change all values in steps of 2 units. I think it's great. Pressing the wheel resets the settings.
For comparison, I edited the same photo with the mouse and using Loupedeck. The time for editing using the mouse was about 4 minutes, but with Loupedeck it was about 35 minutes.
Now I can do color correction in just 30-60 seconds, because thanks to Loupedeck all the settings are on my desk. Just open the photo, set up all your settings and edit!
I'd love to see more Loupedeck Photoshop tools, like Tone Curve, because you have to take on the mouse again. If you have a weak computer, working with Loupedeck can turn into a nightmare, because it is very demanding on the characteristics.
 The Before/After button does not work as you expect
A great bonus is the comparison of B/A variants of the photo using a special button - "Before/After". When you click on it, you compare the photos in the following way.
It seems not very convenient, because usually I use the comparison with the hotkey "" on the keyboard. This allows you to overlay the photos on each other and see the results. All reviews find the lack of this function as a big minus. But I went a little deeper into the problem and found that when I hold down "Fn" and "Before/After" I receive the same "" hot key result.
What do you usually do when you have finished editing in Lightroom? Of course, you export the finished image to a folder, and fortunately, this photo editing console for Lightroom also took care about it and placed the "Export" button in the upper right corner, which is the final feature in any photo editing. With the help of the configured "C1", "C2" you transfer your image to deeper retouching in Photoshop.
Summing Up My Loupedeck Photo Editing Console Review

Loupedeck is the perfect photo editing console for Lightroom 6 & CC, and my review only confirms this. According to Indiegogo, Loupedeck is a prototype, and as I understand from an interview with Valeriya Kostyukovskaya, this technology is constantly developing.
There is something to work on, but this is the device you will want to use. Working with it will make your photo editing faster and adds something interesting to the routine work under color correction in Lightroom, because the interface of the program has already become boring.
I will not compare Loupedeck vs Palette, because each of these devices has its own advantages. But, as Loupedeck is still only a prototype, it has great perspectives.
The standard problem for all photographers and photo retouchers is that they use only a certain set of options to which they are accustomed.
But having everything, literally, at your fingertips, you may think - "why not to twist this wheel?" And, at times, such thoughts lead to new discoveries or to a new photographer’s style.
Who Needs Loupedeck?

For wedding photographers and color correctors, this is a necessary thing. If you shoot many wedding ceremonies at a time, it will also be irreplaceable. If your main job in Lightroom is to work with a brush and gradients, then I advise you to refrain from buying, because for these purposes the purchase of a graphic tablet is better.
If you do batch image editing day by day and need automatic tools – Loupedeck is the thing you definitely need. A lot of photographers and digital artists prefer editing photo with the help of photo editing consoles that save time, your efforts, and guarantee a fast turnaround for your clients.
How Much Time Does Loupedesk Save?

It’s easy to understand how to use. There are no instructions how to use it, you will open some options after a few hours of work, but it's not difficult to understand the main functions Loupedeck offers. In order to understand how everything works it will take about 2 hours, then you can easily edit photos in minutes.
Loupedeck Alternatives
There were quite a few attempts to make a convenient controller for a Lightroom. Generally, Loupedeck does not have analogues, it is the first of its kind, but there are similar MIDI controllers for Lightroom.
1. Behringer BCF-2000

$200 VIEW IN AMAZON
![]()
 Rating
⊕ Easy setup
⊕ Amazingly priced
⊕ Good support from Behringer via their web site
⊕ Good emulation options
⊖ Originally intended for other purposes
⊖ There is no designation on the buttons
⊖ Not the best build quality
Behringer BCF-2000 is the 1st photo editing controller for photographers. Everyone talked about this device 5 years ago when it appeared on the market, it's a MIDI controller that looks more like DJ equipment than a device for a photographer.
There are 8 sliders and 8 knobs for color correction and a huge number of buttons. All of them are closely located on the body and look a bit scary. It costs about $250 and you need to purchase a separate software for $100.
2. Palette Expert Kit

$349 VIEW IN AMAZON
![]() Rating
Rating
⊕ Build quality is exceptional
⊕ Color accents help differentiate tasks
⊕ You can set up the controls how you like
⊕ Compatible with many applications
⊕ Ability to rotate layout in 90-degree increments
⊖ Expensive
⊖ No physical feedback
Palette Expert Kit is a customizable controller for photo and video editing with Adobe Lightroom Classic CC, 6, CC, Adobe Premiere Pro CC, Capture One. It is an assortment of USB-powered, customizable buttons, sliders, and dials to turn the task of editing photos back into a physical one. The software is still full of errors and very annoying sometimes. When switching to another image the settings are not reset.
3. Arturia Beatstep

$99 VIEW IN AMAZON
![]() Rating
Rating
⊕ Instinctive controls
⊕ Premium console build
⊕ Comfortable rubber pads
⊖ Difficult to tune, amateurs might have difficulty
⊖ Can’t adjust the velocity of the patterns
Beatstep, judging by the name, was created not for editing photos, but in fact it perfectly copes with this task. It is an excellent MIDI controller - which only has 16 sensitive sliders and 16 knobs to which you can link to anything. All assignments are edited in the MIDI Control Center utility.


