Want to learn a quick way to add comments to PDF in Adobe Acrobat? Then this guide will come in handy. We have described what free tools you can use to add text boxes or sticky notes to any place in your file, highlight words, underline content, and insert drawings. We have presented the information step by step so that even inexperienced users can learn the process in Acrobat online.
Adobe Acrobat Reader has quick actions, using which you can perform contextual manipulations while hovering or focusing on a particular element. They are called shortcuts and their main purpose is to make a workflow streamlined.
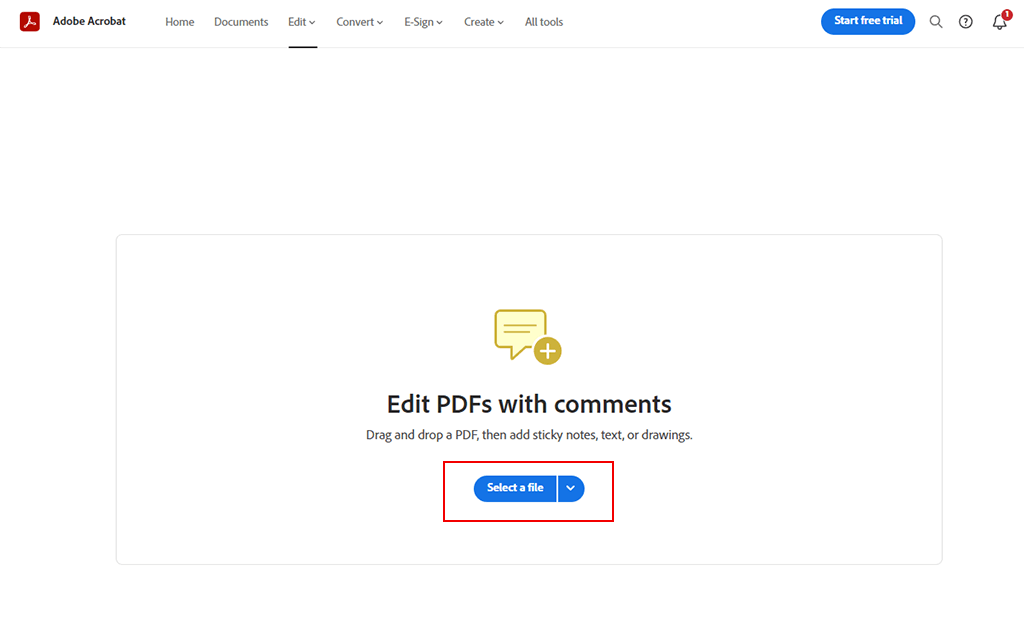
Sign in to Acrobat Web. Indicate your Adobe ID or password, or use your Facebook or Google account. Add files to the active area by clicking Select a File and choose the needed one on your device. To cope with the task quicker, you can simply drag and drop them.
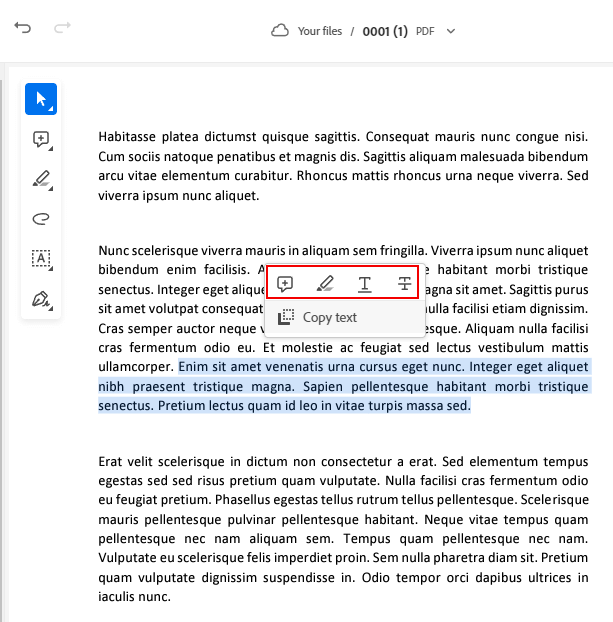
Based on the selection in a PDF file, you can apply quick actions for commenting.
Actions on text selection: It is used to Highlight Text, Strikethrough Text, Underline Text, and Copy Text.
Context-menu actions: Users can right-click and Add Sticky Note, or Use Drawing Tool.
Switch from view to edit mode: Switch from the view mode to edit mode to add comments. Click the Options menu (...) in the toolbar > Edit > Add Comments.
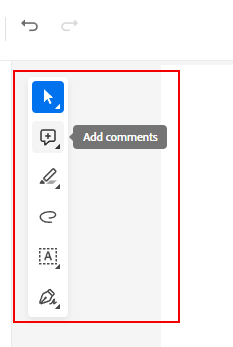
You can see your selected file in a browser. There is also the Add Comment toolbar. Choose the needed annotation instrument and click where you want to place it in your PDF file. You can use such comment types:
Sticky Note: Choose the place where you want to add a note.
Highlight Text: Select the text to highlight it.
Underline Text: Select the text to underline it.
Strikethrough Text: Select the text to strikethrough.
Add Text Comment: Click and type to insert text in a document.
Drawing Tool: Use it to add markups in a document.
All annotation types except the Sticky Note are added to a document flat out. When working with the Sticky Note, you will see the comment pane displayed on the right. You need to enter a comment and click Post. The software saves a file in 10 seconds. For instant saving, you need to choose Close in the toolbar.
People learning how to add comments to a PDF file with Adobe Acrobat can achieve the goal by using the Navigation Panel. It contains lots of handy features that allow fulfilling different tasks with ease. The best part is that all tools are arranged into categories. When selecting a tool, you will see a tool-specific command or a toolbar in the document view.
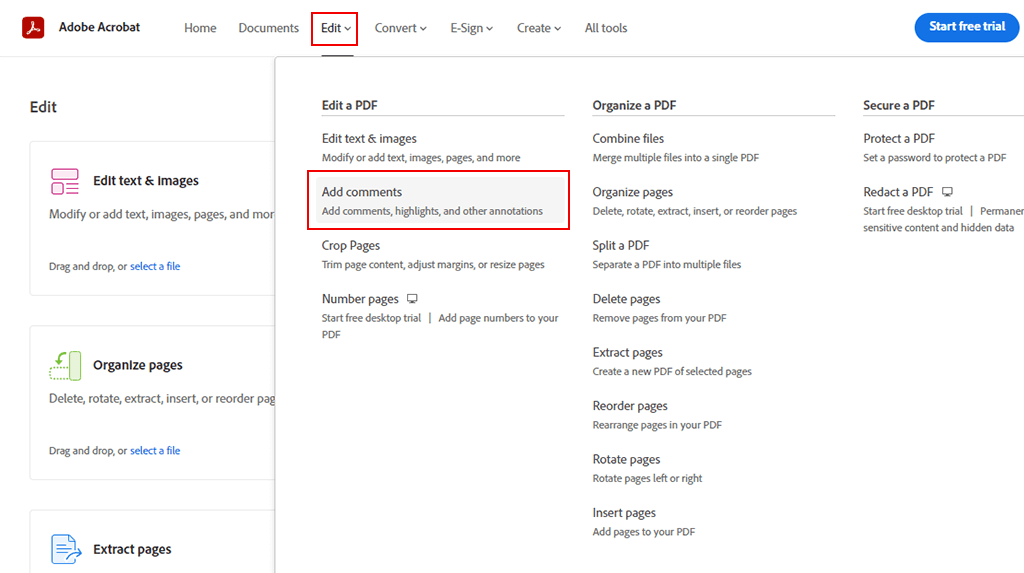
Head to the top navigator bar, and choose Edit > Add Comments. There will open the file explorer window – select files from the Recent or Document list. Upload files from your PC. You can also use the drag-n-drop method.
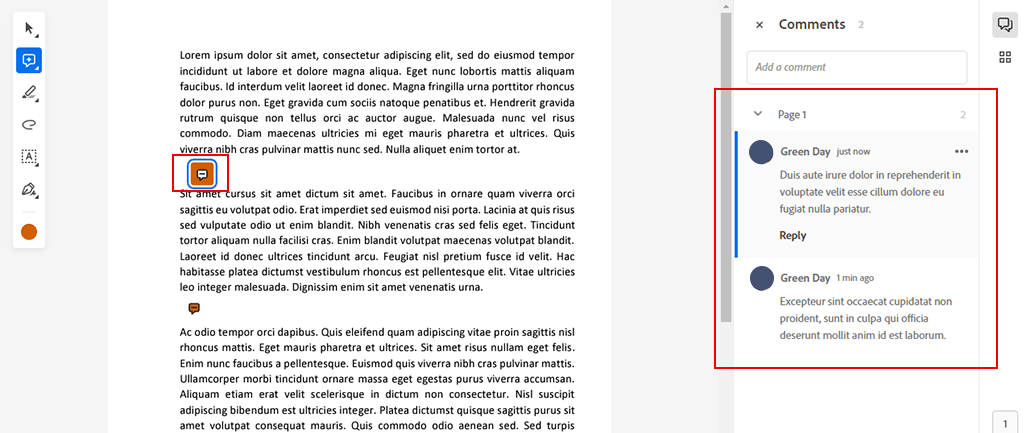
All added comments will appear in the right panel. Look them through if you want. If you are looking for a specific comment, use the search in PDF with Adobe Acrobat.
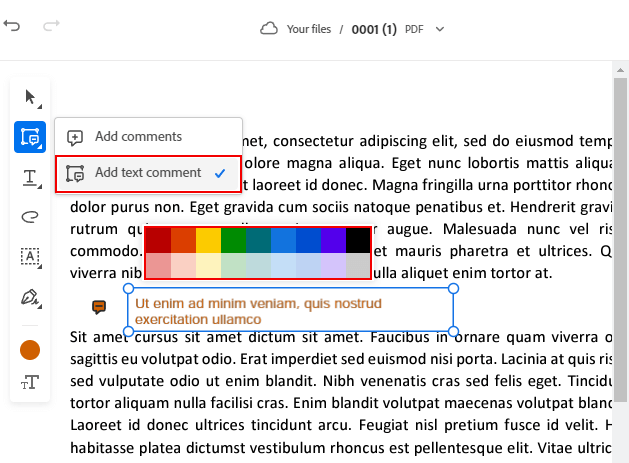
You can highlight a comment with a different color. First off, select your comment and click the color you like in the floating toolbar. After that, you will see the color panel with various options.
When dealing with the Drawing Tool annotation, it is possible to alter line thickness. When it comes to the Add Text annotation, you can play around with the font size. Users especially like the possibility to change fonts in Adobe Acrobat. You can do that from the same toolbar.
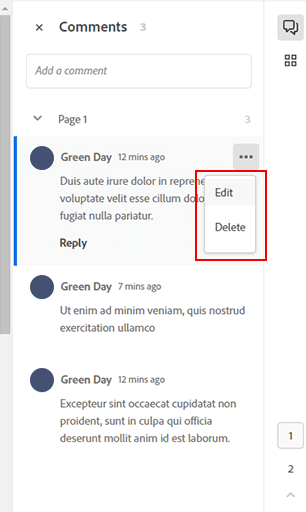
Managing comments in Adobe Acrobat is a straightforward process. For example, to apply some changes to a comment, you need to select it. There will open the comments pane on the right. Choose Edit in the options menu. However, if you edit the Add Text annotation, you need to select the text comment and type new words.
To delete a comment, you need to head to the above-mentioned pane and choose Delete. Or, you can simply select the comment and click the delete icon on the floating toolbar.
To undo or redo any action, you should open the Add Comment toolbar and click the corresponding button.
These are online tools for managing PDFs and adding e-signatures to documents. These services are available in any browser. You can use them both in a free and paid account.
Open the official page and choose the needed instrument. Follow the described instructions. Keep in mind that the service uploads your file to the Document Cloud. If you sign in and choose to save or share your file, it will be immediately saved to the Document Cloud. If you perform these actions without signing in, your files will be automatically deleted within a predefined period. This is done with user security in mind.
If you don’t sign in, you can use a very limited toolset and perform downloading just once. All registered users can take advantage of the extensive functionality offered by the software. Besides, they receive premium tools.
You can import and change PDF files that don’t transcend 100MB. However, PDF to Word and PDF to PPT instruments can effortlessly manage files of up to 200MB. The Compress PDF tool easily handles files that don’t exceed 2GB.
Every user gets 2 free transactions once in 30 days on a rolling basis when trying premium tools. For instance, if you sign in for the first time and use the Convert PDF to Word instrument, there is only one free transaction left for the current 30-day interval. So, to use premium tools without paying for them, you need to wait for a renewal of the 30-day period.