How to Create HDR Photoshop Effect | Tutorial
HDR means High Dynamic Range, which is actually a technique that implies combining several photos into one image in such a way that details from all constituents (shadows, highlights and mid-tones) are visible in the final HDR picture.
However, there’s a way to perform HDR in Photoshop, without combining multiple exposures together into one photo. Below, there are 3 methods that will teach you quick ways to achieve Photoshop HDR effect with a single photo.
Method #1 Through HDR Toning
Photoshop has a dedicated HDR editing tool called HDR Toning. HDR Toning in Photoshop is a powerful tool, that allows to quickly and easily extend your image’s dynamic range. Follow the steps below to find out how to use it.
Step 1. Open HDR Toning Menu
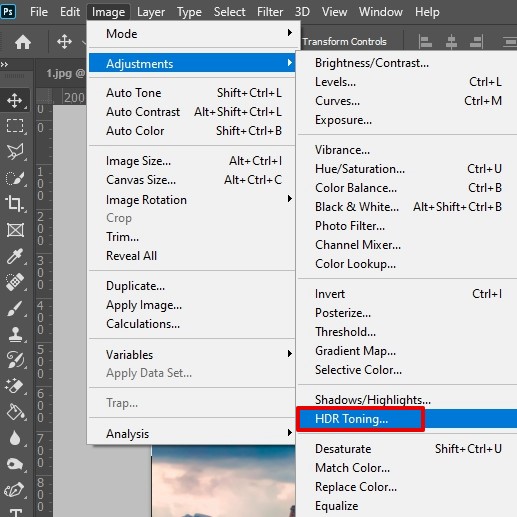
To access the tool, go to Image – Adjustments – HDR Toning. You’ll see the HDR Toning Window come up on the screen.
- Check out these HDR photography tips.
Step 2. Adjust the Settings
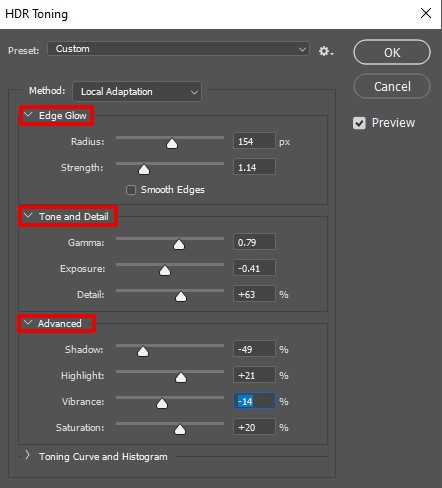
Move the sliders until you get the desired HDR Photoshop effect. Press OK.
Method #2 Through Camera RAW Filter
Another way of achieving impressive Photoshop high dynamic range effect is to recover your photo’s shadows and highlights in Camera RAW. Here’s how you can do it in 3 steps.
Step 1. Duplicate the Background Layer
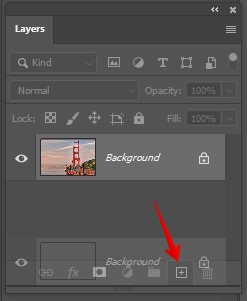
First, let’s duplicate the background layer. Drag the background layer to the “Create a new layer” button at the bottom of the Layers panel. For a quicker result use a shortcut: Cmd + J (for Mac)/Ctrl + J (for Windows).
- Look through the list of the best free HDR software.
Step 2. Open Camera Raw Filter
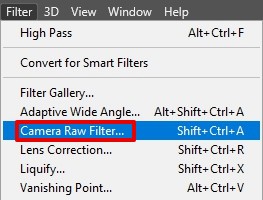
Next, open Camera Raw by going to Filter – Camera Raw Filter. You can also use a shortcut: Shift + Ctrl + A (for Windows)/ Shift + Cmd + A (for Mac).
Step 3. Adjust the Settings
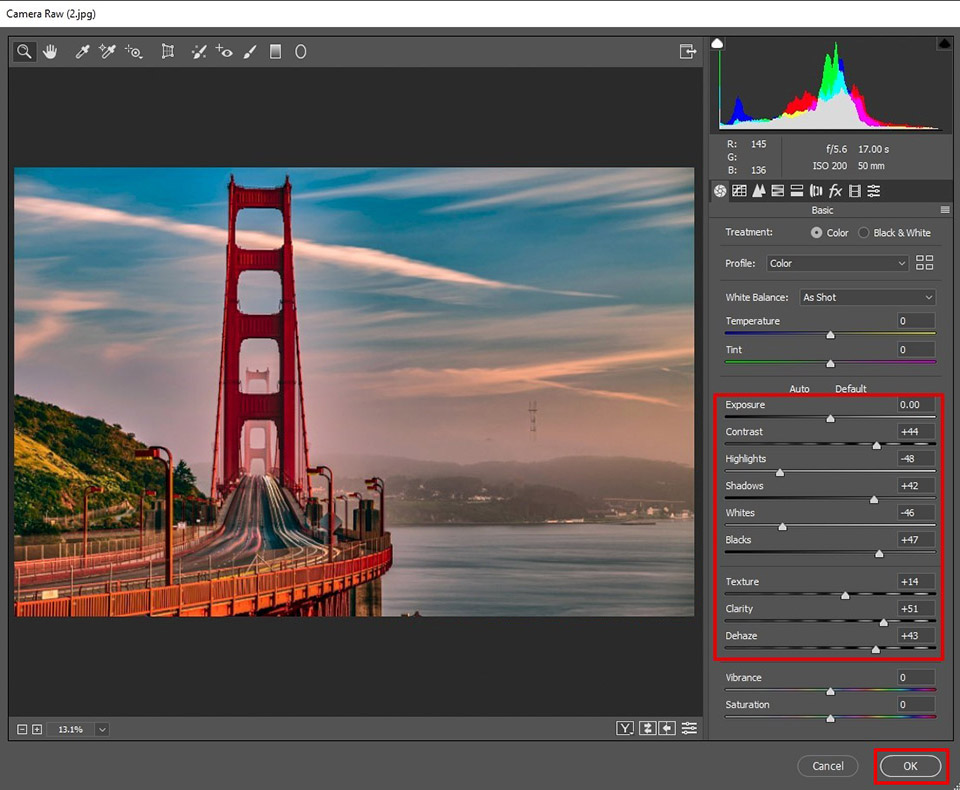
Now, all you have to do, is move the sliders until the image obtains a desirable HDR Photoshop appearance.
Method #3 Through High Pass
If you want to learn how to do HDR in Photoshop through High Pass filter, you should follow the simple steps below.
Step 1. Duplicate the Background Layer
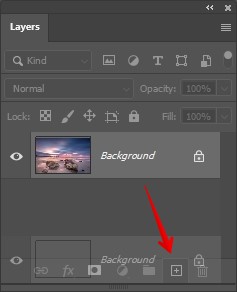
Duplicate the background layer first. Drag the background layer to the “Create a new layer” button at the bottom of the Layers panel. For a quicker result use a shortcut: Cmd + J (for Mac)/Ctrl + J (for Windows).
- Check out trending HDR professional cameras.
Step 2. Open High Pass Menu
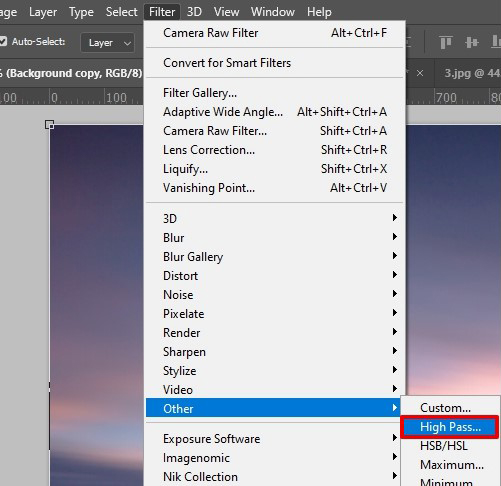
Access the High Pass menu through Filter – Other – High Pass. You’ll see a menu pop up.
Step 3. Adjust the Radius
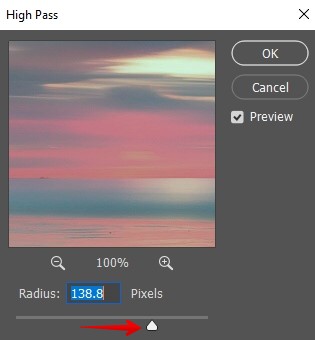
Next, adjust the radius of the filter. I recommend moving the slider to values greater than 100 pixels. Press OK to save the result of your HDR Photoshop manipulations.
- Find out the peculiarities of HDR real estate photography.
Step 4. Set the Overlay Mode
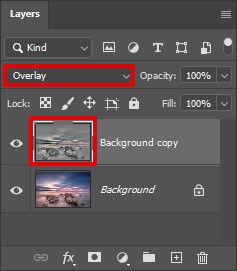
To get an accurate Photoshop High Dynamic Range result, change the Blend Mode from “Normal” to “Overlay”.
HDR Photoshop Freebies
Though the above mentioned HDR Photoshop tutorials are very simple, you may still get the same result in a quicker way using special Ps actions. I have selected the best HDR filters that you can download free of charge and turn your regular images into spectacular HRD masterpieces.
Light HDR
This action imitates the traditional HDR look with highly pronounced details and wide tonal range.
- Learn how to use Photoshop actions.
Black and White HDR
Using this free action, you can quickly transform your shots into B&W HDR images with a bold vibe.
Contrast
This action is specifically developed for landscape HDR photos. Apply it to see how mesmerizing your landscapes can look.


